

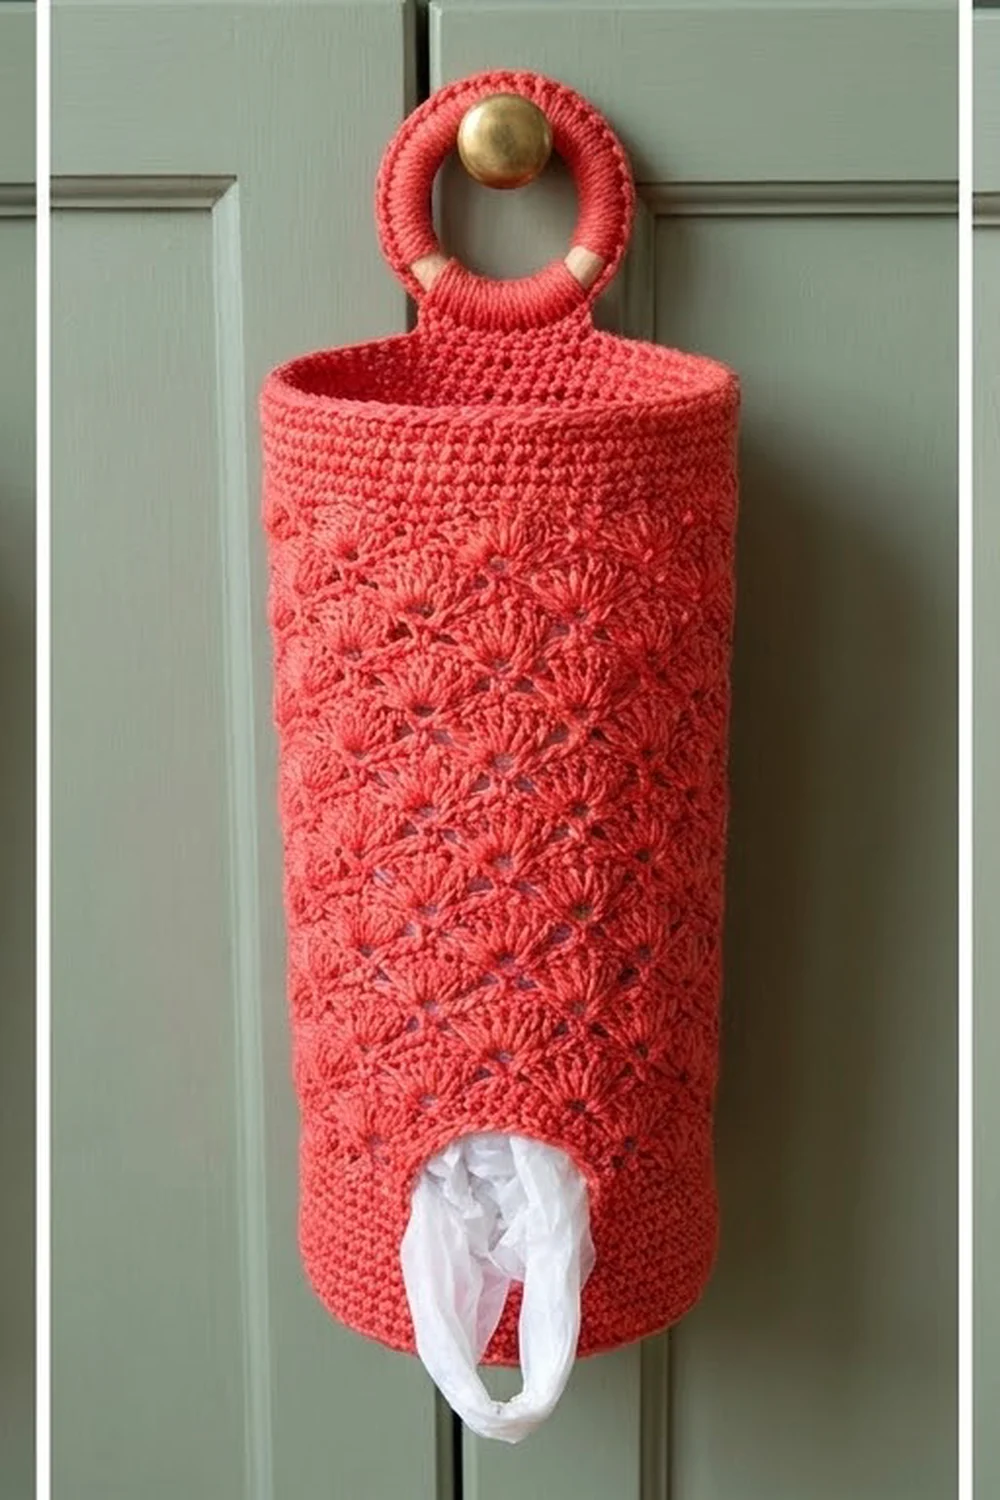
Plastic bags tend to end up stuffed in a drawer. This holder gives them a tidy home on a cabinet knob or hook. You push bags in at the top and pull them out one at a time through a round opening in the base.
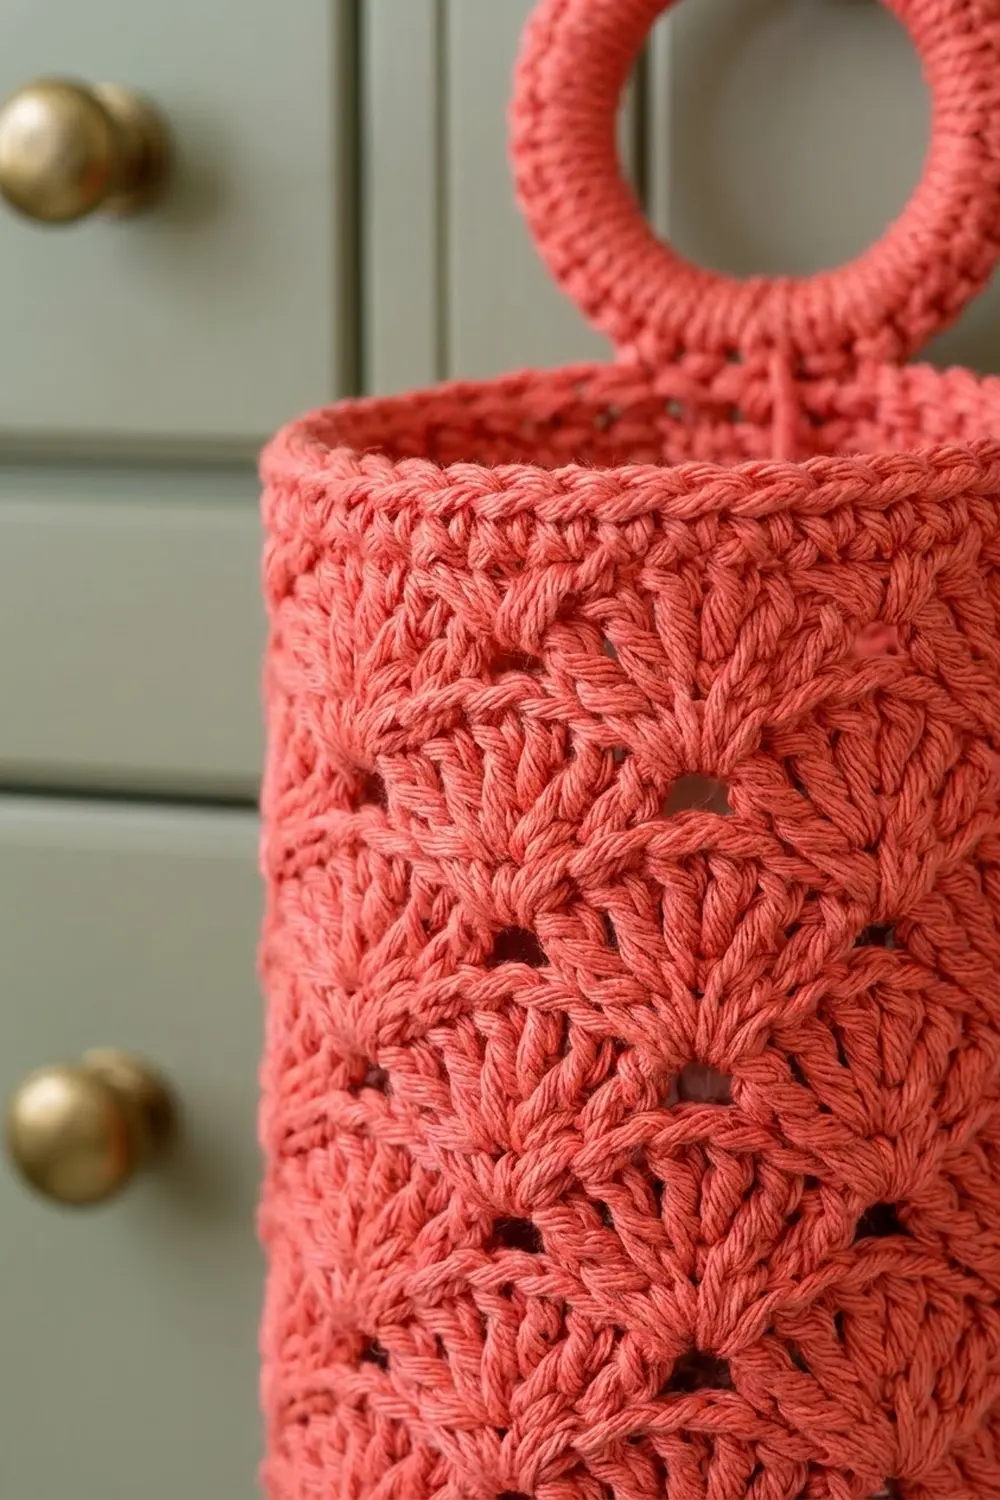
The Coral Scallop design is worked in a warm coral cotton. Staggered shell rounds give it a fish-scale texture, and small eyelets sit between the fans. A smooth single crochet rim finishes the top, and a wooden ring wrapped in single crochet makes a sturdy hanger.
This pattern uses US crochet terms. The finished body is about 4.8 in (12.2 cm) in diameter and 15 in (38.1 cm) tall. Laid flat, it measures 7.5 in (19.1 cm) wide. With the ring attached, the total hanging length is about 17.75 in (45.1 cm).
You start with a flat double crochet disc that has a center hole. Then you turn the edge upward with one back-loop round and work the shell rounds straight up. The top rim is leveled and edged, and finally the covered ring is sewn to the back of the rim.
Finished Size and Construction
- Finished size: 4.8 in (12.2 cm) diameter x 15 in (38.1 cm) tall; 17.75 in (45.1 cm) including the ring
- Skill level: Easy+ (confident beginner)
- Terminology: US crochet terms
- Yarn weight: Worsted / Aran (#4), cotton
- Hook: 5.0 mm (H-8)
- Number of pieces: 2 (one body, one covered ring)
- Layout: Base disc and tube worked continuously in joined rounds; the ring is sewn to the back of the rim
- Body circumference: 15 in (38.1 cm) = 60 stitches
- Height before the top border: 14.25 in (36.2 cm)
- Top border depth: 0.75 in (1.9 cm)
Materials
Yarn: Use a smooth worsted-weight cotton or cotton blend. Cotton holds its shape when the holder is full and does not stretch out of shape over time. Avoid fuzzy or very slippery yarns, because they hide the shell texture.
- Coral: 170 g, approximately 290 m (317 yd)
This quantity includes about a 15% margin for your gauge swatch and small tension differences. The ring cover uses about 8 g of that total.
Tools:
- 5.0 mm (H-8) crochet hook
- One wooden or metal ring, 3 in (7.6 cm) outer diameter
- Stitch marker
- Tapestry needle
- Scissors
- Tape measure
- Rust-proof pins and a rolled towel for blocking
Abbreviations (US Terms)
- ch – chain
- sl st – slip stitch
- sc – single crochet
- hdc – half double crochet
- dc – double crochet
- tr – treble crochet
- BLO – back loop only
- st(s) – stitch(es)
- sk – skip
- rep – repeat
Special stitch – Shell: Work 5 dc in the same stitch.
Half shell: Ch 3 (counts as 1 dc) and 2 dc in the same stitch at the start of a round. Work 2 more dc in that same stitch at the end of the round. Together these make one complete 5-dc shell, which keeps the seam vertical.
Gauge and Checkpoints
- Double crochet: 16 dc x 8 rounds = 4 in (10.2 cm)
- Single crochet: 16 sc x 16 rounds = 4 in (10.2 cm)
- Shell pattern: 1 repeat (6 sts) = 1.5 in (3.8 cm) wide; 2 shell rounds = 1 in (2.5 cm) tall
Test the base first. The base works as your gauge swatch. Complete Rounds 1–3 and measure before going on.
Checkpoints:
- After Round 3: The disc measures 4.8 in (12.2 cm) across. The center hole is about 1.9 in (4.8 cm) across.
- After Round 12 (8 shell rounds): The body is 4.25 in (10.8 cm) tall, measured from the turning ridge.
- After Round 32: The body is 14.25 in (36.2 cm) tall.
- After Round 35: The body is 15 in (38.1 cm) tall, and the flat width is 7.5 in (19.1 cm).
If your disc is too big, go down half a hook size (4.5 mm). If it is too small, go up to 5.5 mm (I-9). Change the hook, not the stitch counts. All the shell math depends on exactly 60 stitches.
If the disc ruffles, your tension is loose: tighten up or drop a hook size. If it cups, loosen up slightly.
Pattern
Base (Rounds 1–3)
Ch 24 and join with a sl st to the first ch to form a ring. Don’t twist the chain.
Round 1: Ch 3 (counts as dc throughout), dc in the same ch, dc in the next ch. 2 dc in the next ch, dc in the next ch rep 11 times. Join with a sl st to the top of the ch-3. (36 sts)
Round 2: Ch 3, dc in the same st, dc in the next 2 sts. 2 dc in the next st, dc in the next 2 sts rep 11 times. Join. (48 sts)
Round 3: Ch 3, dc in the same st, dc in the next 3 sts. 2 dc in the next st, dc in the next 3 sts rep 11 times. Join. (60 sts)
Lay the disc flat and check Checkpoint 1. The outer edge should measure 15 in (38.1 cm) around.
Turning Round (Round 4)
Round 4: Ch 1, sc BLO in each st around. Join with a sl st to the first sc. (60 sc)
The unworked front loops make a crisp ridge, so the base turns cleanly into the tube wall. Do not increase from here on.
Shell Body (Rounds 5–32)
Each shell repeat uses 6 stitches: 1 sc and 1 shell of 5 dc. 60 sts ÷ 6 = 10 repeats per round. Each round’s sc goes into the center dc of the shell below, and each new shell goes into the sc below. This half-repeat offset creates the fish-scale fans and the small eyelets.
Round 5 (Round A): Ch 1, sc in the same st as the join. Sk 2 sts, shell in the next st, sk 2 sts, sc in the next st rep 9 times. Sk 2 sts, shell in the next st, sk 2 sts. Join to the first sc. (10 shells + 10 sc = 60 sts)
Round 6 (Round B): Ch 3, 2 dc in the same st (half shell). Sk 2 dc, sc in the next dc (the center of the shell). Sk 2 dc, shell in the next sc, sk 2 dc, sc in the next dc (center) rep 9 times. Sk 2 dc, 2 dc in the same st as the beginning ch-3 to complete the half shell. Join to the top of the ch-3. (10 shells + 10 sc = 60 sts)
Round 7 (Round A): Ch 1, sc in the same st as the join. This is the top of the ch-3, which is the center of the split shell. Sk 2 dc, shell in the next sc, sk 2 dc, sc in the next dc (center) rep 9 times. Sk 2 dc, shell in the next sc, sk 2 dc. Join to the first sc. (60 sts)
Rounds 8–32: Keep alternating. Work Round B on even rounds and Round A on odd rounds, ending with Round 32 (a Round B). Each round has 60 sts. That makes 28 shell rounds in total.
Check Checkpoint 2 after Round 12 and Checkpoint 3 after Round 32. Don’t fasten off.
Border
Border gauge: 16 sc = 4 in (10.2 cm), the same as the body’s 4 sts per inch. So 60 border stitches measure exactly 15 in (38.1 cm), matching the body circumference. When the holder is flattened, that is 30 sts on the front and 30 sts on the back.
Top Border
Round 32 ends at the center of the split shell, and its 60 sts run in this order: center dc, 2 dc, sc, 2 dc, and so on. The sc positions are the low dips. The leveling round fills those dips with tall stitches.
Round 33 (leveling/trim round): Ch 1, sc in the same st as the join (the center dc). Sc in the next dc, hdc in the next dc, tr in the next sc, hdc in the next dc, sc in the next dc, sc in the next dc (center) rep 9 times. Sc in the next dc, hdc in the next dc, tr in the next sc, hdc in the next dc, sc in the last dc. Join to the first sc.
- Count: 60 sts worked 1 per existing stitch + 0 added = 60 sts
- Per side, flattened: 30 front + 30 back
Round 34: Ch 1, sc in each st around. Join. (60 sc; 30 per side)
Round 35: Ch 1, sc in each st around. Join. (60 sc; 30 per side) Fasten off and weave in the end.
Why the math works: Each 6-st shell repeat becomes exactly 6 leveling stitches, and the leveling round adds nothing extra. 10 repeats x 6 = 60, which matches Round 4 and every shell round. Because the stitch count never changes, the rim cannot flare or pull in.
Bottom Opening Edge
Turn the holder upside down. Join yarn in any remaining loop of the foundation chain.
Round B1: Ch 1, sc in each foundation ch around. Join. (24 sc) Fasten off.
This round firms up the hole so the bags slide out smoothly and the opening stays round. It also hides the bare foundation chain.
Covered Hanging Ring
Make a slip knot on the hook. Hold it against the ring with the hook through the center.
Round 1: Work sc over the ring, pushing each stitch tight against the one before it. Continue until the ring is completely covered, about 64 sc. Join with a sl st to the first sc. Fasten off, leaving a 16 in (40.6 cm) tail for sewing.
The exact count depends on your ring’s thickness. Keep adding sc until no wood shows when the ring is gently flexed.
Covered ring size: about 3.25 in (8.3 cm) outer diameter.
Attaching the Ring
- Flatten the holder with the seam at the center back. Mark the 6 center sts of the back rim.
- Place the ring so its lower edge overlaps the back of the rim by 0.5 in (1.3 cm).
- Using the tail, whipstitch through the ring’s stitches and the 6 marked rim sts, going through both rim rounds.
- Go over the join twice to make it stronger, because this point carries the whole load.
- Weave in the tail.
The ring then rises 2.75 in (7 cm) above the rim, so the total length is 15 + 2.75 = 17.75 in (45.1 cm).
Final Blocking
- Soak the holder in cool water for 10 minutes. Gently press out the water; don’t wring it.
- Roll it in a towel to remove excess moisture.
- Stuff it firmly with a rolled towel about 4.8 in (12.2 cm) in diameter.
- Stand it upright on the base. Shape the shells so the fans sit evenly and the eyelets open.
- Pat the base disc flat and the bottom opening round.
- Pin the ring upright if it tilts, and check the 15 in (38.1 cm) height.
- Let it dry completely, about 24–36 hours, before hanging.
Final Quality-Control Checklist
- Base disc lies flat and measures 4.8 in (12.2 cm) across
- Bottom opening is about 1.9 in (4.8 cm) and edged with 24 sc
- Clear turning ridge at Round 4
- 28 shell rounds, each with 10 shells and 10 sc
- Seam line runs straight up the back
- Rim is level, with 60 sts in each of Rounds 33–35
- Flat width is 7.5 in (19.1 cm) and height is 15 in (38.1 cm)
- No wood shows through the ring cover
- Ring is centered at the back and sewn through 6 sts
- All ends are woven in securely
Troubleshooting
The seam slants around the tube. You joined in the wrong stitch. Round A must start in the top of the ch-3, and Round B must start in the first sc.
The shells look crowded or ruffled. You probably missed a “sk 2” somewhere. Count 60 sts and redo the round.
The tube is narrowing. Your tension is tightening as you go. Relax your grip or go up half a hook size for the shell rounds only.
The rim is wavy. The leveling round stitches are in the wrong order. The tr must land in each sc dip.
Bags fall out on their own. The opening is too loose. Work a second round of sc around the hole, decreasing 4 sts evenly to get 20 sc.
The ring droops forward. Sew it through both rim rounds, and stitch it closer to the top edge.
Care
Hand wash or machine wash cool on a gentle cycle in a laundry bag. Reshape while damp and lay it flat or stand it up to dry.
Final Notes
The measurement chain is simple: 60 stitches make a 15 in (38.1 cm) circumference, which keeps the body 4.8 in (12.2 cm) wide. That count stays the same from Round 3 through Round 35. 28 shell rounds add 14 in (35.6 cm). The turning round and border add 1 in (2.5 cm), for a 15 in (38.1 cm) body. The ring brings the total length to 17.75 in (45.1 cm). Check your gauge on the base, and the rest follows.
Happy crocheting!