

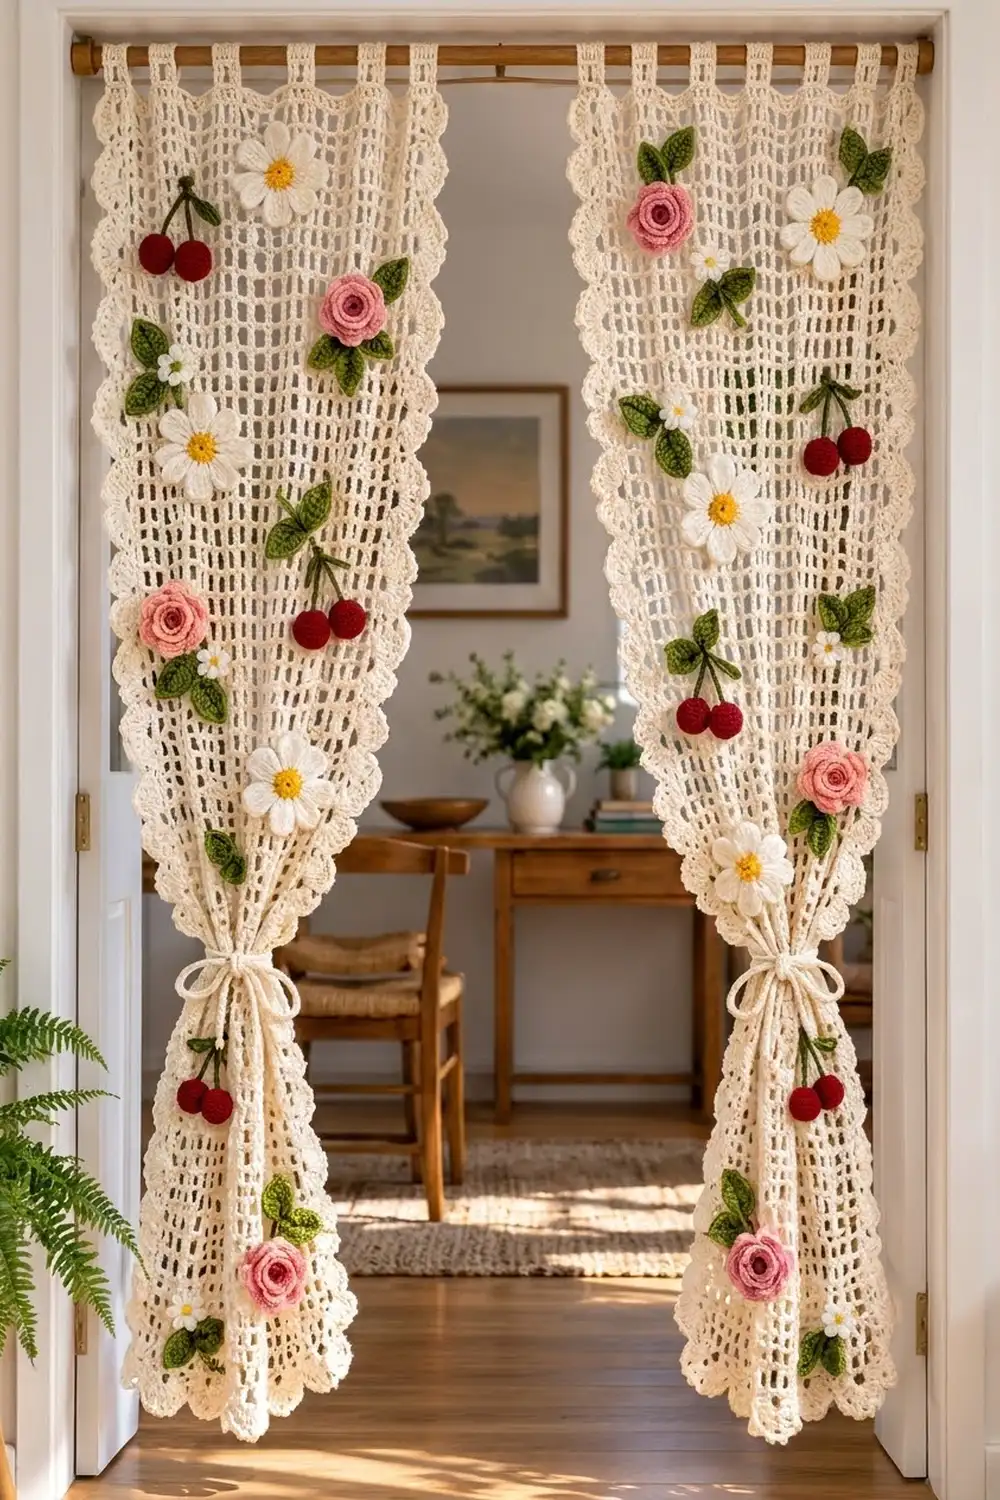
This curtain pair turns a plain doorway into a small cottage garden. Each panel is a light, airy grid of cream filet mesh with soft scallops along the sides and bottom and tab loops at the top. White daisies, pink rolled roses, red cherries and green leaves are scattered down the mesh.
The palette is cream for the panels, white and yellow for the daisies, pink for the roses, deep red for the cherries, and moss green for the leaves and stems. The look is vintage farmhouse: open enough to let light through, but still screening the room behind.
This pattern uses US crochet terms. Each finished panel measures 23 in (58.4 cm) wide by 70.55 in (179.2 cm) long from the top edge to the scallop tips, plus 2 in (5.1 cm) tab loops.
Each panel is one rectangle of filet mesh worked in rows from the bottom up. You then add a single-crochet round, a scallop row on three sides, and seven tabs across the top. Finally, you make the appliqués and sew them on, and make a chain-cord tieback for each panel.
Finished Size and Construction
- Finished panel size: 23 × 70.55 in (58.4 × 179.2 cm), plus 2 in (5.1 cm) tabs
- Skill level: Intermediate
- Terminology: US
- Yarn weight: Worsted (#4) cotton
- Hook: 5 mm (H-8) for the panels, 4 mm (G-6) for the appliqués
- Number of pieces: 2 separate panels, plus appliqués and 2 tiebacks
- Layout: Two panels hung side by side on one rod; the panels are not joined
- Mesh body (size before border): 25 meshes × 86 rows = 20 × 68.8 in (50.8 × 174.8 cm)
- Border depth: 1.5 in (3.8 cm) on the sides and bottom (0.25 in / 0.6 cm sc round + 1.25 in / 3.2 cm scallops); 0.25 in (0.6 cm) on the top
Materials
Use a smooth mercerized or soft-spun worsted cotton. Cotton holds the mesh square, drapes well, and survives washing. Acrylic will work, but it stretches more over a long drop.
- Cream (panels, tabs, tiebacks): 750 g (1,150 m)
- Pink (roses): 75 g (115 m)
- Green (leaves, stems): 60 g (92 m)
- Red (cherries): 50 g (77 m)
- White (daisy petals): 25 g (38 m)
- Yellow (daisy centers): 10 g (15 m)
These quantities make the full pair and include a margin of about 15–20% for swatching and tension differences.
Tools:
– 5 mm (H-8) and 4 mm (G-6) hooks
– Tapestry needle
– Locking stitch markers
– A small amount of fiberfill for the cherries
– Rust-proof pins and a large blocking surface
– A curtain rod up to 1 in (2.5 cm) in diameter
Abbreviations (US Terms)
- ch – chain
- sl st – slip stitch
- sc – single crochet
- hdc – half double crochet
- dc – double crochet
- sc2tog – single crochet 2 together
- sk – skip
- sp – space
- st(s) – stitch(es)
- MR – magic ring
- rep – repeat
Special stitch: Scallop shell – 7 dc worked into the same stitch.
Mesh – one dc plus one ch-1 space. Each mesh row has 26 dc and 25 ch-1 spaces, for 51 stitches.
Gauge and Checkpoints
Mesh gauge (5 mm hook): 5 meshes × 5 rows = 4 in (10.2 cm). Each mesh is 0.8 in (2.0 cm) square.
Single crochet gauge (5 mm hook): 10 sc = 4 in (10.2 cm); 4 sc rows = 1 in (2.5 cm).
Test one piece first. Make a swatch of 11 meshes (ch 26 and follow Row 1 below) and work 10 rows. Block it, then measure 10 meshes across and 10 rows down. Both should measure 8 in (20.3 cm).
Checkpoints:
– Row 1 width: 20 in (50.8 cm)
– Row 10 height: 8 in (20.3 cm)
– Row 43 height: 34.4 in (87.4 cm)
– Row 86 height: 68.8 in (174.8 cm)
– After Border Round 1: 20.5 × 69.3 in (52.1 × 176.0 cm)
– After the scallop row: 23 × 70.55 in (58.4 × 179.2 cm)
If your swatch is too big, go down a hook size. If it’s too small, go up a hook size. Mesh errors multiply over 86 rows: a mesh that is only 0.1 in (0.3 cm) too tall adds 8.6 in (21.8 cm) to the drop.
Panel (Make 2)
With cream and the 5 mm hook, ch 54.
Row 1: Dc in 6th ch from hook (the skipped chs count as dc, ch 1, and a skipped base ch). *Ch 1, sk 1 ch, dc in next ch; rep from * across. (26 dc, 25 ch-1 sps = 25 meshes, 51 sts)
Row 2: Ch 4 (counts as dc + ch 1), turn. Sk first ch-1 sp, dc in next dc. *Ch 1, sk ch-1 sp, dc in next dc; rep from * across, working the last dc in the 3rd ch of the turning ch. (26 dc, 25 ch-1 sps, 51 sts)
Rows 3–86: Rep Row 2. (Each row: 26 dc, 25 ch-1 sps)
Place a marker in the row-end of Row 43. Check the length at Rows 10, 43 and 86 against the checkpoints. Do not fasten off.
Border
Border gauge: 2 sc per mesh row-end and 1 sc per stitch across the top and bottom. Both give 2.5 sc per inch, which matches your sc gauge so the edges stay flat.
Round 1 (sc round): Ch 1, turn so the right side faces you.
- Top edge: 3 sc in the first st (corner), then sc in each of the next 49 sts. Work 3 sc in the last st (corner).
- First long side: Work 2 sc in each row-end, except 1 sc in the marked Row 43 row-end. That is (85 row-ends × 2) + (1 row-end × 1) = 171 sc.
- Bottom corner: 3 sc in the first base ch.
- Bottom edge: Sc in each of the next 49 base chs, working 2 sc in the 17th and 33rd of them. That is 49 + 2 = 51 sc.
- Second bottom corner: 3 sc in the last base ch.
- Second long side: Work it the same as the first long side (171 sc).
- Finish: Sl st to the first sc. Fasten off.
Round 1 counts. The middle sc of each 3-sc group is the corner stitch. The two outer sc of each group belong to the sides.
Counted between corner stitches:
– Top: 1 + 49 + 1 = 51
– Each long side: 1 + 171 + 1 = 173
– Bottom: 1 + 51 + 1 = 53
Counted per side including both corner stitches:
– Top: 53
– Each long side: 175
– Bottom: 55
Total: 53 + 175 + 55 + 175 − 4 shared corners = 454 sc.
Round 2 (scallop row, sides and bottom only): Join cream with a sl st in the top-right corner stitch. Ch 1, sc in the same st.
- First long side: *Sk 2, scallop shell in next st, sk 2, sc in next st; rep from * 29 times. The last sc lands in the bottom corner stitch.
- Bottom: Rep from * 9 times, ending in the other bottom corner stitch.
- Second long side: Rep from * 29 times, ending in the top-left corner stitch.
- Finish: Fasten off.
You now have 67 scallops: 469 dc and 68 sc.
Why the math works. Each scallop repeat uses exactly 6 stitches.
– Each long side: The 173 stitches between corners plus the far corner stitch make 174. 174 ÷ 6 = 29 scallops, about 2.4 in (6.1 cm) apart.
– Bottom: 53 + 1 = 54, and 54 ÷ 6 = 9 scallops.
Every side starts and ends on a corner sc, so the scallops sit symmetrically. That is why Round 1 skips one sc on each long side and adds two on the bottom.
Tabs
Across the top, Round 1 gives 53 stitches including both corner stitches. Seven tabs of 5 stitches with six gaps of 3 stitches use 7 × 5 + 6 × 3 = 53 stitches.
Tab 1: With the right side facing, join cream in the top-left corner stitch.
– Row 1: Ch 1, sc in the same st and in the next 4 sts. (5 sc)
– Rows 2–16: Ch 1, turn, sc in each sc across. (5 sc)
– Fasten off, leaving a 10 in (25.4 cm) tail.
Tabs 2–7: Sk 3 sts after the previous tab and work the next tab the same way. Tab 7 ends exactly in the top-right corner stitch.
Each tab is 4 in (10.2 cm) long. Fold each tab to the wrong side and whipstitch Row 16 to the top of the last mesh row. This makes a 2 in (5.1 cm) loop that fits a rod up to 1 in (2.5 cm) thick.
Appliqués
Work all appliqués with the 4 mm hook so they stay firm. Leave a 12 in (30.5 cm) tail on each piece for sewing.
Daisy (make 8)
- Rnd 1 (yellow): 8 sc in MR, sl st to the first sc. (8 sc) Fasten off.
- Rnd 2 (white): Join in any sc. Ch 6. Working back along the chain, sc in 2nd ch from hook, hdc in next ch, dc in each of the next 2 chs, hdc in next ch. Sl st in next sc of Rnd 1. Rep from * 7 more times. (8 petals)
The finished daisy is about 3.5 in (8.9 cm) across.
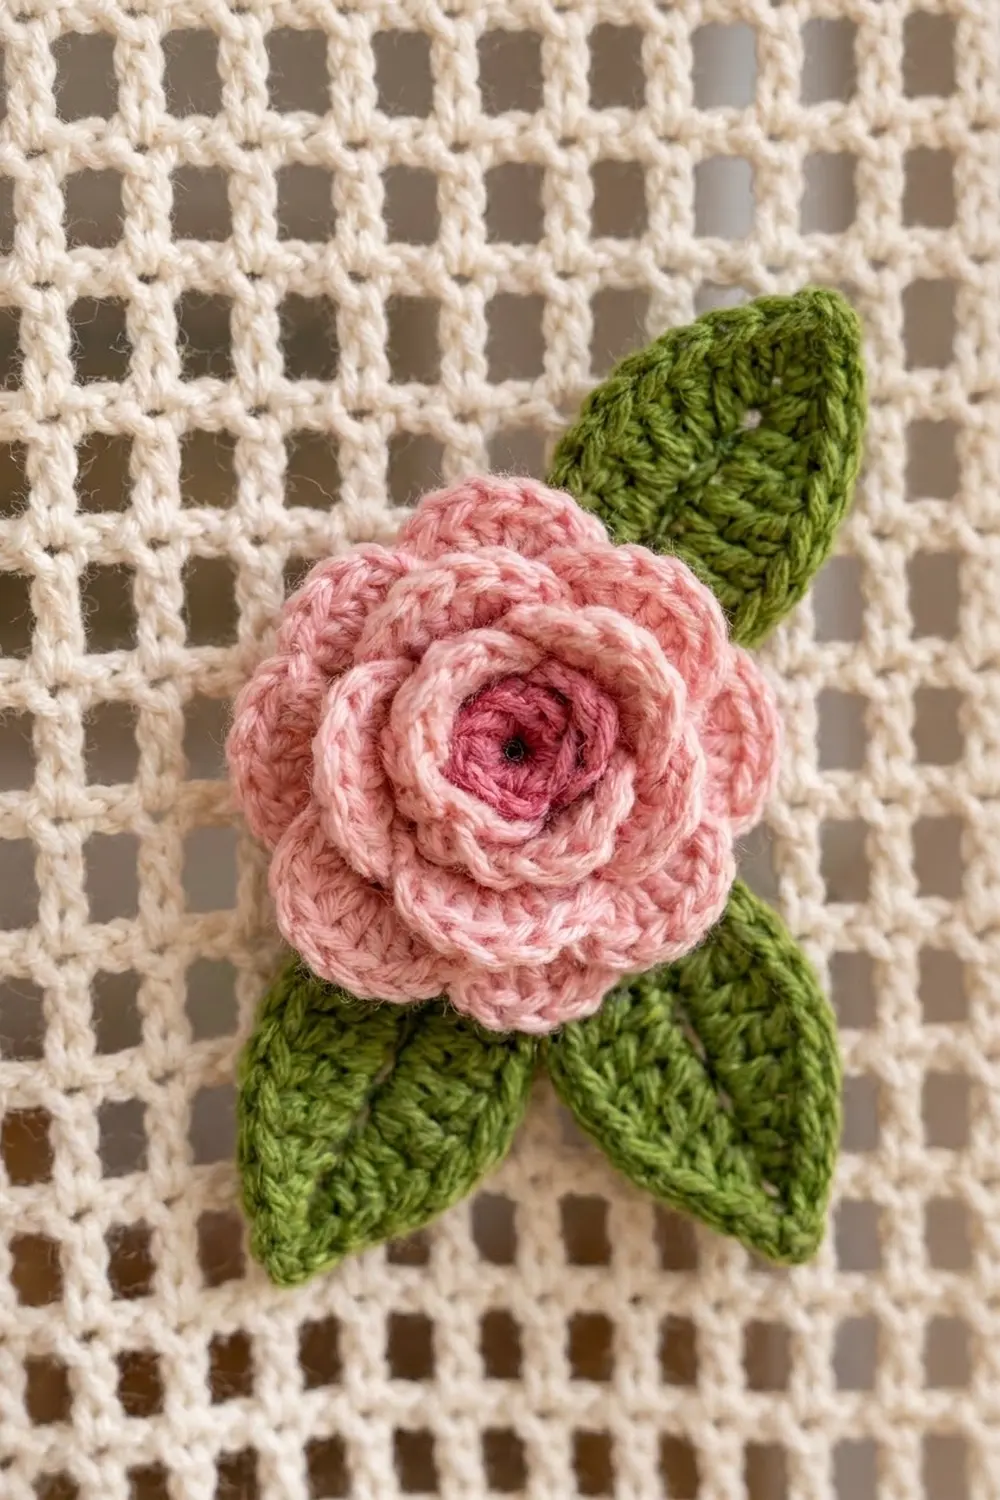
Rolled Rose (make 6)
- Row 1 (pink): Ch 37. Sc in 2nd ch from hook and in each ch across. (36 sc)
- Row 2: Ch 1, turn. *5 dc in next st, sl st in next st; rep from * across. (18 petals)
Roll the strip from the starting end with the petals curling outward. Stitch through all layers at the base to secure the roll. The finished rose is about 3 in (7.6 cm) across.
Leaf (make 28)
With green, ch 10. Work along one side of the chain:
– Sc in 2nd ch from hook, then hdc in the next ch.
– Dc in each of the next 4 chs.
– Hdc in the next ch, then sc in the next ch.
– Work 3 sc in the last ch (the tip).
Work along the other side of the chain:
– Sc in the next ch, then hdc in the next ch.
– Dc in each of the next 4 chs.
– Hdc in the next ch, then sc in the next ch.
– Sl st in the first sc.
You have 19 sts. The finished leaf is about 2.4 in (6.1 cm) long.
Cherry (make 16)
With red:
– Rnd 1: 6 sc in MR. (6)
– Rnd 2: 2 sc in each st. (12)
– Rnd 3: Sc in next st, 2 sc in next st; rep from * around. (18)
– Rnds 4–5: Sc in each st. (18)
– Rnd 6: Sc in next st, sc2tog; rep from * around. (12) Stuff the cherry firmly.
– Rnd 7: Sc2tog 6 times. (6)
Close the opening. The finished cherry is about 1.5 in (3.8 cm) across.
Cherry Stem (make 8)
With green, ch 21. Sl st in 2nd ch from hook and in each ch across. (20 sl st)
Fold the stem in half and tack the fold. Sew one cherry to each end.
Tieback (make 2)
With cream and the 5 mm hook, ch 145. Sl st in the back bump of the 2nd ch from hook and of each ch across. (144 sl st) The tieback is about 36 in (91.4 cm) long.
Make All Pieces
Per pair:
– 2 panels with 7 tabs each
– 8 daisies, 6 roses, 16 cherries, 8 stems and 28 leaves
– 2 tiebacks
Per panel:
– 4 daisies, 3 roses and 4 cherry pairs
– 14 leaves: 2 per rose, 1 per daisy, 1 per cherry pair
Placement grid for one panel. Rows are counted from the bottom, and L/R are the left and right halves of the panel. Mirror this layout for the second panel.
Rows 78-84   L: Cherry pair   R: Daisy
Rows 66-72   L: --            R: Rose
Rows 56-62   L: Daisy         R: Cherry pair
Rows 44-50   L: Rose          R: --
Rows 34-40   L: Cherry pair   R: Daisy
Rows 22-28   (leave clear for the tieback)
Rows 12-18   L: Daisy         R: Cherry pair
Rows 4-10    Center: Rose
Attaching the Appliqués
Lay the panel flat and pin each motif, tucking its leaves partly under the edge of the flower or cherry stem. Sew from the back with matching yarn.
Catch the mesh only at the dc posts, not across the open spaces. A stitch across a hole pulls the grid out of square.
Keep your tension relaxed. Each anchoring stitch should sit flat without puckering the mesh around it.
Checkpoint: Measure the panel width at each motif band once it is sewn on. It should still be 23 in (58.4 cm).
Final Blocking
- Soak each panel in cool water with a little wool wash for 15 minutes.
- Press out the water in a towel. Do not wring.
- Lay the panel flat and pin it to 23 × 70.55 in (58.4 × 179.2 cm).
- Run a long ruler down the mesh columns to keep them straight.
- Pin each scallop into a rounded fan.
- Lift each appliqué and puff it into shape.
- Let the panel dry completely before you hang it.
Final Quality-Control Checklist
- [ ] Each panel has 25 meshes across and 86 rows.
- [ ] Border Round 1 has 454 sc.
- [ ] There are 29 scallops on each long side and 9 across the bottom.
- [ ] There are 7 even tabs, each folded and sewn to make a 2 in (5.1 cm) loop.
- [ ] Each panel has 4 daisies, 3 roses, 4 cherry pairs and 14 leaves, and the two panels mirror each other.
- [ ] All ends are woven in along dc posts.
- [ ] Each panel measures 23 × 70.55 in (58.4 × 179.2 cm).
Troubleshooting
- Mesh slants: Your turning chain is too tight. Work ch 4 loosely, or use a bigger hook for the turning chain only.
- Holes are rectangles, not squares: Your dc is too tall for your chains. Try a slightly smaller hook, or pull the dc loops up less.
- Side border ripples: Your row-ends are taller than 0.8 in (2.0 cm). Re-swatch and check your row gauge before redoing Round 1.
- Scallops don’t land on the corners: Recount Round 1. Each long side must have 173 sts and the bottom 53 sts between corners.
- Panel droops longer after hanging: Cotton relaxes over time. Block it again and dry it flat. If it still droops, remove rows and rework the border.
- Appliqués flop forward: Add two extra anchoring stitches near the top of each motif.
Care
Hand wash in cool water and dry flat, reshaping the scallops while damp. Avoid tumble drying, which can felt the cherries and stretch the mesh.
Final Notes
Everything rests on one measurement chain:
– Each mesh is 0.8 in (2.0 cm), so 25 meshes and 86 rows make a 20 × 68.8 in (50.8 × 174.8 cm) body.
– The 0.25 in (0.6 cm) sc round and 1.25 in (3.2 cm) scallops bring each panel to 23 × 70.55 in (58.4 × 179.2 cm).
– The 2 in (5.1 cm) tabs hang the panel from the rod.
Check your gauge, count Round 1 carefully, and the scallops will fall exactly into place. Happy crocheting!