

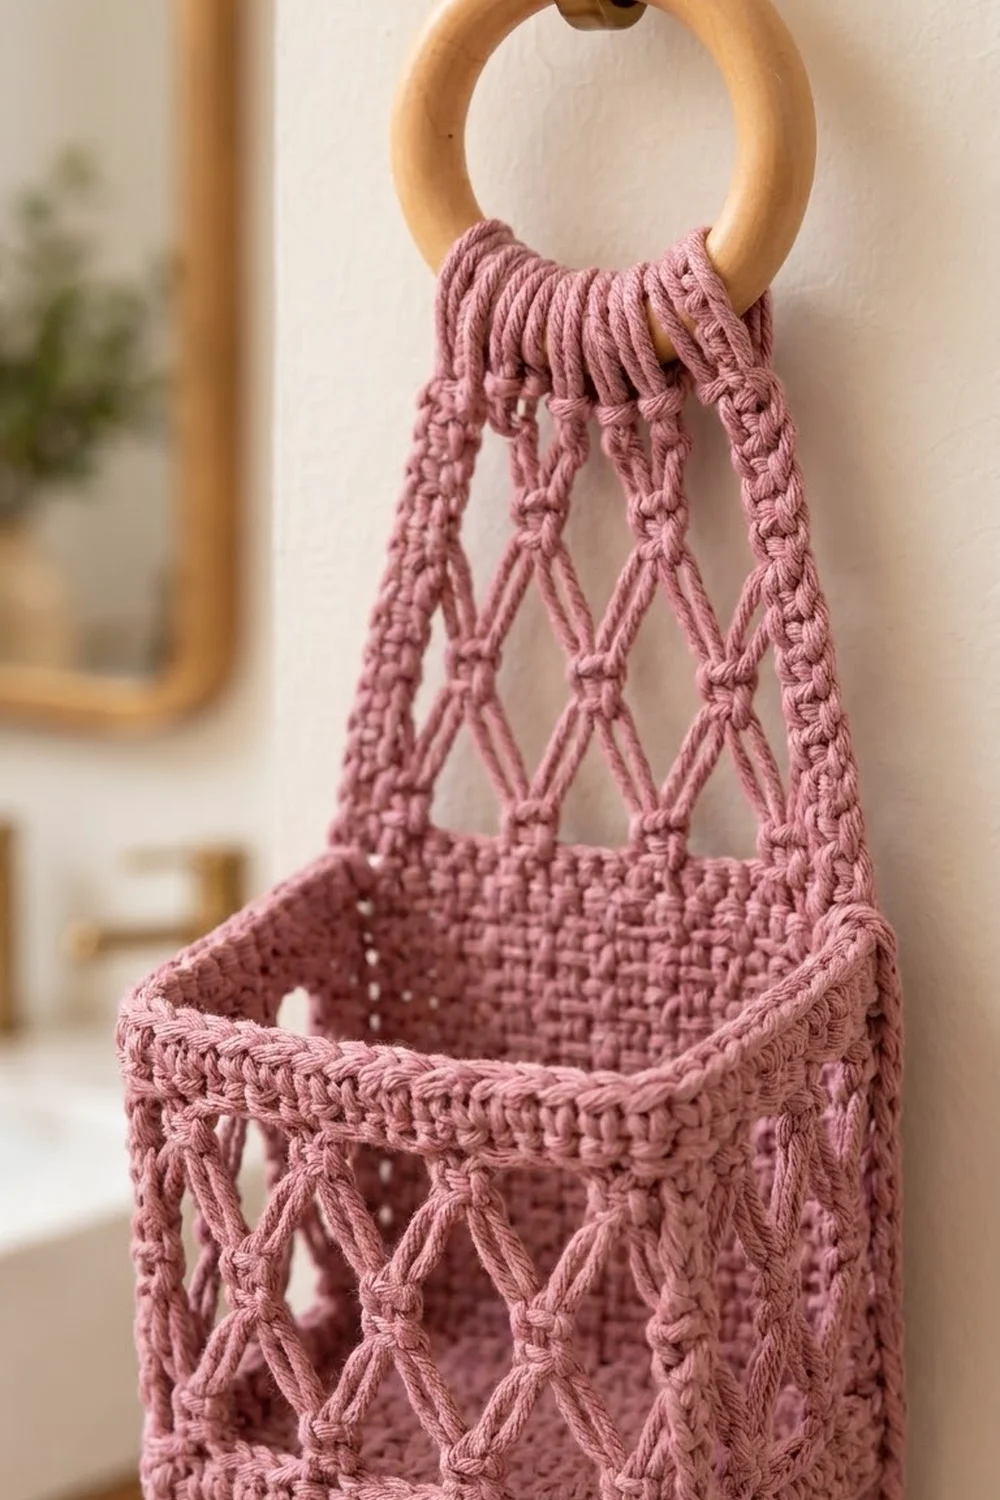
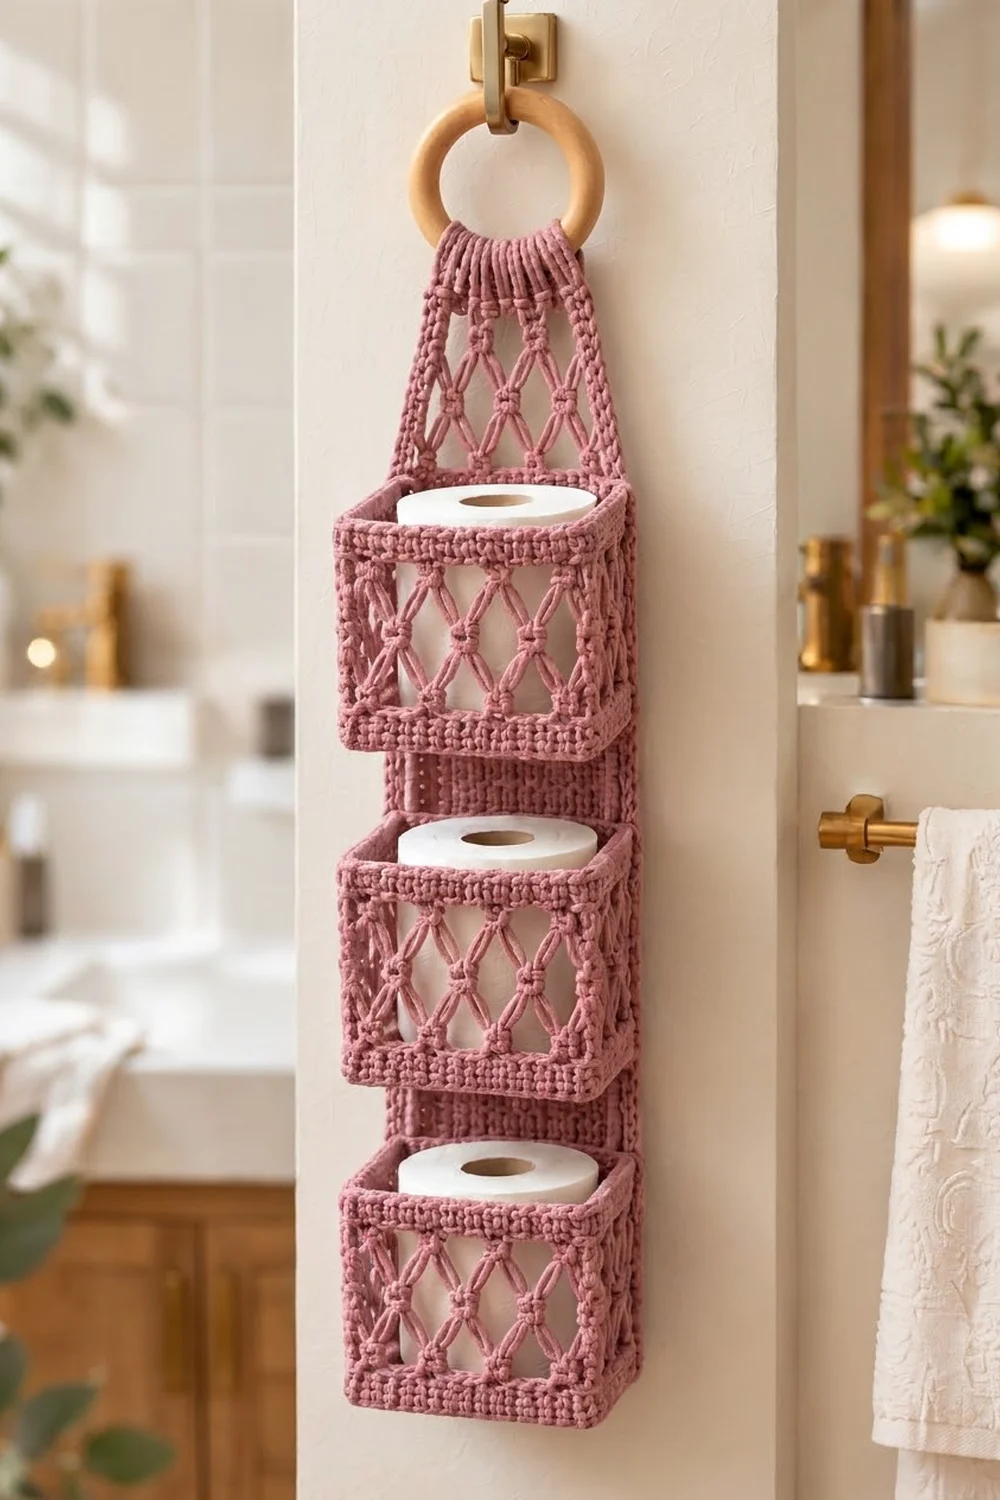
This hanging toilet paper holder has an airy diamond lattice that looks like macramé but is worked entirely with a crochet hook. A long net back panel narrows to a point at the top and wraps around a wooden ring. Three square pockets stacked down its front each hold one standard roll upright.
The sample is worked in a single dusty rose shade with a natural wooden ring, which gives it a soft boho look. Any solid color works, but smooth, light-to-medium shades show the diamond knots best. This pattern uses US crochet terms throughout.
The finished back panel measures 5.25 in (13.3 cm) wide and 21.5 in (54.6 cm) long. Each pocket measures 5.5 in (14.0 cm) wide, 5.5 in (14.0 cm) deep and 4 in (10.2 cm) tall. With the ring, the holder hangs about 24 in (61.0 cm) long.
Construction is simple. You crochet the back panel flat in net rows, shape the top into a point, and edge it with a two-round single crochet border. You make each pocket from the base up, as a solid square with walls worked in rounds. Last, you sew the pockets to the panel and gather the top point onto the ring.
Finished Size and Construction
- Finished size: Back panel 5.25 x 21.5 in (13.3 x 54.6 cm); total hanging length about 24 in (61.0 cm)
- Skill level: Intermediate
- Terminology: US crochet terms
- Yarn weight: Worsted (#4) cotton
- Hook: 5.0 mm (H-8)
- Number of pieces: 4 (1 back panel, 3 pockets) plus 1 wooden ring
- Layout: One vertical column of 3 pockets with a 1.5 in (3.8 cm) gap between pockets
- Piece size: Each pocket is 5.5 x 5.5 x 4 in (14.0 x 14.0 x 10.2 cm)
- Back panel size before border: 4.25 x 20.5 in (10.8 x 52.1 cm)
- Border depth: 0.5 in (1.3 cm), 2 rounds
Materials
Use a smooth, firm worsted-weight cotton or cotton blend. Cotton holds the box shape of the pockets and the open net without sagging. Avoid fuzzy or very stretchy yarns, because they blur the knots and let the pockets droop.
Yarn (one color, dusty rose): 250 g, about 425 m total
– Back panel: 70 g (120 m)
– Pockets: 55 g (93 m) each, 165 g (279 m) total
– Ring wrap and seaming: 15 g (26 m)
These quantities include a margin for gauge swatches and seaming.
Tools
– 5.0 mm (H-8) crochet hook
– Wooden ring, 3 in (7.6 cm) outside diameter
– 6 stitch markers
– Yarn needle
– Scissors and tape measure
– Blocking mat, rustproof pins and a spray bottle
– Optional: three 5 x 5 in (12.7 x 12.7 cm) squares of plastic canvas to stiffen the pocket bases
Abbreviations (US Terms)
- ch – chain
- sl st – slip stitch
- sc – single crochet
- dc – double crochet
- BLO – back loop only
- sk – skip
- st(s) – stitch(es)
- sp – space
- rep – repeat
Special stitch – Net knot (nk): Work an sc into a chain loop, then tug the working yarn gently so the sc closes up into a tight, round knot. Every intersection in the lattice is a net knot. In the instructions it’s written as “sc,” but always snug it up this way.
Post: A column of 7 dc that runs up each pocket corner: 3 sts on one side of the corner, the corner st itself, and 3 sts on the other side.
Gauge and Checkpoints
- Solid gauge: 16 sc and 16 rows = 4 in (10.2 cm)
- Net gauge: 4 net loops (17 foundation sts) = 4.25 in (10.8 cm) wide; 8 net rows = 4 in (10.2 cm) tall, lightly stretched
- Dc round on the pocket walls: 0.5 in (1.3 cm) tall
Make one pocket first, because it tests every stitch you’ll use. Check these measurements as you go:
- Pocket base after Row 21: 5.25 in (13.3 cm) square
- After pocket Rnd 3: walls stand 0.5 in (1.3 cm) tall
- After pocket Rnd 8: walls are 3 in (7.6 cm) tall
- Finished pocket: 5.5 x 5.5 x 4 in (14.0 x 14.0 x 10.2 cm)
- Back panel after Row 8: 4.25 in (10.8 cm) wide, 4 in (10.2 cm) tall
If your base comes out larger than 5.25 in (13.3 cm), go down a hook size. If it’s smaller, go up a hook size. For the net, the width matters more than the height: re-swatch if 4 loops measure more than 4.5 in (11.4 cm) wide.
Back Panel
Leave a 6 in (15.2 cm) tail.
Row 1: Ch 18, sc in 2nd ch from hook, *ch 5, sk 3 ch, sc in next ch; rep from * 3 more times. (5 sc, 4 ch-5 loops)
Row 2: Ch 5 (counts as dc + ch 2), turn, sc in first ch-5 loop, (ch 5, sc in next ch-5 loop) 3 times, ch 2, dc in last sc. (4 sc, 3 ch-5 loops, 2 half loops)
Row 3: Ch 1, turn, sc in first dc, (ch 5, sc in next ch-5 loop) 3 times, ch 5, sc in 3rd ch of turning ch. (5 sc, 4 ch-5 loops)
Each sc lands in the center of a loop from the row below, so the loops close into diamonds with a net knot at every point.
Rows 4–33: Rep Rows 2–3 fifteen more times, ending with a Row 3 repeat. (Row 33: 5 sc, 4 ch-5 loops)
Checkpoint: The panel measures 4.25 x 16.5 in (10.8 x 41.9 cm).
Top Point (Taper)
The taper loops are longer, which stretches the diamonds near the ring the way they look in the finished piece.
Row 34: Turn, sl st in each of first 3 ch of first ch-5 loop, ch 1, sc in same loop, (ch 7, sc in next ch-5 loop) 3 times. (4 sc, 3 ch-7 loops)
Row 35: Turn, sl st in each of first 4 ch of first ch-7 loop, ch 1, sc in same loop, (ch 7, sc in next ch-7 loop) 2 times. (3 sc, 2 ch-7 loops)
Row 36: Turn, sl st in each of first 4 ch of first ch-7 loop, ch 1, sc in same loop, ch 7, sc in next ch-7 loop. (2 sc, 1 ch-7 loop)
Row 37: Turn, sl st in each of first 4 ch, ch 1, sc in same loop. (1 sc, the top point)
Fasten off. Checkpoint: The panel now measures 4.25 x 20.5 in (10.8 x 52.1 cm) before the border.
Pockets
Base
Row 1: Ch 22, sc in 2nd ch from hook and in each ch across. (21 sc)
Rows 2–21: Ch 1, turn, sc in each st across. (21 sc)
Checkpoint: The base measures 5.25 in (13.3 cm) square.
Walls
Rnd 1 (base edge): Ch 1, do not turn. Work around all four edges: 21 sc along each side (1 sc per st or row-end) and 1 extra sc in each corner. Join with a sl st to the first sc. (88 sc: 4 sides x 21, plus 4 corner sc)
Place a marker in each corner sc.
Rnd 2: Ch 1, sc in BLO of each st around, join. (88 sc) Working in the back loops turns the walls upward.
Rnd 3: Ch 1, sc in each st around, join. (88 sc)
From here on, each side has 21 sts. The 3 sts at each end of a side belong to the corner posts.
Rnd 4 (net A): Start at the 1st st of any side. Ch 3 (counts as dc), dc in next 2 sts, ch 5, sk 3, sc in next st, (ch 5, sk 3, sc in next st) 2 times, ch 5, sk 3, dc in next 3 sts, dc in corner st, dc in next 3 sts; rep from * around, ending last rep at *. Join to top of ch-3. (28 dc in 4 posts of 7, 12 sc, 16 ch-5 loops)
Check each side: 3 dc + (4 loops x 4 sts) + 2 more dc = 21 sts, with the post’s 3rd dc counted in the loop span. The 4th loop always ends in the 1st post dc.
Rnd 5 (net B): Ch 3, dc in next 2 dc, ch 3, sc in next ch-5 loop, (ch 5, sc in next ch-5 loop) 3 times, ch 3, dc in next 7 dc (post)*; rep from * around, ending the last rep with dc in the final 4 dc, then join. (28 dc, 16 sc, 12 ch-5 loops, 8 ch-3 half loops)
Rnd 6 (net A): Ch 3, dc in next 2 dc, ch 5, sc in next ch-5 loop, (ch 5, sc in next ch-5 loop) 2 times, ch 5, dc in next 7 dc*; rep from * around, ending as before, join. (28 dc, 12 sc, 16 ch-5 loops)
Rnd 7: Rep Rnd 5.
Rnd 8: Rep Rnd 6.
Checkpoint: The walls are 3 in (7.6 cm) tall.
Rnd 9 (conversion to the solid rim): Ch 1, sc in each dc, sc in each net-knot sc, and 3 sc in each ch-5 loop. Join. (40 sts worked 1 per existing st + 48 sc added in 16 loops = 88 sc)
Per side, that’s 6 post sc, 3 knot sc and 12 loop sc, which adds up to 21 sts. Add the 4 corner sts and you’re back to 88.
Rnds 10–12: Ch 1, sc in each st around, join. (88 sc)
Fasten off and weave in the ends. Checkpoint: The pocket measures 5.5 x 5.5 x 4 in (14.0 x 14.0 x 10.2 cm). The bottom band is 0.5 in (1.3 cm), the net is 2.5 in (6.4 cm) and the top rim is 1 in (2.5 cm).
If you’re using plastic canvas, slip a square into the base now.
Make All Pieces
All pieces use the single dusty rose color.
- Back panel: 1 (70 g / 120 m)
- Pockets: 3 (55 g / 93 m each)
Layout, front view, measured from the bottom edge of the bordered panel:
          ( wooden ring )
             /      \
            / taper  \     Rows 34–37
           | open net |    Rows 30–33
           | POCKET 3 |    Rows 22–29   (11–15 in / 27.9–38.1 cm)
           |   gap    |    Rows 19–21
           | POCKET 2 |    Rows 11–18   (5.5–9.5 in / 14.0–24.1 cm)
           |   gap    |    Rows 8–10
           | POCKET 1 |    border + Rows 1–7   (0–4 in / 0–10.2 cm)
Joining
Finish the back panel border and ring wrap (see the next section) before you join the pockets.
Method: Whipstitch the back wall of each pocket to the front of the panel with a yarn needle and matching yarn.
- Lay the panel flat, right side up. Mark the top of Rows 7, 10, 18, 21 and 29 on both side borders.
- Bottom pocket: Line up its bottom edge with the bottom edge of the panel. The pocket’s back side has 21 sts between its corner sts. The panel’s bottom border has 21 sts (Rnd 2, including its corner sts). Sew them together 1 to 1. The pocket’s 2 corner sts wrap 0.125 in (0.3 cm) around each panel edge.
- Sides: Each back corner post is 4 in (10.2 cm) tall and lines up with 16 sts of the panel’s side border. Sew 1 border st to each sc round (Rnds 2, 3 and 9–12, 6 sts) and 2 border sts to each dc round (Rnds 4–8, 10 sts), for 16 in all.
- Top rim: Sew the 21 back-side sts of Rnd 12 across the net at the marked row, catching every knot and loop.
- Sew Pocket 2 between the Row 10 and Row 18 marks, and Pocket 3 between the Row 21 and Row 29 marks, the same way.
Tension: Pull each stitch just snug. If you sew too tight, the panel puckers. If you sew too loose, the pockets tip forward under the weight of a roll.
Checkpoint: The gaps between pockets measure 1.5 in (3.8 cm), and the panel still measures 5.25 in (13.3 cm) wide.
Border
Border gauge: 16 sc = 4 in (10.2 cm), and each round is 0.25 in (0.6 cm) deep.
Rnd 1: With the right side facing, join yarn in the first foundation ch at a bottom corner. Ch 1 and work:
– 3 sc in the corner ch, sc in each of the next 15 ch, 3 sc in the last ch
– Up the first side: 2 sc in the row-end of each of Rows 1–33 (66 sc)
– Up the taper: 5 sc in the row-ends of each of Rows 34 and 35, and 4 sc in the row-ends of each of Rows 36 and 37 (18 sc)
– 3 sc in the top-point sc
– Down the second side: 18 sc along the taper, then 66 sc along the straight edge
Join. (192 sc: bottom 15 sc, 2 bottom corner groups of 3 sc, 66 sc on each long side, 18 sc on each taper edge, 3 sc at the top point)
These side counts don’t include the corner groups, which are listed separately.
Rnd 2: Ch 1, sc in each st, with 3 sc in the center st of each of the 3 corner groups. Join. (192 sts worked 1 per st + 6 added = 198 sc)
Along the bottom edge, there are now 21 sts from one corner center to the other, counting both.
Why the math works: Each net row is 0.5 in (1.3 cm) tall, and 2 sc at 4 sts per inch cover exactly 0.5 in, so 33 rows x 2 = 66 sc = 16.5 in (41.9 cm). The bottom uses 1 sc for each of the 17 foundation chs, matching the panel’s 4.25 in (10.8 cm) net width. Each taper edge runs diagonally about 4.5 in (11.4 cm), which 18 sc cover at gauge. The two rounds add 0.5 in (1.3 cm) on every side, so the panel ends up 5.25 x 21.5 in (13.3 x 54.6 cm).
Ring wrap: Join yarn in the 7th st before the top-point center st. Make 15 sc: for each one, insert the hook through the next border st, and bring the yarn over the ring on every yarn-over so the stitch closes around both the st and the ring. That covers 7 sts, the center st and 7 more sts. Ch 1, turn, and sl st back across all 15 sts to lock the gather. Fasten off.
Final Blocking
- Wet the finished holder lightly with the spray bottle.
- Pin the panel flat to 5.25 x 21.5 in (13.3 x 54.6 cm), pulling every diamond open evenly.
- Pack each pocket with a 5.5 in (14.0 cm) box or a roll wrapped in a plastic bag to square up the corners.
- Pinch each corner post straight up and down.
- Let everything dry completely, about 24 hours, before you hang it.
Final Quality-Control Checklist
- The panel measures 5.25 in (13.3 cm) wide at every pocket.
- All three pockets are the same height: 4 in (10.2 cm).
- The gaps between pockets are both 1.5 in (3.8 cm).
- The corner posts are vertical and the top rims are level.
- Every net knot is pulled snug.
- The ring wrap is tight and centered.
- All ends are woven in at least 2 in (5.1 cm).
Troubleshooting
- Diamonds lean to one side: You put the sc in the edge of a loop instead of its center. Rework into the middle ch.
- The pocket bells out at the top: Your rim stitches are too loose. Work Rnds 10–12 with a 4.5 mm hook.
- The pocket is short: Your dc are compact. Pull each one up taller, or add a Rnd 13.
- The panel is narrower than the pockets by more than 0.25 in (0.6 cm): Block the panel wider, or add a third border round.
- The holder tilts on the hook: Recenter the ring wrap on the top-point center st.
Care
Hand wash in cool water, roll it in a towel, and dry it flat over the same box forms you used for blocking. Don’t put it in the dryer.
Final Notes
Everything in this holder follows from one measurement chain. With 16 sc to 4 in (10.2 cm), the base is 5.25 in (13.3 cm), which gives an 88-st wall round and 5.5 in (14.0 cm) pockets. With 8 net rows to 4 in (10.2 cm), Rows 1–33 measure 16.5 in (41.9 cm), and the border brings the panel to 5.25 x 21.5 in (13.3 x 54.6 cm). If you check your gauge at each checkpoint, the pockets will line up with their marked rows and the finished holder will hang straight.
Happy crocheting!