

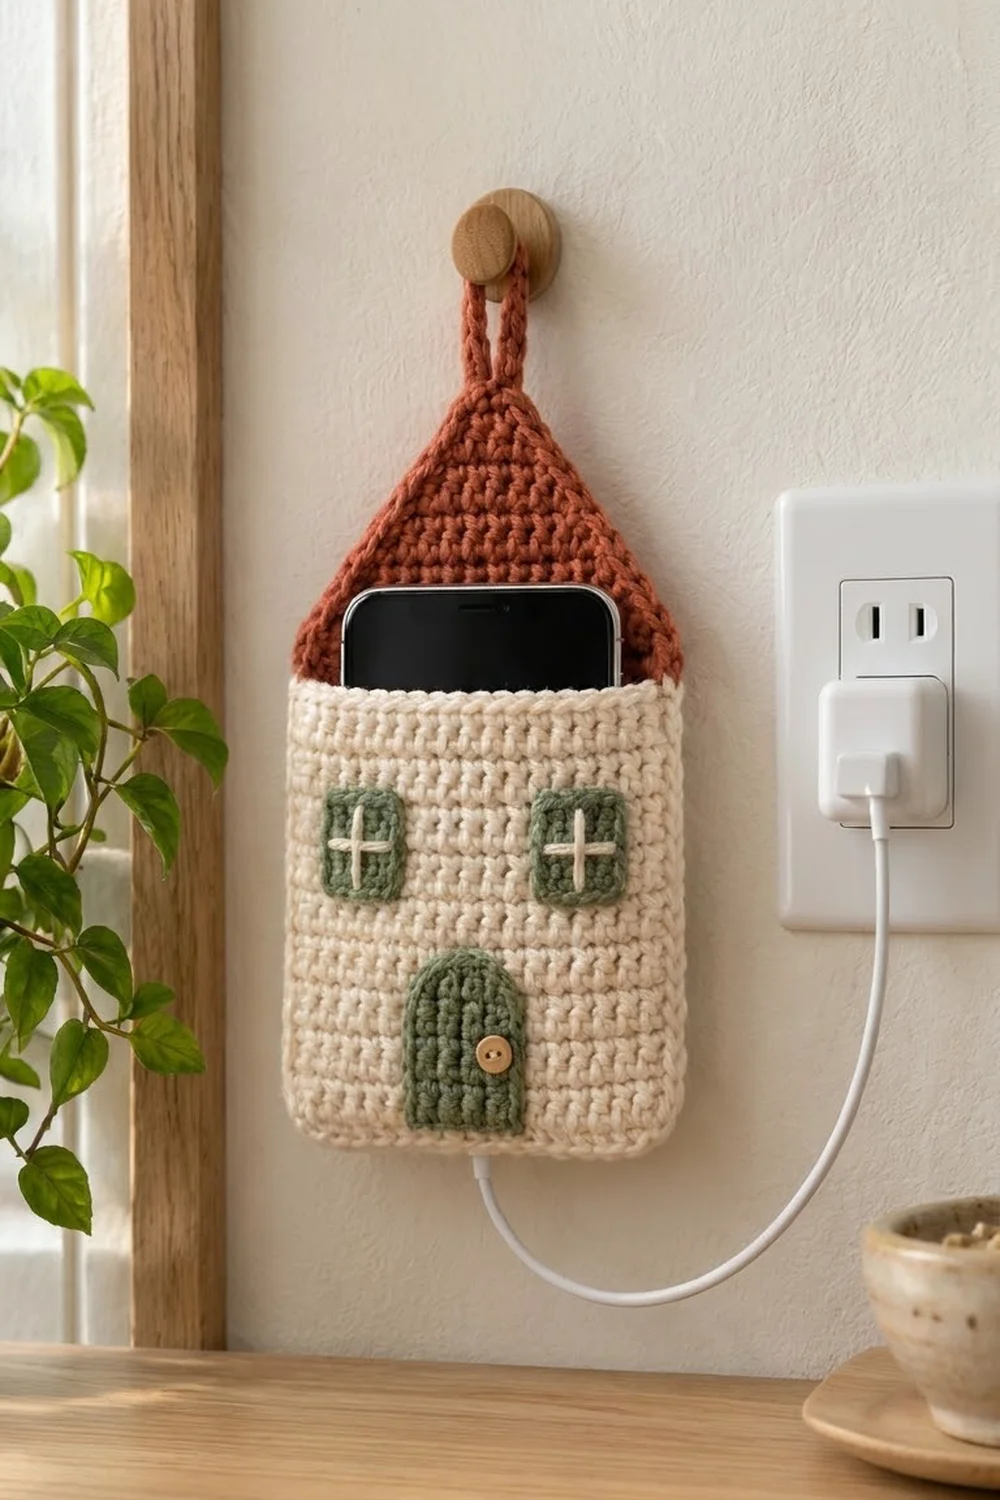
This little cottage hangs beside your outlet and holds your phone while it charges. A cream single-crochet house body, a pointed terracotta roof and sage green windows and door keep the phone off the floor and give the corner some charm. A small wooden button on the door adds a finishing touch.
The palette is warm and calm: cream walls, a terracotta roof, sage trim and a natural wood button. The style is cottage-core and minimal. It suits a bedside table, an entryway or a kitchen counter wall.
This pattern uses US crochet terms. The finished holder is 4.4 in (11.2 cm) wide and 8.2 in (20.8 cm) tall from the bottom edge to the roof peak, plus a hanging loop of about 1.5 in (3.8 cm).
The construction is simple. You work a back panel in rows, cream for the body and then terracotta for a decreasing roof. Next you crochet a matching cream pocket panel and sew three small appliqués onto it. One continuous edging round joins the pocket to the back, leaves a slot for the cable, and trims the roof. A covered loop at the peak finishes the piece.
Finished Size and Construction
- Finished size: 4.4 in (11.2 cm) wide x 8.2 in (20.8 cm) tall, plus a loop of about 1.5 in (3.8 cm)
- Skill level: Easy
- Terminology: US crochet terms
- Yarn weight: Worsted (#4), cotton
- Hook: 4.0 mm (US G-6)
- Number of pieces: 5 (back panel with roof, pocket panel, 2 windows, 1 door)
- Layout: The pocket panel lies over the lower cream section of the back panel. The roof stands above it.
- Back panel before border: 4.0 in (10.2 cm) x 7.8 in (19.8 cm)
- Pocket panel before border: 4.0 in (10.2 cm) x 5.2 in (13.2 cm)
- Border depth: 0.2 in (0.5 cm), one round of single crochet
- Phone fit: The pocket’s inner circumference is about 8.0 in (20.3 cm). It fits phones in cases up to about 3.3 in (8.4 cm) wide and 0.4 in (1.0 cm) thick.
Materials
Use a smooth, mercerized or combed cotton in worsted weight. Cotton holds its shape, doesn’t stretch under a phone’s weight and shows stitch definition clearly. The amounts below assume a yarn of about 85 m (93 yd) per 50 g.
- Cream (body, pocket, window crosses): 25 g, about 43 m (47 yd)
- Terracotta (roof, hanging loop): 12 g, about 20 m (22 yd)
- Sage green (windows, door): 6 g, about 10 m (11 yd)
Tools:
– 4.0 mm (US G-6) crochet hook
– Tapestry needle
– 1 wooden button, 0.5 in (1.3 cm)
– Sewing needle and matching thread for the button
– Stitch markers (4)
– Rust-proof pins
– Ruler or tape measure
All yarn amounts include a margin of about 30% for your gauge swatch, small differences in tension and weaving in ends.
Abbreviations (US Terms)
- ch – chain
- sc – single crochet
- sc2tog – single crochet 2 together (a decrease)
- sl st – slip stitch
- st(s) – stitch(es)
- RS – right side
- WS – wrong side
Special technique – color change: Work the last sc of the old color until 2 loops remain on the hook. Yarn over with the new color and pull through both loops. Continue in the new color.
Turning chain: In this pattern, the ch 1 at the start of each row never counts as a stitch.
Gauge and Checkpoints
Gauge: 18 sc and 20 rows = 4 in (10.2 cm) in sc worked in rows. That is 4.5 sts and 5 rows per inch.
Work the pocket panel first as your gauge test, because it is the simplest piece and you need it anyway.
Checkpoints:
– After Row 10 of the pocket: 4.0 in (10.2 cm) wide x 2.0 in (5.1 cm) tall.
– Finished pocket panel (Row 26): 4.0 in (10.2 cm) x 5.2 in (13.2 cm).
– Back panel through Row 26: the same size as the pocket. Lay the two panels on top of each other to check.
– Back panel with roof (Row 39): 7.8 in (19.8 cm) tall.
– After the border: 4.4 in (11.2 cm) x 8.2 in (20.8 cm).
If your piece is too big: Change to a hook 0.5 mm smaller. A pocket wider than 4.2 in (10.7 cm) will let the phone slump.
If your piece is too small: Change to a hook 0.5 mm larger. A pocket narrower than 3.8 in (9.7 cm) may not fit a phone in a case.
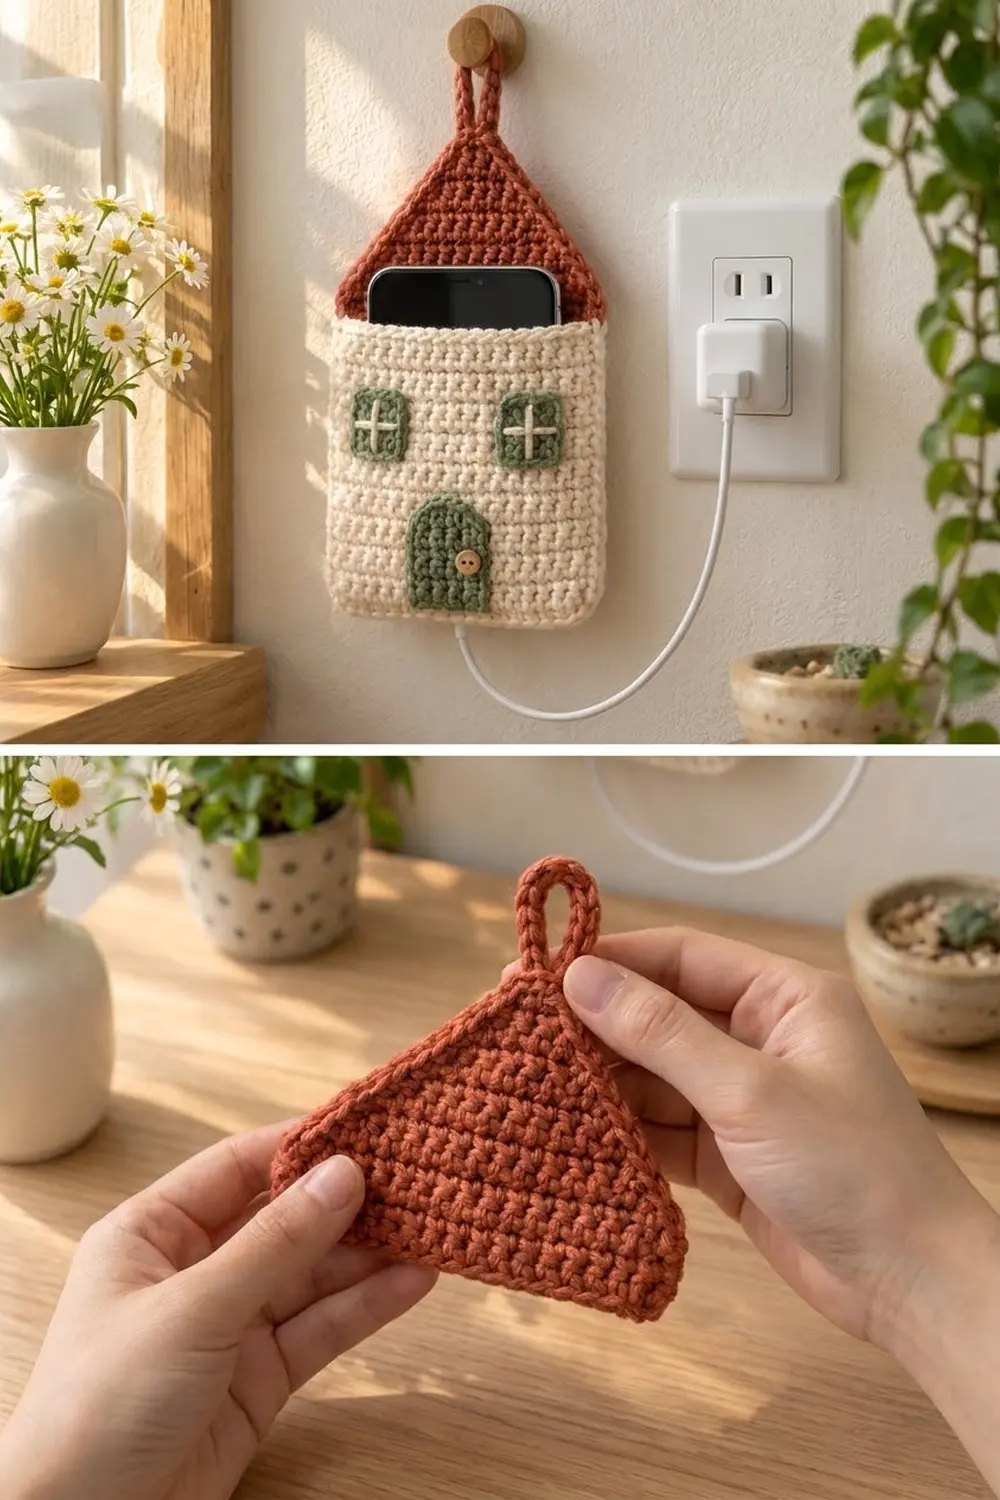
Pocket Panel (Cream, Make 1)
Row 1: Ch 19, sc in 2nd ch from hook and in each ch across. (18 sc)
Rows 2–26: Ch 1, turn, sc in each st across. (18 sc)
Fasten off and weave in ends. The top of Row 26 becomes the pocket opening, so keep the last row’s tension even.
Checkpoint: 4.0 in (10.2 cm) x 5.2 in (13.2 cm).
Back Panel with Roof (Cream and Terracotta, Make 1)
Row 1: With cream, ch 19, sc in 2nd ch from hook and in each ch across. (18 sc)
Rows 2–26: Ch 1, turn, sc in each st across. (18 sc) On the last st of Row 26, change to terracotta. Cut cream.
Roof. Rows 30, 33 and 36 are plain rows. They make the slope slightly steeper than 45 degrees, which gives the gable look.
Row 27: Ch 1, turn, sc in each st across. (18 sc)
Row 28: Ch 1, turn, sc2tog, sc 14, sc2tog. (16 sc)
Row 29: Ch 1, turn, sc2tog, sc 12, sc2tog. (14 sc)
Row 30: Ch 1, turn, sc in each st across. (14 sc)
Row 31: Ch 1, turn, sc2tog, sc 10, sc2tog. (12 sc)
Row 32: Ch 1, turn, sc2tog, sc 8, sc2tog. (10 sc)
Row 33: Ch 1, turn, sc in each st across. (10 sc)
Row 34: Ch 1, turn, sc2tog, sc 6, sc2tog. (8 sc)
Row 35: Ch 1, turn, sc2tog, sc 4, sc2tog. (6 sc)
Row 36: Ch 1, turn, sc in each st across. (6 sc)
Row 37: Ch 1, turn, sc2tog, sc 2, sc2tog. (4 sc)
Row 38: Ch 1, turn, sc2tog twice. (2 sc)
Row 39: Ch 1, turn, sc2tog. (1 sc, the roof peak)
Fasten off and weave in ends.
Checkpoint: The roof is 13 rows, 2.6 in (6.6 cm) tall. The whole panel is 4.0 in (10.2 cm) x 7.8 in (19.8 cm).
Windows (Sage Green, Make 2)
Row 1: Ch 4, sc in 2nd ch from hook and in each ch across. (3 sc)
Rows 2–4: Ch 1, turn, sc in each st across. (3 sc)
The piece now measures about 0.7 in (1.8 cm) x 0.8 in (2.0 cm).
Edging round: Ch 1, turn. Work around the piece as follows. Top: 2 sc in the first st, sc 1, 2 sc in the last st (5). Side: sc in each of the 4 row ends (4). Bottom, in the foundation ch: 2 sc in the first ch, sc 1, 2 sc in the last ch (5). Side: sc in each of the 4 row ends (4). Sl st to the first sc. (18 sc)
The paired stitches at the corners round them off softly. Each window measures 1.1 in (2.8 cm) wide x 1.2 in (3.0 cm) tall. Leave a 12 in (30.5 cm) tail for sewing.
Window cross: Thread cream yarn on a tapestry needle. Make one straight stitch from the top center to the bottom center of the window, over the middle column of sts. Make a second straight stitch from side to side over the center of the window. Secure the ends on the WS.
Door (Sage Green, Make 1)
Row 1: Ch 6, sc in 2nd ch from hook and in each ch across. (5 sc)
Rows 2–7: Ch 1, turn, sc in each st across. (5 sc)
Row 8: Ch 1, turn, sc2tog, sc 1, sc2tog. (3 sc) This row shapes the top corners for the arch.
The piece now measures about 1.1 in (2.8 cm) x 1.6 in (4.1 cm).
Edging round: Ch 1. Do not turn. Work around as follows. Side: sc in each of the 8 row ends (8). Top: 2 sc in the first st, sc 1, 2 sc in the last st (5). Other side: sc in each of the 8 row ends (8). Bottom, in the foundation ch: sc in each ch (5). Sl st to the first sc. (26 sc)
The door measures 1.5 in (3.8 cm) wide x 2.0 in (5.1 cm) tall. Leave a 12 in (30.5 cm) tail.
Sew the wooden button to the door with sewing thread. Place it 0.2 in (0.5 cm) in from the right edge, at mid-height.
Make All Pieces
Piece checklist:
– Cream: 1 pocket panel
– Cream and terracotta: 1 back panel with roof
– Sage green: 2 windows, 1 door
Appliqué layout on the pocket panel (measured on the unbordered 4.0 in x 5.2 in / 10.2 cm x 13.2 cm panel):
+------------------------------+
|   [ W ]             [ W ]    |   windows 0.4 in (1.0 cm) below top
|                              |   and 0.4 in (1.0 cm) from each side
|                              |
|            [ D ]             |   door centered left to right
|            [ D ]             |
+------------------------------+   door 0.2 in (0.5 cm) above bottom
Pin the windows and the door to the RS of the pocket panel. Whipstitch around each piece through its edging round with its own tail, catching only the pocket panel. Sew the appliqués before joining, so that no stitches go through the back panel and the pocket stays open.
Joining
You join the pocket to the back with a cream single-crochet round through both layers. The round runs along the sides and the bottom, and leaves the top open.
Set-up: Place the pocket panel RS up on top of the back panel, matching Row 1 to Row 1 and the side edges exactly. The top of the pocket lines up with the color change at Rows 26/27. Pin along the sides and bottom.
Stitch-to-stitch logic: The sides have 26 row ends each. At 4.5 sts per inch, the 5.2 in (13.2 cm) side needs 23.4 sts, so you work 24 sc and skip two row ends. Across the bottom, each of the 18 foundation chains gets one sc through both layers, and each corner chain gets 3 sc.
Joining round (cream): With the pocket facing you, join cream at the top right corner of the pocket, working through both layers.
- Right side: Ch 1. Working down, sc in each row end, skipping the row ends of Rows 18 and 9. (24 sc)
- Bottom: 3 sc in the corner ch. Sc 6 through both layers. Then work the cable slot: sc 4 through the back panel only, leaving the matching 4 pocket chains unworked. Sc 6 through both layers. 3 sc in the last corner ch. (22 sc = 3 + 6 + 4 + 6 + 3)
- Left side: Working up, sc in each row end, skipping the row ends of Rows 9 and 18. (24 sc) On the last sc, change to terracotta. Do not fasten off. Continue with the Border.
The cream sides and bottom total 70 sc (24 + 22 + 24). The slot leaves an opening about 0.9 in (2.3 cm) wide between the layers for the cable plug.
Tension: Keep your sc relaxed but firm. Edges that are too tight will cup the pocket and squeeze the phone.
Checkpoint: The pocket section measures 4.4 in (11.2 cm) wide x 5.4 in (13.7 cm) tall.
Border
Border gauge: The same as the body: 4.5 sc per inch. One round adds 0.2 in (0.5 cm) to each edge.
Roof edging (terracotta, back panel only):
- Left slope: Working up, sc in each of the 12 row ends of Rows 27–38. Work 2 sc in the row ends of the plain Rows 30, 33 and 36. (15 sc)
- Peak: 3 sc in the Row 39 stitch. Place a marker in the middle sc. (3 sc)
- Right slope: Working down, mirror the left slope, with 2 sc in the row ends of Rows 36, 33 and 30. (15 sc)
- Sl st to the first cream sc of the round. Fasten off.
Round totals: Right side 24, bottom 22 (corners included), left side 24, left slope 15, peak 3, right slope 15. Total: 103 sc.
Why the math works: Each roof slope covers 2.0 in (5.1 cm) across and 2.6 in (6.6 cm) up, so it is about 3.3 in (8.4 cm) long. At 4.5 sts per inch that needs 14.85, rounded to 15 sc. The 12 row ends give 12 sc. The 3 extra sc go in the plain rows, where the edge steps straight up. The sides use 24 sc over 5.2 in (13.2 cm), which matches the stitch gauge. The bottom’s 18 foundation sts plus 4 extra corner sts sit flat around the two corners. The pocket top edge is left open, so it takes no stitches.
Hanging loop (terracotta): Join terracotta in the marked peak sc. Ch 16, then sl st in the same st. Work 24 sc into the ch-16 loop, sl st in the peak st, fasten off and weave in ends. The 24 sc pack the chain densely, which makes it thick and rope-like. The loop stands about 1.5 in (3.8 cm) above the peak.
Final checkpoint: 4.4 in (11.2 cm) x 8.2 in (20.8 cm), plus the loop.
Final Blocking
- Weave in all remaining ends on the inside of the back panel.
- Mist the holder lightly with water until it is damp, not soaked.
- Lay it flat on a blocking mat, pocket side up.
- Pin the bottom corners square. Pin the sides straight to 4.4 in (11.2 cm) wide.
- Pin the roof peak so the total height is 8.2 in (20.8 cm), with the slopes straight.
- Smooth the windows and door flat with your fingers. Do not pin through the button.
- Slip a piece of card into the pocket so the layers don’t dry stuck together.
- Let it dry completely, about 12–24 hours.
Final Quality-Control Checklist
- Pocket measures 4.4 in (11.2 cm) x 5.4 in (13.7 cm)
- Overall height to the peak is 8.2 in (20.8 cm)
- Roof slopes are straight and match each other
- Edge round counts: 24 / 22 / 24 cream, 15 / 3 / 15 terracotta
- Cable slot is open and about 0.9 in (2.3 cm) wide
- Windows are level and 0.6 in (1.5 cm) from the finished side edges
- Door is centered with its button secure
- Window crosses are centered and snug
- Hanging loop is firm and centered at the peak
- Phone slides in easily and the top of the phone shows above the pocket
Troubleshooting
Pocket is too tight for the phone: Your gauge is tight. Remake the pocket and back with a 4.5 mm hook, or add 2 sts to the foundation of both panels.
Roof leans to one side: You probably skipped a decrease on one end. Count the stitches row by row against the pattern.
Side edges ripple: Too many sts went into the row ends. Check that you skipped the row ends of Rows 9 and 18.
Side edges pull in: Your edging is too tight. Redo it with a looser hand or a hook 0.5 mm larger, for the border only.
Appliqués pucker: The whipstitches are pulled too tight. Unpick them and resew with relaxed tension.
Loop is floppy: Add 2–4 more sc into the loop so it packs tighter.
Care
Hand wash in cool water with mild soap, press out the water in a towel, and dry flat. Remove the phone and the cable before washing, and avoid wringing so the roof keeps its shape.
Final Notes
The measurement chain is short and easy to check. With a gauge of 18 sc and 20 rows over 4 in (10.2 cm), the 18-stitch panels are 4.0 in (10.2 cm) wide. The 26-row body is 5.2 in (13.2 cm) tall. The 13-row roof adds 2.6 in (6.6 cm), for a back panel 7.8 in (19.8 cm) tall. One edging round adds 0.2 in (0.5 cm) on each edge, so the finished cottage is 4.4 in (11.2 cm) x 8.2 in (20.8 cm), with a 1.5 in (3.8 cm) loop on top. Check each stage as you go and the holder will fit your phone neatly.
Happy crocheting!