

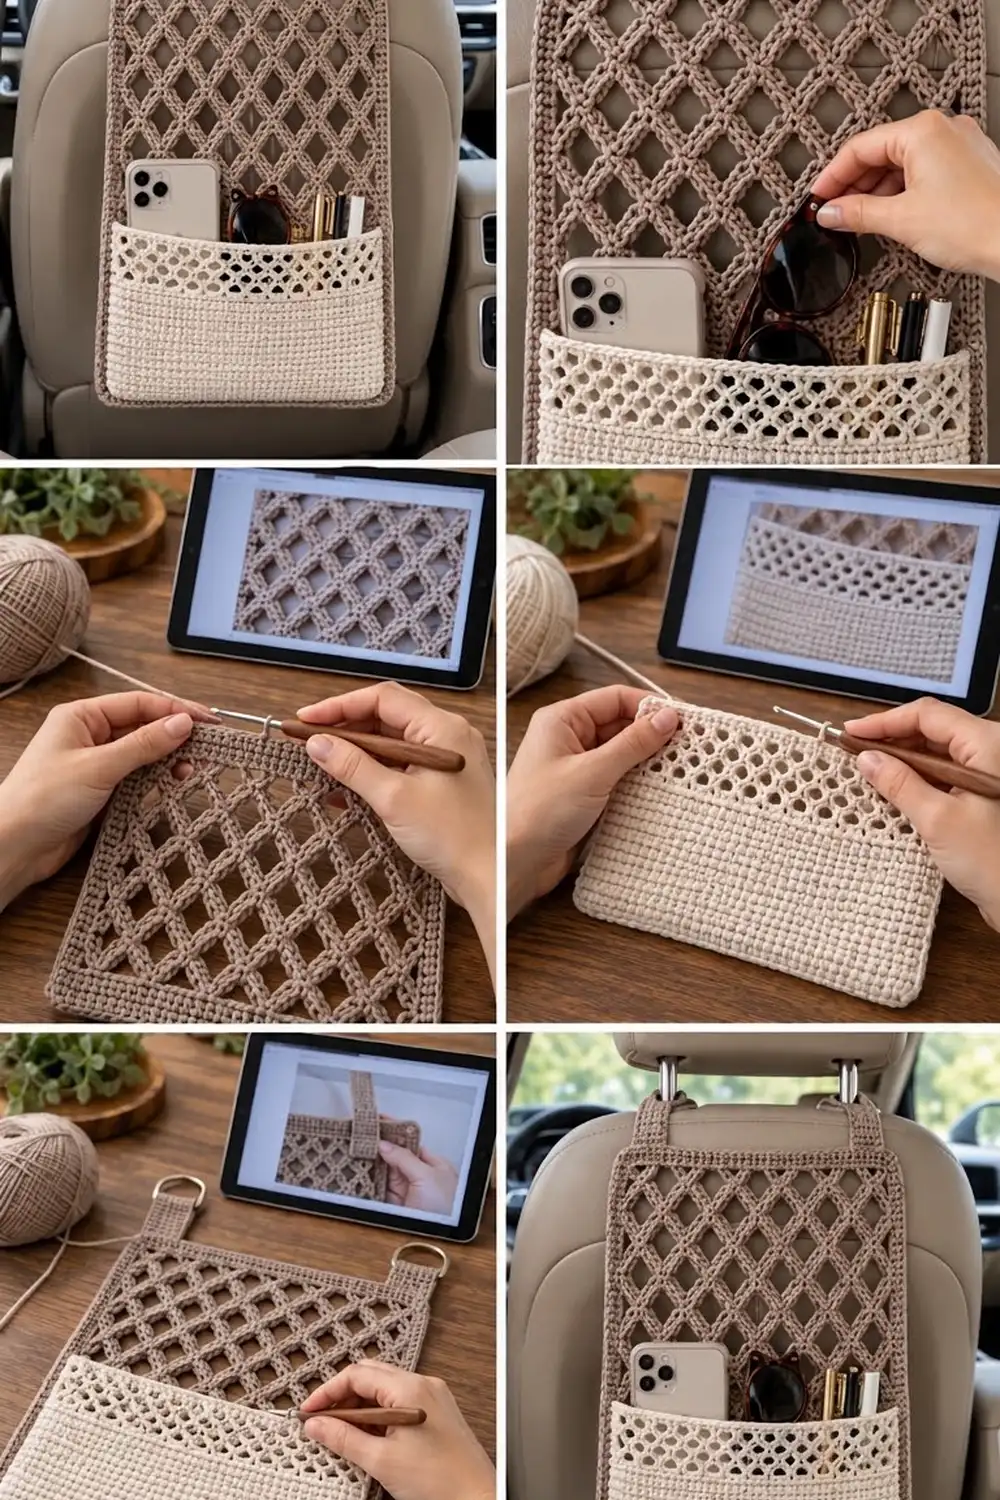
The Trellis Drive Car Seat Organizer is a light, airy organizer that hangs from the back of a car seat. A taupe diamond lattice panel lets the seat show through. A solid cream pocket at the bottom holds a phone, sunglasses, pens and other small things you want close by.
The palette is two calm neutrals, mushroom taupe and warm cream, so it suits most car interiors. The style is modern and a little boho: an open trellis on top, a dense pocket below, and a crisp solid border holding the lattice square.
This pattern uses US crochet terms. The finished organizer measures 12.5 in × 17.75 in (31.8 × 45.1 cm) without the straps. The strap loops add about 3.5 in (8.9 cm) above the top edge.
Construction is simple. You work the lattice panel flat in rows, then add a 4-round single crochet border. The pocket is worked flat from the bottom up, moving from solid rows into a small mesh band. You make two straps in rows, then sew the pocket to the front of the panel and the straps to the back.
Finished Size and Construction
- Finished size: 12.5 in × 17.75 in (31.8 × 45.1 cm), straps not included
- Skill level: Easy-intermediate
- Terminology: US crochet terms
- Yarn weight: Worsted (#4) cotton or cotton blend
- Hook: 5.0 mm (US H-8)
- Number of pieces: 4 (1 back panel, 1 pocket, 2 straps)
- Layout: Pocket centered on the lower front of the panel; straps sewn to the back of the top border
- Back panel lattice before border: 10.5 in × 15.75 in (26.7 × 40.0 cm)
- Border depth: 1 in (2.5 cm) on all four sides
- Pocket: 11.75 in × 7 in (29.8 × 17.8 cm)
- Strap: 2 in × 9 in (5.1 × 22.9 cm) each
Materials
Use a smooth, firm worsted-weight cotton. Cotton keeps the lattice open and crisp, holds its shape in a warm car, and doesn’t stretch much under the weight of a phone. Avoid fuzzy or very drapey yarns, because they blur the diamonds.
These quantities assume a cotton of about 85 m per 50 g (roughly 1.7 m per gram):
- Taupe (main color, MC): 150 g / 255 m, for the lattice, border and straps
- Cream (contrast color, CC): 80 g / 136 m, for the pocket
Both amounts include a margin of about 20% for gauge swatches and differences between yarns.
Tools:
– 5.0 mm (US H-8) crochet hook
– Tapestry needle
– 6–8 locking stitch markers
– Scissors
– Measuring tape
– Blocking mats and rust-proof pins
– Spray bottle
– Optional: 2 metal D-rings, 2 in (5.1 cm) inner width
Abbreviations (US Terms)
- ch – chain
- sc – single crochet
- hdc – half double crochet
- tr – treble crochet
- sk – skip
- st(s) – stitch(es)
- sp – space
- rnd – round
- rep – repeat
- RS / WS – right side / wrong side
Special stitch – trellis loop: a chain loop (ch 7 on the panel, ch 3 on the pocket) anchored with a sc into the center of the loop below. Rows of these offset loops form the diamond lattice.
Gauge and Checkpoints
Solid gauge: 16 sc × 16 rows = 4 in (10.2 cm), which is 4 sts and 4 rows per inch (2.5 cm).
Panel lattice gauge (after blocking): 1 ch-7 trellis loop = 1.5 in (3.8 cm) wide, and 4 rows = 3 in (7.6 cm) tall.
Pocket mesh gauge: 1 ch-3 loop = 0.5 in (1.3 cm) wide, and 5 mesh rows = 1.75 in (4.4 cm) tall.
Test one piece first. The pocket is the best test, because it uses the solid gauge and the small mesh in one piece. Make it, block it, and measure it before you start the panel.
Checkpoints:
1. Pocket after Row 18: 11.75 in (29.8 cm) wide × 4.5 in (11.4 cm) tall.
2. Finished pocket: 11.75 in × 7 in (29.8 × 17.8 cm).
3. Panel lattice after Row 21, gently stretched: 10.5 in × 15.75 in (26.7 × 40.0 cm).
4. Panel after border Rnd 4: 12.5 in × 17.75 in (31.8 × 45.1 cm).
If your piece is too big, go down a hook size (4.5 mm / US 7). If it’s too small, go up to 5.5 mm (US I-9). If only the lattice is off, change the hook for the panel rows only and keep the border on the 5.0 mm hook.
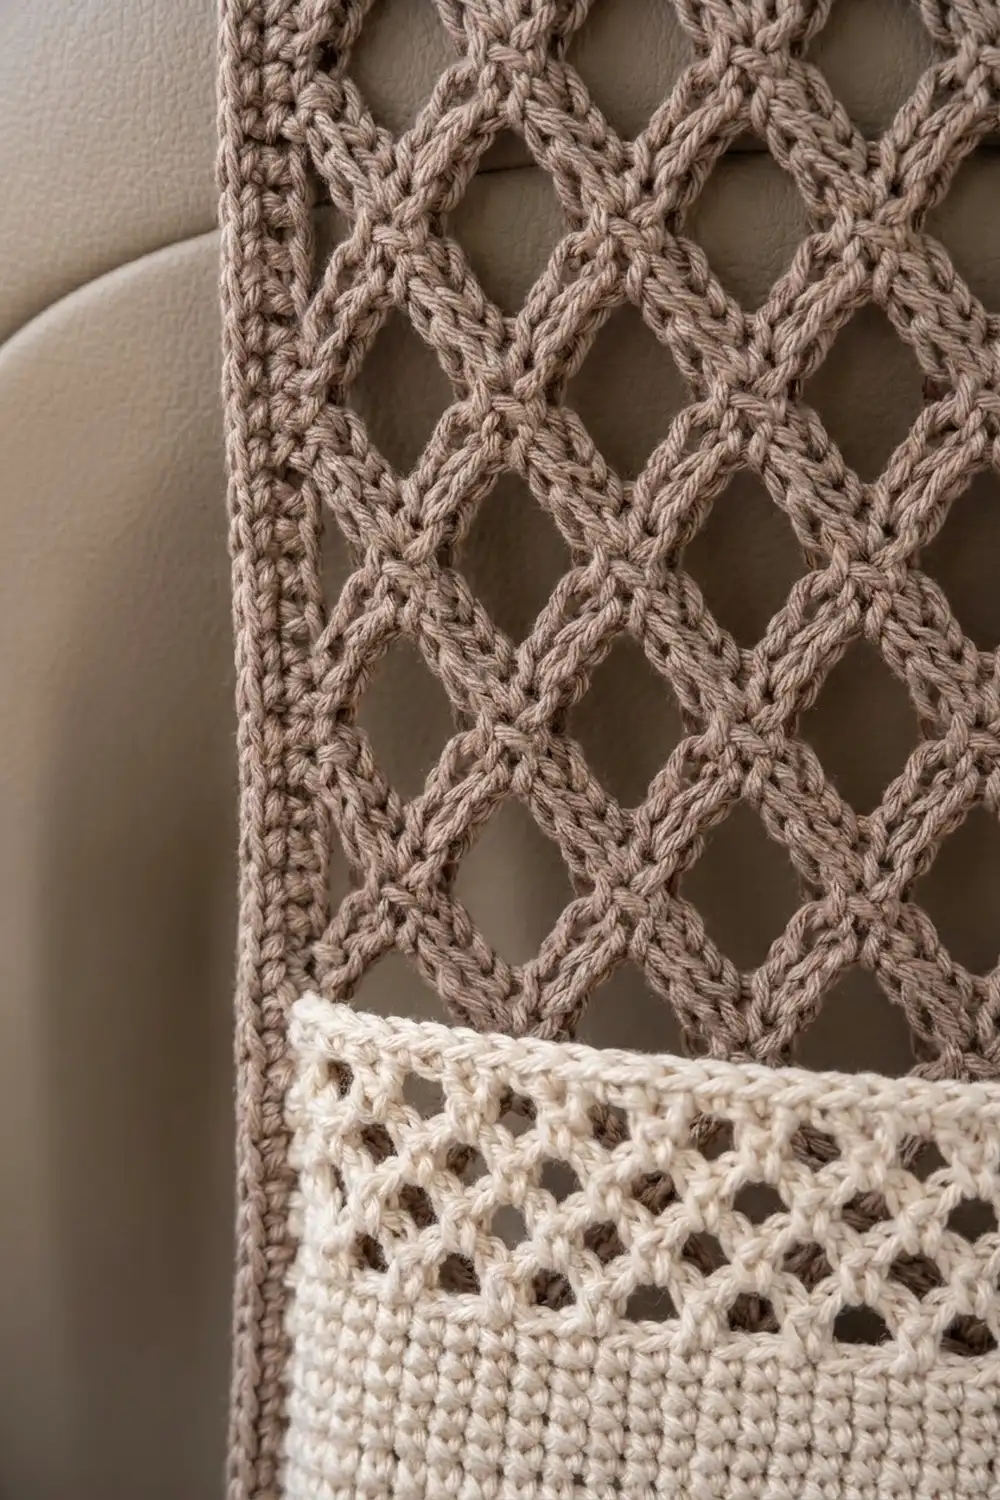
Back Panel Lattice
With MC, ch 44.
Row 1 (RS): Sc in 2nd ch from hook, ch 7, sk 5 ch, sc in next ch; rep from * 6 more times. Turn. (7 ch-7 loops, 8 sc)*
Row 2: Ch 7 (counts as tr + ch 3), sc in first ch-7 loop, ch 7, sc in next ch-7 loop; rep from * 5 more times, ch 3, tr in last sc. Turn. (6 full loops + 2 half loops)*
Row 3: Ch 1, sc in tr, ch 7, sc in next ch-7 loop; rep from * 5 more times, ch 7, sc in 4th ch of turning ch-7. Turn. (7 ch-7 loops, 8 sc)*
Rows 4–21: Rep Rows 2–3 nine more times. You finish on a Row 3 repeat, so the top edge has 7 full loops. Don’t fasten off.
Checkpoint: 21 rows at 0.75 in (1.9 cm) each = 15.75 in (40.0 cm). 7 loops at 1.5 in (3.8 cm) each = 10.5 in (26.7 cm).
The half loops in each even row keep the side edges straight. They also give the border a solid post to work into on every row end.
With CC, ch 48.
Row 1 (RS): Sc in 2nd ch from hook and in each ch across. Turn. (47 sc)
Rows 2–18: Ch 1, sc in each st across. Turn. (47 sc)
Checkpoint: 11.75 in × 4.5 in (29.8 × 11.4 cm). Work these rows firmly so the pocket holds its shape when it’s full.
Row 19 (mesh set-up): Ch 1, sc in first st, ch 3, sk 1 st, sc in next st; rep from * across. Turn. (23 ch-3 loops, 24 sc)*
Row 20: Ch 3 (counts as hdc + ch 1), sc in first ch-3 loop, ch 3, sc in next ch-3 loop; rep from * 21 more times, ch 1, hdc in last sc. Turn. (22 full loops + 2 half loops)*
Row 21: Ch 1, sc in hdc, ch 3, sc in next ch-3 loop; rep from * 21 more times, ch 3, sc in 2nd ch of turning ch-3. Turn. (23 ch-3 loops, 24 sc)*
Rows 22–23: Rep Rows 20–21.
Row 24 (conversion row): Ch 1, sc in each sc and 1 sc in each ch-3 loop across. Turn. (24 sc worked 1-per-existing-sc + 23 sc added in loops = 47 sc)
Rows 25–26: Ch 1, sc in each st across. Turn. (47 sc)
Fasten off, leaving a 40 in (101.6 cm) tail for sewing.
Checkpoint: 4.5 in solid + 1.75 in mesh + 0.75 in top band = 7 in (11.4 + 4.4 + 1.9 = 17.8 cm).
Straps (Make 2)
With MC, ch 9.
Row 1: Sc in 2nd ch from hook and in each ch across. Turn. (8 sc)
Rows 2–36: Ch 1, sc in each st across. Turn. (8 sc)
Fasten off, leaving a 20 in (50.8 cm) tail.
Checkpoint: 2 in × 9 in (5.1 × 22.9 cm).
Make All Pieces
- MC (taupe): 1 back panel (lattice + border) and 2 straps
- CC (cream): 1 pocket
Layout, viewed from the front:
   [strap]                 [strap]      <- sewn to back of top border
+-------------------------------------+
|  border 1 in (2.5 cm)               |
|   / \ / \ / \ / \ / \ / \ / \       |
|   \ / \ / \ / \ / \ / \ / \ /       |  taupe lattice
|   / \ / \ / \ / \ / \ / \ / \       |
| +---------------------------------+ |
| |  cream mini-mesh band            | |
| |  cream solid sc                  | |  pocket 11.75 x 7 in
| +---------------------------------+ |
+-------------------------------------+
Joining
Order of work: finish the lattice, work the Border (next section), then come back here to assemble. The border section stays in one place so all of the edge math is together.
Pocket placement: Lay the bordered panel RS up. Center the pocket RS up with its bottom edge 0.375 in (1.0 cm) above the panel’s bottom edge, which leaves 0.375 in (1.0 cm) of taupe showing on each side. The pocket’s sides and bottom now sit on the solid border, not on the open lattice, so the seams are anchored in firm stitches. The pocket top sits 7.375 in (18.7 cm) above the panel bottom. Pin every 1 in (2.5 cm).
Stitch-to-stitch logic: Both pieces work at 4 sts per inch, so they line up 1 to 1.
- Bottom seam: Whipstitch through each of the 47 pocket sts and 1 matching border sc behind it.
- Side seams: The pocket has 26 rows (Rows 1–26), so take 26 stitches up each side, one per pocket row end. Catch the border sc behind each one. Where the pocket’s mesh rows sit at a slightly different row height, ease the extra over 2–3 stitches.
- Top edge: Leave it open.
- Backstitch twice at the top corners. They take the most strain.
Straps: Center each strap 2.5 in (6.4 cm) in from a side edge, measured to the strap’s center, so the strap centers are 7.5 in (19.1 cm) apart. Check this against your headrest posts and adjust as needed. On the WS of the panel, lay 1 in (2.5 cm) of one strap end over the top border and whipstitch around all four edges. Fold the strap into a loop and sew the other end over the first in the same way. If you’re using D-rings, thread the strap through the ring before folding.
Tension: Pull each whipstitch snug enough to close the seam but not so tight that it puckers. The pocket should lie flat with no ripple.
Size checkpoint: The assembled organizer still measures 12.5 in × 17.75 in (31.8 × 45.1 cm), and each strap loop stands about 3.5 in (8.9 cm) above the top edge.
Border
Border gauge: 4 sc per inch along every edge and 4 rnds per inch in depth, the same as the solid gauge.
Count rule: a side count is the number of sc between two corner ch-2 spaces. The ch-2 corners aren’t counted. Each corner (sc, ch 2, sc) gives 1 sc to each adjoining side, and those sc are already included in the side counts.
Rnd 1 (RS): Keep working with MC. Ch 1, then:
- Top: Work 6 sc in each of the 7 ch-7 loops. (42 sc)
- Corner: Ch 2.
- Side: Work 3 sc in each of the 21 row ends, working into the sc or the tr post. (63 sc)
- Corner: Ch 2.
- Bottom: Work 6 sc around each of the 7 skipped 5-ch sections of the foundation chain, inserting the hook under the whole section. (42 sc)
- Corner: Ch 2.
- Side: Work 3 sc in each of the 21 row ends. (63 sc)
- Corner: Ch 2. Join with sl st to the first sc.
(42 + 63 + 42 + 63 = 210 sc, plus 4 ch-2 corners)
Rnd 2: Ch 1, sc in each sc around, and work (sc, ch 2, sc) in each corner ch-2 sp. Join. (Top/bottom: 44 sc each, sides: 65 sc each; 218 sc total)
Rnd 3: Rep Rnd 2. (Top/bottom: 46 sc each, sides: 67 sc each; 226 sc total)
Rnd 4: Rep Rnd 2. (Top/bottom: 48 sc each, sides: 69 sc each; 234 sc total)
Fasten off and weave in the ends.
Why the math works: The lattice is 10.5 in (26.7 cm) wide, and at 4 sts per inch that’s 42 sc, or 6 sc per 1.5 in (3.8 cm) loop. It’s 15.75 in (40.0 cm) tall, and at 4 sts per inch that’s 63 sc, or 3 sc per 0.75 in (1.9 cm) row. So the border neither ruffles nor pulls in. Each round adds 1 sc to each end of every side, which is +2 per side and +8 per round. After 4 rnds the border is 1 in (2.5 cm) deep: 10.5 + 1 + 1 = 12.5 in (31.8 cm) wide and 15.75 + 1 + 1 = 17.75 in (45.1 cm) tall.
Final Blocking
- Lightly mist the whole organizer until it’s damp but not soaked.
- Lay it RS up on blocking mats.
- Pin the four outer corners to 12.5 in × 17.75 in (31.8 × 45.1 cm).
- Pin along each border edge every 1–1.5 in (2.5–3.8 cm), keeping the edges straight.
- Gently open the lattice diamonds with your fingers so each loop sits at about 1.5 in (3.8 cm) wide.
- Smooth the pocket flat and square its top edge.
- Lay the straps flat beside the panel, or pin the loops open.
- Leave it to dry completely, at least 12 hours, before unpinning.
Final Quality-Control Checklist
- Panel measures 12.5 in × 17.75 in (31.8 × 45.1 cm)
- Border Rnd 4 counts are 48 / 69 / 48 / 69 sc
- Every lattice row has 7 full loops on odd rows and 6 full + 2 half loops on even rows
- Pocket is 47 sts wide and 7 in (17.8 cm) tall
- Pocket is centered with 0.375 in (1.0 cm) of taupe showing on each side and below
- Pocket seams are sewn into the border, not into the lattice
- Pocket top edge is open and the top corners are reinforced
- Straps are 2 in × 9 in (5.1 × 22.9 cm), sewn to the WS, and evenly spaced
- All ends are woven in securely
Troubleshooting
Diamonds are lopsided: Make sure each sc goes into the center of the loop below, not to one side of it.
Lattice side edges curve inward: Check that the even rows end with ch 3, tr, and the odd rows end in the 4th ch of the turning chain.
Border ruffles: You have too many stitches. Recount Rnd 1 to 42 / 63 / 42 / 63.
Border pulls in or cups: You have too few stitches, or your tension is too tight. Go up half a hook size for the border only.
Pocket sags when full: Work the solid rows tighter, or add one more sc row at the top.
Straps stretch: Sew the strap ends with two passes, and use firmer cotton for the straps.
Pocket wider than the panel opening: Your solid gauge is loose. Remake the pocket on a 4.5 mm (US 7) hook.
Care
Hand wash cool with mild soap, press out the water in a towel, and dry flat to the blocked measurements. Don’t tumble dry, because heat can shrink cotton and distort the lattice.
Final Notes
The measurement chain is simple. The lattice is 7 loops × 21 rows, or 10.5 in × 15.75 in (26.7 × 40.0 cm). The border starts at 42 / 63 sc, matching 4 sts per inch, and adds 1 in (2.5 cm) on every side for 12.5 in × 17.75 in (31.8 × 45.1 cm). The pocket is 47 sts × 26 rows, or 11.75 in × 7 in (29.8 × 17.8 cm), and sits neatly inside the border. Two 2 in × 9 in (5.1 × 22.9 cm) straps finish the hanger. Check your gauge on the pocket first, and the rest of the measurements will line up.
Happy crocheting!