

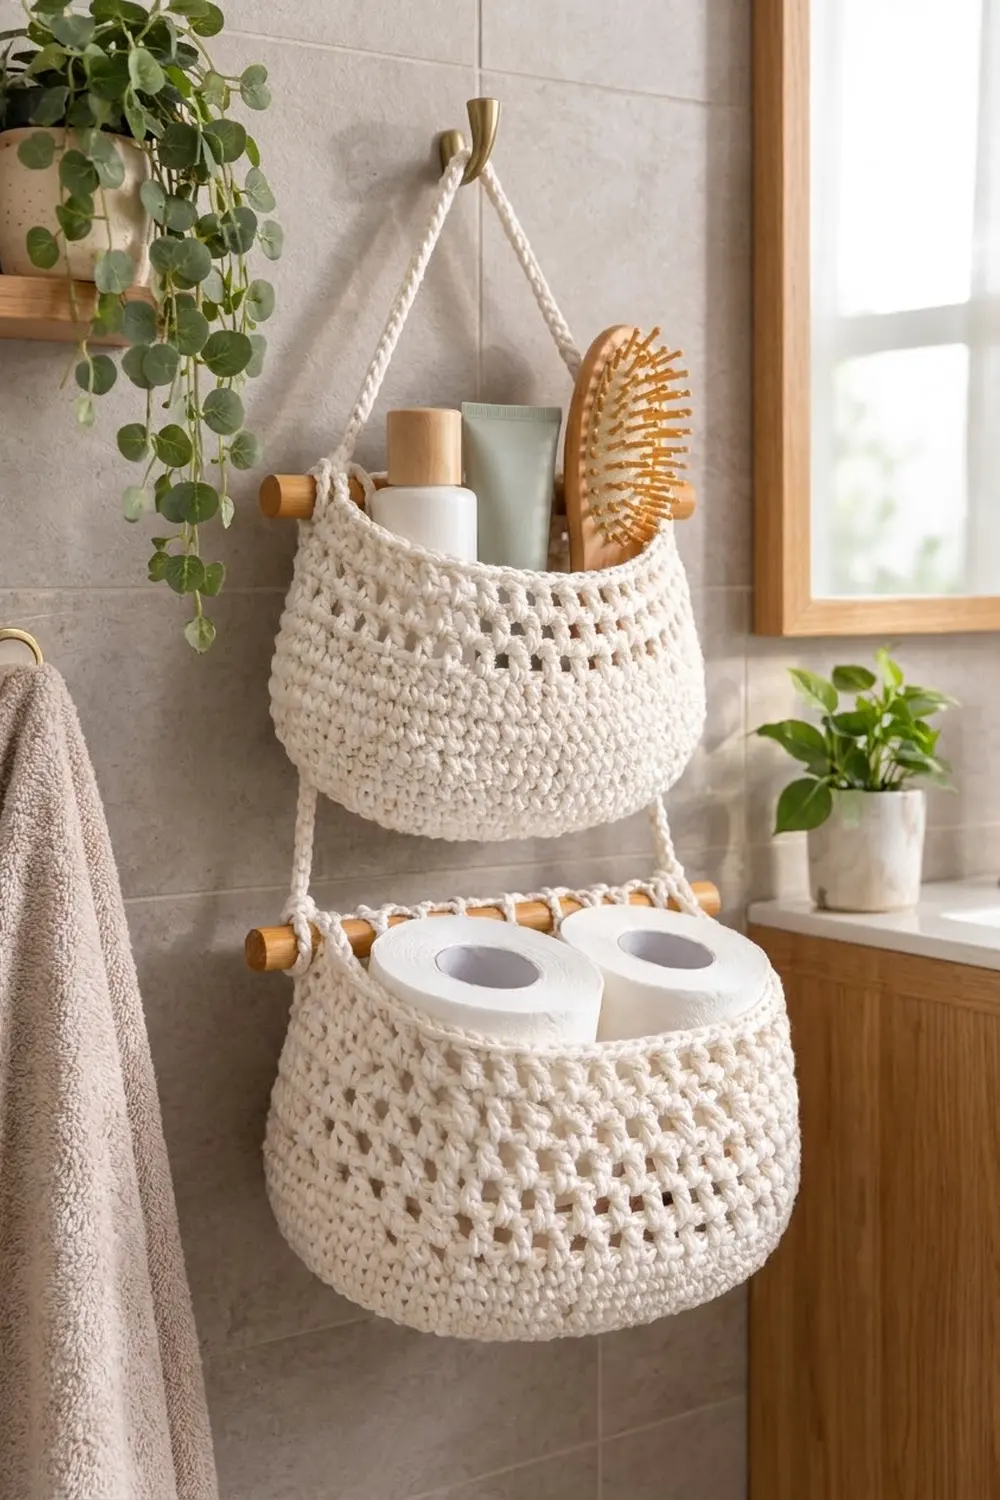
This hanging organizer has two oval baskets, one above the other. Each one has solid bands at the bottom and top with staggered mesh holes in between. Wooden dowels run through the rims, and rope-like crochet cords join the tiers and hang the set from a single hook. Use it for bath bottles, hair tools, or spare toilet rolls.
The whole piece uses one color, a cream chunky cotton. With a single neutral shade, the texture does the work, and the basket suits a natural, spa-style bathroom.
This pattern uses US crochet terms. The finished organizer is about 22.75 in (57.8 cm) tall from the top of the hanging loop to the bottom of the lower basket. The upper basket is about 9 in (22.9 cm) wide and 5 in (12.7 cm) tall. The lower basket is about 11 in (27.9 cm) wide and 5.75 in (14.6 cm) tall.
Each basket starts with an oval base worked around a foundation chain. The sides go straight up, with one back-loop round making a clean base edge. A short rim border leaves a slot at each narrow end for the dowel. Then you make three slip-stitch cords and attach them to the dowel ends.
Finished Size and Construction
- Finished size: 22.75 in (57.8 cm) tall overall; 14 in (35.6 cm) wide at the lower dowel
- Skill level: Easy to intermediate
- Terminology: US crochet terms
- Yarn weight: Bulky (#5) cotton
- Hook: 6.0 mm (J-10)
- Number of pieces: 5 crocheted pieces (2 baskets, 3 cords) plus 2 dowels
- Layout: Vertical stack: hanging loop, upper basket, connecting cords, lower basket
- Upper basket: 9 in (22.9 cm) wide x 4.75 in (12.1 cm) deep x 5 in (12.7 cm) tall
- Lower basket: 11 in (27.9 cm) wide x 5.25 in (13.3 cm) deep x 5.75 in (14.6 cm) tall
- Height before border: upper 4 in (10.2 cm); lower 4.75 in (12.1 cm)
- Border depth: 1 in (2.5 cm), 3 rounds
Materials
Yarn: Use a firm bulky cotton or cotton blend. Cotton holds the basket shape and handles bathroom humidity well. Avoid soft acrylic, because the walls will slump.
- Cream: 160 g / 175 yd (160 m) in total
- Upper basket: about 50 g
- Lower basket: about 70 g
- Cords (worked with the yarn held double): about 20 g
These quantities include roughly a 15% margin for gauge differences and swatching.
Tools:
– 6.0 mm (J-10) crochet hook
– 4 locking stitch markers
– Yarn needle
– Scissors
– Wooden dowel, 1/2 in (1.3 cm) diameter, cut to 12 in (30.5 cm), for the upper basket
– Wooden dowel, 5/8 in (1.6 cm) diameter, cut to 14 in (35.6 cm), for the lower basket
– Fine sandpaper to round the dowel ends
– Optional: wood glue
– Measuring tape
Abbreviations (US Terms)
- ch – chain
- sc – single crochet
- dc – double crochet
- sl st – slip stitch
- sk – skip
- sp – space
- st(s) – stitch(es)
- inc – 2 sc in the same stitch
- BLO – back loop only
- rep – repeat
- rev sc – reverse single crochet
Special stitch – Reverse single crochet (rev sc): Work from left to right (left-handers work right to left). Insert the hook into the next stitch to the right, yarn over, and pull up a loop. Yarn over and pull through both loops. This makes the rounded, rope-like rim.
Special technique – Back-bump slip-stitch cord: Make a chain, then slip stitch into the back bump (the horizontal bar on the back) of each chain. This gives a firm, round cord that won’t stretch.
Gauge and Checkpoints
- Sc gauge: 11 sts and 12 rounds = 4 in (10.2 cm)
- Mesh gauge: 5 mesh rounds = 3 in (7.6 cm); each mesh round is about 0.6 in (1.5 cm) tall
- Cord gauge (yarn held double): 5 ch = 2 in (5.1 cm)
Test one piece first. Make the upper basket base (Rounds 1–7) before anything else. It is the best gauge test, because both bases follow the same increase logic.
Checkpoints:
1. Upper base, after Rnd 7: 66 sts, about 9 in (22.9 cm) long x 4.75 in (12.1 cm) wide.
2. Lower base, after Rnd 8: 80 sts, about 11 in (27.9 cm) long x 5.25 in (13.3 cm) wide.
3. Upper sides before the border: 4 in (10.2 cm) tall.
4. Lower sides before the border: 4.75 in (12.1 cm) tall.
5. After the border: add 1 in (2.5 cm) to each basket.
If your base is too big, try a 5.5 mm hook. If it’s too small or stiff, try a 6.5 mm hook. Don’t change the stitch counts. The dowel lengths and slot positions depend on them.
Upper Basket
Join each round with a sl st to the first st. Ch 1 at the start of each sc round does not count as a stitch. Each oval has four zones: two straight sides and two curved ends.
Base
Foundation: Ch 15.
Rnd 1: Sc in 2nd ch from hook and in next 12 ch (13 sc). Work 3 sc in last ch. Rotate and work along the underside of the chain: sc in next 12 ch, then 2 sc in the last ch (the one already holding the first sc). Join. (30 sts: 12 per side, 3 per end)
Rnd 2: Ch 1. Sc in next 12 sts, inc in each of next 3 sts, sc in next 12 sts, inc in each of next 3 sts. Join. (36 sts: 12 per side, 6 per end)
Rnd 3: Ch 1. Sc 12, (sc 1, inc) x 3, sc 12, (sc 1, inc) x 3. Join. (42 sts; 9 per end)
Rnd 4: Ch 1. Sc 12, (sc 2, inc) x 3, sc 12, (sc 2, inc) x 3. Join. (48 sts; 12 per end)
Rnd 5: Ch 1. Sc 12, (sc 3, inc) x 3, sc 12, (sc 3, inc) x 3. Join. (54 sts; 15 per end)
Rnd 6: Ch 1. Sc 12, (sc 4, inc) x 3, sc 12, (sc 4, inc) x 3. Join. (60 sts; 18 per end)
Rnd 7: Ch 1. Sc 12, (sc 5, inc) x 3, sc 12, (sc 5, inc) x 3. Join. (66 sts: 12 per side, 21 per end)
Each round adds 6 stitches, 3 at each curved end. This keeps the oval flat. The base should now measure 9 in x 4.75 in (22.9 cm x 12.1 cm), with a circumference of about 24 in (61.0 cm).
Sides
Rnd 8 (base edge): Ch 1. Sc BLO in each st around. Join. (66 sts) This makes a ridge, and the walls turn upward from here.
Rnds 9–10: Ch 1. Sc in each st around. Join. (66 sts each)
Rnd 11 (Mesh A): Ch 4 (counts as dc + ch 1). Sk next st. Dc in next st, ch 1, sk next st; rep from * around. Join with sl st to 3rd ch of beg ch-4. (33 dc + 33 ch-1 sps = 66 sts)*
Rnd 12 (Mesh B): Sl st into first ch-1 sp. Ch 4 (counts as dc + ch 1). Dc in next ch-1 sp, ch 1; rep from * around. Join to 3rd ch of beg ch-4. (33 dc + 33 ch-1 sps = 66 sts)* Each dc now sits above a hole, so the holes stagger.
Rnds 13–14: Rep Rnd 12. (66 sts each) You now have 4 mesh rounds.
Rnd 15 (conversion): Ch 1. Sc in each dc and in each ch-1 sp around. Join. (33 sc in dc + 33 sc in sps = 66 sts)
Rnd 16: Ch 1. Sc in each st around. Join. (66 sts)
Checkpoint: The sides measure 4 in (10.2 cm) from the base ridge.
Lower Basket
The lower basket uses the same method, with a longer chain and one extra base round and one extra mesh round.
Base
Foundation: Ch 19.
Rnd 1: Sc in 2nd ch from hook and in next 16 ch (17 sc). Work 3 sc in last ch. Working along the underside, sc in next 16 ch, then 2 sc in the last ch. Join. (38 sts: 16 per side, 3 per end)
Rnd 2: Ch 1. Sc 16, inc x 3, sc 16, inc x 3. Join. (44 sts; 6 per end)
Rnd 3: Ch 1. Sc 16, (sc 1, inc) x 3, sc 16, (sc 1, inc) x 3. Join. (50 sts; 9 per end)
Rnd 4: Same as Rnd 3, but with (sc 2, inc) x 3 at each end. (56 sts; 12 per end)
Rnd 5: (sc 3, inc) x 3 at each end. (62 sts; 15 per end)
Rnd 6: (sc 4, inc) x 3 at each end. (68 sts; 18 per end)
Rnd 7: (sc 5, inc) x 3 at each end. (74 sts; 21 per end)
Rnd 8: (sc 6, inc) x 3 at each end. (80 sts: 16 per side, 24 per end)
Checkpoint: 11 in x 5.25 in (27.9 cm x 13.3 cm), with a circumference of about 29 in (73.7 cm).
Sides
Rnd 9: Ch 1. Sc BLO in each st around. Join. (80 sts)
Rnds 10–11: Ch 1. Sc in each st around. Join. (80 sts each)
Rnd 12 (Mesh A): Work as upper Rnd 11. (40 dc + 40 ch-1 sps = 80 sts)
Rnds 13–16 (Mesh B): Work as upper Rnd 12. (80 sts each) You now have 5 mesh rounds.
Rnd 17 (conversion): Ch 1. Sc in each dc and each ch-1 sp. Join. (40 + 40 = 80 sts)
Rnd 18: Ch 1. Sc in each st around. Join. (80 sts)
Checkpoint: The sides measure 4.75 in (12.1 cm) from the base ridge.
Make All Pieces
Everything is made in Cream:
- 1 upper basket, worked through Rnd 16 for now (border comes later)
- 1 lower basket, worked through Rnd 18 for now (border comes later)
- 1 Cord A (hanger), 24 in (61.0 cm)
- 2 Cord B (connectors), 10 in (25.4 cm) each
Cords (hold 2 strands of yarn together):
- Cord A: Ch 61. Sl st in back bump of 2nd ch from hook and in each ch across. (60 sl st) Fasten off and leave 12 in (30.5 cm) tails at both ends.
- Cord B (make 2): Ch 26. Sl st in back bump of 2nd ch from hook and in each ch across. (25 sl st) Leave 12 in (30.5 cm) tails.
Check each cord’s length without stretching it. Add or remove chains if needed. Both Cord B pieces must be the same length.
Layout grid:
            [ loop ]
            /      \
       Cord A    Cord A
          /          \
  o==[ UPPER BASKET 9 in ]==o      12 in dowel
  |                         |
Cord B                   Cord B
  |                         |
 o===[ LOWER BASKET 11 in ]===o    14 in dowel
Border (Both Baskets)
Border gauge: 11 sts = 4 in (10.2 cm) along the rim. The 3 border rounds together are 1 in (2.5 cm) deep.
Set up: Lay the basket flat so the long sides face front and back. Place a marker at the first stitch of the front long side, then mark the center slot stitches at each narrow end:
- Upper basket: 12 sts per long side and 21 sts per end. The slot uses the center 3 sts of each end.
- Lower basket: 16 sts per long side and 24 sts per end. The slot uses the center 4 sts of each end.
Upper Basket Border
Border Rnd 1 (slot round): Join yarn at the front marker and ch 1. Work: sc 12 (front), sc 9, ch 3, sk 3, sc 9 (end), sc 12 (back), sc 9, ch 3, sk 3, sc 9 (end). Join. (60 sc + 6 ch = 66 sts. Per side: front 12, end 21, back 12, end 21.)
Border Rnd 2: Ch 1. Sc in each sc, and work 3 sc into each ch-3 sp. Join. (60 sc worked 1-per-stitch + 6 sc in slots = 66 sts)
Border Rnd 3: Ch 1. Rev sc in each st around. Join and fasten off. (66 sts)
The slot is about 1.1 in (2.8 cm) wide, which fits the 1/2 in (1.3 cm) dowel.
Lower Basket Border
Border Rnd 1: Sc 16, sc 10, ch 4, sk 4, sc 10, sc 16, sc 10, ch 4, sk 4, sc 10. Join. (72 sc + 8 ch = 80 sts. Per side: front 16, end 24, back 16, end 24.)
Border Rnd 2: Sc in each sc, 4 sc in each ch-4 sp. (72 + 8 = 80 sts)
Border Rnd 3: Rev sc in each st around. (80 sts) Fasten off.
The slot is about 1.5 in (3.8 cm) wide, which fits the 5/8 in (1.6 cm) dowel.
Why the math works: Each chain replaces exactly the number of stitches it skips. Then the next round puts the same number of sc back into the space. The count never changes, so the rim stays the same length as the base edge and doesn’t ruffle or pull in. The slots sit at the exact center of each end, so the dowel runs straight along the long axis. That keeps the basket level when it hangs.
Joining
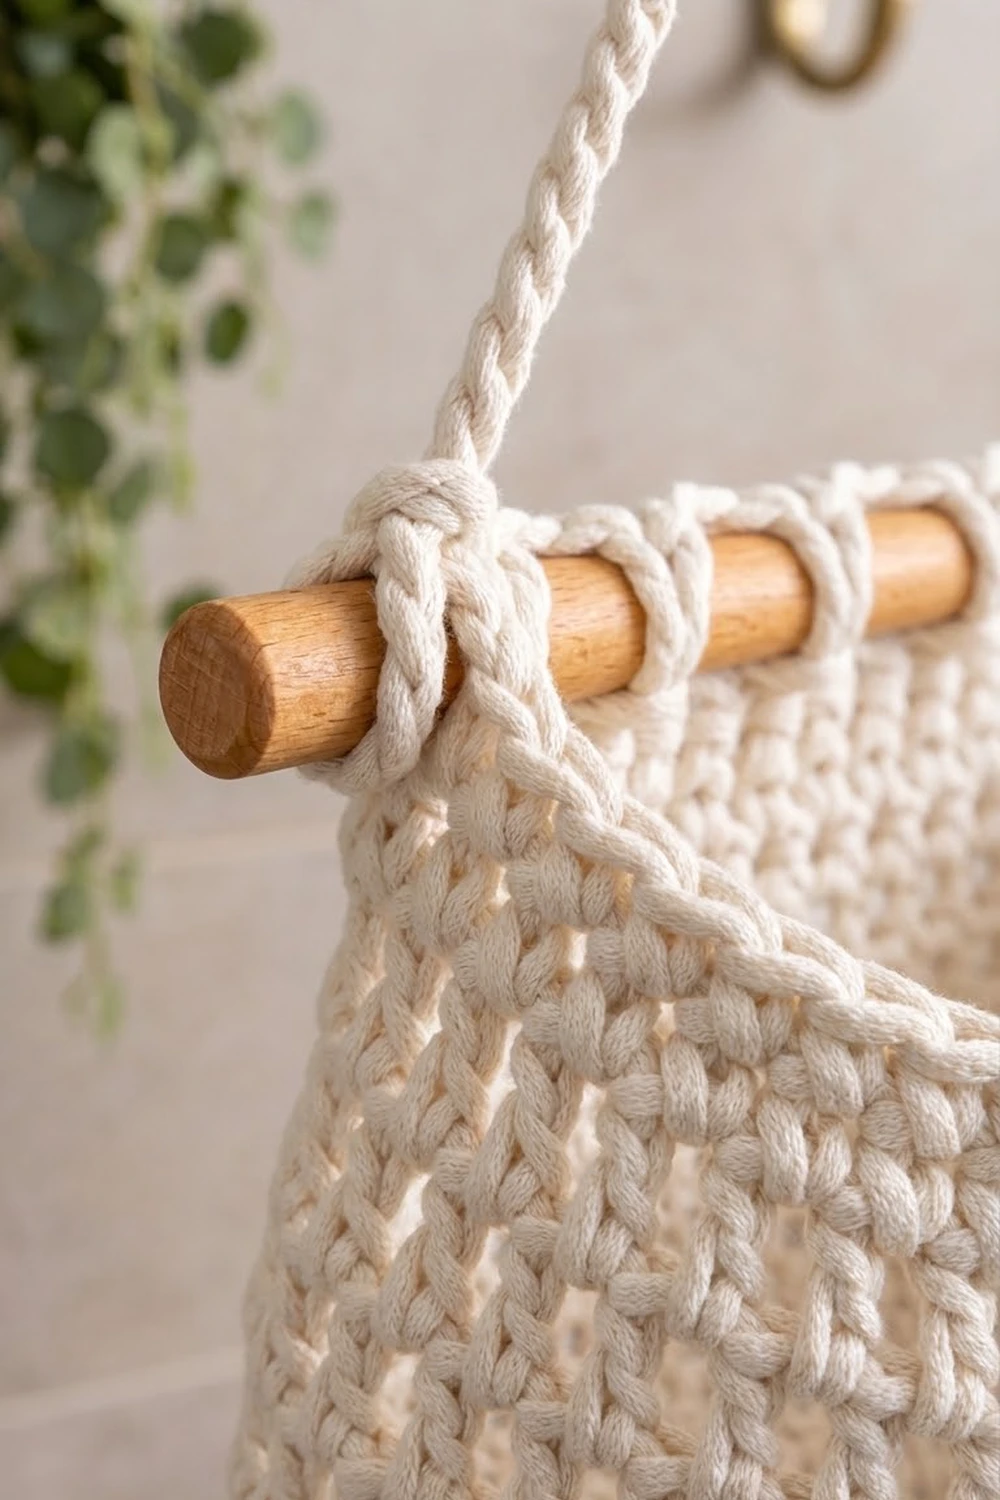
Method: Sew a folded loop at each cord end and slide it over a dowel end.
- Prepare the dowels. Sand the ends round. Slide the 12 in (30.5 cm) dowel through the upper basket’s slots and the 14 in (35.6 cm) dowel through the lower basket’s slots. Center each dowel so 1.5 in (3.8 cm) sticks out on each side.
- Make the hanging loop. Fold Cord A in half. Using a tail, whipstitch the two layers together 1 in (2.5 cm) below the fold. This makes a 1 in (2.5 cm) loop.
- Attach Cord A. At each end of Cord A, wrap the last 1.5 in (3.8 cm) around the upper dowel, about 0.25 in (0.6 cm) from the tip. Whipstitch the end flat against the cord, going stitch-to-stitch: each needle pass goes through one sl st of the cord end and the matching sl st of the cord body, 6 passes per end.
- Attach Cord B. Wrap the top of each Cord B around the upper dowel just inboard of Cord A, next to the rim. Wrap the bottom end around the lower dowel, 0.25 in (0.6 cm) from the tip. Each attachment uses 1.5 in (3.8 cm) of cord and 6 stitch-to-stitch passes.
- If you like, add a dot of wood glue inside each loop so it can’t slide.
Tension advice: Pull each stitch snug, but not so tight that the cord twists. Both legs of each cord must sit at the same angle.
Size checkpoint: Hang the organizer empty. The hanging point (apex) should be about 7.75 in (19.7 cm) above the upper dowel, and the gap between the dowels about 7 in (17.8 cm). The total height should be about 22.75 in (57.8 cm). Lay a level on both dowels. If one is tilted, move a cord loop by 1 sl st.
Final Blocking
- Take the dowels out.
- Mist each basket thoroughly with water.
- Stuff each basket firmly with a rolled towel so the sides stand straight and the oval keeps its shape.
- Push the base ridge out with your fingers so it is crisp.
- Smooth the mesh rounds so the holes line up in even, staggered rows.
- Let the baskets dry completely, usually 24 hours.
- Put the dowels back, hang the organizer, and check it once more with a level.
Final Quality-Control Checklist
- [ ] Upper base has 66 sts; lower base has 80 sts
- [ ] Bases lie flat with no cupping or ruffling
- [ ] Base ridge is visible all the way around
- [ ] Holes stagger evenly in every mesh round
- [ ] Each basket’s rim count matches its base count
- [ ] Slots are centered at the narrow ends
- [ ] Dowels stick out 1.5 in (3.8 cm) on each side
- [ ] Both Cord B pieces are 10 in (25.4 cm) long
- [ ] Both dowels hang level
- [ ] All tails are woven in through at least 2 in (5.1 cm) of stitches
Troubleshooting
The base cups upward: Your stitches are too tight, or you missed an increase. Count each end again. It should gain 3 sts per round.
The base ruffles: You added extra increases. Go back to the last correct round count.
The mesh holes line up in columns instead of staggering: You skipped the sl st into the first ch-1 sp. Every Mesh B round must start in a space.
The sides lean outward: Go down 0.5 mm in hook size for the sc bands only.
The dowel is too tight in the slot: Go up one ch in the slot and skip one more st. Then work the same number of sc into the space in Border Rnd 2.
The baskets tilt: The cords are uneven. Re-sew the shorter cord’s loop with 1 fewer sl st.
The rim flares: Your rev sc is too loose. Work it with a smaller hook.
Care
Remove the dowels. Hand wash in cool water with mild soap, press out the water in a towel, and dry the baskets stuffed into shape.
Final Notes
Each measurement depends on the one before it. If your gauge is 11 sts per 4 in (10.2 cm), the upper base comes out at 9 x 4.75 in (22.9 x 12.1 cm) and the lower at 11 x 5.25 in (27.9 x 13.3 cm). The straight sides add 4 in (10.2 cm) and 4.75 in (12.1 cm) of height, and each border adds 1 in (2.5 cm). The 12 in (30.5 cm) and 14 in (35.6 cm) dowels then stick out 1.5 in (3.8 cm) on each side. The 24 in (61.0 cm) hanger and 10 in (25.4 cm) connectors bring the hanging organizer to about 22.75 in (57.8 cm). If you check each stage as you go, the dowels will hang level at the end.
Happy crocheting!