

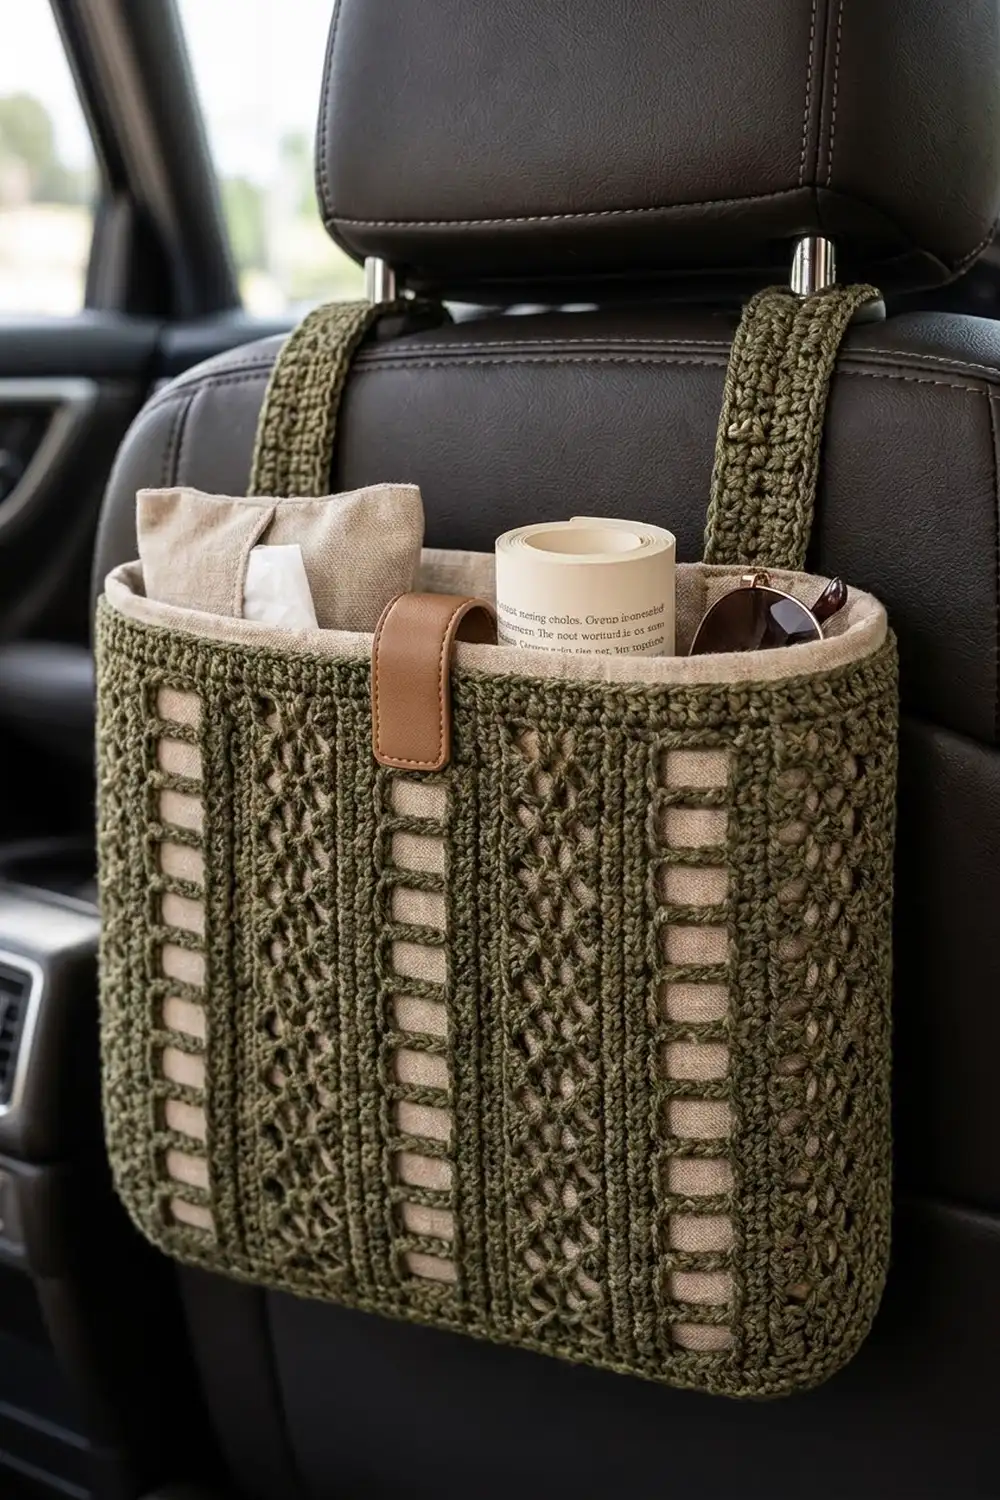
This car seat organizer is a sturdy, lacy basket that hangs from the headrest posts behind a front seat. It holds tissues, sunglasses, snacks and small odds and ends where a passenger can reach them.
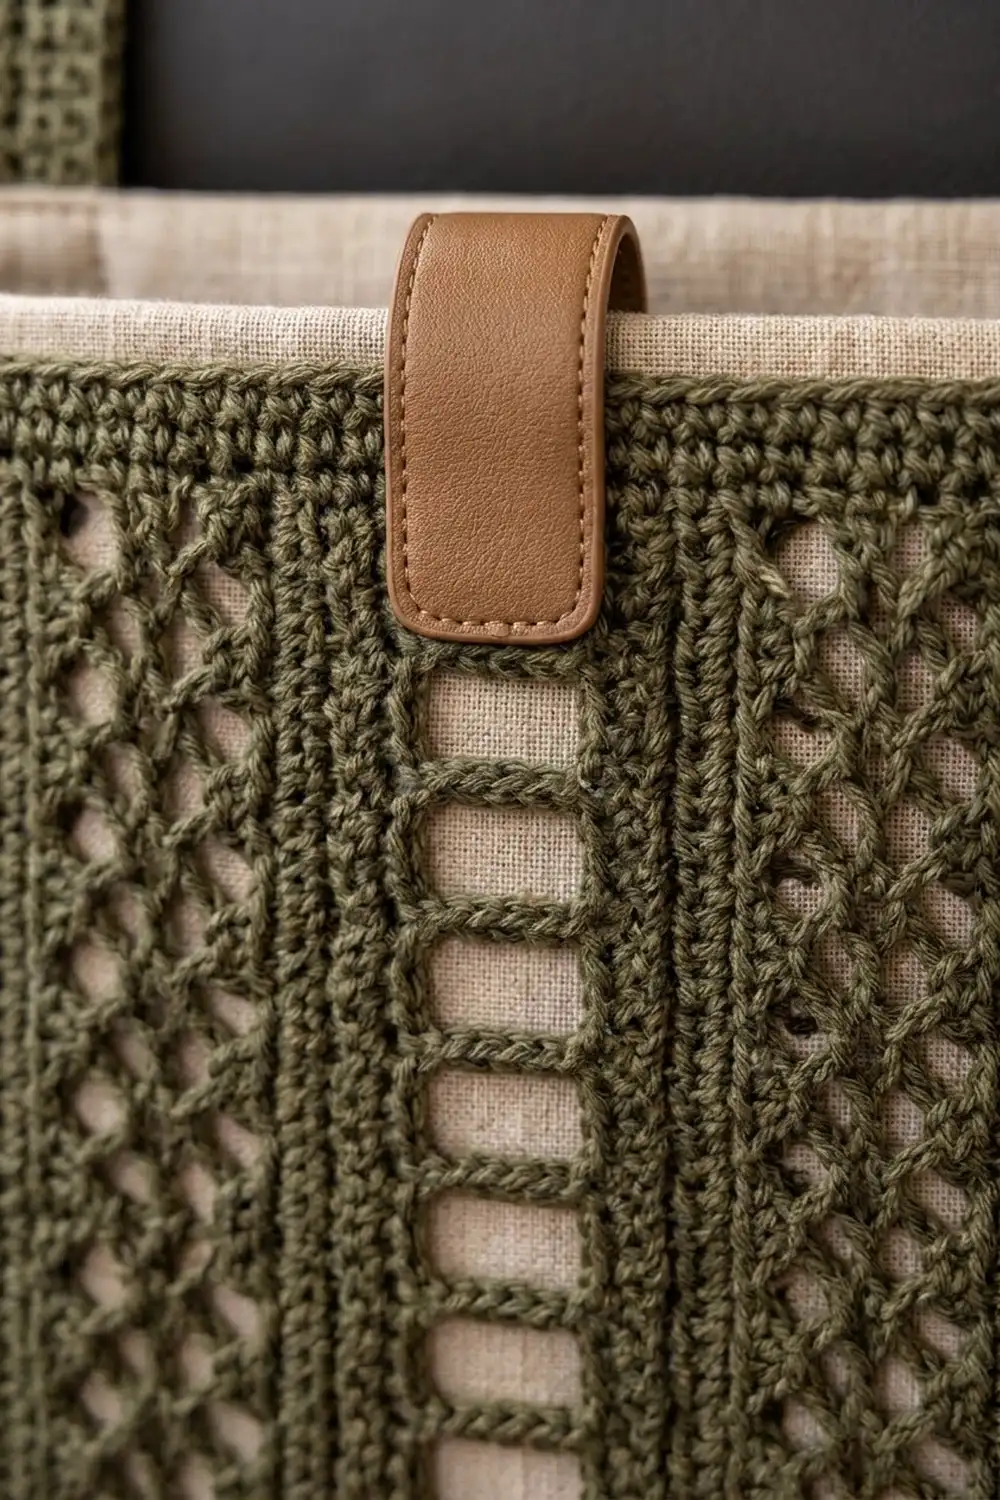
The design uses one olive green cotton yarn. Tall vertical columns alternate between two textures. Ladder columns have stacked rectangular windows with thin horizontal bars. Narrower lattice columns have small staggered holes that look like tiny diamonds. A natural beige linen lining shows through every opening and stands just above the solid top band. A tan faux leather tab finishes the center front.
The pattern uses US crochet terms. The finished organizer is about 10 in (25.4 cm) wide, 10 in (25.4 cm) tall and 3.5 in (8.9 cm) deep. The top edge measures 24 in (61.0 cm) around.
Construction is seamless. You work a solid oval base in single crochet rounds, then turn the corner with a back-loop round. The lace walls go straight up in joined rounds with no increases, and a short band finishes the rim. The two straps are worked flat and sewn on. A sewn fabric lining and a base insert hold the shape.
Finished Size and Construction
- Finished size: 10 in (25.4 cm) wide x 10 in (25.4 cm) tall x 3.5 in (8.9 cm) deep
- Skill level: Intermediate
- Terminology: US crochet terms
- Yarn weight: Worsted (4), cotton or cotton blend
- Hook: 4.5 mm (US 7)
- Number of pieces: 1 crocheted body (base and walls in one piece) plus 2 sewn-on straps
- Layout: Oval base, straight walls, 8 pattern repeats around (4 on the front, 4 on the back)
- Base size: 10 in x 3.5 in (25.4 cm x 8.9 cm)
- Wall height before border: about 9.5 in (24.1 cm)
- Border depth: about 0.5 in (1.3 cm)
- Strap size: 1.5 in x 14 in (3.8 cm x 35.6 cm)
Materials
Choose a firm, smooth worsted-weight cotton or cotton blend. Cotton holds the basket shape, shows the openwork clearly and stretches very little under the weight of what’s inside. Avoid fuzzy or very soft yarns, because they blur the windows and sag.
- Olive green: 220 g, about 375 m (410 yd)
These amounts include a margin of about 15 percent for your gauge swatch and for differences in tension.
Tools and notions:
- 4.5 mm (US 7) crochet hook
- At least 4 locking stitch markers
- Tapestry needle, scissors and measuring tape
- Beige linen or linen-look cotton, about 27 in x 20 in (68.6 cm x 50.8 cm)
- Matching sewing thread and a sharp sewing needle
- Plastic canvas or heavy cardboard for the base insert, 9.5 in x 3 in (24.1 cm x 7.6 cm)
- Tan faux leather strip, 1 in x 4.5 in (2.5 cm x 11.4 cm)
- 2 heavy-duty sew-on snaps, about 0.75 in (1.9 cm) across
- Rust-proof pins
Abbreviations (US Terms)
- ch: chain
- sc: single crochet
- dc: double crochet
- sl st: slip stitch
- sk: skip
- st(s): stitch(es)
- sp: space
- BLO: back loop only
- inc: 2 sc in the same stitch
- rep: repeat
- rnd(s): round(s)
Special terms:
- Window round: A dc round that makes the openings. When you count the round, each ch counts as 1 stitch.
- Rung round: A sc round worked over a window round. Work 1 sc in each dc, 1 sc in each ch-1 sp and 3 sc in each ch-3 sp. This closes each window with a thin horizontal bar.
- Starting chains: The ch-3 at the start of a window round counts as the first dc. The ch-1 at the start of a sc round does not count as a stitch.
Gauge and Checkpoints
Single crochet gauge: 16 sc and 18 rnds = 4 in (10.2 cm).
Pattern gauge: 1 repeat (12 sts) = 3 in (7.6 cm) wide. 4 pairs of window and rung rounds (8 rnds) = 3 in (7.6 cm) tall.
Use the base as your test piece. Work Rounds 1–8 and measure the base flat before you start the walls. Check these measurements as you go:
- After Round 1: about 6.5 in (16.5 cm) long
- After Round 8: 10 in x 3.5 in (25.4 cm x 8.9 cm), 96 sts
- After Round 18: walls about 3.5 in (8.9 cm) tall
- After Round 34: walls about 9.5 in (24.1 cm) tall
- Finished: 10 in (25.4 cm) tall, 24 in (61.0 cm) around the top
If your base comes out too big, go down half a millimeter in hook size. If it’s too small, go up half a millimeter. Keep the stitch counts the same, because every wall stitch depends on the 96-stitch base and the 12-stitch repeat.
Part 1: Oval Base
Work in joined rounds with the right side facing you. Don’t turn.
Ch 27.
Rnd 1: 3 sc in 2nd ch from hook, sc in next 24 ch, 3 sc in last ch. Working along the opposite side of the foundation chain, sc in next 24 ch. Join with sl st to first sc. (54 sts: 3 at each end, 24 along each long side)
Put a marker in the center stitch of each 3-stitch end, and move the markers up as you work. All increases happen at the two curved ends. Each long side stays at 24 stitches.
Rnd 2: Ch 1, inc in each of next 3 sts, sc in next 24, inc in each of next 3 sts, sc in next 24; join. (60 sts: 6 at each end)
Rnd 3: Ch 1, [sc in next st, inc] 3 times, sc in next 24, [sc in next st, inc] 3 times, sc in next 24; join. (66 sts: 9 at each end)
Rnd 4: Ch 1, [sc in next 2 sts, inc] 3 times, sc in next 24, [sc in next 2 sts, inc] 3 times, sc in next 24; join. (72 sts: 12 at each end)
Rnd 5: Ch 1, [sc in next 3 sts, inc] 3 times, sc in next 24, [sc in next 3 sts, inc] 3 times, sc in next 24; join. (78 sts: 15 at each end)
Rnd 6: Ch 1, [sc in next 4 sts, inc] 3 times, sc in next 24, [sc in next 4 sts, inc] 3 times, sc in next 24; join. (84 sts: 18 at each end)
Rnd 7: Ch 1, [sc in next 5 sts, inc] 3 times, sc in next 24, [sc in next 5 sts, inc] 3 times, sc in next 24; join. (90 sts: 21 at each end)
Rnd 8: Ch 1, [sc in next 6 sts, inc] 3 times, sc in next 24, [sc in next 6 sts, inc] 3 times, sc in next 24; join. (96 sts: 24 at each end)
The base now has 24 + 24 + 24 + 24 = 96 sts. To keep the ends round instead of pointed, you can move the increase within each bracket by one stitch on every other round. The counts stay the same.
Checkpoint: 10 in x 3.5 in (25.4 cm x 8.9 cm), lying flat with no ruffling or cupping.
Part 2: Wall Set-Up
Before Round 9, move your starting point to the center of one curved end. Sl st forward until you reach the gap between the 12th and 13th stitches of that end. This puts the round seam at the side of the organizer, where it’s hard to see. It also splits the walls into a 48-stitch front and a 48-stitch back.
Rnd 9: Ch 1, sc BLO in each st around; join. (96 sts)
The unworked front loops make a crisp ridge where the base meets the walls.
Rnd 10: Ch 1, sc in each st around; join. (96 sts)
Place a marker at the center of the other curved end, 48 sts from the seam. There are no more increases from here on.
Part 3: Ladder and Lattice Walls
Each 12-stitch repeat is one ladder column of 5 sts (dc, ch-3 window, dc) followed by one lattice column of 7 sts. There are 8 repeats around.
Rnd 11 (Window Round A): Ch 3 (counts as dc), ch 3, sk 3, dc in next st, [ch 1, sk 1, dc in next st] 3 times, ch 1, sk 1. Dc in next st, ch 3, sk 3, dc in next st, [ch 1, sk 1, dc in next st] 3 times, ch 1, sk 1; rep from * 6 more times. Join with sl st to top of beginning ch-3. (96 sts: 40 dc + 56 ch)*
In Round A, each lattice column has holes at stitches 1, 3, 5 and 7, and dc at stitches 2, 4 and 6.
Rnd 12 (Rung Round): Ch 1, sc in each dc, 1 sc in each ch-1 sp and 3 sc in each ch-3 sp around; join. (96 sts: 40 + 32 + 24)
Rnd 13 (Window Round B): Ch 3 (counts as dc), ch 3, sk 3, dc in next st, dc in next st, [ch 1, sk 1, dc in next st] 3 times. Dc in next st, ch 3, sk 3, dc in next st, dc in next st, [ch 1, sk 1, dc in next st] 3 times; rep from * 6 more times; join. (96 sts: 48 dc + 48 ch)*
In Round B, each lattice column has dc at stitches 1, 3, 5 and 7, and holes at stitches 2, 4 and 6. Each new hole sits above a solid stitch from the round before, which creates the staggered diamond lattice. The ladder windows stay in the same place every round, so they stack into straight vertical columns.
Rnd 14 (Rung Round): Ch 1, sc in each dc, 1 sc in each ch-1 sp and 3 sc in each ch-3 sp around; join. (96 sts: 48 + 24 + 24)
Rnds 15–34: Rep Rnds 11–14 five more times. (96 sts in every round)
That gives 12 window rounds, so each ladder column has 12 stacked windows.
Checkpoint: The walls measure about 9.5 in (24.1 cm) from the base ridge. They should rise straight up, with each ladder window directly above the one below it.
Part 4: Straps (Make 2)
Work flat in rows.
Ch 7.
Row 1: Sc in 2nd ch from hook and in each ch across; turn. (6 sts)
Rows 2–63: Ch 1, sc in each st across; turn. (6 sts)
Fasten off, leaving a 20 in (50.8 cm) tail for sewing.
Checkpoint: Each strap measures 1.5 in x 14 in (3.8 cm x 35.6 cm). Lay the two straps side by side and add or remove rows until they match.
Border
The border is a solid top band. It firms up the rim and gives the lining a clean edge to sit against.
Border gauge: 16 sc = 4 in (10.2 cm), the same as the base. Two sc rounds plus one sl st round measure about 0.5 in (1.3 cm).
Rnd 35: Ch 1, sc in each st around; join. (96 sts = 96 worked 1 per existing st + 0 added; 48 on the front, 48 on the back)
Rnd 36: Ch 1, sc in each st around; join. (96 sts: 48 front, 48 back)
Rnd 37: Sl st loosely in each st around; join to first sl st. (96 sl sts: 48 front, 48 back)
Fasten off and weave in all ends.
Why the math works: The base ends at 96 sts, which is exactly 8 repeats of 12. Every wall round and border round also has 96 sts, worked 1 per existing stitch. That keeps the rim the same 24 in (61.0 cm) around as the base, so the walls stand straight instead of flaring out or pulling in. The front and the back each have 48 sts: 12 end stitches, 24 straight stitches and 12 end stitches. That’s exactly 4 repeats per side. If your rim measures more than 24.5 in (62.2 cm) around, redo Round 37 with a smaller hook.
Final Blocking
- Stuff the organizer firmly with a folded towel or a box about 10 in x 3.5 in (25.4 cm x 8.9 cm).
- Mist it with water until it’s evenly damp.
- Straighten each ladder column with your fingers so the windows line up and have square corners.
- Gently open the lattice holes and level the rung rounds.
- Check the measurements: 10 in (25.4 cm) tall, 10 in (25.4 cm) wide, 3.5 in (8.9 cm) deep.
- Pin the straps flat to 1.5 in x 14 in (3.8 cm x 35.6 cm) and mist them.
- Let everything dry completely, for at least 24 hours.
Lining: Trace the blocked base and add a 0.5 in (1.3 cm) seam allowance all around. Cut a wall rectangle 25 in x 12.5 in (63.5 cm x 31.8 cm). Sew the short ends together with a 0.5 in (1.3 cm) seam, then sew the wall to the base the same way. Fold the top edge down 0.5 in (1.3 cm), then 0.75 in (1.9 cm), and stitch the hem. The finished lining wall is 10.75 in (27.3 cm) tall.
Assembly:
- Place the base insert in the bottom of the basket.
- Put the lining inside with its wrong side facing the crochet. The hemmed top should stand about 0.75 in (1.9 cm) above the crochet rim.
- Whipstitch the lining to the inside of Round 35 using small, hidden stitches.
- Position the straps on the back wall 3.5 in (8.9 cm) to each side of the back center, so they are 7 in (17.8 cm) apart, center to center. Change the spacing if your headrest posts are farther apart or closer together.
- Overlap one end of each strap 1.5 in (3.8 cm) onto the inside of the back rim and sew it securely through all layers.
- Sew one half of a snap near the free end of each strap. Sew the other half 3 in (7.6 cm) further along the strap, so the strap wraps around the post and snaps closed.
- Fold the leather strip over the center front of the rim so about 2 in (5.1 cm) shows on the outside, and stitch it on with strong thread.
Final Quality-Control Checklist
- The base measures 10 in x 3.5 in (25.4 cm x 8.9 cm) and lies flat.
- Every round from 8 through 37 has 96 sts.
- All 8 ladder columns have 12 windows, each closed by a rung.
- The lattice holes are staggered from one window round to the next.
- The round seam sits at the center of one side.
- The walls stand straight at about 10 in (25.4 cm) tall.
- The two straps match at 14 in (35.6 cm).
- The lining lies smooth behind the windows.
- The leather tab is centered on the front.
Troubleshooting
The columns lean or spiral. Join every round in the top of its first stitch, start the next round in the same place and never turn.
The walls flare out. Your dc rounds are looser than your base. Work the window rounds with a 4 mm hook.
The walls pull in. Your rung rounds are too tight. Use a 5 mm hook for the rung rounds only.
The windows are uneven. Work exactly 3 sc in every ch-3 sp.
The straps stretch. Sew cotton twill tape to the back of each strap.
The base cups. Rip back and recount the 24 straight stitches on each long side.
Care
Take out the lining and the base insert. Hand wash the crochet in cool water and dry it flat over a form stuffed with a towel.
Final Notes
This organizer is built on one chain of measurements. A 27-chain foundation becomes a 96-stitch oval base measuring 10 in x 3.5 in (25.4 cm x 8.9 cm). Those 96 stitches make 8 repeats of 12, which rise straight up through 12 window rounds to about 9.5 in (24.1 cm). The 96-stitch border adds 0.5 in (1.3 cm), for a finished height of 10 in (25.4 cm). If your base matches its checkpoint, the rest of the organizer should come out right too.
Happy crocheting!