

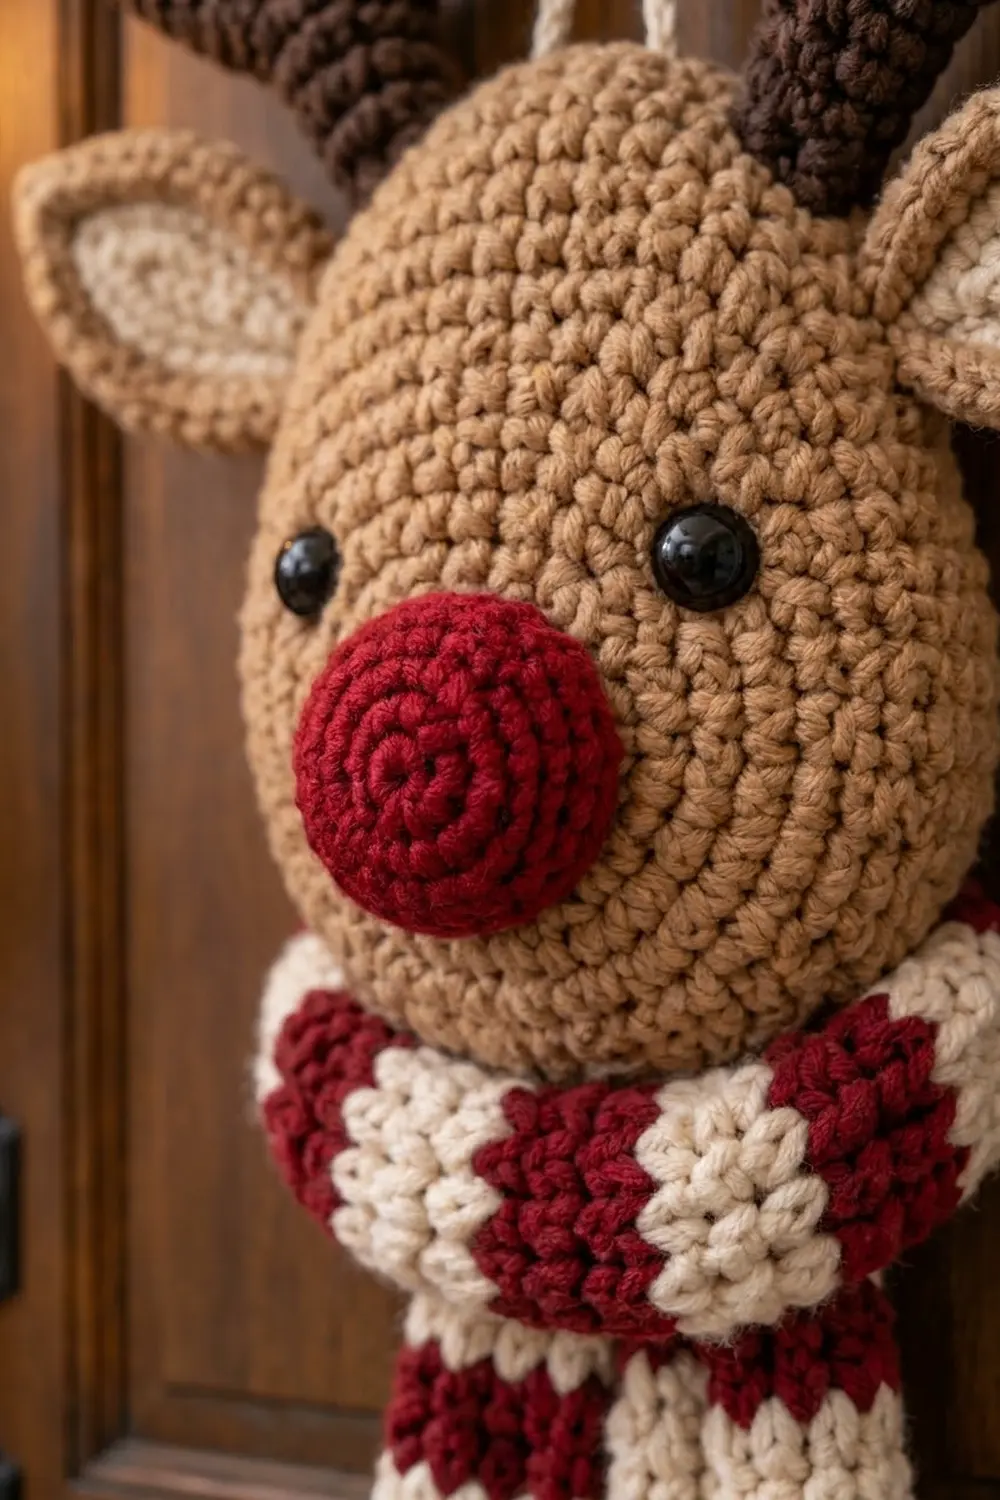
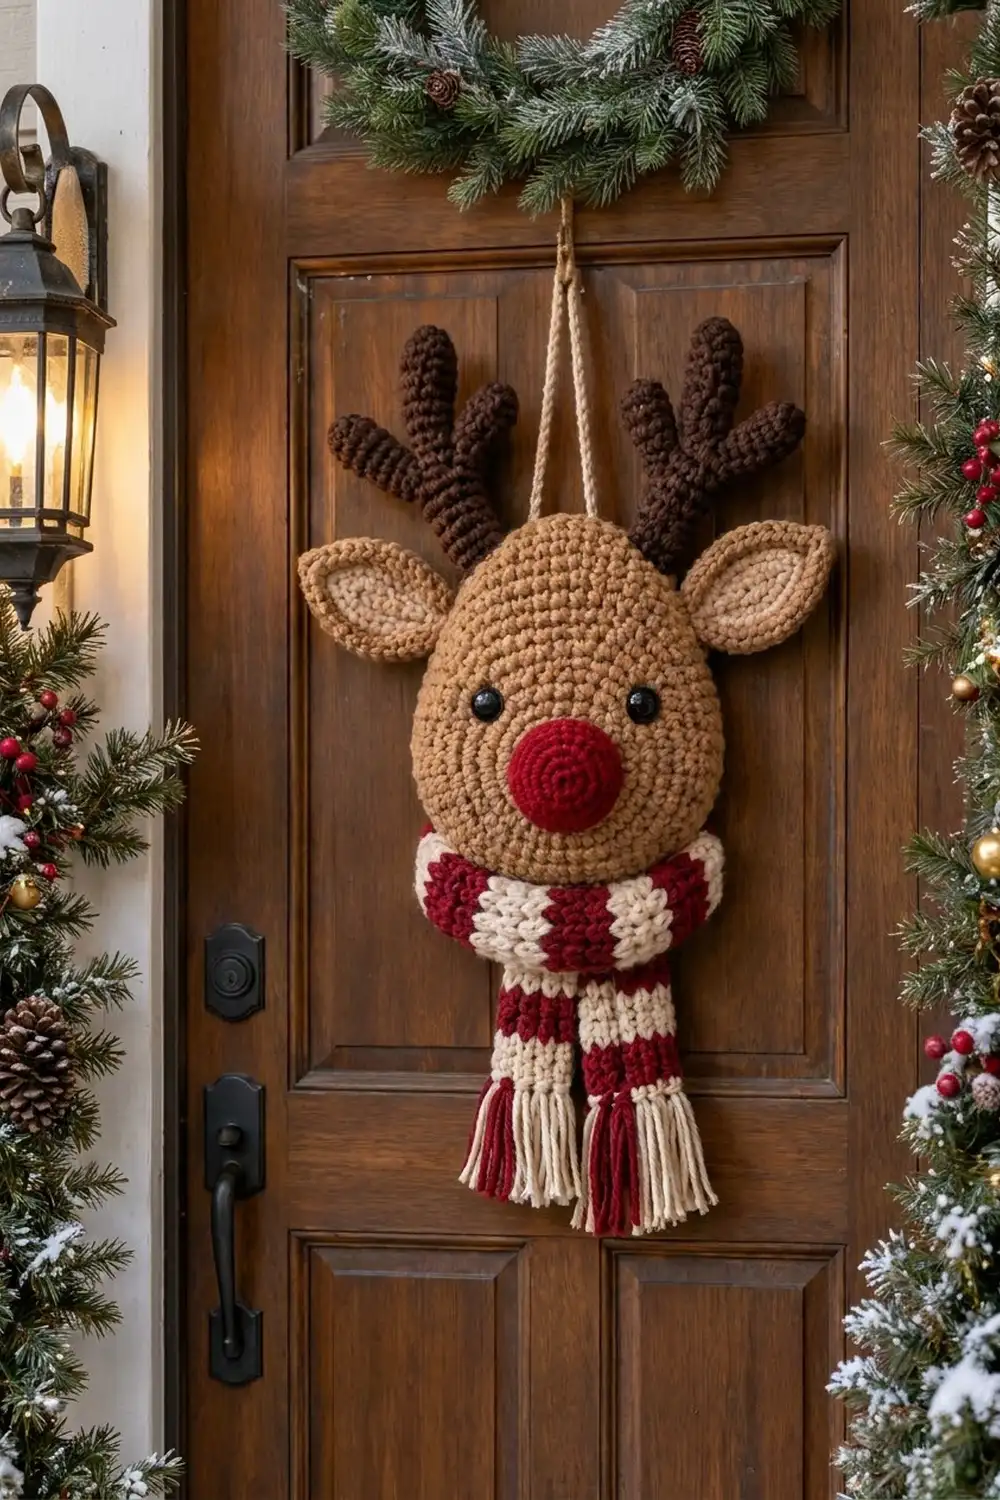
Rudy is a chunky reindeer face made to hang on a front door. He has a soft, slightly puffy egg-shaped head, a round red nose, layered ears, branching dark antlers, and a red-and-cream striped scarf with fringed tails.
The palette is classic and cozy: warm tan for the head, chocolate brown for the antlers, cream for the inner ears and half the scarf stripes, and deep cranberry red for the nose and the other stripes. Two black safety eyes finish the face.
This pattern uses US crochet terms. The head measures about 7 in wide x 8.6 in tall (17.8 cm x 21.8 cm). The full hanger, from antler tips to fringe, is about 19 in tall (48.3 cm) and about 11 in wide (27.9 cm) across the ears.
Construction is simple. You crochet two oval head panels, add the eyes and nose to the front panel, and tack the ears, antlers, and hanging cord to the inside of the back panel. One single crochet edging round joins the panels. Then the separate scarf wraps the lower head.
Finished Size and Construction
- Finished head size: 7 in x 8.6 in (17.8 cm x 21.8 cm)
- Overall hanger: about 11 in x 19 in (27.9 cm x 48.3 cm), cord not included
- Skill level: Easy-intermediate
- Terminology: US
- Yarn weight: Bulky (#5)
- Hook: 6.0 mm (J-10)
- Number of pieces: One finished hanger, made from small parts: 2 head panels, a nose, 2 ears, 2 antlers with 6 tines, a scarf, and a cord. It is not a set of joined motifs.
- Layout: One head, with the ears and antlers at the top and the scarf around the lower head
- Head panel size before edging: 6.4 in x 8 in (16.3 cm x 20.3 cm)
- Edging depth: 1 round, about 0.3 in (0.8 cm)
Materials
Choose a smooth bulky acrylic or wool blend so the stitch texture shows clearly. Avoid fuzzy or chenille yarns, which hide the stripes and make stitches hard to count.
- Tan (head, ear rims, cord): 100 g / 140 m
- Dark brown (antlers): 50 g / 70 m
- Cranberry red (nose, scarf, fringe): 50 g / 70 m
- Cream (inner ears, scarf, fringe): 40 g / 60 m
The quantities include a margin of about 20 percent for swatching and gauge differences.
Tools
- 6.0 mm (J-10) crochet hook
- Two 12 mm black safety eyes
- About 1 oz (30 g) polyester fiberfill
- Tapestry needle
- 4 locking stitch markers
- Straight pins
- Scissors and a ruler
Abbreviations (US Terms)
- ch – chain
- sl st – slip stitch
- sc – single crochet
- hdc – half double crochet
- dc – double crochet
- inc – 2 sc in the same stitch
- dec – sc2tog (an invisible decrease is best for the nose)
- MR – magic ring
- st(s) – stitch(es)
- sp – space
- WS – wrong side
Special technique – joined oval round: Close each head round with a sl st to the first sc, then ch 1. The ch 1 never counts as a stitch. The increases stack in the same positions every round, so the oval ends stay rounded and the sides stay straight.
Gauge and Checkpoints
Gauge: 12 sc and 13 rounds = 4 in (10.2 cm) in sc. For the scarf, 12 hdc and 10 rows = 4 in (10.2 cm).
Make one head panel first and use it as your swatch. Measure it flat, without stretching.
- After Rnd 4: about 2.5 in x 4.2 in (6.4 cm x 10.7 cm)
- After Rnd 7: about 4.5 in x 6.1 in (11.4 cm x 15.5 cm)
- After Rnd 10: about 6.4 in x 8 in (16.3 cm x 20.3 cm)
Too big? Go down one hook size (5.5 mm). Too small? Go up one size (6.5 mm). If the panel ruffles, your tension is too loose for the increase rate, so go down a hook size. If it cups, go up a size.
Head Panels (Make 2, Tan)
The foundation chain becomes the vertical center line of the head. The end where you start is the bottom (chin), and the far end is the top.
Rnd 1: Ch 7. Sc in 2nd ch from hook, sc in next 4 ch, 3 sc in last ch. Rotate and work along the other side of the chain: sc in next 4 ch, 2 sc in last ch (the same ch as the first sc). Sl st to first sc. (14 sts)
Rnd 2: Ch 1, inc in first st, sc in next 4, inc in each of next 3, sc in next 4, inc in each of next 2. Sl st to first sc. (20 sts)
From here on, every round follows the same formula. The bracketed repeats sit on the two curved ends, and each “sc in next 4” is a straight side.
Rnd 3: Ch 1, [sc in next st, inc] once, sc in next 4, [sc in next st, inc] 3 times, sc in next 4, [sc in next st, inc] 2 times. Sl st. (26 sts)
Rnd 4: Ch 1, [sc in next 2, inc] once, sc in next 4, [sc in next 2, inc] 3 times, sc in next 4, [sc in next 2, inc] 2 times. Sl st. (32 sts)
Rnd 5: Same as Rnd 4, but work sc in next 3 inside each bracket. (38 sts)
Rnd 6: Same, with sc in next 4 inside each bracket. (44 sts)
Rnd 7: Same, with sc in next 5 inside each bracket. (50 sts)
Rnd 8: Same, with sc in next 6 inside each bracket. (56 sts)
Rnd 9: Same, with sc in next 7 inside each bracket. (62 sts)
Rnd 10 (cheek shaping): Ch 1, [hdc in next 8, 2 hdc in next] once, sc in next 4, [sc in next 8, inc] 3 times, sc in next 4, [hdc in next 8, 2 hdc in next] 2 times. Sl st. (68 sts)
The hdc on the bottom curve make the lower cheeks slightly fuller than the top, which gives the egg shape. Every round adds exactly 6 sts, so Rnd n has 6n + 8 sts.
Fasten off the first panel with a short tail. This is the back panel. On the second panel (the front), leave the yarn attached and put the working loop on a marker. Weave in the starting tails.
Nose (Make 1, Red)
Work in a continuous spiral. The spiral rings show on the front of the nose.
Rnd 1: 6 sc in MR. (6)
Rnd 2: Inc in each st. (12)
Rnd 3: [Sc, inc] 6 times. (18)
Rnd 4: [Sc in next 2, inc] 6 times. (24)
Rnds 5–7: Sc in each st. (24)
Rnd 8: [Sc in next 2, dec] 6 times. (18)
Rnd 9: [Sc, dec] 6 times. (12) Stuff firmly.
Rnd 10: Dec 6 times. (6)
Fasten off, close the hole, and leave a 12 in (30.5 cm) tail. Press the nose gently to flatten it to about 2.5 in (6.4 cm) across.
Ears (Make 2)
Each ear is one piece: a cream leaf-shaped center with a tan rim.
Rnd 1 (cream): Ch 9. Sc in 2nd ch from hook, hdc in next ch, dc in next 3 ch, hdc in next ch, sc in next ch, (sc, ch 2, sc) in last ch. Working along the other side of the chain: sc in next ch, hdc in next ch, dc in next 3 ch, hdc in next ch, sc in last ch (the same ch as the first sc). Sl st to first sc. (16 sts + ch-2 tip) Fasten off cream.
Rnd 2 (tan): Join tan in the first sc. Ch 1, inc in same st, sc in next 6, sc in next sc, (sc, ch 2, sc) in ch-2 sp, sc in next sc, sc in next 6, inc in last st. Sl st to first sc. (20 sts + ch-2 tip)
This is a conversion round: 16 sts are worked once each, and 4 are added (2 at the tip and 2 at the base), for 16 + 4 = 20. Each ear is about 3.25 in x 2 in (8.3 cm x 5.1 cm). Leave a 10 in (25.4 cm) tail.
Antlers (Make 2, Dark Brown)
Work all antler parts in continuous spirals. Stuff lightly as you go so the tubes stay round but flexible.
Main beam (make 2):
Rnd 1: 6 sc in MR. (6)
Rnd 2: [Sc, inc] 3 times. (9)
Rnds 3–12: Sc in each st. (9)
Fasten off with a 10 in (25.4 cm) tail. Each beam is about 3.8 in (9.7 cm) long.
Long tine (make 4): Work 6 sc in MR, then sc in each st for 6 more rounds. (6 sts, 7 rounds, about 2.2 in / 5.6 cm)
Short tine (make 2): Work 6 sc in MR, then sc in each st for 4 more rounds. (6 sts, 5 rounds, about 1.6 in / 4.1 cm)
For each antler, sew 2 long tines to the inner side of the beam, angled upward, about 1 in (2.5 cm) and 2 in (5.1 cm) below the tip. Sew 1 short tine to the outer side, about 1.5 in (3.8 cm) below the tip. Make the second antler as a mirror image of the first.
Scarf (Red and Cream Stripes)
The scarf is worked in short rows across its width, so the stripes run across the scarf. Change colors every 2 rows on the last yarn over of the last stitch. All the color changes happen on the same edge, so carry the unused color loosely up that side.
Row 1 (red): Ch 9, hdc in 3rd ch from hook and in each ch across. (7 hdc)
Row 2 (red): Ch 2 (does not count), turn, hdc in each st across. (7 hdc)
Rows 3–62: Repeat Row 2, alternating 2 rows cream and 2 rows red. (7 hdc each row)
You now have 31 stripes, starting and ending with red. The scarf measures about 2.3 in x 24.8 in (5.8 cm x 63.0 cm).
Fringe: Cut 8 cream and 8 red strands, each 7 in (17.8 cm) long. At each short end, attach 4 fringe knots of 2 strands each in sts 1, 3, 5, and 7, in the color order cream, red, cream, red. Trim the fringe to 3 in (7.6 cm).
Hanging Cord (Tan)
Holding 2 strands of tan together, ch 40, for about 10 in (25.4 cm). Fasten off and leave tails for sewing.
Pre-Assembly
- Eyes: On the front panel, insert the safety eyes between Rnds 4 and 5, one on each side of the upper end of the foundation chain. Space them about 2.5 in (6.4 cm) apart and lock the washers.
- Nose: Pin the nose on the foundation chain line, centered about 3.75 in (9.5 cm) above the chin and just below the eyes. Sew around its base with the tail.
- Ears, antlers, and cord: Lay the back panel WS up with the top curve away from you. Whip stitch each antler base about 0.5 in (1.3 cm) inside the edge, about 1 in (2.5 cm) on either side of center. Pinch each ear base in half to give it a slight cup, then stitch it inside the edge at about the 10 o’clock and 2 o’clock positions. Sew the cord ends between the antlers, 2 in (5.1 cm) apart.
Border: Joining Edging Round
Border gauge: 3 sc per inch (12 sc = 4 in / 10.2 cm), worked through both panels.
Place the panels WS together with the front panel facing you, matching the edges stitch for stitch. Put the front panel’s held loop back on your hook.
Rnd 11 (joining): Working through both layers, ch 1, [sc in next 9, inc] once, sc in next 4, [sc in next 9, inc] 3 times, sc in next 4, [sc in next 9, inc] 2 times. Sl st to first sc. (74 sts)
Before you work the last 15 sts, stuff the head lightly, to about 1 in (2.5 cm) thick at the center. Finish the round and fasten off.
Count per section after Rnd 11:
– Bottom curve: 11 + 22 = 33 sts
– Left side: 4 sts
– Top curve: 33 sts
– Right side: 4 sts
– Total: 33 + 4 + 33 + 4 = 74 sts
Why the math works: At this gauge, each round adds about 0.3 in (0.8 cm) to the radius. A flat sc circle therefore needs about 6 more sts per round. The two curved ends together act as one circle split in half, and the straight sides stay at 4 sts. The joining round keeps the same +6 rate, so the edge lies flat. It adds one round to every edge: 6.4 + 0.6 = 7 in (17.8 cm) wide and 8 + 0.6 = 8.6 in (21.8 cm) tall.
Add the scarf: Center the scarf across the front of the lower head, with its bottom edge level with the chin. Take both ends around the back and bring them to the front again. Cross them at the front center so both tails hang down, each about 5.4 in (13.7 cm) long plus fringe. Tack the scarf to the head in 3 or 4 hidden spots.
Final Blocking
- Before assembly, pin the scarf flat to 2.3 in x 24.8 in (5.8 cm x 63.0 cm).
- Pin each ear flat to 3.25 in x 2 in (8.3 cm x 5.1 cm), shaping a sharp tip.
- Mist wool blends lightly. For acrylic, hold the steam just above the fabric without touching it.
- Let everything dry completely.
- After assembly, steam only the head edge, pressing it gently with your fingers so the oval stays even. Do not press the stuffed areas or the nose.
- Comb the fringe straight and trim it evenly to 3 in (7.6 cm).
Final Quality-Control Checklist
- The head is 7 in x 8.6 in (17.8 cm x 21.8 cm) with 74 edge sts.
- The bottom curve is visibly fuller than the top.
- The eyes are level and locked, and the nose is centered and firmly sewn.
- Both ears show a clear cream center and tan rim, with matching tips.
- The antlers are mirror images and stand upright.
- The scarf has 31 stripes, red at both ends, with 4 fringe knots per end.
- The cord is secure and the hanger hangs straight.
- All ends are woven in.
Troubleshooting
- Head ruffles: There are too many sts for your gauge. Go down a hook size, and check that you haven’t added extra increases.
- Head cups: Your tension is too tight. Go up a hook size.
- Oval ends look pointed: On alternate rounds, stagger the increases by working half of the bracket’s sc before the inc.
- Ear tip is blunt: Work the ch-2 tip more tightly and pin it to a point while blocking.
- Scarf edges wave: Make sure you aren’t counting the turning ch 2 as a stitch, and keep the carried yarn loose.
- Hanger tilts forward: Move the cord ends 0.5 in (1.3 cm) lower on the back panel.
Care
Spot clean with a damp cloth and mild soap, then air dry flat. In the off-season, store the hanger away from direct sun and damp porches.
Final Notes
The measurement chain is short. Match the gauge of 12 sc = 4 in (10.2 cm), and check the panel at 2.5 in x 4.2 in (6.4 cm x 10.7 cm) after Rnd 4. It should reach 6.4 in x 8 in (16.3 cm x 20.3 cm) at Rnd 10. Join the panels with 74 sts for a 7 in x 8.6 in (17.8 cm x 21.8 cm) head. Add the 24.8 in (63.0 cm) scarf, and Rudy is ready for the door.
Happy crocheting!