

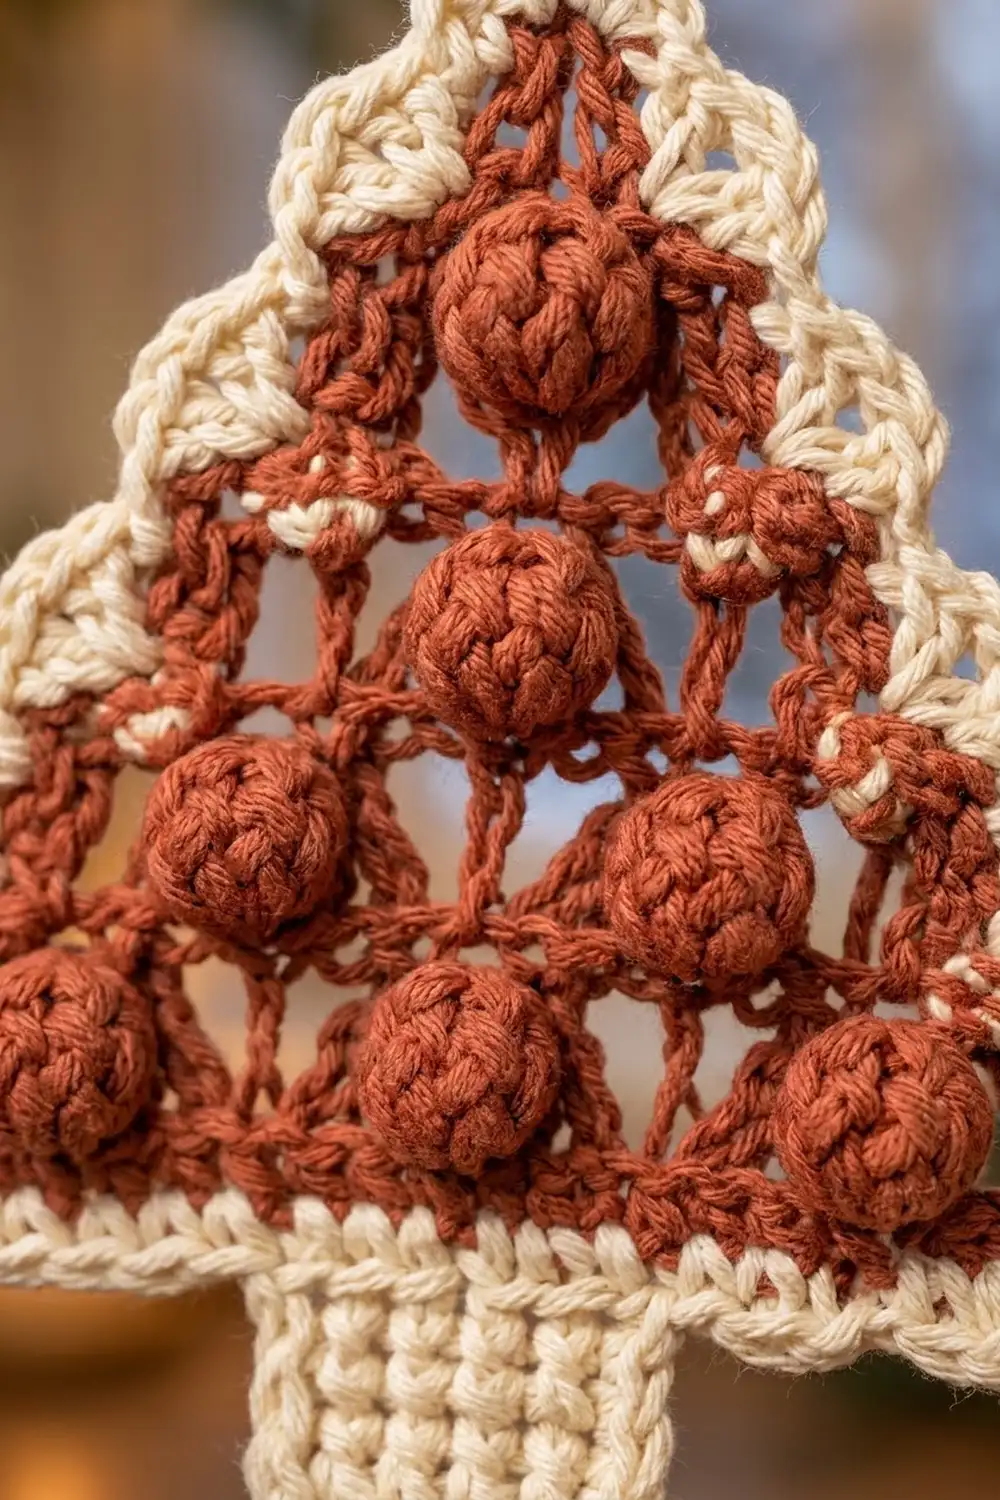
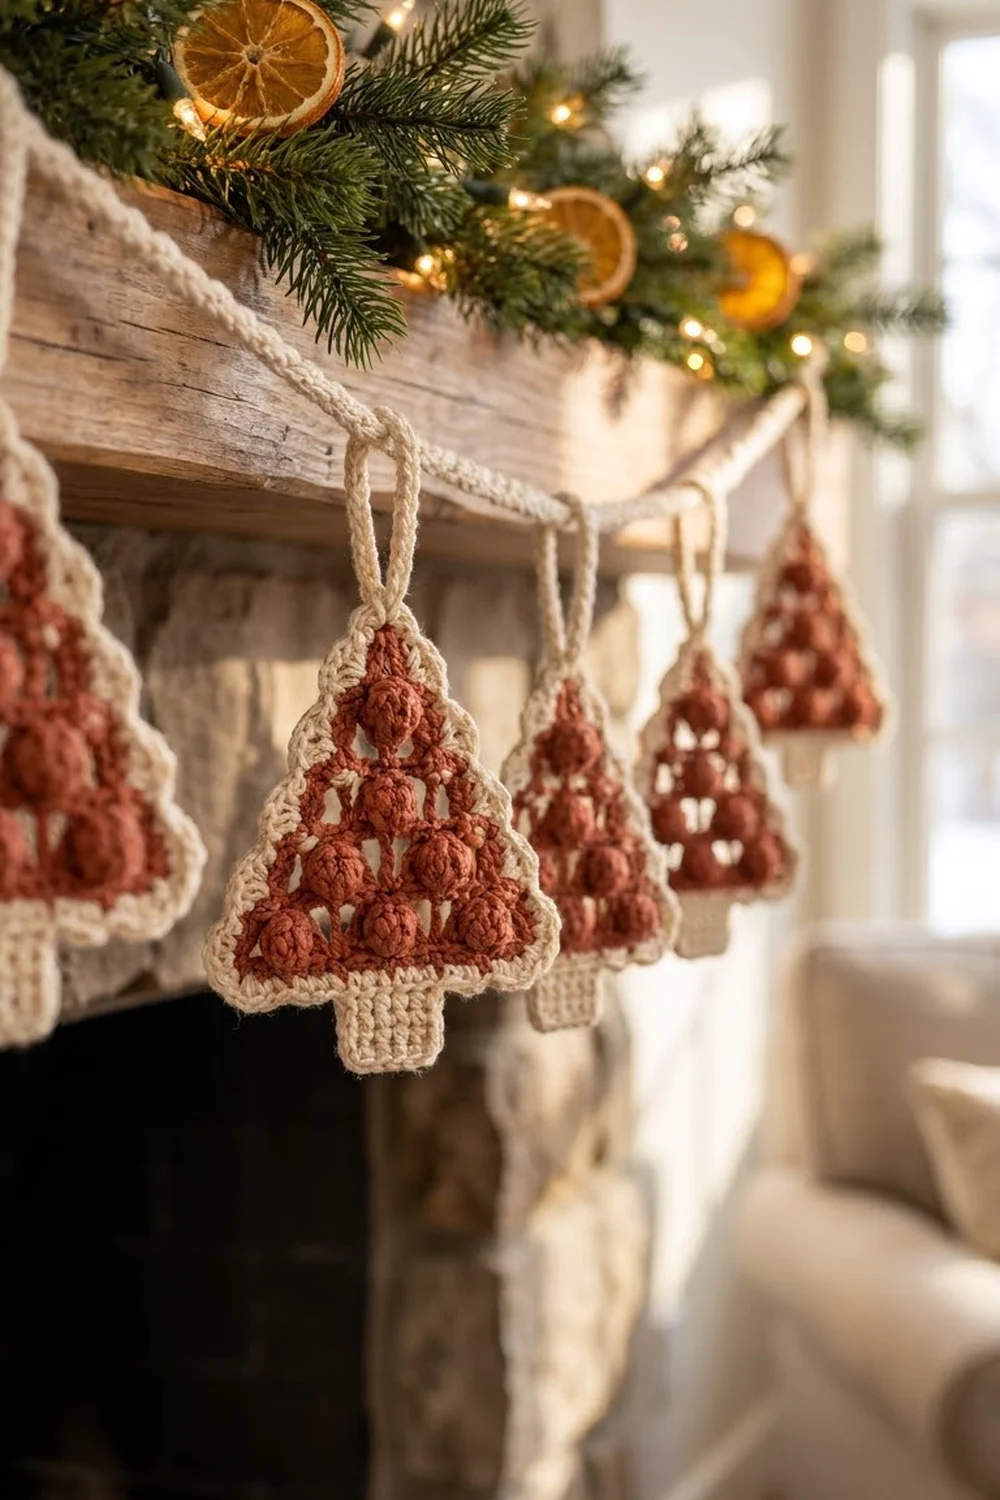
The Cinnamon Berry Tree is a small, flat Christmas tree ornament. Its rows of chunky bobbles are stacked in a pyramid: four bobbles across the bottom tier, then three, then two, then one at the top. Little ch-1 spaces between them give the tree a light, lacy look. A cream trunk and a raised cream rope edge frame the warm rust-red body, and a thick cream hanging loop sits at the tip.
The palette is simple. A rich rust or cinnamon red makes the tree, and a soft natural cream makes the trunk, border and loop. The look is cozy farmhouse, and it suits a window, a tree branch, a gift tag or a cord strung across a mantel.
This pattern uses US crochet terms. Without the loop, the finished ornament measures about 4.25 in (10.8 cm) wide and 4.75 in (12.1 cm) tall. With the loop, it is about 6 in (15.2 cm) tall.
Construction is straightforward. You work the tree body flat in rows from the bottom up. The bobbles go on wrong-side rows so they pop out on the front, and each tier steps in by 2 stitches at each end. Next you work the trunk downward from the foundation chain. Finally, a two-round border goes around everything and a covered hanging loop finishes the tip.
Finished Size and Construction
- Finished size: 4.25 in (10.8 cm) wide x 4.75 in (12.1 cm) tall; 6 in (15.2 cm) tall including the loop
- Skill level: Easy-intermediate
- Terminology: US
- Yarn weight: Medium (#4) worsted cotton
- Hook: 4.0 mm (G-6)
- Number of pieces: 1 (one single ornament)
- Layout: Tree body and trunk worked in one piece, with a border all around
- Piece size before border: 3.75 in (9.5 cm) wide x 4.25 in (10.8 cm) tall (body 3.25 in / 8.3 cm + trunk 1 in / 2.5 cm)
- Border depth: 0.25 in (0.6 cm) on every edge
Materials
Choose a smooth mercerized or combed cotton in worsted weight. Cotton shows the bobbles clearly, holds a crisp edge and blocks flat. Acrylic also works, but the ornament will be softer and a little puffier.
- Color A, Rust Red: 10 g / about 17 m (19 yd)
- Color B, Cream: 6 g / about 10 m (11 yd)
These quantities include a margin for your gauge check and for weaving in ends.
Tools:
- 4.0 mm (G-6) crochet hook
- Tapestry needle
- Scissors
- 2 stitch markers
- Blocking mat, rust-proof pins and a spray bottle
Abbreviations (US Terms)
- ch – chain
- sl st – slip stitch
- sc – single crochet
- dc – double crochet
- sk – skip
- st(s) – stitch(es)
- sp – space
- RS / WS – right side / wrong side
- rev sc – reverse single crochet (crab stitch)
- BLO – back loop only
Special stitch – Bobble (BO): [Yarn over, insert hook in the indicated st, yarn over and pull up a loop, yarn over and pull through 2 loops] 5 times in the same st, leaving 6 loops on the hook. Yarn over and pull through all 6 loops. The bobble will puff toward the side facing away from you.
Stitch counting note: In bobble rows, each dc, each BO and each ch-1 sp counts as 1 st. The ch-3 at the start of a row counts as 1 dc.
Gauge and Checkpoints
Gauge: 9 sc and 8 sc rows = 2 in (5.1 cm). That works out to 4.5 sc per inch and 4 sc rows per inch. One bobble row is about 0.5 in (1.3 cm) tall.
Work Rows 1–2 of the tree first and measure before you continue. They act as your gauge swatch.
Checkpoints:
- After Row 2: 3.75 in (9.5 cm) wide and about 0.75 in (1.9 cm) tall
- After Row 5: about 1.75 in (4.4 cm) tall
- After Row 9: about 3.25 in (8.3 cm) tall from foundation to tip
- Trunk: 1.1 in (2.8 cm) wide x 1 in (2.5 cm) tall
- After the border: 4.25 in (10.8 cm) x 4.75 in (12.1 cm)
If your piece is too big, switch to a 3.75 mm (F-5) hook. If it is too small, switch to a 4.5 mm (7) hook. Don’t change the stitch counts, because all of the shaping depends on the 17-stitch base.
Tree Body
Use Color A.
Foundation: Ch 18.
Row 1 (RS): Sc in 2nd ch from hook and in each ch across. Turn. (17 sc)
Row 2 (WS, bobble row): Ch 3 (counts as dc), [ch 1, sk next st, BO in next st, ch 1, sk next st, dc in next st] 4 times. Turn. (17 sts: 5 dc, 4 BO, 8 ch-1 sps)
The bobbles sit on sts 3, 7, 11 and 15. Check that they puff toward the RS.
Row 3 (RS, step-in): Sl st in first 2 sts, ch 1, sc in next 13 sts, working into the dc, ch-1 sps and BO tops. Leave the last 2 sts unworked. Turn. (13 sc)
Row 4 (WS, bobble row): Ch 3 (counts as dc), [ch 1, sk next st, BO in next st, ch 1, sk next st, dc in next st] 3 times. Turn. (13 sts: 4 dc, 3 BO, 6 ch-1 sps)
The dc posts of this row sit above the Row 2 bobbles, and the new bobbles fall between them. This creates the staggered pyramid.
Row 5 (RS, step-in): Sl st in first 2 sts, ch 1, sc in next 9 sts. Leave the last 2 sts unworked. Turn. (9 sc)
Row 6 (WS, bobble row): Ch 3, [ch 1, sk next st, BO in next st, ch 1, sk next st, dc in next st] 2 times. Turn. (9 sts: 3 dc, 2 BO, 4 ch-1 sps)
Row 7 (RS, step-in): Sl st in first 2 sts, ch 1, sc in next 5 sts. Leave the last 2 sts unworked. Turn. (5 sc)
Row 8 (WS, bobble row): Ch 3, ch 1, sk next st, BO in next st, ch 1, sk next st, dc in last st. Turn. (5 sts: 2 dc, 1 BO, 2 ch-1 sps)
Row 9 (RS, tip): Sl st in first 2 sts, ch 1, sc in next st (the top of the BO). Leave the last 2 sts unworked. (1 sc)
Fasten off Color A. The body should measure 3.75 in (9.5 cm) across the base and 3.25 in (8.3 cm) tall. Each side now has four small 2-stitch ledges, which form the tiered edge.
Trunk
Use Color B. Hold the tree with the RS facing and the foundation chain at the top, and work into the free loops of the foundation chain. Count all 17 free loops, then place markers in loops 7 and 11.
Row 1 (RS): Join B with a sl st in marked loop 7. Ch 1, then sc in the same loop and in the next 4 loops, ending in loop 11. Turn. (5 sc)
Rows 2–4: Ch 1, sc in BLO of each st across. Turn. (5 sc)
Fasten off. Working in BLO gives the trunk a fine, firm ridged texture. The trunk should measure 1.1 in (2.8 cm) wide x 1 in (2.5 cm) tall. On each side of the trunk you should see 5 free foundation loops (2–6 and 12–16) plus the corner loop (1 or 17).
Border
Use Color B.
Border gauge: Round 1 (sc) and Round 2 (rev sc) together add 0.25 in (0.6 cm) to every edge. That is 0.5 in (1.3 cm) in total each way.
Round 1 (RS): Join B with a sl st in the Row 9 tip sc. Ch 1, then work around as follows:
- Tip: 3 sc in the tip sc (3)
- Right slant, working down: 2 sc across the Row 8 ledge, 2 sc in the side of Row 8, 1 sc in the side of Row 7; 2 sc across the Row 6 ledge, 2 sc in the side of Row 6, 1 sc in the side of Row 5; 2 sc across the Row 4 ledge, 2 sc in the side of Row 4, 1 sc in the side of Row 3; 2 sc across the Row 2 ledge, 2 sc in the side of Row 2, 1 sc in the side of Row 1 (20)
- Base corner: 3 sc in free loop 17 (3)
- Base, right of trunk: sc in free loops 16, 15, 14, 13 and 12 (5)
- Trunk side: 1 sc in the side of each trunk row, Rows 1–4 (4)
- Trunk corner: 3 sc in the first st of trunk Row 4 (3)
- Trunk bottom: sc in the next 3 sts (3)
- Trunk corner: 3 sc in the last st (3)
- Trunk side: 1 sc in the side of each trunk row, Rows 4–1 (4)
- Base, left of trunk: sc in free loops 6, 5, 4, 3 and 2 (5)
- Base corner: 3 sc in free loop 1 (3)
- Left slant, working up: mirror the right slant. Work 1, 2, 2 for Rows 1–2, then 1, 2, 2 for Rows 3–4, 1, 2, 2 for Rows 5–6 and 1, 2, 2 for Rows 7–8 (20)
Sl st to the first sc. (76 sc)
Check: 3 + 20 + 3 + 5 + 4 + 3 + 3 + 3 + 4 + 5 + 3 + 20 = 76.
Round 2 (RS, rope edge): Ch 1, then rev sc in each st around, working from left to right. Sl st to the first st. (76 rev sc) Fasten off.
Why the math works: An sc row is about as tall as one sc is wide, so each sc row end gets 1 border st. A bobble row is twice as tall, so each one gets 2. Each 2-stitch ledge gets 1 sc per stitch. The 3-sc groups at the tip and every corner add just enough fullness to turn without cupping. Round 2 is worked 1-for-1, so its 76 sts add depth without changing the shape. Both slants carry exactly 20 sts, which keeps the tree symmetrical.
Hanging loop: Join B with a sl st in the center sc of the 3-sc tip group. Ch 14, then sl st in the same st to form a loop. Work 18 sc over the ch-14 loop to cover it completely, then sl st in the tip st. Fasten off. The covered loop stands about 1.25 in (3.2 cm) tall and is firm enough to stay upright.
Final Blocking
- Weave in all ends on the WS, running each tail through stitches of its own color.
- Spritz the ornament with water until it is evenly damp but not soaked.
- Lay it RS up on the blocking mat.
- Pin the two base corners 4.25 in (10.8 cm) apart.
- Pin the tip so the height without the loop is 4.75 in (12.1 cm).
- Straighten both slants so they match, and lightly pin each tier ledge so the steps stay crisp.
- Square the trunk to about 1.6 in (4.1 cm) wide including its border, centered under the tip.
- Don’t flatten the bobbles. Gently pinch each one from the front so it stays round.
- Let the ornament dry completely, then unpin it.
Final Quality-Control Checklist
- Bobble tiers are 4 / 3 / 2 / 1, all puffed toward the RS
- Each bobble sits between the two bobbles below it
- Each slant has 4 even steps and 20 border sts
- The trunk is 5 sts wide and centered on foundation loops 7–11
- Border Round 1 has 76 sc and Round 2 has 76 rev sc
- Final size is 4.25 in (10.8 cm) x 4.75 in (12.1 cm)
- The loop is centered on the tip and fully covered
- No ends show on the RS
Troubleshooting
Bobbles pop to the back: They were worked on a RS row. Bobble rows must be the even-numbered WS rows.
The tree leans to one side: The sc count after the sl sts is off. Recount each step-in row: 13, 9, 5, 1.
The edges ripple: Too many border sts went into the bobble row ends. Use exactly 2 sc per bobble row end.
The corners curl up: Your border tension is tight. Relax your tension, or work Round 2 with a hook 0.5 mm larger.
The trunk is off-center: It was started in the wrong loop. Recount all 17 foundation loops and start in loop 7.
The crab stitch looks messy: Pull up slightly taller loops and keep the hook angled downward as you work each stitch.
Care
Hand wash in cool water with mild soap. Roll the ornament in a towel to remove water, then dry it flat, re-pinning while damp if needed.
Final Notes
The measurement chain is short. A 17-sc base at 4.5 sc per inch makes a 3.75 in (9.5 cm) tree base. Nine rows bring the body to 3.25 in (8.3 cm), and the 1 in (2.5 cm) trunk brings the piece to 4.25 in (10.8 cm) tall. The 0.25 in (0.6 cm) border then finishes it at 4.25 in (10.8 cm) x 4.75 in (12.1 cm). If your Row 2 checkpoint matches, everything after it will follow. Each ornament is a single piece, so make one, or make as many as you’d like to hang.
Happy crocheting!