

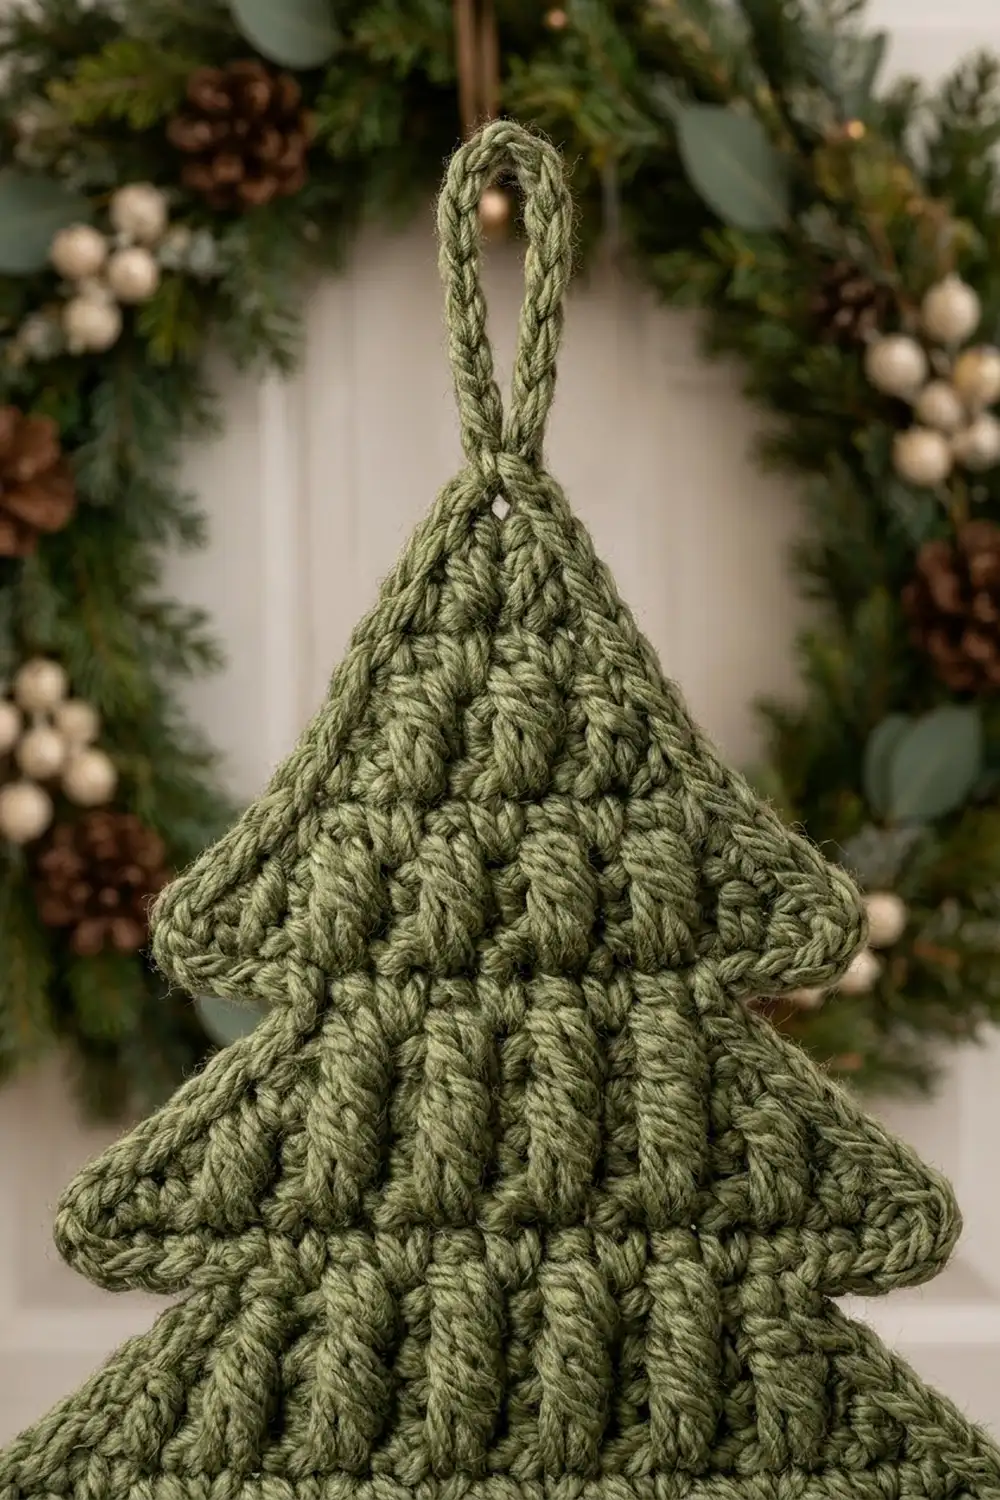
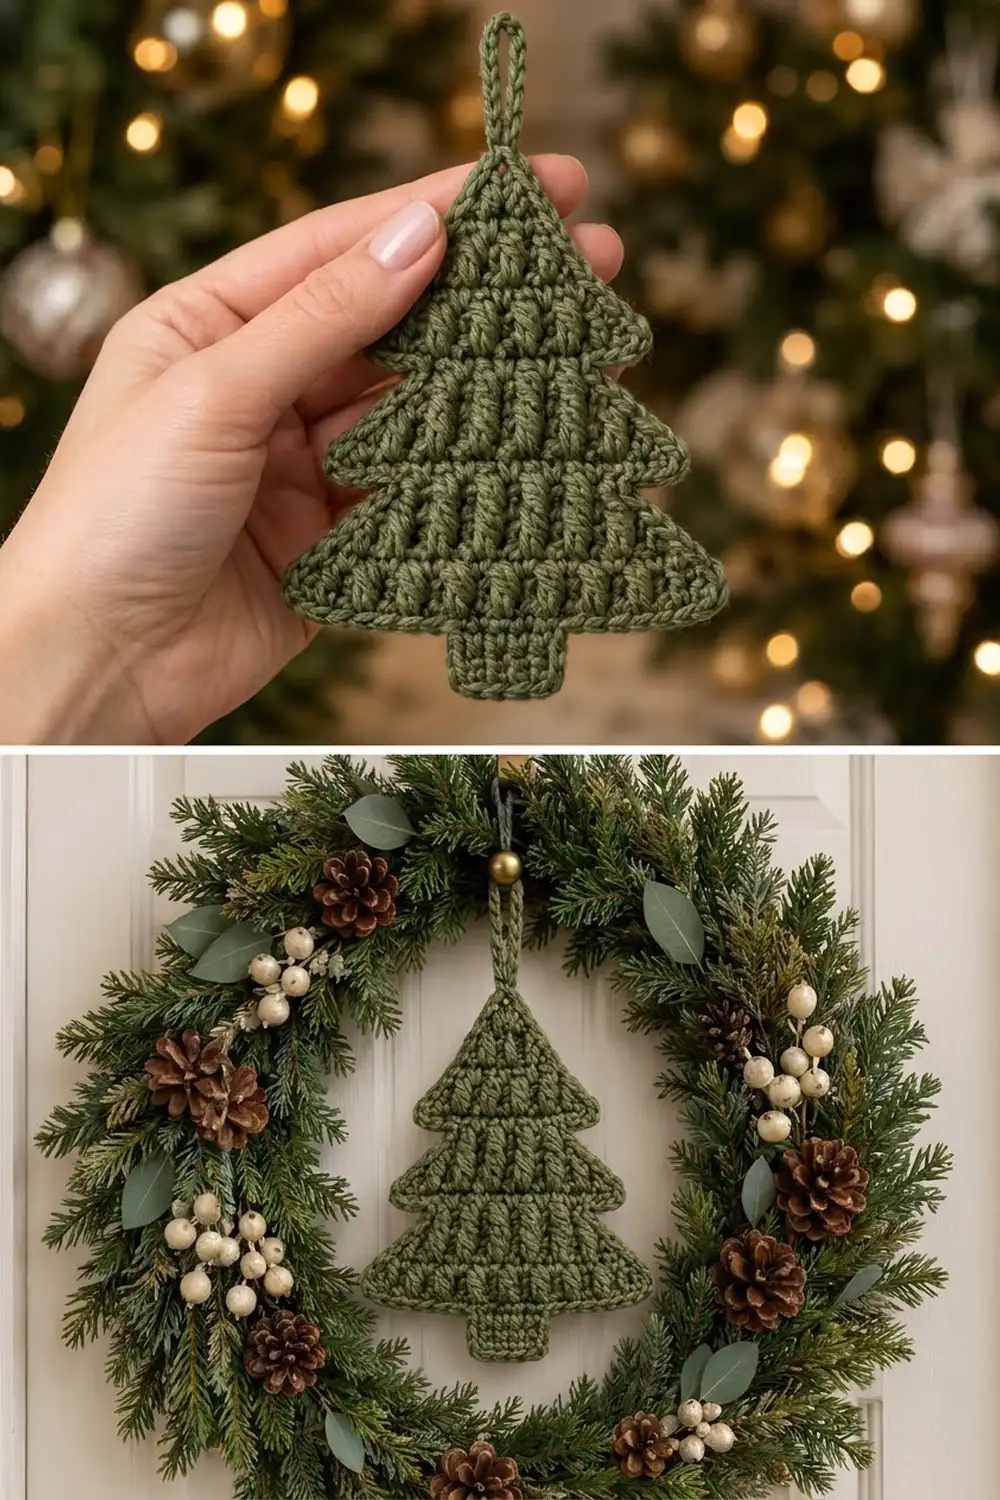
This little tree is a flat ornament with three stepped tiers, a square trunk and a sturdy hanging loop. Bands of plump puff stitches run across each tier, so it looks like layered branches even though it uses only one color.
The sample is worked in a soft sage green. The look is rustic and calm, and it suits a natural wreath, a gift tag or a tree branch equally well.
The pattern uses US crochet terms. The finished ornament measures about 5.75 in (14.6 cm) wide and 6.5 in (16.5 cm) tall without the loop. The loop adds about 1.5 in (3.8 cm).
You work the tree in turned rows from the tip down. Each tier grows with increases at the edges. A short “step” row then pulls the next tier in to create the notch, and the trunk is worked over the center stitches. One round of single crochet edging finishes the outline and forms the loop.
Finished Size and Construction
- Finished size: 5.75 in (14.6 cm) wide x 6.5 in (16.5 cm) tall, plus a 1.5 in (3.8 cm) loop
- Skill level: Easy-intermediate
- Terminology: US crochet terms
- Yarn weight: Worsted (#4)
- Hook: 4.5 mm (US 7)
- Number of pieces: 1
- Layout: Single flat piece, worked in rows from the tip down
- Piece size before border: 5.25 in (13.3 cm) wide x 6 in (15.2 cm) tall
- Border depth: about 0.25 in (0.6 cm) on every edge
Materials
Choose a smooth worsted-weight yarn with good stitch definition. Acrylic, wool blends and cotton blends all work. Avoid fuzzy or very loosely plied yarn: you make each puff by pulling up several loops, and splitty yarn makes them messy.
- Sage green: 15 g, about 30 m (33 yd)
Tools:
- 4.5 mm (US 7) crochet hook
- Tapestry needle
- Scissors
- Ruler or tape measure
- Blocking mat and rust-proof pins
- Spray bottle with water
The yarn quantity includes about 30 percent extra for your test tier and for weaving in ends.
Abbreviations (US Terms)
- ch – chain
- sl st – slip stitch
- sc – single crochet
- hdc – half double crochet
- st(s) – stitch(es)
- sp – space
- RS – right side
- WS – wrong side
- inc – 2 sc in the same st
Puff stitch (puff): Yarn over, insert your hook in the stitch, yarn over and pull up a loop to about 0.5 in (1.3 cm). Repeat 2 more times in the same stitch (7 loops on hook). Yarn over and pull through all 7 loops, then ch 1 to close. The closing ch-1 does not count as a stitch. On the next row, work into the top of the puff, not into the ch-1.
Gauge and Checkpoints
Gauge: 16 sc and 18 sc rows = 4 in (10.2 cm). One puff row is about 0.33 in (0.8 cm) tall.
Make Tier 1 (Rows 1–8) first as your test piece. It should measure 3.25 in (8.3 cm) across Row 8 and 2 in (5.1 cm) from the tip to Row 8.
Checkpoints:
- After Row 8: 3.25 in (8.3 cm) wide, 2 in (5.1 cm) tall
- After Row 14: 4.25 in (10.8 cm) wide, 3.5 in (8.9 cm) tall
- After Row 20: 5.25 in (13.3 cm) wide, 5 in (12.7 cm) tall
- After Row 25: 6 in (15.2 cm) tall, trunk 1.75 in (4.4 cm) wide
- After the border: 5.75 in (14.6 cm) x 6.5 in (16.5 cm)
If your test tier is too big, go down a hook size. If it is too small, go up a hook size. If the width is right but the height is off, check your puffs. Pull every loop up to an even 0.5 in (1.3 cm), because uneven loop length changes row height more than anything else.
Pattern
Turn at the end of every row. The ch 1 at the start of sc rows and the ch 2 at the start of puff rows do not count as stitches.
Puff row method: Ch 2, hdc in first st, puff in next st, sc in next st; repeat from * until 2 sts remain, puff in next st, hdc in last st. A puff row of N stitches always has (N − 1) ÷ 2 puffs, (N − 3) ÷ 2 sc and 2 hdc, so the stitch count stays the same.
Tier 1
Row 1 (RS): Ch 2, 3 sc in 2nd ch from hook, turn. (3 sts)
Row 2 (WS): Ch 1, inc in first st, sc in next st, inc in last st, turn. (5 sts)
Row 3 (RS): Ch 1, inc in first st, sc in each st to last st, inc in last st, turn. (7 sts)
Row 4 (WS): Repeat Row 3. (9 sts)
Row 5 (RS, puff row): Work the puff row method. (9 sts: 4 puffs, 3 sc, 2 hdc)
Row 6 (WS): Repeat Row 3. (11 sts)
Row 7 (RS, puff row): Work the puff row method. (11 sts: 5 puffs, 4 sc, 2 hdc)
Row 8 (WS): Repeat Row 3. (13 sts)
Check: 3.25 in (8.3 cm) wide.
Tier 2
Row 9 (RS, step row): Do not ch. Sl st in first 3 sts, ch 1, sc in same st as last sl st, sc in next 8 sts, leave last 2 sts unworked, turn. (9 sts)
This row pulls the tier in by 2 stitches on each side. The 2 skipped stitches on each edge form the small ledge, or notch, under Tier 1.
Row 10 (WS): Ch 1, 2 sc in each of first 2 sts, sc in next 5 sts, 2 sc in each of last 2 sts, turn. (13 sts)
Row 11 (RS, puff row): Work the puff row method. (13 sts: 6 puffs, 5 sc, 2 hdc)
Row 12 (WS): Repeat Row 3. (15 sts)
Row 13 (RS, puff row): Work the puff row method. (15 sts: 7 puffs, 6 sc, 2 hdc)
Row 14 (WS): Repeat Row 3. (17 sts)
Check: 4.25 in (10.8 cm) wide, 3.5 in (8.9 cm) from the tip.
Tier 3
Row 15 (RS, step row): Do not ch. Sl st in first 3 sts, ch 1, sc in same st as last sl st, sc in next 12 sts, leave last 2 sts unworked, turn. (13 sts)
Row 16 (WS): Ch 1, 2 sc in each of first 2 sts, sc in next 9 sts, 2 sc in each of last 2 sts, turn. (17 sts)
Row 17 (RS, puff row): Work the puff row method. (17 sts: 8 puffs, 7 sc, 2 hdc)
Row 18 (WS): Repeat Row 3. (19 sts)
Row 19 (RS, puff row): Work the puff row method. (19 sts: 9 puffs, 8 sc, 2 hdc)
Row 20 (WS): Repeat Row 3. (21 sts)
Check: 5.25 in (13.3 cm) wide, 5 in (12.7 cm) from the tip.
Trunk
Row 21 (RS): Do not ch. Sl st in first 8 sts, ch 1, sc in same st as last sl st, sc in next 6 sts, leave last 7 sts unworked, turn. (7 sts)
The trunk sits on stitches 8–14 of Row 20, which leaves exactly 7 stitches free on each side.
Rows 22–25: Ch 1, sc in each st across, turn. (7 sts)
At the end of Row 25, fasten off.
Check: 6 in (15.2 cm) from the tip to the bottom of the trunk, trunk 1.75 in (4.4 cm) wide.
Border
Border gauge: 1 sc in each sc row end, 2 sc in each puff row end, 1 sc in each stitch along flat edges and 3 sc in each outer corner.
Where a step row began with slip stitches, work the border into the original stitches underneath. Insert your hook under both loops of the original stitch, behind the slip stitch.
Round 1 (RS): With RS facing, join yarn with a standing sc at the tip, working into the foundation ch of Row 1. Ch 14, sc in same spot. Now work down the first side:
- Tier 1 side: 9 sc across the row ends of Rows 1–7 (1 sc in each of the 5 sc row ends, 2 sc in each of the 2 puff row ends)
- Tier 1 corner: 3 sc in the outer st of Row 8
- Tier 1 ledge: sc in the next unworked st of Row 8
- Tier 2 side: 7 sc across the row ends of Rows 9–13 (3 sc row ends, 2 puff row ends)
- Tier 2 corner: 3 sc in the outer st of Row 14
- Tier 2 ledge: sc in the next unworked st of Row 14
- Tier 3 side: 7 sc across the row ends of Rows 15–19
- Tier 3 corner: 3 sc in the outer st of Row 20
- Tier 3 bottom: sc in each of the next 6 unworked sts of Row 20
- Trunk side: 4 sc across the row ends of Rows 21–24
- Trunk bottom: 3 sc in the first st of Row 25, sc in next 5 sts, 3 sc in the last st
Work up the second side as a mirror image:
– 4 sc on the trunk side
– 6 sc on the Tier 3 bottom
– 3 sc in the Tier 3 corner
– 7 sc on the Tier 3 side
– 1 sc on the Tier 2 ledge
– 3 sc in the Tier 2 corner
– 7 sc on the Tier 2 side
– 1 sc on the Tier 1 ledge
– 3 sc in the Tier 1 corner
– 9 sc on the Tier 1 side
Sl st to the first sc.
Counts: each side has 9 + 3 + 1 + 7 + 3 + 1 + 7 + 3 + 6 + 4 = 44 sc. The trunk bottom has 3 + 5 + 3 = 11 sc. Add the 2 sc at the tip and the round totals 2 + 44 + 44 + 11 = 101 sc, plus the ch-14 loop.
Loop: Sl st into the ch-14 sp. Work 18 sc into the ch-14 sp, then sl st in the first sc of Round 1. Fasten off and weave in ends.
Why the math works: At 16 sts and 18 rows per 4 in (10.2 cm), a sc row end is almost exactly as tall as one sc is wide, so 1 sc per sc row end keeps the sides flat. A puff row is about 0.33 in (0.8 cm) tall, or roughly one and a half sc widths. 2 sc fill that edge without ruffling the slanted sides. The 3 sc at each outer corner turn the edge sharply and give each tier a crisp point. The inner corners get no extra stitches, so the notches stay tucked in. Working 18 sc over 14 chains gives the loop a little extra fullness, so it curves into a smooth, firm ring about 1.5 in (3.8 cm) tall.
Final Blocking
- Weave in all ends on the WS before blocking, but don’t trim them short yet.
- Mist the ornament lightly with water until it is damp, not soaked.
- Lay it RS up on the blocking mat.
- Pin the tip, the six tier corners and the four trunk corners first.
- Ease the piece to 5.75 in (14.6 cm) across the bottom tier and 6.5 in (16.5 cm) from the tip to the bottom of the trunk.
- Pin the inner notches so they sit inward, and straighten each slanted side between the pins.
- Gently pinch each puff to round it up. Don’t flatten the texture.
- Pin the loop straight up from the tip.
- Let it dry completely, then unpin it and trim the ends.
Final Quality-Control Checklist
- The ornament measures 5.75 in (14.6 cm) x 6.5 in (16.5 cm), plus the 1.5 in (3.8 cm) loop.
- Each tier is wider than the one above it: 13, 17 and 21 sts before the border.
- There are six puff bands, two in each tier, and every puff faces the RS.
- Each step row left exactly 2 unworked sts on both sides.
- The trunk is centered, with 7 free sts on each side of Row 20.
- The border has 101 sc, with 3 sc at every outer corner.
- The two sides of the tree mirror each other.
- The loop is firmly covered in sc and sits centered on the tip.
- All ends are woven in securely and don’t show on the RS.
Troubleshooting
Puffs look flat or uneven: Pull every loop up to the same height before closing, and remember the ch-1 that locks each puff.
Edges of puff rows look gappy: Make sure you start with ch 2 and an hdc, not ch 1 and a sc.
The tree leans to one side: Recount the step rows. Exactly 2 sts must stay unworked on each side, and the trunk must start in st 8.
Notches are hard to see: Don’t add stitches at the inner corners, and pin the notches inward during blocking.
Border ruffles on the sides: Your puff rows are short. Work 1 sc in each puff row end instead of 2.
Loop is floppy: Pack the sc tightly over the chain, or work 20 sc instead of 18.
Care
Hand wash in cool water, press out the extra water in a towel and dry flat, reshaping the tiers. Store the ornament flat or hanging so the loop and corners keep their shape.
Final Notes
Check the measurements as you go:
– Tier 1 is 3.25 in (8.3 cm) wide and 2 in (5.1 cm) tall.
– Tier 2 reaches 4.25 in (10.8 cm) wide at 3.5 in (8.9 cm) tall.
– Tier 3 reaches 5.25 in (13.3 cm) wide at 5 in (12.7 cm) tall.
– The trunk brings the height to 6 in (15.2 cm).
– The 101-stitch border adds 0.25 in (0.6 cm) on every edge, for a finished ornament of 5.75 in (14.6 cm) x 6.5 in (16.5 cm) with a 1.5 in (3.8 cm) loop on top.
If your test tier matches the gauge, the rest of the tree will match too.
Happy crocheting!