

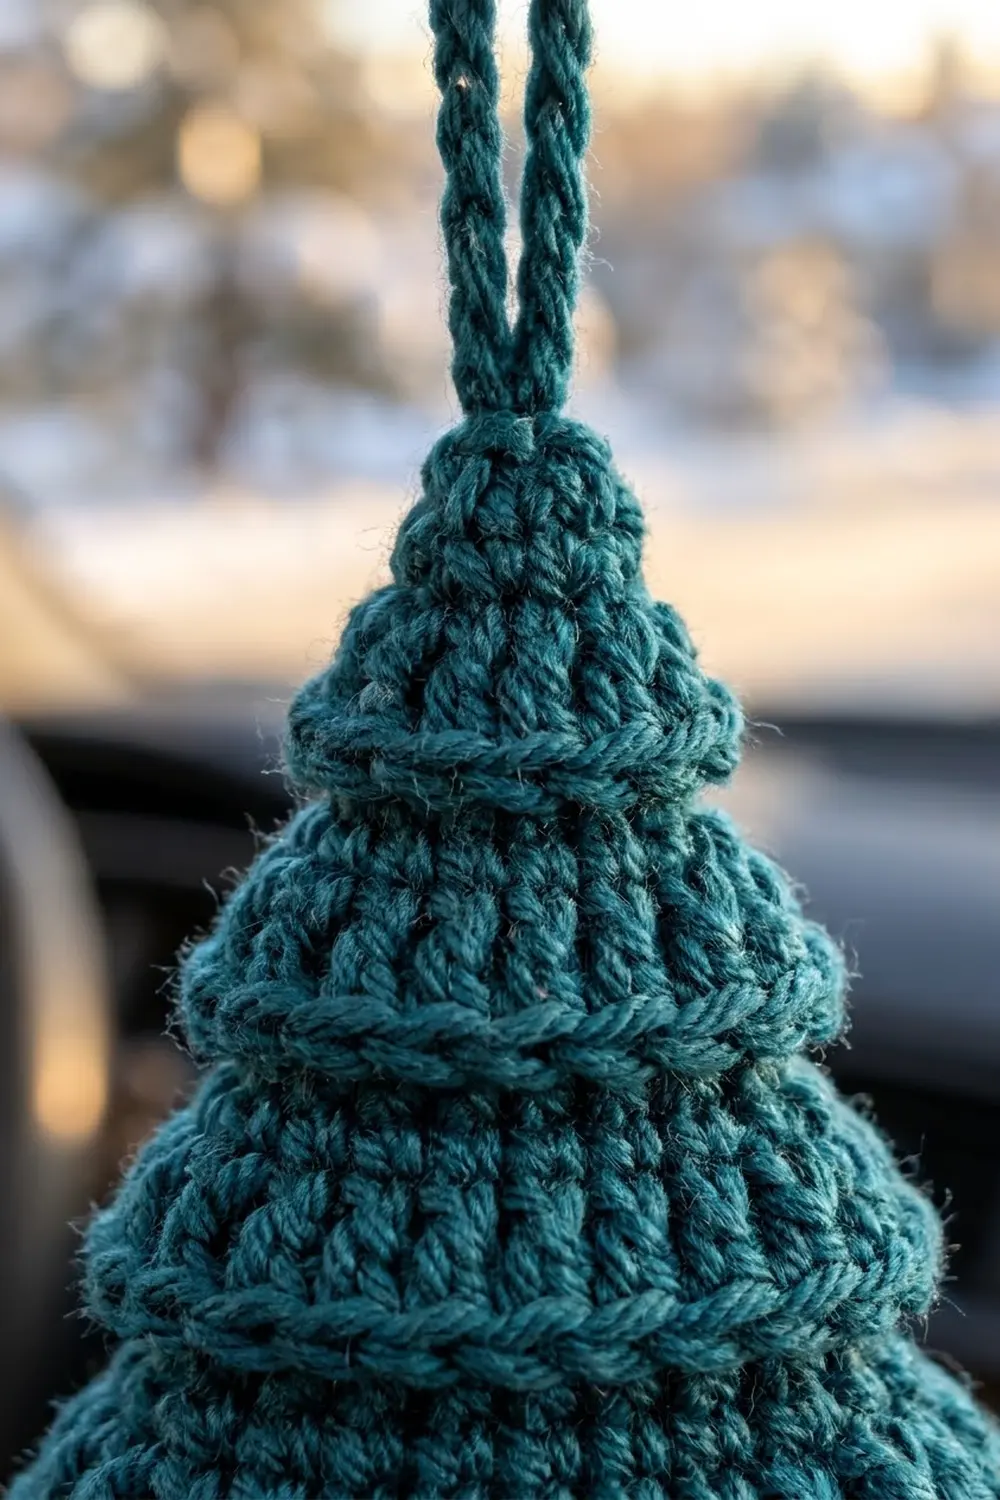
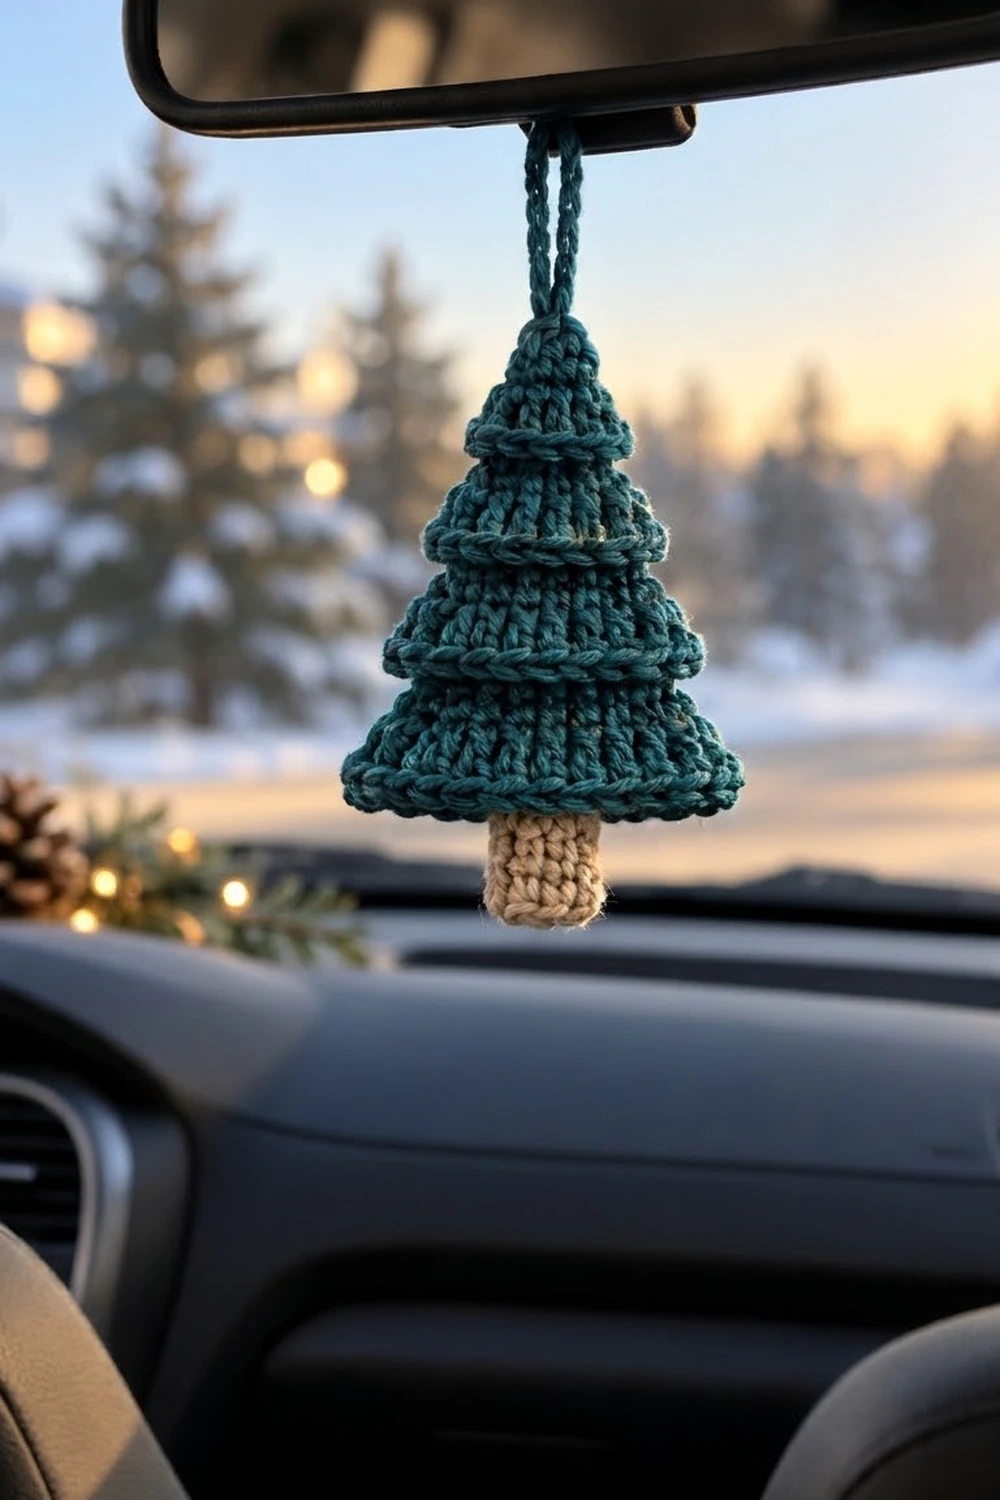
This little tree is made to hang from a rearview mirror, a hook by the door, or a branch of the big tree. It is one flat piece in deep teal with a soft tan trunk and a sturdy teal hanging loop. Double crochet bands give each tier fine vertical texture. Raised ridges between the tiers make the stepped evergreen outline.
The look is simple and cozy, with a classic Scandinavian feel. Teal and oatmeal keep it calm and wintery, and you could swap in forest green, sage, or cream without changing a single stitch.
This pattern uses US crochet terms. The finished tree is about 3.5 in (8.9 cm) wide and 3.8 in (9.7 cm) tall, trunk included. The hanging loop adds about 2.75 in (7.0 cm), for a total hanging length of about 6.55 in (16.6 cm).
The tree is worked flat from the bottom up. Single crochet ridge rows alternate with double crochet rows, and you decrease at both ends of every row. A slip stitch edge tidies the slanted sides, the loop is chained at the tip, and the trunk is worked straight down from the foundation edge.
Finished Size and Construction
- Finished size: 3.5 in (8.9 cm) wide x 3.8 in (9.7 cm) tall, without the loop
- Skill level: Easy
- Terminology: US crochet terms
- Yarn weight: DK (#3)
- Hook: 3.5 mm (E-4)
- Number of pieces: 1 (the tree, trunk, and loop all come from one piece)
- Layout: one standalone ornament, no joining
- Tree body size: 3.5 in (8.9 cm) wide x 3.0 in (7.6 cm) tall
- Size before border: 3.5 in (8.9 cm) x 3.0 in (7.6 cm) body
- Border depth: about 1/16 in (0.2 cm); a slip stitch edge that doesn’t change the width
- Trunk: about 0.9 in (2.3 cm) wide x 0.8 in (2.0 cm) tall
Materials
Choose a smooth, firmly plied DK yarn. Cotton or a cotton blend keeps a crisp outline and makes the ridges stand out clearly. Acrylic also works and is lighter and easy to wash. Fuzzy or loosely plied yarn hides the ridges.
- Color A, deep teal: 10 g, about 25 m (27 yd)
- Color B, light tan/oatmeal: 3 g, about 6 m (7 yd)
These quantities include a safety margin. One tree uses less than this.
Tools:
– 3.5 mm (E-4) crochet hook
– Tapestry needle
– Scissors
– Stitch markers (2)
– Ruler or tape measure
– Pins and a foam blocking mat
– Spray bottle with water
Abbreviations (US Terms)
- ch – chain
- sl st – slip stitch
- sc – single crochet
- dc – double crochet
- sc2tog – single crochet 2 together
- dc2tog – double crochet 2 together
- dc3tog – double crochet 3 together
- FLO – front loop only
- RS / WS – right side / wrong side
- st(s) – stitch(es)
- yo – yarn over
Special stitch – FLO ridge row: On the wrong side, work every stitch, decreases included, into the front loop only. That is the loop closest to you. The back loops stay unworked and sit as a raised horizontal bar on the right side. That bar is the ridge between tiers.
sc2tog in FLO: Insert into the front loop of the next st, yo, pull up a loop. Insert into the front loop of the following st, yo, pull up a loop. Yo and pull through all 3 loops.
Gauge and Checkpoints
The tree is small, so it works as its own gauge swatch. Work Rows 1–4 and measure before you go on.
- Stitch gauge: 19 sc = 3.5 in (8.9 cm) across Row 1
- Row gauge: each sc row is about 0.2 in (0.5 cm) tall; each dc row is about 0.4 in (1.0 cm) tall
Checkpoints:
– After Row 1: 3.5 in (8.9 cm) wide
– After Row 4: 1.2 in (3.0 cm) tall at the center
– After Row 10: 3.0 in (7.6 cm) tall at the center
– After the trunk: 3.8 in (9.7 cm) tall overall
Too big? Change to a 3.25 mm (D-3) hook. Too small? Change to a 3.75 mm (F-5) hook. If only the height is wrong, check your dc. Loose, tall dc stretch the tiers, so pull the first yarn-over snug.
Don’t make the foundation chain loose to get the width. A loose foundation makes the bottom edge flare.
Tree Body
Before you start: Leave a 6 in (15.2 cm) tail on the foundation chain. Work the turning chains snugly. A loose ch 2 makes little loops at the row ends, and they show along the slanted sides even after the border. Count your stitches after every row. Small mistakes are easy to spot on such a short piece.
With Color A, ch 20.
Row 1 (WS): Sc in the 2nd ch from the hook and in each ch across. Turn. (19 sc)
Row 1 is the bottom edge. Put a marker in the first and last stitches so you can find the corners later.
Tier 1
Row 2 (RS): Ch 2 (does not count as a st), dc2tog over the first 2 sts, dc in the next 15 sts, dc2tog over the last 2 sts. Turn. (17 dc)
Row 3 (WS, ridge): Ch 1. Working in FLO throughout: sc2tog, sc in the next 13 sts, sc2tog. Turn. (15 sc)
Check the right side now. You should see a raised horizontal ridge along the top of Row 2. That ridge separates Tier 1 from Tier 2.
Tier 2
Row 4 (RS): Ch 2, dc2tog, dc in the next 11 sts, dc2tog. Turn. (13 dc)
Row 5 (WS, ridge): Ch 1. In FLO: sc2tog, sc in the next 9 sts, sc2tog. Turn. (11 sc)
Tier 3
Row 6 (RS): Ch 2, dc2tog, dc in the next 7 sts, dc2tog. Turn. (9 dc)
Row 7 (WS, ridge): Ch 1. In FLO: sc2tog, sc in the next 5 sts, sc2tog. Turn. (7 sc)
Tier 4
Row 8 (RS): Ch 2, dc2tog, dc in the next 3 sts, dc2tog. Turn. (5 dc)
Row 9 (WS, ridge): Ch 1. In FLO: sc2tog, sc in the next st, sc2tog. Turn. (3 sc)
Tip
Row 10 (RS): Ch 2, dc3tog over all 3 sts. (1 st)
Do not fasten off.
Row-count logic: Each row loses 1 stitch at each end, so 2 stitches per row. From 19, the counts go 17, 15, 13, 11, 9, 7, 5, 3, 1. The five sc rows add up to 1.0 in (2.5 cm) and the five dc rows add up to 2.0 in (5.1 cm), so Rows 1–10 come to 3.0 in (7.6 cm). That gives four dc tiers with a small pointed tip on top.
Hanging Loop
You are still at the tip, with the RS facing.
- Ch 30.
- Sl st into the top of the dc3tog to close the loop.
- Sl st into the back bump of each of the 30 ch around the loop.
- Sl st into the top of the dc3tog again.
The slip stitches double the chain into a firm, cord-like loop about 2.75 in (7.0 cm) tall. It won’t stretch out on a mirror. Keep the yarn attached for the first side of the border.
Border
The border is a slip stitch outline along the two slanted sides. It covers the uneven row ends without adding width.
Border gauge: Work 1 sl st into the end of each sc row and 2 sl sts into the end of each dc row. Each sl st covers about 0.2 in (0.5 cm) of row height.
Side 1 (down): With the RS facing, start at the tip and work down the first slanted side.
– Rows 10, 8, 6, 4, 2 (dc rows): 2 sl sts in each row end = 10 sl sts
– Rows 9, 7, 5, 3, 1 (sc rows): 1 sl st in each row end = 5 sl sts
– Total: 15 sl sts. Fasten off at the bottom corner marker.
Side 2 (up): With the RS facing, join Color A at the other bottom corner marker. Work up the second slanted side from Row 1 to Row 10, using the same counts.
– Total: 15 sl sts. Sl st into the base of the loop and fasten off.
Why the math works: Each side has 5 sc rows and 5 dc rows. A dc row is about twice as tall as an sc row, so it gets twice as many slip stitches: (5 x 1) + (5 x 2) = 15. That spreads 15 sl sts along a slanted side about 3.5 in (8.9 cm) long, roughly 4.3 per inch. This is close to the natural spacing of slip stitches, so the edge lies flat. More stitches would make the edge ruffle. Fewer would pull the tiers in. Leave the flat bottom edge (Row 1) unbordered, because the trunk is worked from it.
Keep the slip stitches loose, about as loose as your chains. Tight slip stitches pull the sides in and curl the tier points.
Trunk
Turn the tree upside down so the foundation chain is at the top, with the RS facing you. The free loops of the foundation chain run along the bottom of Row 1, with 19 loops across.
Count in from the corner to the 8th loop and join Color B there.
Trunk Row 1 (RS): Ch 1, sc in the same loop and in the next 4 free loops. Turn. (5 sc)
The 5 trunk stitches use loops 8–12, which leaves 7 unworked loops on each side. That keeps the trunk centered.
Trunk Rows 2–4: Ch 1, sc in each st across. Turn. (5 sc per row)
Fasten off after Row 4. The trunk is about 0.9 in (2.3 cm) wide x 0.8 in (2.0 cm) tall, which brings the whole tree to 3.8 in (9.7 cm).
Optional trunk edge: If the trunk sides look rough, use Color B to sl st loosely down one side, across the bottom, and up the other side. Work 1 sl st per row end and 1 per st (4 + 5 + 4 = 13 sl sts).
Final Blocking
- Weave in all ends on the WS. Run teal tails through teal stitches and tan tails through tan stitches so no color shows through.
- Mist the tree lightly until it is damp, not wet.
- Lay it RS up on the mat.
- Pin both bottom corners so the base measures 3.5 in (8.9 cm).
- Pin the tip so the body is 3.0 in (7.6 cm) tall, with the trunk hanging straight below the center.
- Use your fingers to set each ridge level and horizontal. Don’t flatten the ridges; they should stay raised.
- Pin the trunk square at 0.9 in (2.3 cm) x 0.8 in (2.0 cm).
- Lay the loop straight up from the tip.
- Let it dry completely, then remove the pins.
Final Quality-Control Checklist
- [ ] The base is 3.5 in (8.9 cm) wide
- [ ] The body is 3.0 in (7.6 cm) tall, and the whole piece is 3.8 in (9.7 cm) with the trunk
- [ ] There are four dc tiers plus a pointed tip
- [ ] Four raised ridges show on the RS, one at the top of each tier
- [ ] Each slanted side has 15 sl sts and lies flat
- [ ] The trunk is 5 sts wide and 4 rows tall, centered on loops 8–12
- [ ] The loop is about 2.75 in (7.0 cm) tall, firm, and doubled with sl sts
- [ ] All ends are woven in and hidden
Troubleshooting
The ridges show on the wrong side. The ridge rows were worked on the RS or in the back loop. Work Rows 3, 5, 7, and 9 on the WS, in the front loop only.
The stitch counts are off. Count after each row: 19, 17, 15, 13, 11, 9, 7, 5, 3, 1. Most errors come from counting the turning chain. In this pattern it never counts as a stitch.
The sides are lumpy. Check your decreases. Always decrease over the very first 2 sts and the very last 2 sts of the row.
The tree curls forward. The ridge rows are too tight. Relax your tension on the sc rows or block a little more firmly.
The tip is blunt. Make sure you worked dc3tog over all 3 sts in Row 10, not dc2tog plus a dc.
The trunk is off-center. Recount the free loops. There should be 7 unworked loops on each side.
The trunk looks stretched. Pull your sc a little tighter. The trunk should be firm so the ornament hangs straight.
The loop is floppy. Check that you slip stitched back along all 30 chains.
Care
Hand wash in cool water, roll in a towel to press out the water, and dry flat. Don’t leave it in a hot, sunny car window for long periods, or the teal may fade.
Final Notes
The measurements build in a simple chain. The base starts with 19 sc at 3.5 in (8.9 cm). Ten rows of even decreases bring the body to 3.0 in (7.6 cm). The 15 sl sts on each side tidy the edges without changing the size. The 4-row trunk brings the tree to 3.8 in (9.7 cm), and the loop adds 2.75 in (7.0 cm) for hanging. If Rows 1 and 4 measure correctly, the rest will follow.
Make one for your own mirror, then a few more for gifts. Try sage with cream or forest green with walnut brown for a set. Each tree takes less than an hour.
Happy crocheting!