

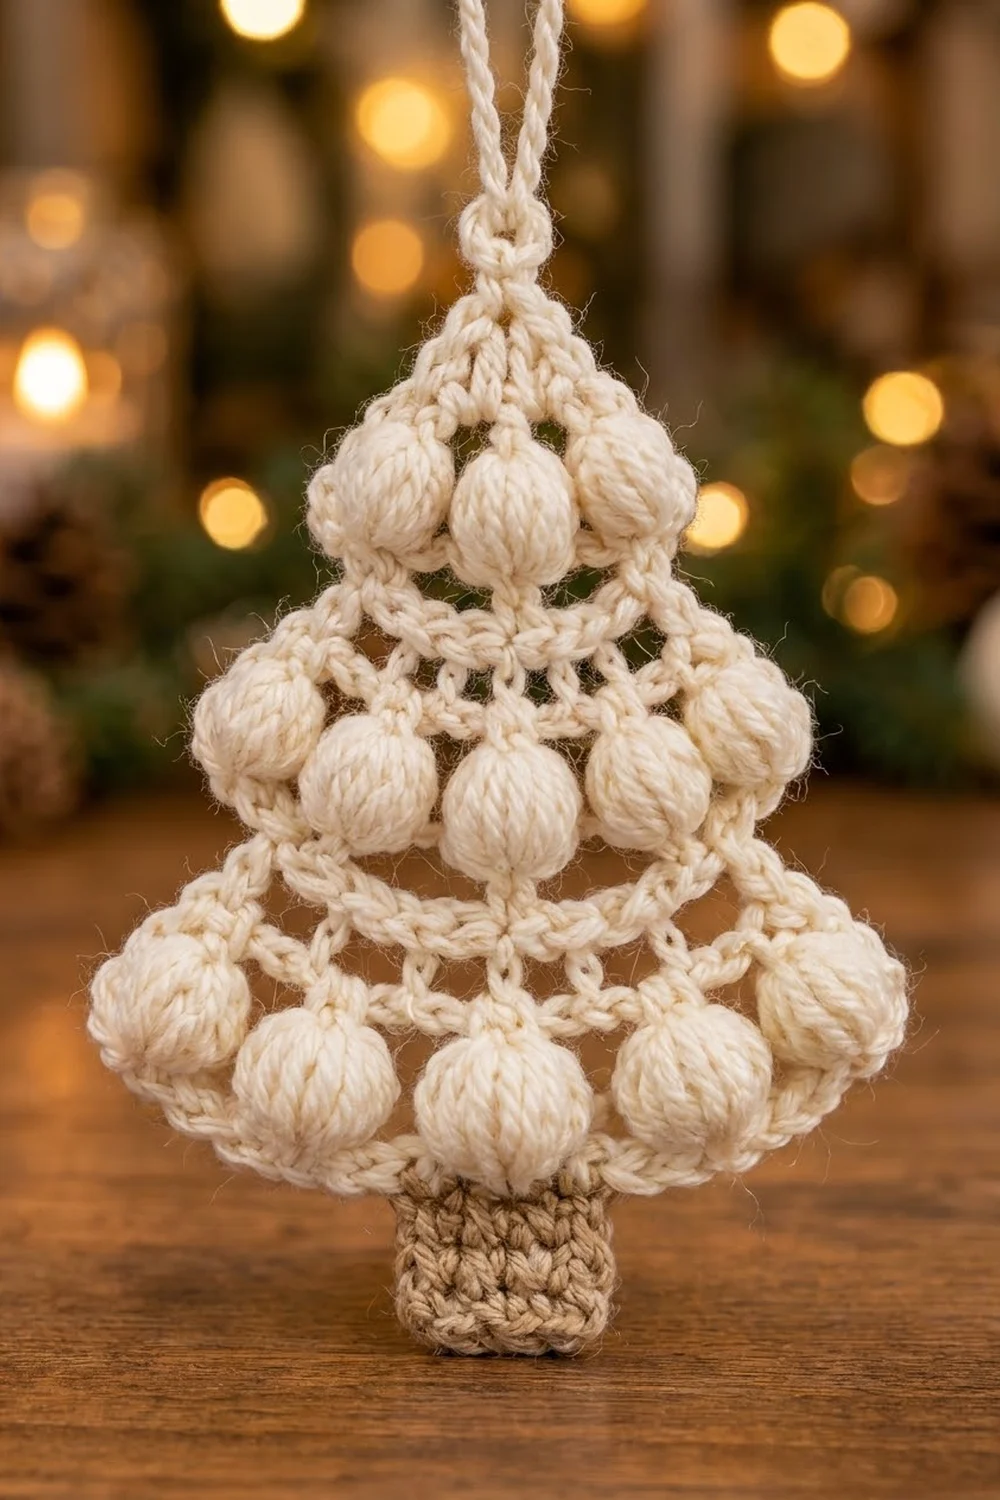
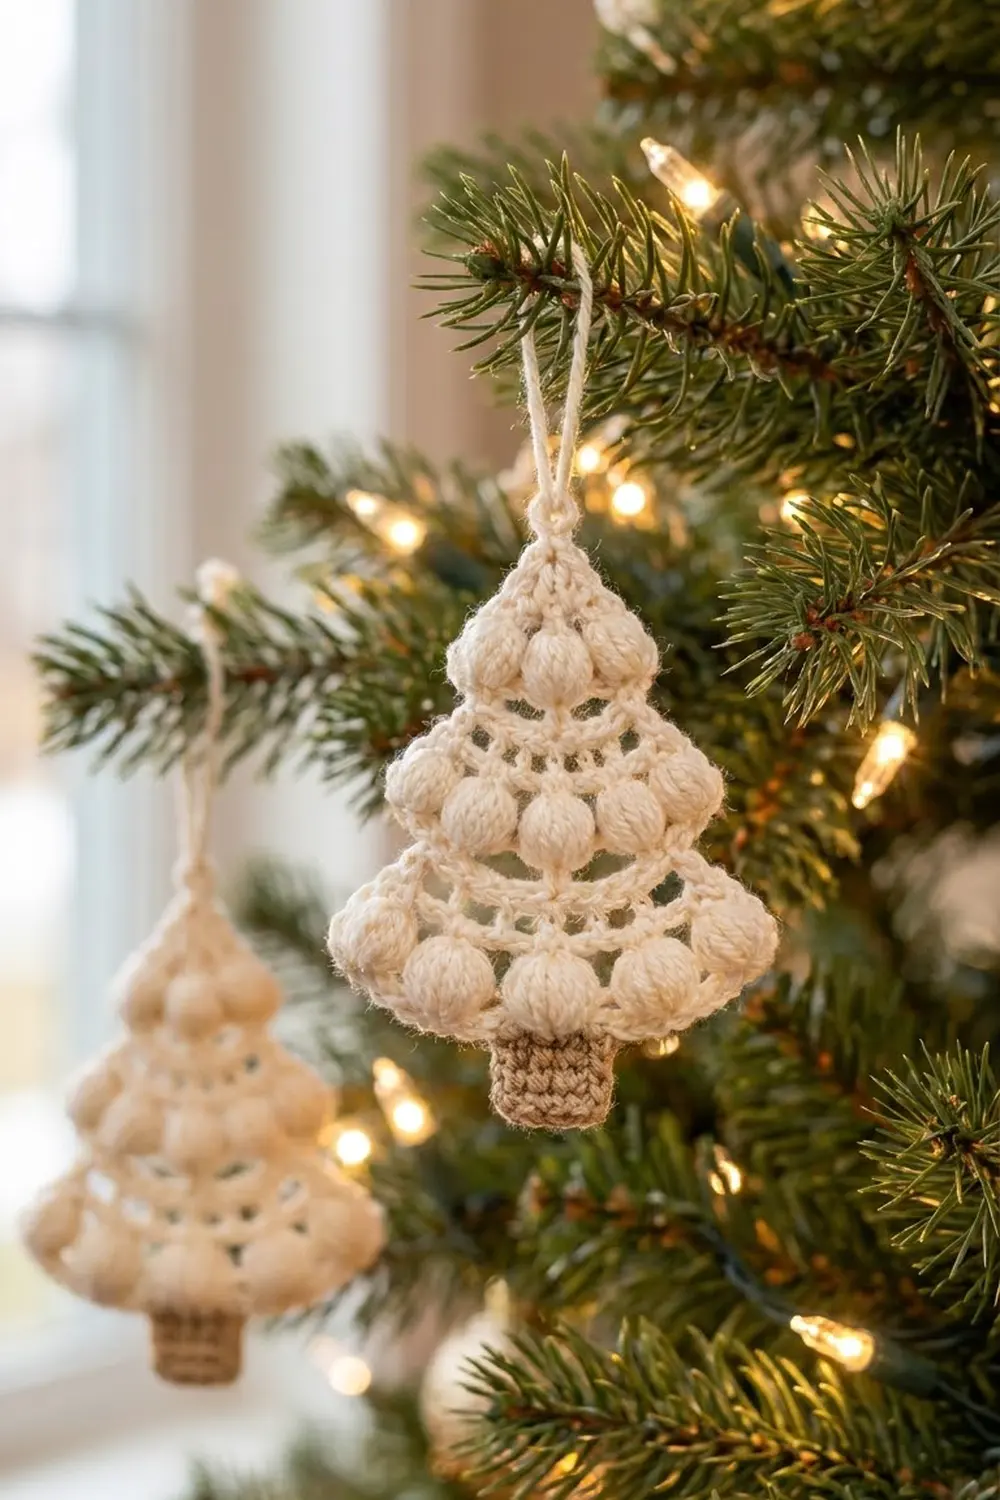
The Snowberry Puff Tree is a small, flat Christmas ornament with three stacked tiers. Each tier ends in a row of plump puff stitches, with a lacy row of chain spaces just above it. Each tier is narrower at the top than the bottom edge of the tier above it, so the tree gets a stepped pagoda outline.
The tree is worked in soft cream cotton, with a short tan trunk worked straight onto the bottom row. A neat cream edging outlines the whole tree. The hanging loop is made during the edging, so the ornament can go straight on the branch.
This pattern uses US crochet terms. The finished ornament is about 3.75 in (9.5 cm) wide and 4.5 in (11.4 cm) tall, not counting the hanging loop. The loop adds about 1.25 in (3.2 cm).
The whole ornament is one piece. You work the tree in turned rows from the tip down, then add the trunk in tan. Last, you work one edging row in cream up one side, around the tip (where the loop goes), and back down the other side.
Finished Size and Construction
- Finished size: 3.75 in (9.5 cm) wide x 4.5 in (11.4 cm) tall, plus a 1.25 in (3.2 cm) hanging loop
- Skill level: Intermediate (puff stitches, step shaping, row-end edging)
- Terminology: US
- Yarn weight: DK / light worsted (weight 3), cotton or cotton blend
- Hook: 3.5 mm (E-4)
- Number of pieces: 1 (tree and trunk worked as one piece)
- Layout: single flat ornament, no joining
- Piece size before edging: 3.5 in (8.9 cm) wide x 4.4 in (11.2 cm) tall
- Edging depth: about 1/8 in (0.3 cm) per side
Materials
Cotton or a cotton blend gives the clearest puffs and a crisp edge. Pick a smooth yarn with a soft twist. Splitty yarn makes the puffs fiddly, and fuzzy yarn hides the lacy rows.
- Cream (MC): 15 g, about 38 m
- Tan (CC): 3 g, about 8 m
Both amounts include a small safety margin. The puff rows use more yarn than you might expect.
Tools:
- 3.5 mm (E-4) crochet hook
- Tapestry needle
- Scissors
- 2 stitch markers
- Pins and a foam mat for blocking
- Ruler or tape measure
Abbreviations (US Terms)
- ch – chain
- sl st – slip stitch
- sc – single crochet
- dc – double crochet
- sk – skip
- st(s) – stitch(es)
- sp – space
- RS / WS – right side / wrong side
- V-st – (dc, ch 1, dc) in the same stitch
Special stitch: Puff stitch (puff). [Yarn over, insert hook in the given st or sp, yarn over, pull up a loop to about 1/2 in (1.3 cm)] 4 times (9 loops on hook). Yarn over, pull through all 9 loops, then ch 1 to close. The closing ch 1 does not count as a stitch. Each puff counts as 1 st.
All puffs are worked on WS rows, so they bulge toward the RS. If a puff sinks to the back, push it through to the front with your fingertip.
Gauge and Checkpoints
Gauge: 22 sc and 24 rows = 4 in (10.2 cm) in sc with a 3.5 mm hook.
The ornament is small enough to be its own gauge swatch. Make Tier 1 and measure it, laid flat and not stretched, before you go on.
Checkpoints:
- After Tier 1 (Row 4): 2 in (5.1 cm) wide x 1.2 in (3.0 cm) tall
- After Tier 2 (Row 8): 2.75 in (7.0 cm) wide x 2.4 in (6.1 cm) tall
- After Tier 3 (Row 12): 3.5 in (8.9 cm) wide x 3.6 in (9.1 cm) tall
- Trunk: 0.9 in (2.3 cm) wide x 0.8 in (2.0 cm) tall
- Before edging: 3.5 in (8.9 cm) x 4.4 in (11.2 cm)
- After edging: 3.75 in (9.5 cm) x 4.5 in (11.4 cm)
If Tier 1 is wider than 2.25 in (5.7 cm), go down to a 3.25 mm (D-3) hook. If it is narrower than 1.75 in (4.4 cm), go up to 3.75 mm (F-5). If only the height is off, look at your puffs and pull every loop up to the same height.
Pattern: Tree Body
Use cream for the whole body. Turn at the start of every row. The beginning ch 1 does not count as a stitch. The beginning ch 4 counts as dc + ch 1.
Every tier uses the same four rows: a narrow starting row, an increase row (+4 sts), a mesh row (+4 sts), and a puff row (same count). In mesh rows, each dc and each ch-1 sp counts as 1 st. Mesh rows alternate dc and ch-1 sp, so every puff in the next row lands in a ch-1 sp.
Tier 1
Row 1 (RS): Ch 2, 3 sc in 2nd ch from hook. (3 sts)
Row 2 (WS): Ch 1, turn, 3 sc in first st, sc in next st, 3 sc in last st. (7 sts)
Row 3 (RS, mesh): Ch 4 (counts as dc + ch 1), turn, dc in first st (first V-st made), [ch 1, sk next st, dc in next st] 2 times, ch 1, sk next st, V-st in last st. (11 sts: 6 dc + 5 ch-1 sps)
Row 4 (WS, puff): Ch 1, turn, sc in first dc, puff in next ch-1 sp, [sc in next 3 sts, puff in next ch-1 sp] 2 times, sc in 3rd ch of turning ch. (11 sts: 3 puffs + 8 sc)
Measure Tier 1 now.
Tier 2
Row 5 (RS, step-in): Turn, sl st in first 3 sts, ch 1, sc in same st as last sl st and in next 6 sts. Leave last 2 sts unworked. (7 sts)
The 2 skipped sts at each end make a ledge. This is where Tier 1’s outer puffs stick out past Tier 2.
Row 6 (WS): Ch 1, turn, 2 sc in each of first 2 sts, sc in next 3 sts, 2 sc in each of last 2 sts. (11 sts)
Row 7 (RS, mesh): Ch 4, turn, dc in first st, [ch 1, sk next st, dc in next st] 4 times, ch 1, sk next st, V-st in last st. (15 sts: 8 dc + 7 ch-1 sps)
Row 8 (WS, puff): Ch 1, turn, sc in first dc, puff in next ch-1 sp, [sc in next 3 sts, puff in next ch-1 sp] 3 times, sc in 3rd ch of turning ch. (15 sts: 4 puffs + 11 sc)
Tier 3
Row 9 (RS, step-in): Turn, sl st in first 3 sts, ch 1, sc in same st as last sl st and in next 10 sts. Leave last 2 sts unworked. (11 sts)
Row 10 (WS): Ch 1, turn, 2 sc in each of first 2 sts, sc in next 7 sts, 2 sc in each of last 2 sts. (15 sts)
Row 11 (RS, mesh): Ch 4, turn, dc in first st, [ch 1, sk next st, dc in next st] 6 times, ch 1, sk next st, V-st in last st. (19 sts: 10 dc + 9 ch-1 sps)
Row 12 (WS, puff): Ch 1, turn, sc in first dc, puff in next ch-1 sp, [sc in next 3 sts, puff in next ch-1 sp] 4 times, sc in 3rd ch of turning ch. (19 sts: 5 puffs + 14 sc)
Fasten off cream. The body should measure 3.5 in (8.9 cm) wide x 3.6 in (9.1 cm) tall.
Count check: Each step-in row takes away 4 sts (2 at each end). The increase row and the mesh row each add 4. So each tier ends 4 sts wider than the one above it (11, 15, 19), and gets one more puff (3, 4, 5).
Pattern: Trunk
With RS facing, count 7 sts in from the edge of Row 12 and put a marker in the 8th st. The trunk sits on the center 5 sts (sts 8–12), with 7 free sts on each side. The middle puff (st 10) is at the center of the trunk.
Row 1 (RS): Join tan in marked st, ch 1, sc in same st and in next 4 sts. (5 sc)
Rows 2–5: Ch 1, turn, sc in each st across. (5 sc)
Fasten off and weave in the end. The trunk measures 0.9 in (2.3 cm) wide x 0.8 in (2.0 cm) tall. The piece is now 4.4 in (11.2 cm) tall.
Edging and Hanging Loop
The edging is one row of sc in cream. It starts beside the trunk, goes up one side, around the tip, and down the other side. The trunk is not edged.
Edging gauge: Work 1 sc in each sc row-end, 2 sc in each dc row-end, and 1 sc in each puff row-end. A puff row is about as tall as 2 sc, but the 3-sc corner already covers part of its height, so 1 more sc is enough.
With RS facing, join cream in st 13 of Row 12 (the first free st beside the trunk).
First side, up to the tip:
- Tier 3 bottom: Ch 1, sc in same st and in next 5 sts, 3 sc in last st (corner). (9 sc)
- Tier 3 side: 1 sc in Row 12 row-end, 2 sc in Row 11 row-end, 1 sc in each of Rows 10 and 9 row-ends. (5 sc)
- Tier 2 ledge: Sc in the inner ledge st of Row 8, 3 sc in the outer ledge st (corner). On a ledge with slip stitches on top, work through the slip stitches. (4 sc)
- Tier 2 side: 1 sc in Row 8 row-end, 2 sc in Row 7 row-end, 1 sc in each of Rows 6 and 5 row-ends. (5 sc)
- Tier 1 ledge: Sc in the inner ledge st of Row 4, 3 sc in the outer ledge st. (4 sc)
- Tier 1 side: 1 sc in Row 4 row-end, 2 sc in Row 3 row-end, 1 sc in each of Rows 2 and 1 row-ends. (5 sc)
- Tip: Work (sc, ch 16, sc) in the foundation ch at the tip. This is 1 sc for each side, with the loop between them.
Second side, down from the tip: Work steps 6 to 1 in reverse order:
- Tier 1 side (5 sc)
- Tier 1 ledge: 3 sc in the outer st, sc in the inner st (4 sc)
- Tier 2 side (5 sc)
- Tier 2 ledge (4 sc)
- Tier 3 side (5 sc)
- Tier 3 bottom: 3 sc in st 1 of Row 12, then sc in sts 2–7 (9 sc)
Fasten off and weave the end into the back of the trunk.
Edging count: Each side has 9 + 5 + 4 + 5 + 4 + 5 + 1 = 33 sc. The edging totals 66 sc plus the ch-16 loop.
Why the math works: Row 12 has 19 sts and the trunk uses 5, which leaves 7 on each side. Six of them get 1 sc each and the corner st gets 3, for 9. Each tier side has two sc rows, one dc row and one puff row, which get 1 + 1 + 2 + 1 = 5 sc. The extra corner sc covers the rest of the puff row’s height. Each ledge gets 1 sc per st plus 2 extra at the corner so the edge can turn without cupping. The ch-16 loop folds to about 1.25 in (3.2 cm).
Final Blocking
- Weave in all ends first. Hide cream ends in cream areas and tan ends in the trunk.
- Spray the ornament until damp, or soak it briefly and roll it in a towel.
- Lay it RS up on a foam mat.
- Pin the tip, the three outer tier corners on each side, and the trunk’s bottom corners.
- Check the size: 3.75 in (9.5 cm) across Tier 3 and 4.5 in (11.4 cm) from tip to trunk.
- Open each ch-1 sp in the mesh rows with your fingertip.
- Round each puff with your fingers. Never press the puffs flat.
- Let it dry completely before unpinning. For a stiffer ornament, mist it lightly with fabric stiffener while it is pinned.
Final Quality-Control Checklist
- The tiers have 3, 4 and 5 puffs, top to bottom.
- Row 12 has 19 sts, with 7 free sts on each side of the trunk.
- Every puff sits in a ch-1 sp, bulges to the RS, and is closed with a ch.
- Each tier’s outer puff sticks out past the start of the tier below.
- The trunk is centered and 5 sts wide.
- The edging has 33 sc per side and lies flat.
- The hanging loop is centered at the tip and not twisted.
- The finished size is 3.75 in (9.5 cm) x 4.5 in (11.4 cm).
- All ends are secure and hidden.
Troubleshooting
Puffs look thin or uneven. Pull every loop up to the same height and always use 4 wraps.
Puffs bulge to the back. Puff rows must be WS rows. If Row 4 lands on the RS, you missed a turn somewhere.
The tree is lopsided. Each step-in row should start with 3 sl sts and leave 2 sts unworked at the end. One extra sl st moves the next tier off center.
The mesh rows come out narrower than the puff rows. Make your ch-1s a little looser, or use a hook half a size larger for the mesh rows only.
The edging ruffles or cups. If it ruffles, check that you used 1 sc (not 2) in each sc row-end. If it cups, check for a missing corner sc.
The trunk is off center. Count 7 free sts on each side before joining the tan.
Care
Hand wash in cool water with mild soap, press out the water in a towel, and dry flat. Reshape the puffs while damp.
Final Notes
Each measurement builds on the one before. Gauge is 22 sc to 4 in (10.2 cm). The three tiers should measure 2 in (5.1 cm), 2.75 in (7.0 cm) and 3.5 in (8.9 cm) wide. The trunk brings the height to 4.4 in (11.2 cm). The edging brings the ornament to 3.75 in (9.5 cm) x 4.5 in (11.4 cm). Check each stage before moving on, and the tree will come out the right size and shape.
Happy crocheting!