

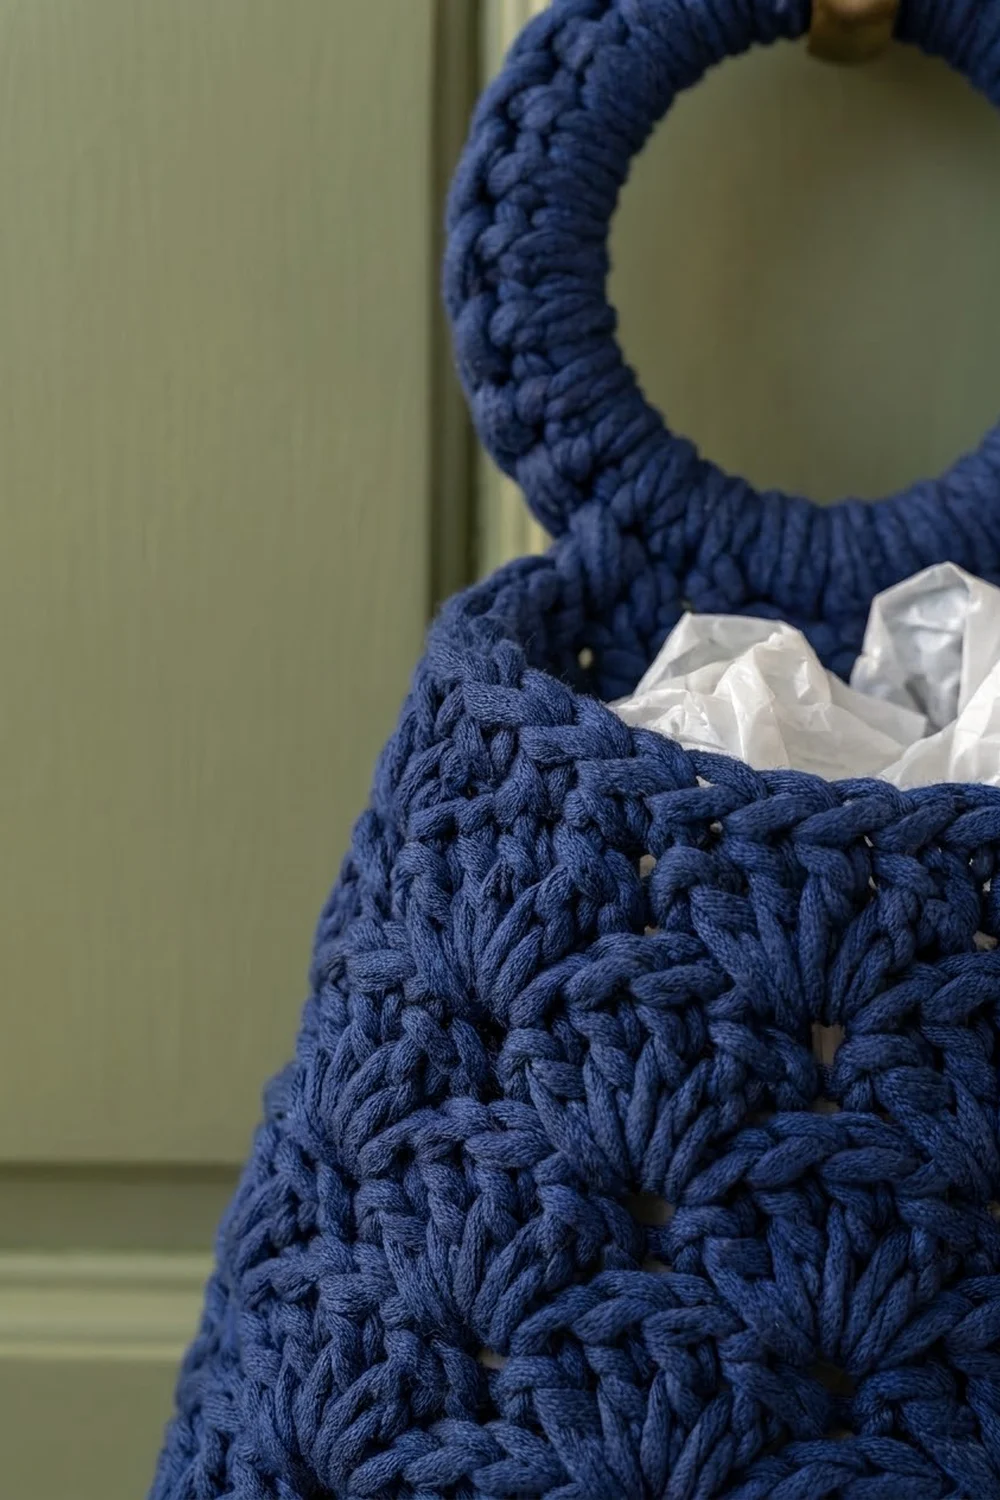
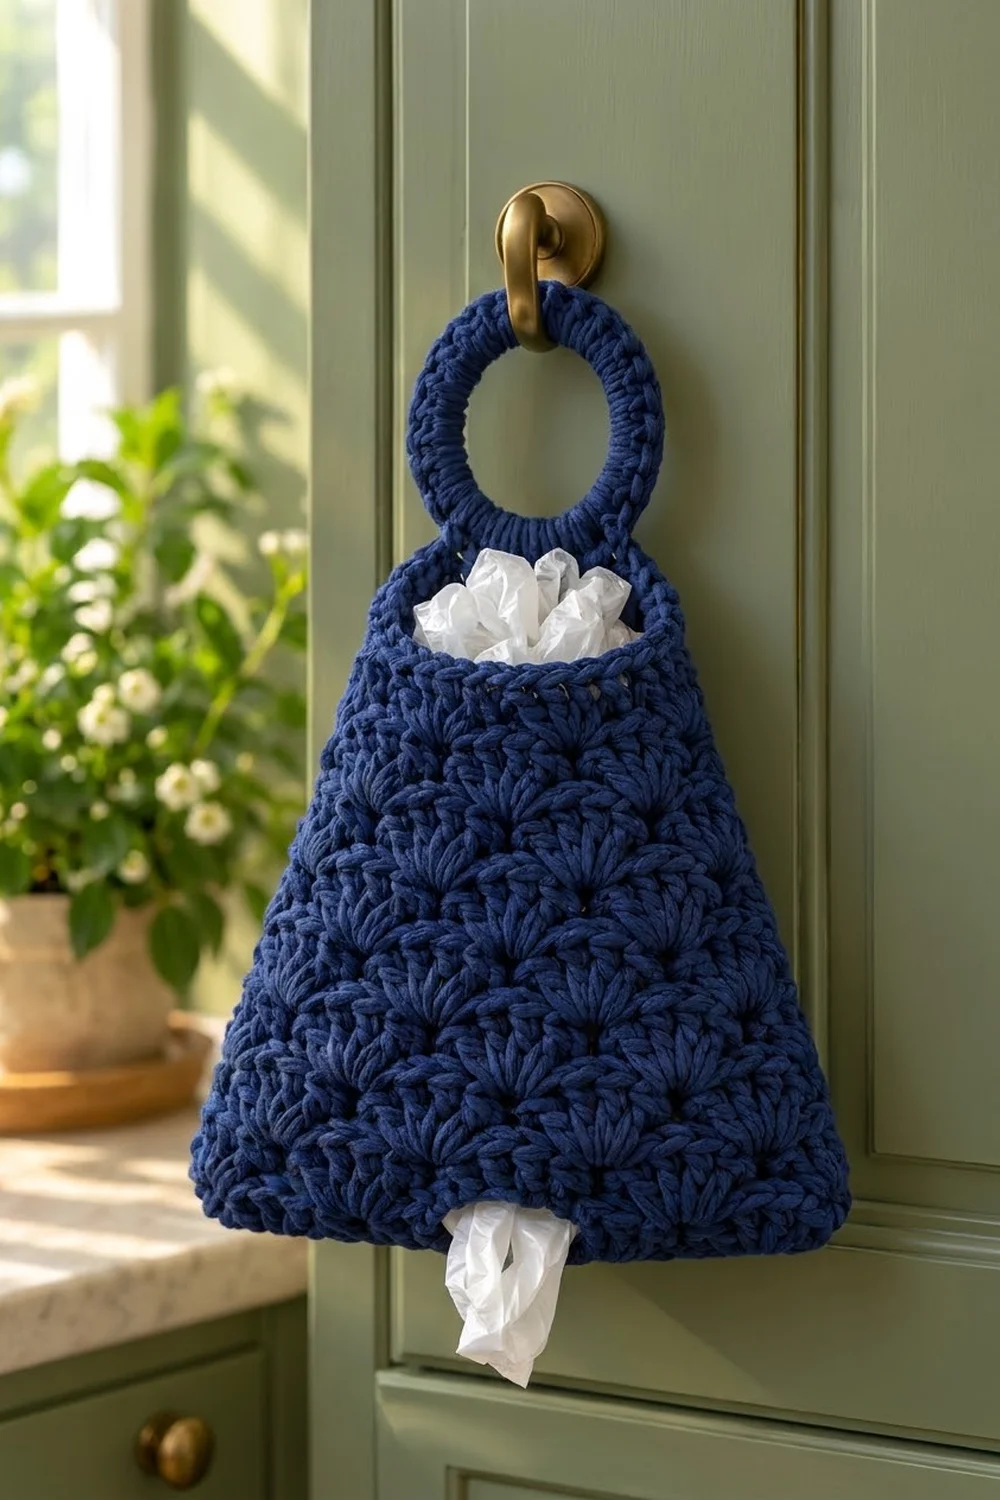
The Harbor Shell Grocery Bag Holder is a tapered navy bag holder that hangs from a hook or cabinet knob by a covered ring. You push used plastic bags in at the top and pull them out one at a time through a small slot at the bottom.
The whole body is worked in a full shell stitch that stacks into neat rows of fans. A plain single crochet band finishes the top opening, and a single crochet round tidies the bottom edge. The deep navy color is classic and practical. It hides kitchen marks and suits wood, painted cabinets and plain walls alike.
This pattern uses US crochet terms. The finished body measures 7 in (17.8 cm) wide at the top, 12.25 in (31.1 cm) wide at the bottom, and 12 in (30.5 cm) tall. With the ring, the holder hangs about 15 in (38.1 cm) long.
The construction is simple. You work the body from the top down in joined rounds, adding one shell repeat at each side fold on three increase rounds. Then you seam the bottom edge closed at both ends, leaving a slot in the center. Last, you cover a ring with single crochet and attach it with a small tab at the back.
Finished Size and Construction
- Finished size: 7 in (17.8 cm) top width, 12.25 in (31.1 cm) bottom width, 12 in (30.5 cm) body height; about 15 in (38.1 cm) hanging length with ring
- Skill level: Intermediate (easy shell stitch, careful increase placement)
- Terminology: US crochet terms
- Yarn weight: Bulky (#5) cotton or cotton blend
- Hook: 6.0 mm (US J-10)
- Number of pieces: 1 body plus 1 covered ring, joined into one finished item
- Layout: Single tapered tube, flattened, with the ring centered at the top back
- Piece size: Body 12 in (30.5 cm) tall; covered ring about 3.5 in (8.9 cm) across
- Size before border: 11.5 in (29.2 cm) tall after the last shell round, 12.25 in (31.1 cm) wide flat
- Border depth: about 0.5 in (1.3 cm) of trim round plus bottom seam
Materials
Choose a smooth bulky cotton or cotton blend with good stitch definition. Cotton keeps the shells crisp and does not sag under the weight of a full load of bags. Avoid fuzzy or brushed yarns, which blur the fan texture. Also avoid very slippery yarns, which let the shells spread and make the holder grow longer over time.
- Navy blue: 250 g, about 300 m (328 yd)
This amount covers the body, trim, bottom seam, tab and ring cover. It includes a margin of about 15 percent for your test rounds and small differences in tension.
Tools:
- 6.0 mm (US J-10) crochet hook
- 1 plastic or wooden ring, 2.75 in (7.0 cm) outer diameter
- 4 locking stitch markers
- Tapestry needle
- Scissors
- Measuring tape
- Pins and a spray bottle for blocking
Abbreviations (US Terms)
- ch: chain
- sl st: slip stitch
- sc: single crochet
- dc: double crochet
- st(s): stitch(es)
- rnd(s): round(s)
- sk: skip
- rep: repeat
Special stitch: Shell. Work 5 dc in the same stitch. One shell repeat is 1 sc plus 1 shell, which equals 6 sts.
Special stitch: Shell Increase (Shell Inc). This is worked over one marked shell from the round below. It replaces the usual “sk 2 dc, sc in center dc, sk 2 dc.” Work it as: sk 1 dc, sc in next dc, shell in next dc (the center dc), sc in next dc, sk 1 dc. It turns one shell from the round below into sc, shell, sc, which adds exactly 1 shell repeat (6 sts).
Gauge and Checkpoints
Gauge in sc: 12 sc and 3 rnds = 3.5 in (8.9 cm) wide by 1 in (2.5 cm) tall.
Gauge in shell pattern: 2 shell repeats (12 sts) = 3.5 in (8.9 cm) wide; 4 shell rnds = 3 in (7.6 cm) tall. One shell repeat is 1.75 in (4.4 cm) wide, and one shell rnd is 0.75 in (1.9 cm) tall.
Use the top of the body as your test piece. Work Rnds 1–7, lay the tube flat and measure before going any further. This uses less than a fifth of the yarn, and it tells you whether the final size will be right.
Checkpoints:
- After Rnd 3: 7 in (17.8 cm) wide flat, 1 in (2.5 cm) tall
- After Rnd 5: 7 in (17.8 cm) wide flat, 2.5 in (6.4 cm) tall
- After Rnd 7: 8.75 in (22.2 cm) wide flat at the lower edge, 4 in (10.2 cm) tall
- After Rnd 12: 12.25 in (31.1 cm) wide flat, 7.75 in (19.7 cm) tall
- After Rnd 17: 12.25 in (31.1 cm) wide flat, 11.5 in (29.2 cm) tall
- After Rnd 18: about 11.75 in (29.8 cm) tall
If your piece is too wide, go down to a 5.5 mm (US I-9) hook. If it is too narrow, go up to a 6.5 mm (US K-10.5) hook. Change hooks and start again rather than changing stitch counts, because the shell repeats and increase positions depend on the counts given.
Body
The body is worked from the top down in joined rounds with the right side always facing you. Do not turn. The round join sits at the center back, where the ring tab will later cover it.
Foundation: Ch 48 loosely, then sl st to the first ch to form a ring, taking care not to twist the chain.
Rnd 1: Ch 1, sc in each ch around, sl st to first sc to join. (48 sc)
Rnds 2–3: Ch 1, sc in each st around, join. (48 sc)
This sc band is the finished top opening. It should measure 7 in (17.8 cm) wide when flattened.
Shell Rounds
The shell pattern alternates between two rounds. Round A puts a sc in the center dc of each shell and a shell in each sc. Round B does the same, but begins with a split shell so the join stays in one place.
Rnd 4 (Round A setup): Ch 1, sc in first st, sk 2 sts, shell in next st, sk 2 sts, sc in next st, rep from * around, ending with sk 2 sts, shell in next st, sk 2 sts, sl st to first sc to join. (8 sc + 8 shells = 48 sts)
Rnd 5 (Round B): Ch 3 (counts as dc), 2 dc in same st as join, sk 2 dc, sc in center dc of next shell, sk 2 dc, shell in next sc, rep from * around, ending with sk 2 dc, sc in center dc of last shell, sk 2 dc, 2 dc in first sc (same st as beginning ch-3), sl st to top of ch-3 to join. (8 shells + 8 sc = 48 sts)
Together, the beginning ch-3, its 2 dc and the final 2 dc make one complete 5-st shell, with the ch-3 at its center.
Place side markers: Count the split shell as Shell 1. Place a marker in the center dc of Shell 3 and another in the center dc of Shell 7. These two shells sit exactly 4 repeats apart and mark the two side folds.
Rnd 6 (Round A, increase): Ch 1, sc in top of ch-3, sk 2 dc, shell in next sc, sk 2 dc, sc in center dc of next shell, rep from * around, ending with shell in last sc, sk 2 dc, sl st to first sc to join. At each marked shell, work a Shell Inc instead of the usual sc. Move each marker to the center dc of the new shell inside the Shell Inc. (10 sc + 10 shells = 60 sts)
Rnd 7 (Round B): Work as Rnd 5. (10 shells + 10 sc = 60 sts)
Rnd 8 (Round A): Work as Rnd 6 without increases. (10 sc + 10 shells = 60 sts)
Rnd 9 (Round B, increase): Work as Rnd 5, but at each marked shell, work a Shell Inc instead of the usual sc. Move each marker to the center dc of the new shell. (12 shells + 12 sc = 72 sts)
Rnd 10 (Round A): Work as Rnd 8. (12 sc + 12 shells = 72 sts)
Rnd 11 (Round B): Work as Rnd 7. (12 shells + 12 sc = 72 sts)
Rnd 12 (Round A, increase): Work as Rnd 6, with a Shell Inc at each marked shell. Move each marker to the new center dc. (14 sc + 14 shells = 84 sts)
Rnds 13–17: Without increasing, alternate Round B and Round A, starting with Round B. Rnds 13, 15 and 17 are Round B; Rnds 14 and 16 are Round A. (84 sts each round)
Why the increases alternate: After an increase in Round A, the side fold sits on a Round A shell. That means the next increase has to happen in a Round B, which is worked into Round A shells. The order above already follows this rule.
Each Shell Inc adds 6 sts at one side, so each increase round adds 12 sts in total. Each face grows from 4 repeats to 7 repeats, which gives the trapezoid shape.
Rnd 18 (trim round): Ch 1, sc in each st around, join. (84 sts worked 1 per existing st + 0 extra = 84 sc)
Place a marker in the sc directly above each side marker. Fasten off, and weave in the starting tail.
Covered Ring
Rnd 1: Make a slipknot on the hook. Working over the 2.75 in (7.0 cm) ring, work 36 sc around it, packing the stitches closely so none of the ring shows. Sl st to first sc to join. (36 sc)
Rotate the stitches so the top loops face the inside of the ring. Fasten off, leaving a 6 in (15.2 cm) tail, and weave it in. The covered ring measures about 3.5 in (8.9 cm) across.
Hanging Tab
Hold the body with the back facing you. The tab is worked into the last 3 sts and the first 3 sts of Rnd 3, so it sits centered over the join.
Row 1: Join yarn in the 3rd st before the join, ch 1, sc in same st and next 5 sts. (6 sc)
Rows 2–4: Ch 1, turn, sc in each st across. (6 sc)
The tab measures 1.75 in (4.4 cm) wide and about 1.25 in (3.2 cm) tall. Pass the tab through the covered ring from front to back, fold it down to the inside of the body, and whipstitch Row 4 to the inside of Rnd 2. Fasten off and weave in the tail.
Border
The border is the bottom finish. It is made up of Rnd 18 (already worked above), the bottom seam and the back edge of the slot.
Border gauge: 12 sc = 3.5 in (8.9 cm), the same as the top band.
Stitch layout of Rnd 18: 84 sts = 1 fold st + 41 front sts + 1 fold st + 41 back sts. Flatten the body so each fold marker sits exactly on a side edge.
Bottom Seam Row: With the front facing you, join yarn in the right-hand fold st.
- Sc in the fold st. (1 sc)
- Working through 1 front st and its matching back st together, sc in each of the next 14 pairs. (14 sc)
- Working through the front layer only, sc in each of the next 13 sts. (13 sc)
- Working through both layers again, sc in each of the next 14 pairs. (14 sc)
- Sc in the left-hand fold st. (1 sc)
Total: 1 + 14 + 13 + 14 + 1 = 43 sc. Fasten off.
Back Opening Edge: Join yarn in the first unjoined back st of the slot, then sc in each of the 13 open back sts. (13 sc) Fasten off.
Why the math works: Each face has 41 sts between the folds. Splitting them 14 + 13 + 14 puts the slot exactly in the center. Both faces use the same split, so every front st has a matching back st, and no stitches are added at the seams. The slot is 13 sts wide. At 12 sc = 3.5 in (8.9 cm), that is about 3.8 in (9.7 cm): wide enough for your fingers but narrow enough to hold the bags in.
Final Blocking
- Weave in all remaining tails on the inside of the body.
- Lay the holder flat with the fold markers on the side edges and the ring centered at the top back.
- Mist it evenly with water until damp, not soaked.
- Pin the top band to 7 in (17.8 cm) wide.
- Pin the bottom edge to 12.25 in (31.1 cm) wide, keeping the slot centered.
- Pin the height to 12 in (30.5 cm) from the top band to the bottom seam, easing the sides into straight diagonal lines.
- Gently open each shell with your fingers so the fans sit evenly.
- Let it dry completely, then remove the pins and markers.
Final Quality-Control Checklist
- The top band measures 7 in (17.8 cm) flat.
- The bottom edge measures 12.25 in (31.1 cm) flat.
- The body measures 12 in (30.5 cm) tall.
- Rnd 17 has 84 sts: 14 sc and 14 shells.
- The shell columns line up evenly from top to bottom.
- Both side folds sit on the marked increase columns.
- The slot is centered, with 14 joined sts on each side.
- The ring is fully covered, and the tab is secure.
- All tails are woven in on the inside.
Troubleshooting
The round join drifts sideways. Check that each Round B starts with ch 3 in the join st and ends with 2 dc in that same st.
The sides look stepped instead of smooth. This is normal before blocking. Pin the sides into straight lines while the piece is damp.
The stitch count is off after an increase round. Count shells only. You should have 10, 12 and 14 shells after Rnds 6, 9 and 12.
The top opening is too tight. The foundation chain was worked too tightly. Rework it with a larger hook, then switch back to the 6.0 mm hook for Rnd 1.
The slot gapes open. Work the Back Opening Edge a little more firmly, or add 1 more joined pair on each side of the slot.
The ring shows through the stitches. Add 2–4 more sc so the stitches pack tightly.
The holder stretches longer when full. Your tension is loose, or the yarn is too drapey. Go down a hook size, or choose a firmer cotton.
Care
Hand wash in cool water and lay flat to dry, reshaping it to the blocked size. Do not hang it up while wet, or the cotton may stretch lengthwise.
Final Notes
Each stage of the Harbor Shell Grocery Bag Holder sets up the next one. The top band sets the width at 48 sts and 7 in (17.8 cm). Three Shell Inc rounds grow the body to 84 sts and 12.25 in (31.1 cm). Fourteen shell rounds bring the height to 11.5 in (29.2 cm), and the trim round plus the seam add about 0.5 in (1.3 cm), for a 12 in (30.5 cm) body.
Each 41-st face splits into 14 + 13 + 14 for a centered slot. The covered ring brings the hanging length to about 15 in (38.1 cm). If every checkpoint matches, your holder will match too.
Happy crocheting!