

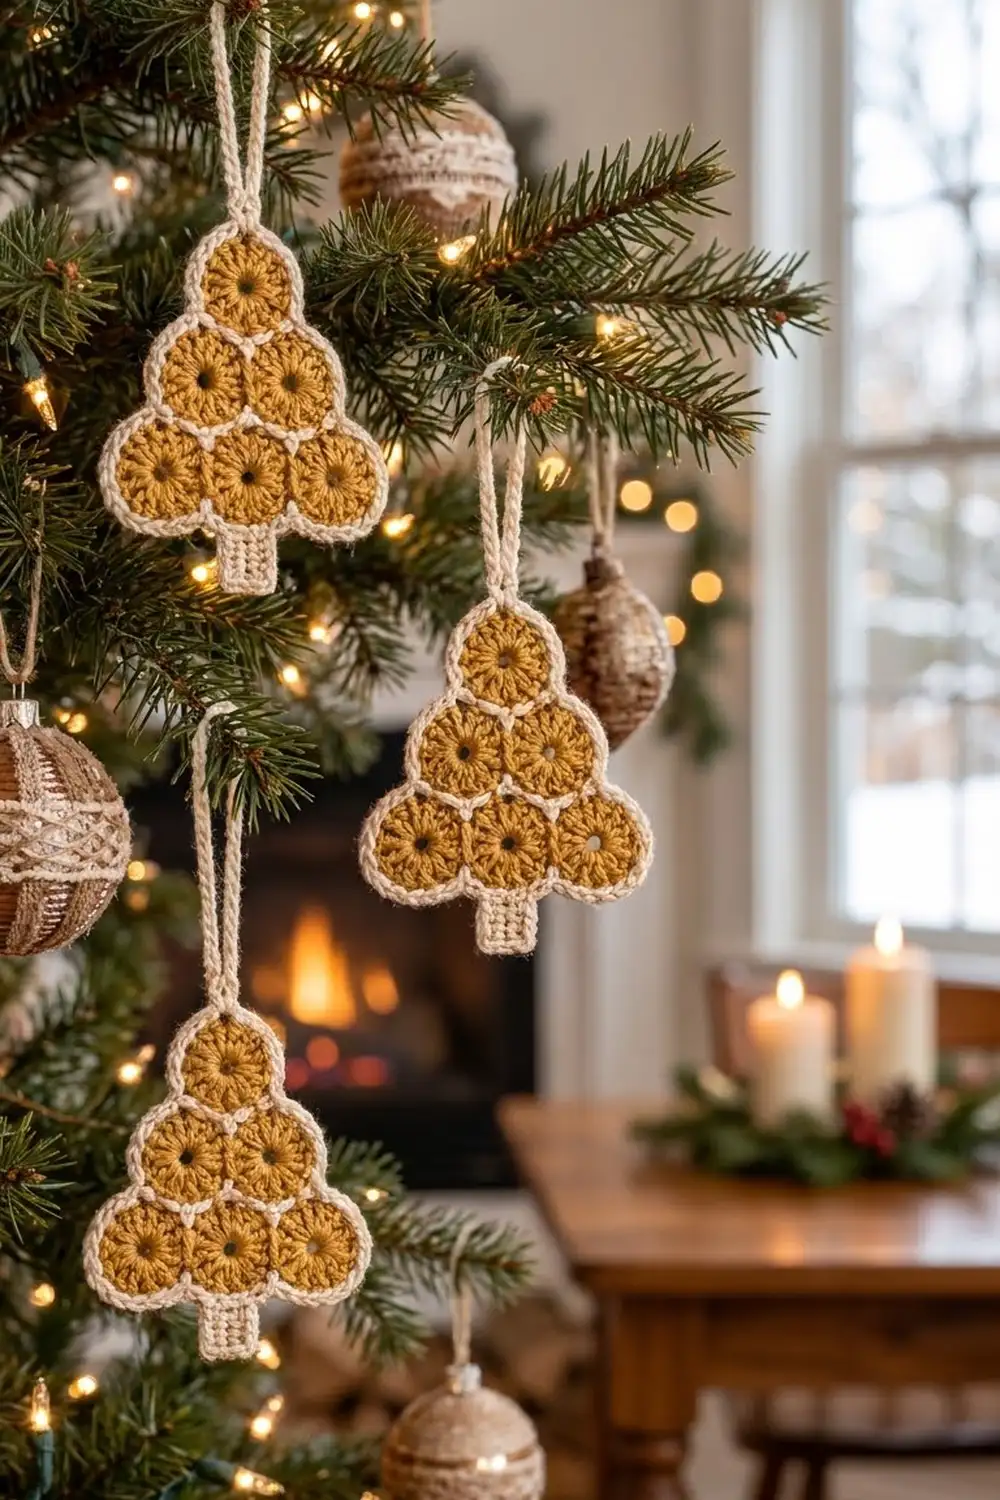
This little tree ornament is made from six mustard-gold circles stacked in a 1-2-3 triangle. Each circle has an open center, like a tiny golden bauble. A cream outline frames every circle and draws soft lines between them, and a cream border follows the scalloped edge of the whole tree. A short cream trunk and a padded hanging loop complete it.
The colors are warm gold and cream. Hang a few on a real tree for a cozy, natural look, or use them as gift toppers. The pattern uses US crochet terms throughout.
The finished ornament is about 4.9 in (12.4 cm) wide and 5.25 in (13.3 cm) tall from the top of the tree to the bottom of the trunk. The hanging loop adds about 1.5 in (3.8 cm).
You’ll crochet six identical circles, sew them together at nine contact points, and then work one border round around the outside. To finish, you work the trunk in rows from the border and add the hanging loop.
Finished Size and Construction
- Finished size: 4.9 in (12.4 cm) wide x 5.25 in (13.3 cm) tall, not counting the loop
- Skill level: Easy to intermediate
- Terminology: US crochet terms
- Yarn weight: Sport / fine (#2) cotton
- Hook: 3.0 mm (between US C/2 and D/3)
- Number of pieces: 6 circle motifs, plus a trunk and loop worked directly onto the ornament
- Layout: 1-2-3 triangle (3 rows of circles)
- Circle size: 1.5 in (3.8 cm) across
- Size before border: 4.5 in (11.4 cm) wide x 4.1 in (10.4 cm) tall
- Border depth: 0.2 in (0.5 cm) on every edge
- Trunk: 0.8 in (2.0 cm) wide x 0.75 in (1.9 cm) tall
Materials
Use a smooth mercerized cotton or cotton blend in sport weight. Cotton keeps the stitches crisp and the center holes open, and it blocks flat. Avoid fuzzy yarns, which blur the cream lines between circles.
Yarn (per ornament):
- Mustard gold: 8 g, about 24 m (26 yd)
- Cream: 7 g, about 21 m (23 yd)
These amounts include a margin for swatching and weaving in ends. A 50 g ball of each color makes about five ornaments.
Tools:
- 3.0 mm crochet hook
- Tapestry needle
- Scissors
- 2 stitch markers
- Ruler or tape measure
- Pins and a foam blocking mat
- Spray bottle with water
Abbreviations (US Terms)
- ch – chain
- sl st – slip stitch
- sc – single crochet
- dc – double crochet
- st(s) – stitch(es)
- RS – right side
- sc2tog – single crochet 2 together
Special stitch – sc2tog across a valley: Insert your hook in the last outer st of one circle, yarn over and pull up a loop. Then insert it in the first outer st of the next circle, yarn over and pull up a loop. Yarn over and pull through all 3 loops. This one stitch bridges the dip between two circles and keeps the border from bunching there.
Gauge and Checkpoints
Gauge: 20 sc and 22 rows = 4 in (10.2 cm) with a 3.0 mm hook.
Make and measure one complete circle before you make the rest. The circle is your real gauge swatch, and every later measurement depends on it.
Checkpoints for one circle:
- After Round 1: 0.8 in (2.0 cm) across
- After Round 2: 1.3 in (3.3 cm) across
- After Round 3: 1.5 in (3.8 cm) across
If your circle is too big, change to a 2.75 mm hook. If it’s too small, change to a 3.25 mm hook. If Round 2 ruffles, your dc are too short for 24 stitches, so loosen your tension or go up a hook size. If Round 2 cups, go down a hook size.
Being off by 0.1 in (0.3 cm) per circle adds up to about 0.3 in (0.8 cm) across the bottom row, so fix it now.
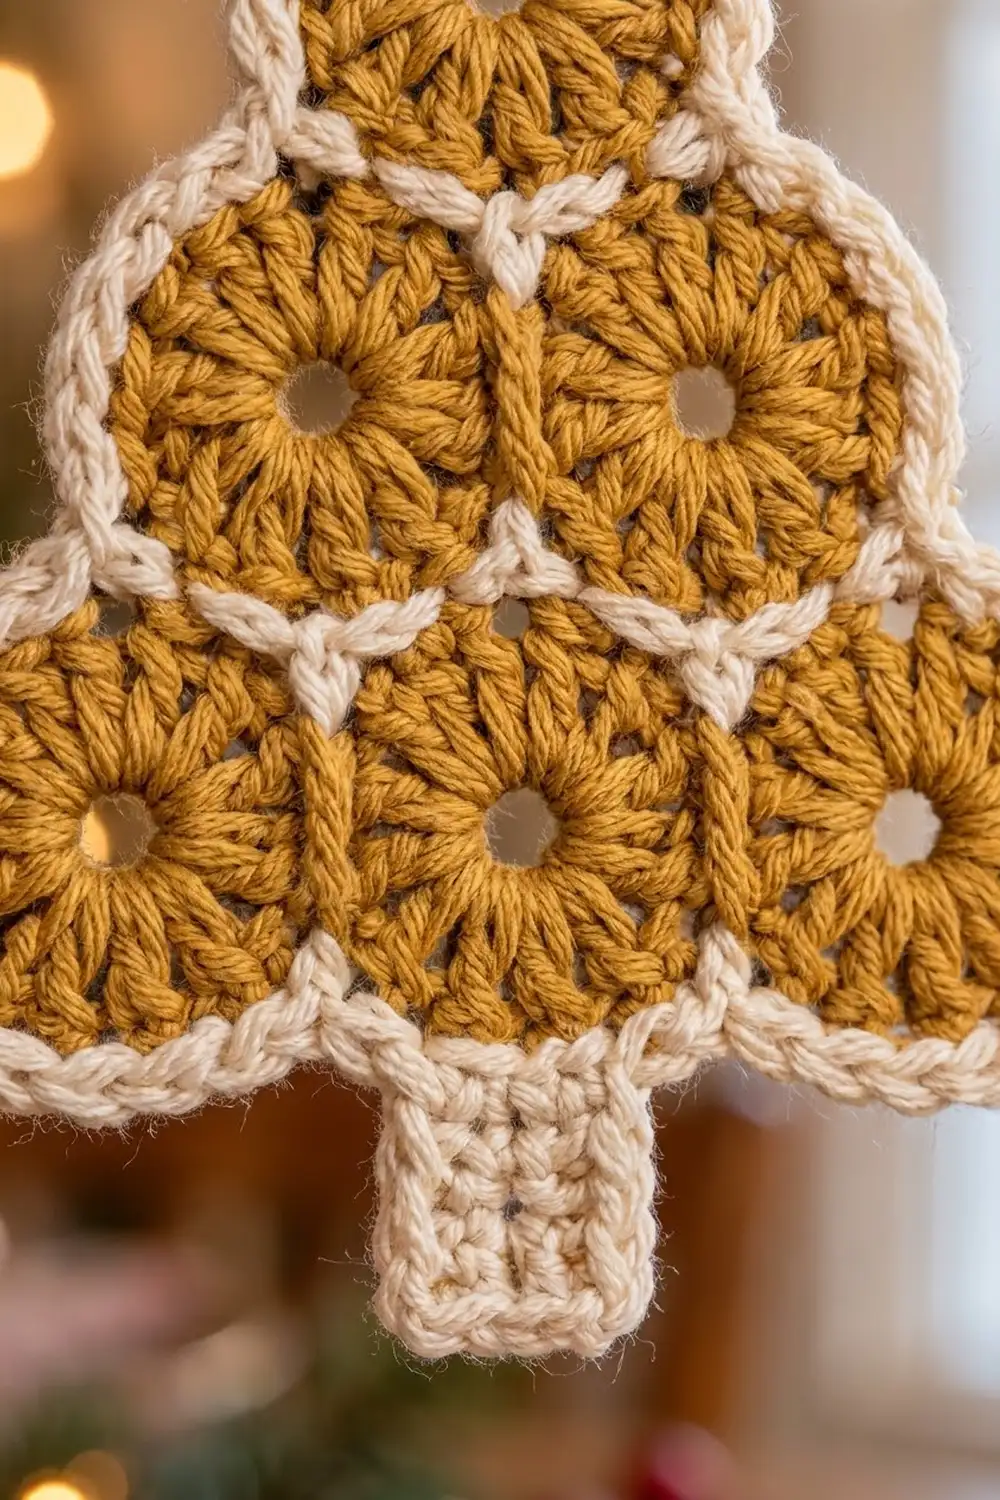
Circle Motif (Make 6)
Each circle has 3 rounds. Do not turn between rounds; work every round with the RS facing you.
Round 1 (mustard): Ch 4 and sl st to the first ch to make a ring. Ch 3 (counts as the first dc), then work 11 dc into the ring. Sl st to the top of the beginning ch-3. (12 dc)
The ch-4 ring leaves the open center hole. Don’t pull the starting tail to close it.
Round 2 (mustard): Ch 3 (counts as dc). Work 1 dc in the same st, then 2 dc in each remaining st around. Sl st to the top of the beginning ch-3. (24 dc)
Fasten off mustard and weave in the end on the wrong side.
Round 3 (cream): Join cream with a sl st in any st. Ch 1, then sc in the same st and in each st around. Sl st to the first sc. (24 sc)
Fasten off and leave an 8 in (20.3 cm) tail for sewing.
Round 3 doesn’t increase, so the cream round grips the edge and keeps the circle flat. Its 24 stitches are the only stitches used for joining and for the border.
Make All Pieces
For one ornament you need:
- 6 circles in total
- Mustard: Rounds 1–2 of all 6 circles
- Cream: Round 3 of all 6 circles, plus the border, trunk, and loop
Lay the circles out RS up, with each circle touching its neighbors:
          [ T ]
      [ L2 ][ R2 ]
  [ L3 ][ M3 ][ R3 ]
         |trunk|
- Row 1: T (top)
- Row 2: L2 (left), R2 (right)
- Row 3: L3 (left), M3 (middle), R3 (right)
Joining
Method: Whipstitch with the cream tails, through the back loops only.
The circles touch at 9 contact points:
- T touches L2 and R2 (2 contacts)
- L2 touches R2 (1 contact)
- L2 touches L3 and M3 (2 contacts)
- R2 touches M3 and R3 (2 contacts)
- M3 touches L3 and R3 (2 contacts)
Stitch-to-stitch logic: At each contact, take the 2 Round 3 stitches on each circle that sit closest to the touching point. Whipstitch these 2 pairs together, so 2 stitches on one circle match 2 stitches on the other. No stitches are added or skipped. Every circle still has 24 sc, and each contact uses 2 of them.
After joining, the stitches on each circle fall into three groups: joined stitches, short 2-stitch inner arcs that face the 4 small triangular gaps inside the tree, and outer stitches. Count the outer stitches on each circle between its outermost seams:
| Circle | Contacts | Joined sts | Inner-gap sts | Outer sts |
|---|---|---|---|---|
| T | 2 | 4 | 2 | 18 |
| L2 | 4 | 8 | 6 | 10 |
| R2 | 4 | 8 | 6 | 10 |
| L3 | 2 | 4 | 2 | 18 |
| M3 | 4 | 8 | 6 | 10 |
| R3 | 2 | 4 | 2 | 18 |
Each row adds up to 24. The outer stitches total 84.
Where three circles meet around a gap, add one small whipstitch to pull the inner arcs together. This makes the cream “Y” shape you see between the circles.
Tension: Pull each whipstitch just snug enough that the edges touch. If you pull too tight, the tree curls. If you sew too loosely, you’ll see gaps.
Size checkpoint: The joined tree should measure 4.5 in (11.4 cm) across the bottom row and 4.1 in (10.4 cm) from the top of T to the bottom of M3.
Border
Border gauge: One round of sc adds 0.2 in (0.5 cm) on every edge, which matches the 22 rows per 4 in (10.2 cm) gauge.
Before you start, number each circle’s outer stitches in the direction you’ll work, starting from the seam you enter that circle at. Place a marker in T’s outer st 10. On T, outer sts 9 and 10 sit on either side of the top center.
Round 1 (cream): With RS facing, join cream with a sl st in T’s outer st 10. Ch 1, then work each section in order:
- T, left half: sc in sts 10–17 (8 sc)
- Valley: sc2tog over T st 18 and L2 st 1 (1)
- L2: sc in sts 2–9 (8 sc)
- Valley: sc2tog over L2 st 10 and L3 st 1 (1)
- L3: sc in sts 2–17 (16 sc)
- Valley: sc2tog over L3 st 18 and M3 st 1 (1)
- M3: sc in sts 2–9 (8 sc)
- Valley: sc2tog over M3 st 10 and R3 st 1 (1)
- R3: sc in sts 2–17 (16 sc)
- Valley: sc2tog over R3 st 18 and R2 st 1 (1)
- R2: sc in sts 2–9 (8 sc)
- Valley: sc2tog over R2 st 10 and T st 1 (1)
- T, right half: sc in sts 2–9 (8 sc)
Sl st to the first sc. (78 sts: 72 sc + 6 sc2tog)
Do not fasten off. Move straight on to the loop.
Why the math works: The round starts from the 84 outer stitches counted after joining. Each sc2tog uses 2 of them, so the round has 84 worked 1-per-stitch, minus 6 at the valleys, for 78. No stitches are added at the seams. The joined and inner-gap stitches stay inside the tree, so the border only follows the real outline.
The valleys are concave curves, so they need fewer stitches, and the sc2tog keeps the border tight there. The rounded tops of the circles are convex and take 1 sc per stitch, which keeps them smooth without ruffling.
Hanging loop: Ch 24, which is about 3.2 in (8.1 cm). Sl st in the first sc of Round 1 again, at the top center, to close the loop. Work 16 sc over the chain into the loop, then sl st in the same base st. Fasten off and weave in the end.
The padded loop stands about 1.5 in (3.8 cm) above the tree.
Trunk (cream): Find M3’s 8 border sc at the bottom center. With RS facing, join cream with a sl st in the 3rd of these 8 sc.
- Row 1: Ch 1, sc in the same st and in each of the next 3 sts, ending in the 6th of the 8. (4 sc)
- Rows 2–4: Ch 1, turn, sc in each st across. (4 sc)
Fasten off and weave in the end. The trunk measures 0.8 in (2.0 cm) wide x 0.75 in (1.9 cm) tall and sits centered below M3.
Final Blocking
- Weave in all remaining ends on the wrong side, inside the cream stitches so they don’t show through the gold.
- Spritz the ornament until it is evenly damp, but not dripping.
- Lay it RS up on the blocking mat.
- Pin the bottom row of circles to 4.5 in (11.4 cm) across, measured inside the border.
- Pin the top of T so the tree body measures 4.5 in (11.4 cm) tall to the edge of the border.
- Pin each circle round, and push a pin through each center hole to open it.
- Pin the trunk square, 0.75 in (1.9 cm) long.
- Leave it to dry completely, which takes about 6–8 hours.
- Unpin and check the measurements again.
Final Quality-Control Checklist
- [ ] All 6 circles measure 1.5 in (3.8 cm) across
- [ ] Each circle has 12 dc, then 24 dc, then 24 sc
- [ ] 9 contact points are sewn with 2 stitches each
- [ ] Outer stitches total 84 before the border
- [ ] The border has 78 stitches, with an sc2tog at all 6 valleys
- [ ] The width is 4.9 in (12.4 cm)
- [ ] The tree body is 4.5 in (11.4 cm) tall
- [ ] The trunk is 4 sc wide, 4 rows tall, and centered under M3
- [ ] The loop is sitting at the top center and is firmly attached
- [ ] No ends show on the RS
- [ ] The ornament lies flat with no curling
Troubleshooting
The circle ruffles: Your Round 2 dc are too short. Loosen up or go up a hook size.
The circle cups: Your Round 2 tension is too loose for the ring. Go down a hook size.
The tree curls after joining: The whipstitches are too tight. Snip and re-sew more loosely.
The border flares at the valleys: You missed an sc2tog. Count the 6 valleys again.
The border pulls in on the curves: You skipped outer stitches. Each circle’s sc count should match the section list.
The trunk sits off-center: Count M3’s 8 border sc again and start in the 3rd.
The center holes are closed: You pulled the starting tail too tight. Ease it open before blocking.
The loop twists or flops: The sc over the chain are too loose. Pack all 16 sc tightly, and steam the loop lightly while you block.
Gold shows through the cream lines: You worked Round 3 into the wrong loops. Work it through both loops of every Round 2 dc so the cream covers the edge completely.
Care
Hand wash in cool water with mild soap, gently press out the water in a towel, and lay flat to dry. Reshape and pin if needed.
Final Notes
Every measurement depends on the one before it. A circle of 12 dc, then 24 dc, then 24 sc measures 1.5 in (3.8 cm). Six circles in a 1-2-3 triangle measure 4.5 in (11.4 cm) wide and 4.1 in (10.4 cm) tall. Joining leaves 84 outer stitches, and the border reduces them to 78. The border adds 0.2 in (0.5 cm) on every edge, giving 4.9 in (12.4 cm) by 4.5 in (11.4 cm). A 0.75 in (1.9 cm) trunk brings the height to 5.25 in (13.3 cm).
If your first circle matches gauge, the rest of the measurements will follow. Make a whole set in an afternoon and hang them together.
Happy crocheting!