

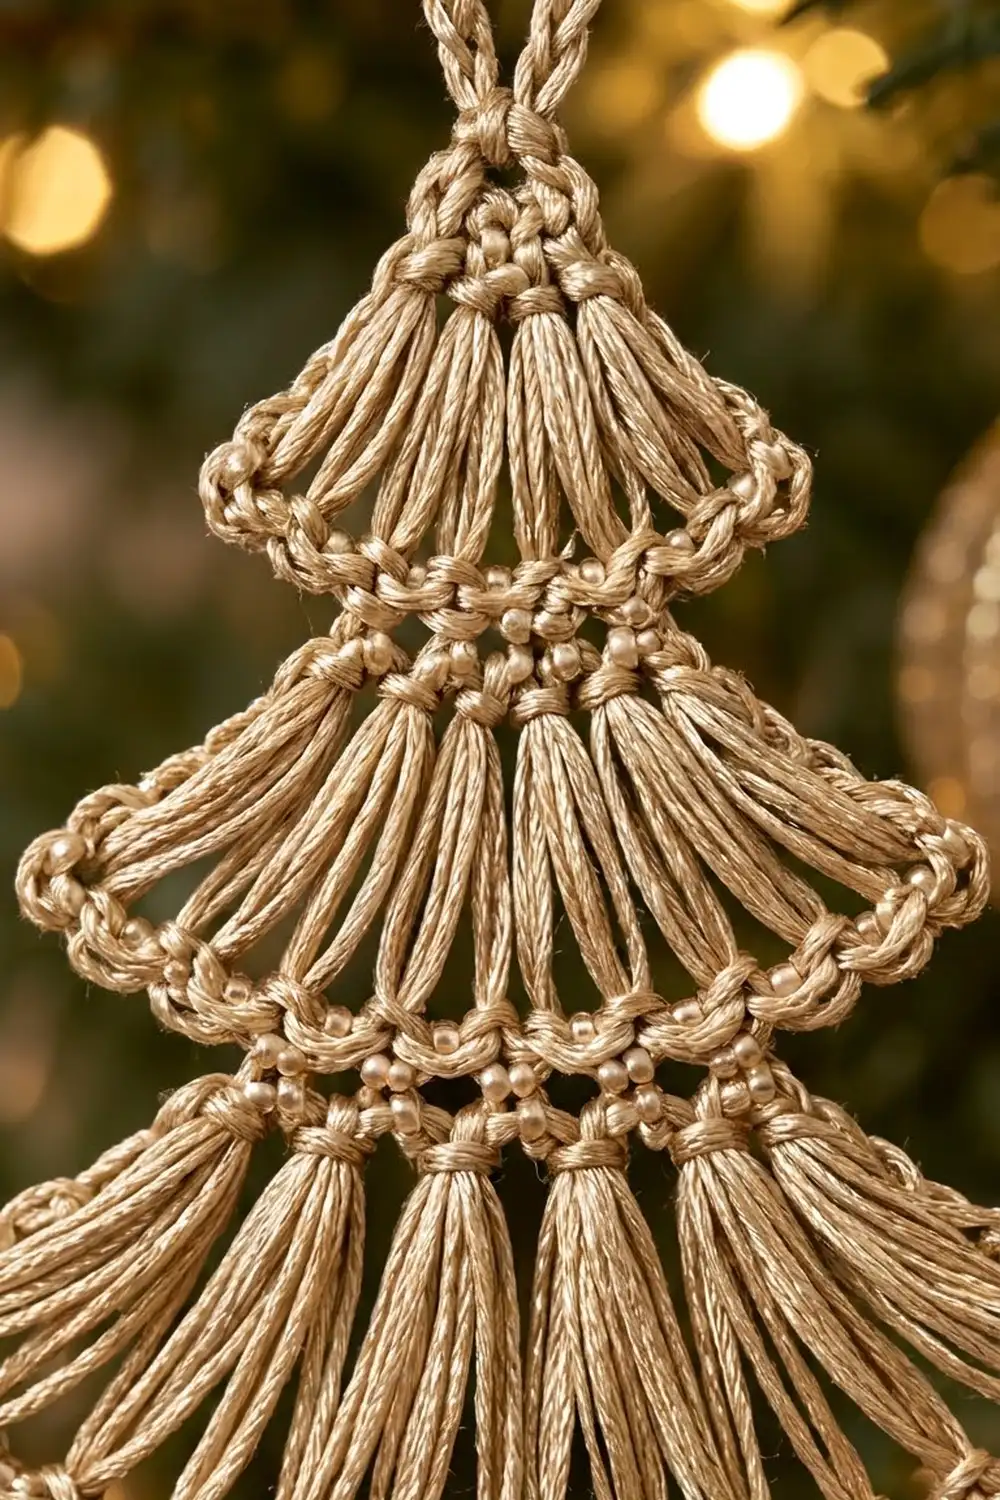
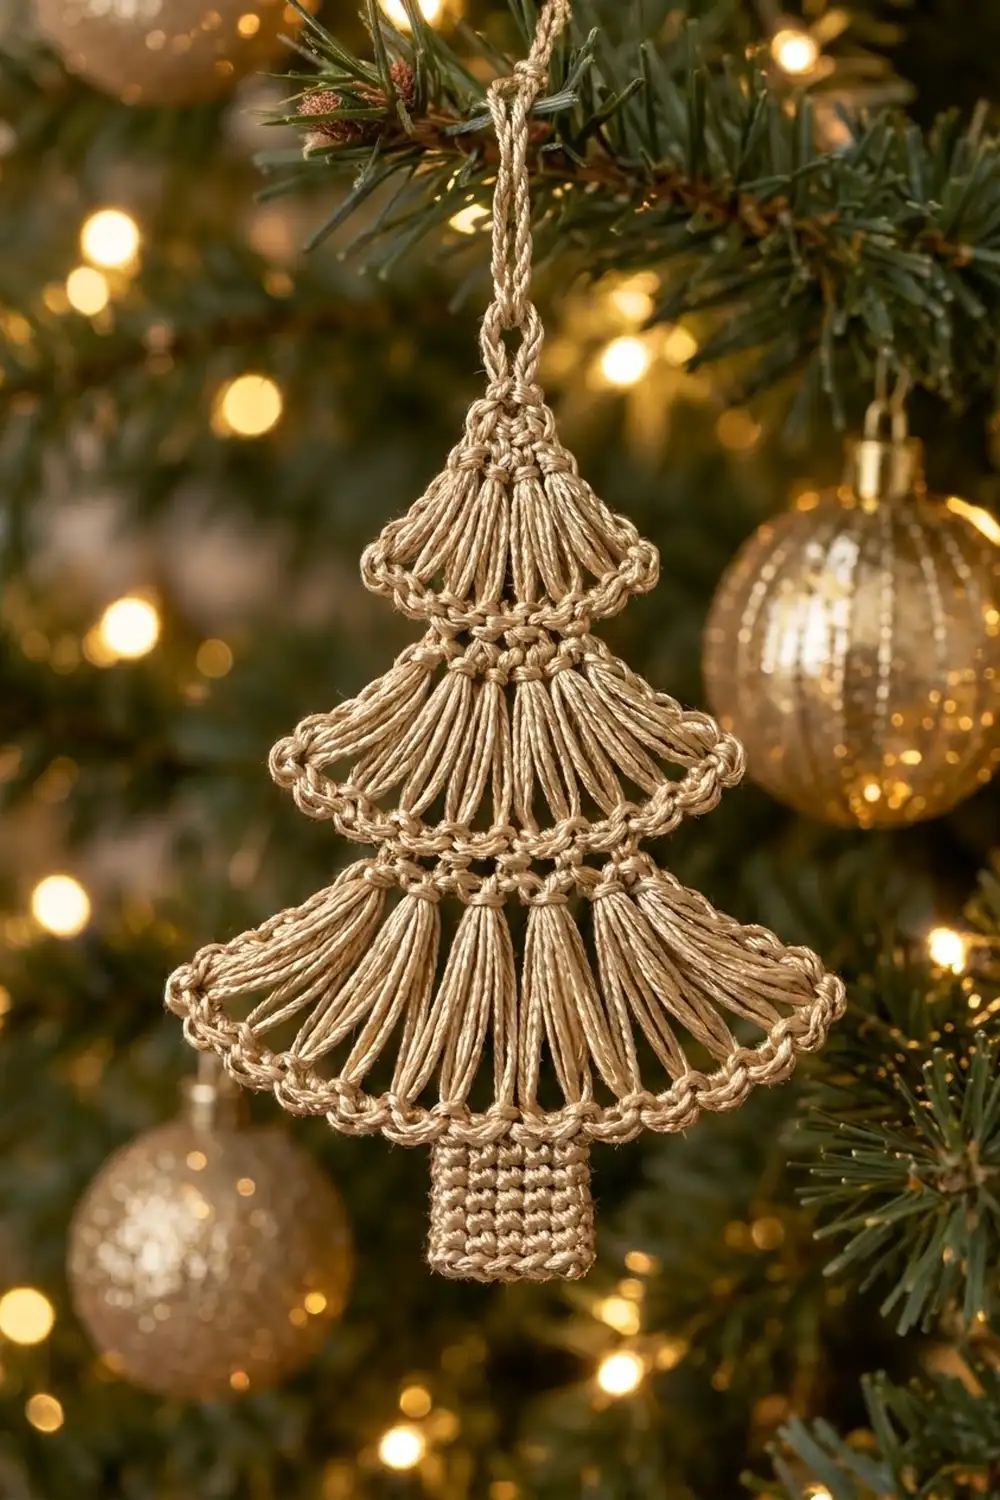
The Golden Fan Christmas Tree is a flat, lacy ornament made in broomstick lace. It has three stacked tiers of long loops. In each tier, the loops are gathered into tight bundles at the top and fan out toward a wider, beaded lower edge. This gives the tree its pleated, airy look.
The ornament uses one color: a champagne-gold sport weight yarn with a soft twist and a slight sheen. A small rectangular trunk in single crochet sits under the bottom tier. A chain loop at the tip lets you hang the tree on a branch, in a window or on a gift.
This pattern uses US crochet terms. The finished ornament measures 5 in (12.7 cm) wide at the bottom tier and 6.5 in (16.5 cm) tall from the trunk to the tip. With the hanging loop it is about 7.5 in (19.1 cm) tall.
The tree is one single piece, worked from the bottom up. You start with the wide base row of the bottom tier and build the three broomstick tiers in turn, with a two-row increase band between tiers. Then you work the trunk into the foundation chain and finish with a reverse single crochet edge along the bottom tier.
Finished Size and Construction
- Finished size: 5 in (12.7 cm) wide x 6.5 in (16.5 cm) tall, plus a 1 in (2.5 cm) hanging loop
- Skill level: Intermediate (basic broomstick lace)
- Terminology: US crochet terms
- Yarn weight: Sport (#2)
- Hook: 3.25 mm (US D/3)
- Loop stick: 3/4 in (1.9 cm) dowel or 19 mm (US 35) knitting needle
- Number of pieces: 1
- Layout: Single ornament, three tiers stacked vertically, trunk centered below
- Piece size: 5 in (12.7 cm) x 6.5 in (16.5 cm)
- Size before border: 5 in (12.7 cm) x 6.5 in (16.5 cm). The border sits on the bottom edge of Tier 1 and does not change the outer measurements.
- Border depth: 1 row of reverse single crochet, about 0.125 in (0.3 cm)
Materials
Choose a smooth, firmly twisted sport weight yarn in cotton or a cotton blend. A plied yarn shows the loop bundles clearly. A light metallic strand adds sparkle. Avoid fuzzy yarns, because the loops will blur together.
- Champagne gold: 12 g, about 36 m (39 yd)
Tools:
- 3.25 mm (US D/3) crochet hook
- 3/4 in (1.9 cm) wooden dowel or 19 mm (US 35) knitting needle
- Tapestry needle
- Scissors
- 2 locking stitch markers
- Blocking mat, rustproof pins and a spray bottle
- Optional: fabric stiffener or starch
The yarn amount includes a margin of about 25% for your gauge test and tails. One ornament uses roughly 9 g.
Abbreviations (US Terms)
- ch – chain
- sc – single crochet
- sc2tog – single crochet 2 together
- sl st – slip stitch
- rev sc – reverse single crochet (crab stitch)
- st(s) – stitch(es)
- RS / WS – right side / wrong side
Special stitches
Broomstick loop (BL): Insert hook in the next st, yarn over and pull up a loop. Lengthen the loop until it slips over the stick, and leave it on the stick.
BL group (2 sc): Slide the hook through the center of the next 5 loops together and lift them off the stick. Yarn over, pull up a loop, yarn over and pull through both loops on hook (1 sc made). Work 1 more sc into the same group. This gathers 5 loops into a bundle 2 sts wide.
Reverse single crochet (rev sc): Working from left to right, insert hook in the next st to the right, yarn over, pull up a loop, yarn over and pull through both loops on hook.
Gauge and Checkpoints
Gauge: 24 sc and 28 rows = 4 in (10.2 cm) in sc with a 3.25 mm hook. That is 6 sc and 7 rows per 1 in (2.5 cm).
Test the bottom tier before you go on. Work the foundation and Rows 1–3 below, then measure:
- Row 1: 30 sc should measure 5 in (12.7 cm) wide.
- Row 3: the gathered row of 12 sc should measure 2 in (5.1 cm) wide.
- Loops: the lifted loops should hang about 1.25 in (3.2 cm) long.
- Tier 1 height: about 1.5 in (3.8 cm) from the foundation to the top of Row 3.
If Row 1 is more than 0.25 in (0.6 cm) wider than 5 in (12.7 cm), go down one hook size. If it is more than 0.25 in (0.6 cm) narrower, go up one hook size. If the loops are too short or too long, change the stick instead of the hook. A thicker stick makes longer loops.
If your test tier matches, carry straight on to Tier 2. If it doesn’t, pull it out and start again with the new hook or stick.
Pattern
All broomstick sections are worked with the RS facing. Each loop row runs from left to right, and each gathering row runs back from right to left, ending at the left edge. Each increase band is one WS row and one RS row, so you always end at the left edge, ready for the next loop row.
Tier 1 (Bottom Tier)
Foundation: Ch 31.
Row 1 (RS): Sc in 2nd ch from hook and in each ch across. Do not turn. (30 sc)
The piece now measures 5 in (12.7 cm) wide.
Row 2 (loop row): Lengthen the loop on your hook and slip it onto the stick (1 loop). Working back across Row 1 from left to right, work 1 BL in each remaining st. (30 loops)
Row 3 (gathering row): Slide the loops off the stick as you work. Start with ch 1 (does not count as a st), then work 1 BL group over the first 5 loops. Work 1 BL group over each following set of 5 loops. (6 groups x 2 sc = 12 sc)
This is a conversion row: 30 loops become 12 sc. The top of Tier 1 now measures 2 in (5.1 cm) wide, and the tier is about 1.5 in (3.8 cm) tall. You should see 6 bundles, each pinched at the top and fanning toward the base row.
Tier 2 (Middle Tier)
Row 4 (WS increase): Ch 1, turn. 2 sc in each of the next 11 sts, 3 sc in the last st. (12 sts worked + 13 extra = 25 sc)
Row 5 (RS): Ch 1, turn. Sc in each st across. Do not turn. (25 sc)
This band flares outward and forms the beaded lower edge of Tier 2. Flattened gently, it measures about 4.2 in (10.7 cm) across.
Row 6 (loop row): Slip the loop on your hook onto the stick, then work 1 BL in each remaining st from left to right. (25 loops)
Row 7 (gathering row): Ch 1, then work 1 BL group over each set of 5 loops. (5 groups x 2 sc = 10 sc)
Checkpoint: the top of Tier 2 measures about 1.7 in (4.3 cm) wide. Tier 2 alone is about 1.75 in (4.4 cm) tall. The tree measures about 3.25 in (8.3 cm) from the foundation to the top of Row 7.
Tier 3 (Top Tier)
Row 8 (WS increase): Ch 1, turn. 2 sc in each st across. (10 sts worked + 10 extra = 20 sc)
Row 9 (RS): Ch 1, turn. Sc in each st across. Do not turn. (20 sc)
This band measures about 3.3 in (8.4 cm) across.
Row 10 (loop row): Slip the loop on your hook onto the stick, then work 1 BL in each remaining st. (20 loops)
Row 11 (gathering row): Ch 1, then work 1 BL group over each set of 5 loops. (4 groups x 2 sc = 8 sc)
Checkpoint: the top of Tier 3 measures about 1.3 in (3.3 cm) wide. The tree measures about 5 in (12.7 cm) from the foundation to the top of Row 11.
Tip and Hanging Loop
Row 12 (WS): Ch 1, turn. Sc2tog 4 times. (4 sc)
Row 13: Ch 1, turn. Sc2tog twice. (2 sc)
Row 14: Ch 1, turn. Sc2tog. (1 sc)
Hanging loop: Ch 14, sl st in the top of the Row 14 st. Fasten off, leaving a 6 in (15.2 cm) tail.
Thread the tail onto the tapestry needle. Wrap it twice around the base of the loop to make a small, firm knot at the tip, then weave it in. The loop should stand about 1 in (2.5 cm) tall.
Checkpoint: the tree measures about 5.5 in (14.0 cm) from the foundation to the tip, not counting the loop.
Trunk
Turn the tree upside down so the foundation chain is on top and the RS faces you. The foundation chain has 30 free loops. The center 6 are loops 13 through 18. Place a marker in loop 13 and another in loop 18.
Row 1: Join yarn in marked loop 13. Ch 1, sc in the same loop and in each of the next 5 loops, ending in loop 18. (6 sc)
Rows 2–7: Ch 1, turn. Sc in each st across. (6 sc)
Fasten off and weave in the ends. The trunk measures 1 in (2.5 cm) wide and 1 in (2.5 cm) tall. The whole tree now measures 6.5 in (16.5 cm) tall.
Border
The border is one row of reverse single crochet along the lower edge of Tier 1. You work it into the free loops of the foundation chain on both sides of the trunk. It gives the bottom tier the same beaded, rope-like edge that the increase bands give Tiers 2 and 3.
Border gauge: Work 1 rev sc in each free loop. The rev sc should match the sc gauge of 6 sts per 1 in (2.5 cm), so the edge stays flat and doesn’t ruffle or pull in.
Hold the tree right side up with the RS facing you.
Left section: Join yarn in the free loop at the left corner of the foundation. Ch 1, then work rev sc in the same loop and in each free loop, moving right toward the trunk. (12 rev sc) Sl st into the side of trunk Row 1. Fasten off.
Right section: Join yarn in the first free loop to the right of the trunk (loop 12 counted from the right edge). Ch 1, then work rev sc in the same loop and in each free loop, moving right to the corner. (12 rev sc) Fasten off.
Why the math works: The foundation has 30 free loops, and the trunk uses the center 6. That leaves 30 − 6 = 24 loops, split evenly as 12 on each side. Each section is 12 sts at 6 sts per inch, which is 2 in (5.1 cm). So 2 in + 1 in (trunk) + 2 in = 5 in (12.7 cm), exactly the width of Row 1. No stitches are added or skipped, so the edge lies flat.
Final Blocking
- Weave in all remaining tails along the sc rows, never through the loops.
- Soak the ornament in cool water for 10 minutes, or spray it until it is fully damp.
- Press out the excess water in a towel. Do not wring.
- Lay the tree RS up on the blocking mat.
- Pin the bottom corners of Tier 1 so Row 1 measures 5 in (12.7 cm) wide.
- Pin the trunk straight so it measures 1 in (2.5 cm) square.
- Pin each increase band flat: about 4.2 in (10.7 cm) for Tier 2 and about 3.3 in (8.4 cm) for Tier 3.
- Straighten each loop bundle with your fingers so the loops fan evenly toward the band below.
- Pin the tip so the total height is 6.5 in (16.5 cm). Stand the hanging loop upright.
- For a crisp ornament, brush on fabric stiffener now. Let it dry completely before you unpin it.
Final Quality-Control Checklist
- Tier 1 has 6 bundles, Tier 2 has 5 and Tier 3 has 4.
- Every bundle holds exactly 5 loops.
- Row 1 measures 5 in (12.7 cm) wide.
- The trunk is centered, 6 sts wide and 7 rows tall.
- The border has 12 rev sc on each side of the trunk.
- The tree is 6.5 in (16.5 cm) tall without the loop.
- The hanging loop is secure and the tip knot is tight.
- No tails show on the RS.
- The ornament hangs straight without twisting.
Troubleshooting
Loops are uneven in length. Keep the stick still and pull each loop just far enough to slide on. Don’t tug loops that are already on the stick.
A bundle has 4 or 6 loops. Count the loops on the stick before Rows 3, 7 and 11. You need 30, 25 and 20. If the count is wrong, pull back and redo the loop row.
Tiers look narrow and stiff. Your increase rows may be tight. Loosen your tension on Rows 4 and 8, or use a hook one size larger just for those rows.
Bottom edge ruffles. The border is too loose. Rework it with a smaller hook, keeping 12 sts per side.
Trunk is off-center. Recount the foundation loops and rejoin in loop 13.
The tree curls. Wet block it again and use stiffener.
Care
Spot clean or hand wash in cool water, then reshape and dry flat. Store the ornament flat between sheets of tissue paper so the loops keep their fan shape.
Final Notes
The whole ornament follows one simple measurement chain. Row 1 sets the width: 30 sc at 6 sts per inch gives 5 in (12.7 cm). Each tier gathers 5 loops into 2 sc, so 30 loops become 12 sc, 25 loops become 10 sc and 20 loops become 8 sc. The increase bands set the next two tiers at 25 sc and 20 sc wide.
The heights stack up as 1.5 in (3.8 cm) for Tier 1, 1.75 in (4.4 cm) each for Tiers 2 and 3, 0.5 in (1.3 cm) for the tip and 1 in (2.5 cm) for the trunk. That adds up to 6.5 in (16.5 cm). The border uses the 24 free foundation loops beside the trunk, 12 per side, so the base stays exactly 5 in (12.7 cm).
Check your gauge on Tier 1 and count your loops before each gathering row, and the tree will come out right every time.
Happy crocheting!