

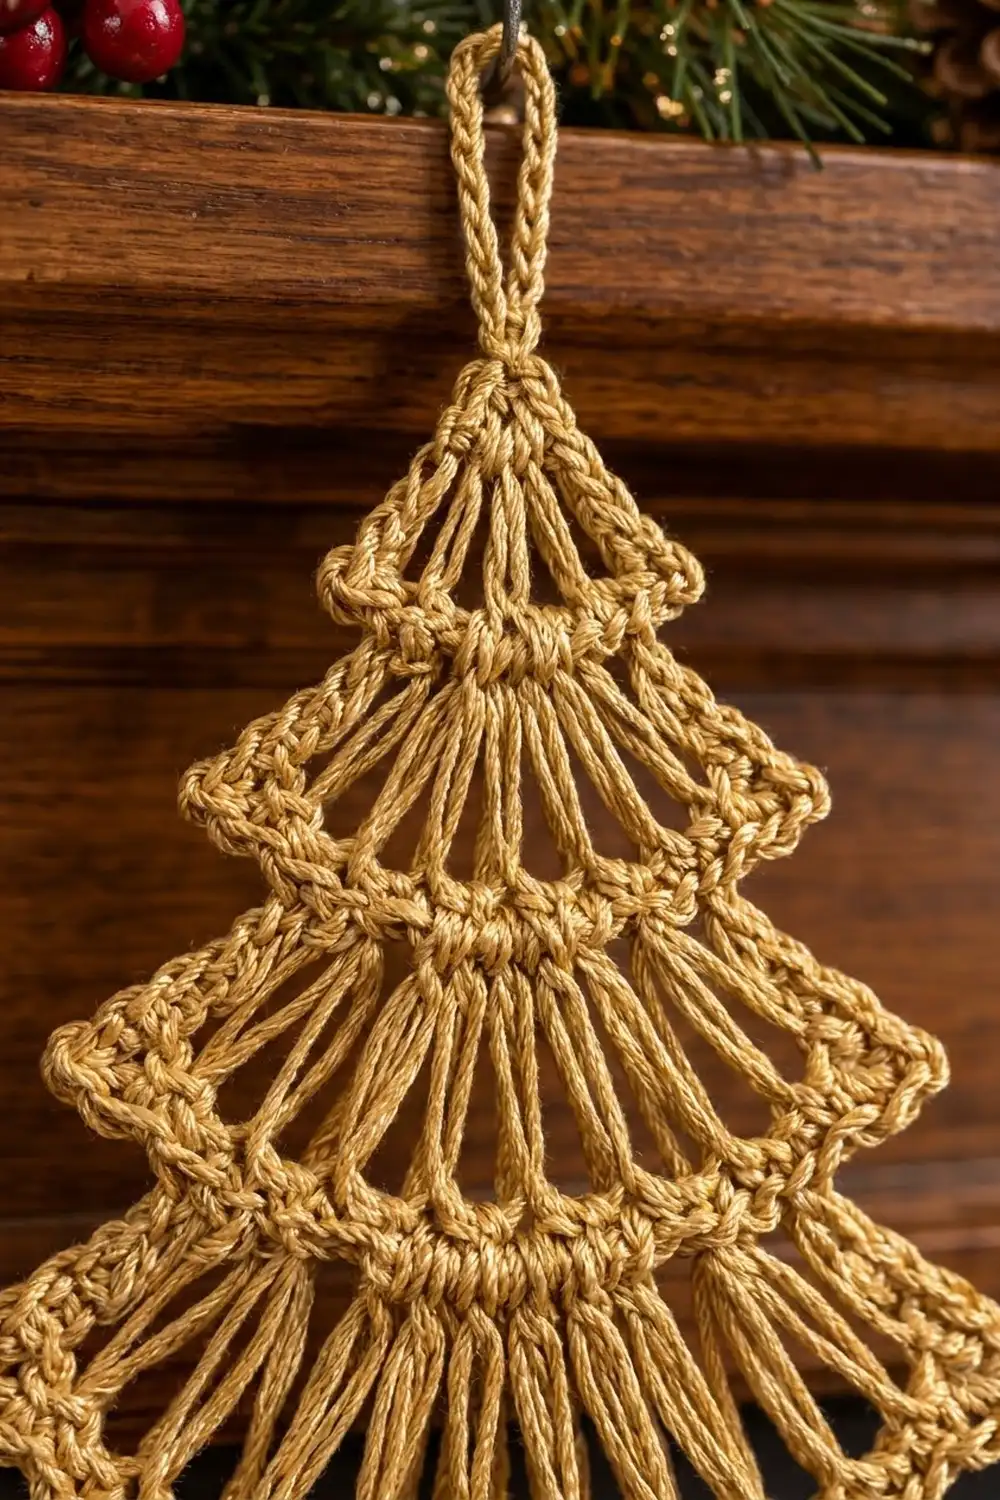
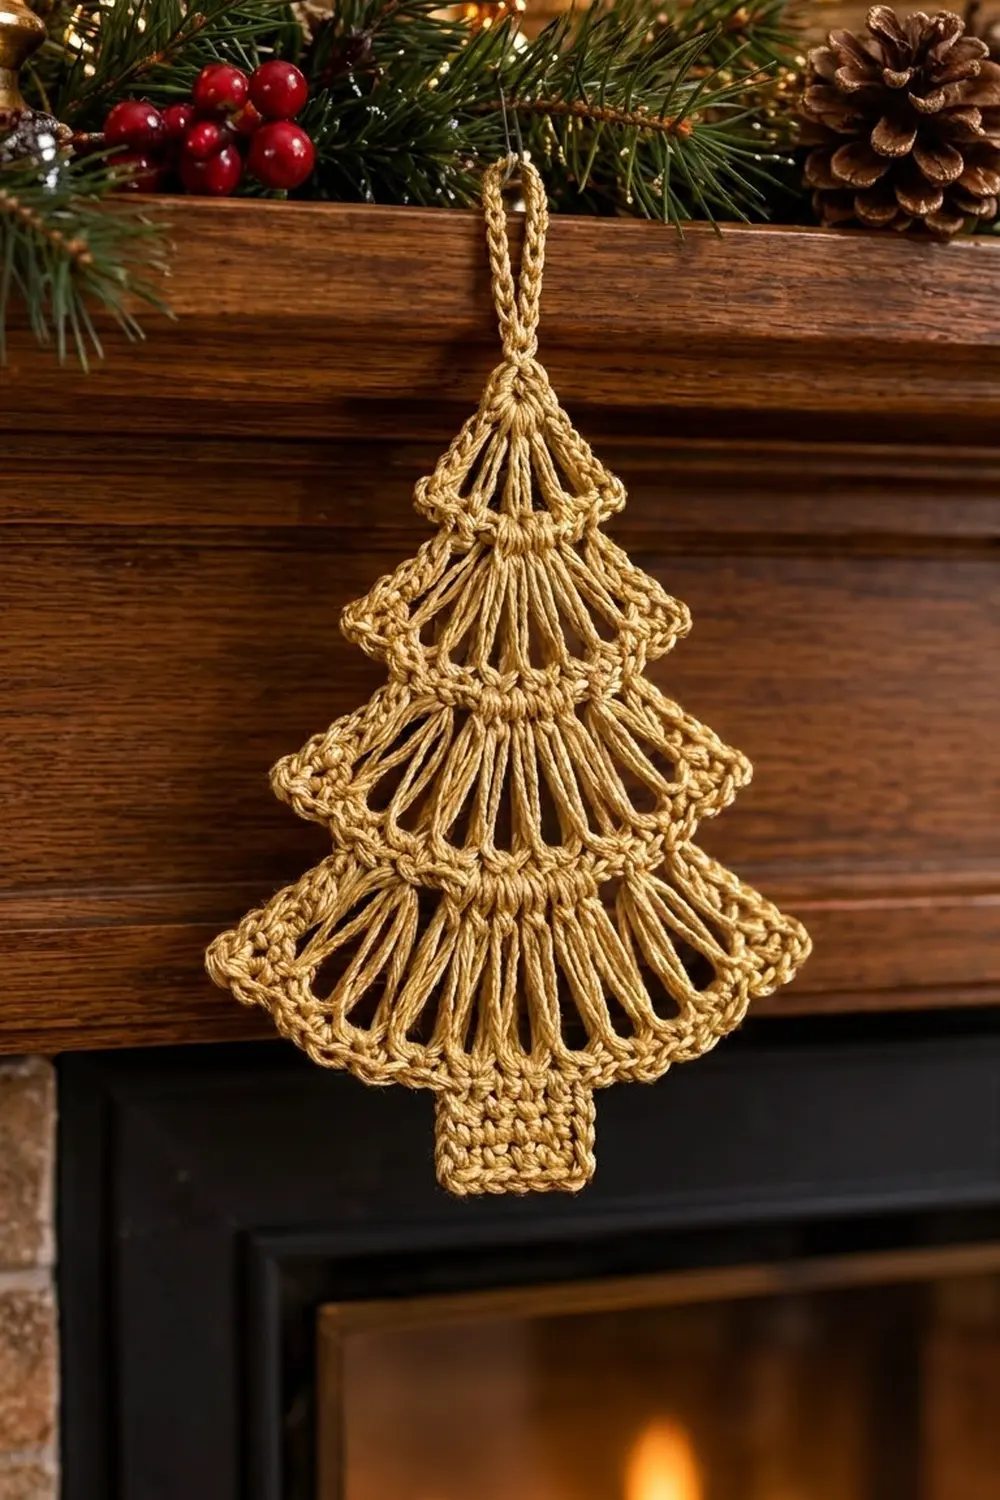
The Golden Cascade Tree is a flat, lacy ornament with four tiers of long fan strands. Each tier starts at a narrow band, opens into a fan, and ends in a firm single crochet edge. Because each edge is wider than the band beneath it, the tiers look layered, like branches on a real tree.
The sample uses one color, a warm golden tan with a soft sheen. Against a wooden mantel or green branches it reads as vintage gold. The style is simple and classic, and it works well as a tree ornament, a gift tag, or a mantel accent.
This pattern uses US crochet terms. The finished ornament measures 4.9 in (12.4 cm) wide by 5.5 in (14.0 cm) tall. Including the hanging loop, it is 6.75 in (17.1 cm) tall.
You make the tree in one piece from the bottom up, turning each row. First you crochet the trunk. Then you extend it into the wide base edge and build four tiers, each with three rows: edge, fan, and band. Two decrease rows close the peak. Last, you work a two-round rope border around the whole outline and add the hanging loop.
Finished Size and Construction
- Finished size: 4.9 in (12.4 cm) wide × 5.5 in (14.0 cm) tall
- Height with hanging loop: 6.75 in (17.1 cm)
- Skill level: Intermediate
- Terminology: US crochet terms
- Yarn weight: Sport (#2), cotton or cotton-blend
- Hook: 2.75 mm (US C/2)
- Number of pieces: 1
- Layout: Single flat motif with no joining
- Piece size before border: 4.5 in (11.4 cm) wide × 5.1 in (13.0 cm) tall
- Border depth: 0.2 in (0.5 cm) on every edge
Materials
Yarn: Use a smooth sport weight cotton or cotton blend. Mercerized or metallic-blend yarns make the fan strands stand out clearly. Fuzzy yarns hide the open spaces, so avoid them.
- Golden tan (Color A): 15 g, about 45 m (49 yd)
Tools:
- 2.75 mm (US C/2) crochet hook
- Tapestry needle
- Scissors
- 2 stitch markers
- Blocking mat and rust-proof pins
- Optional: fabric stiffener or a starch spray
- Ruler or measuring tape
The yarn amount includes a margin of about 25% for your gauge swatch and weaving in ends.
Abbreviations (US Terms)
- ch – chain
- sc – single crochet
- dtr – double treble crochet (yo twice, insert hook, pull up loop, [yo, pull through 2 loops] 3 times)
- sc3tog – single crochet 3 together
- sk – skip
- sl st – slip stitch
- st(s) – stitch(es)
- yo – yarn over
- rev sc – reverse single crochet (crab stitch)
Special stitch – foundation single crochet extension (fsc): Insert your hook into the base (the chain part) of the last stitch you made. Yo and pull up a loop. Yo and pull through 1 loop; this makes the base chain. Yo and pull through 2 loops. Each fsc counts as one stitch and adds width without a separate foundation chain.
Note: The ch 1 at the start of a row does not count as a stitch. The ch 5 at the start of a fan row counts as the first dtr.
Gauge and Checkpoints
Gauge: 13 sc and 14 rows of sc = 2 in (5.1 cm). One dtr row measures 0.75 in (1.9 cm) tall once blocked.
Before starting, chain 14 and work 14 rows of sc. Then add one row of dtr, worked into every stitch. Block the swatch and measure it. Checking gauge on a small swatch is quicker than finding out halfway through the tree.
Checkpoints (measured flat, before blocking may vary by about 0.1 in / 0.3 cm):
- After Row 6 (trunk): 1.1 in (2.8 cm) wide, 0.9 in (2.3 cm) tall
- After Row 7: base edge is 4.5 in (11.4 cm) wide
- After Row 9: 1.9 in (4.8 cm) tall from the bottom of the trunk
- After Row 12: 2.9 in (7.4 cm) tall
- After Row 15: 4.0 in (10.2 cm) tall
- After Row 19: 5.1 in (13.0 cm) tall
- After border: 4.9 in × 5.5 in (12.4 cm × 14.0 cm)
If your piece is too big: Go down to a 2.5 mm hook. If only the fans are too tall, keep each dtr shorter by pulling the first loop up only to the height of the hook.
If your piece is too small: Go up to a 3.0 mm hook. If only the fans are short, lift the first loop of each dtr slightly before you work the stitch off.
Pattern
Trunk
Ch 8.
Row 1: Sc in the 2nd ch from the hook and in each ch across. Turn. (7 sc)
Rows 2–6: Ch 1, sc in each st across. Turn at the end of Rows 2–5 only. At the end of Row 6, do not turn. (7 sc per row)
Checkpoint: the trunk should measure 1.1 in (2.8 cm) wide and 0.9 in (2.3 cm) tall.
Tier 4 (Bottom Tier)
Row 7 (base edge): Ch 12. Sc in the 2nd ch from the hook and in each of the next 10 ch, for 11 sc. Sc in each of the 7 trunk sts, for 18 sts. Then work 11 fsc, starting in the last sc made. Turn. (29 sts: 11 + 7 + 11)
The trunk now sits exactly in the center, with 11 sts extending past it on each side.
Row 8 (fan): Ch 5 (counts as first dtr). Sk the next st, dtr in the next st. Repeat from * 13 more times. Turn. (15 dtr)
The last dtr goes into st 29, because 1 + (2 × 14) = 29. The dtr strands fan out from the wide edge and come together at the top. The skipped stitches leave the open spaces between strands.
Row 9 (band): Ch 1, sc in each dtr across, working the last sc into the top of the ch-5. Turn. (15 sc)
Checkpoint: the band measures 2.3 in (5.8 cm) wide. The total height is 1.9 in (4.8 cm).
Tier 3
Row 10 (edge, increase row): Ch 1. Sc in the next st, 2 sc in each of the next 2 sts. Repeat from * 4 more times. Turn. (25 sc: 15 worked into + 10 increases)
This row flares beyond the band below it. That flare creates the stepped tier outline.
Row 11 (fan): Ch 5 (counts as dtr). Sk the next st, dtr in the next st. Repeat from * 11 more times. Turn. (13 dtr)
Row 12 (band): Ch 1, sc in each dtr across, with the last sc in the top of the ch-5. Turn. (13 sc)
Checkpoint: the band measures 2.0 in (5.1 cm) wide. The total height is 2.9 in (7.4 cm).
Tier 2
Row 13 (edge, increase row): Ch 1, sc in the first st. 2 sc in each of the next 2 sts, sc in the next st. Repeat from * 3 more times. Turn. (21 sc: 13 worked into + 8 increases)
Row 14 (fan): Ch 5 (counts as dtr). Sk the next st, dtr in the next st. Repeat from * 9 more times. Turn. (11 dtr)
Row 15 (band): Ch 1, sc in each dtr across, with the last sc in the top of the ch-5. Turn. (11 sc)
Checkpoint: the band measures 1.7 in (4.3 cm) wide. The total height is 4.0 in (10.2 cm).
Tier 1 (Top Tier and Peak)
Row 16 (edge, increase row): Ch 1, 2 sc in the first st. Sc in the next st, 2 sc in the next st. Repeat from * 4 more times. Turn. (17 sc: 11 worked into + 6 increases)
Row 17 (fan): Ch 5 (counts as dtr). Sk the next st, dtr in the next st. Repeat from * 7 more times. Turn. (9 dtr)
Row 18 (gather): Ch 1, sc3tog over the next 3 sts 3 times. Work the final sc3tog over the last 2 dtr and the top of the ch-5. Turn. (3 sts)
Row 19 (peak): Ch 1, sc3tog over all 3 sts. Do not turn and do not fasten off. (1 st)
Checkpoint: the tree measures 4.5 in (11.4 cm) at its widest point and 5.1 in (13.0 cm) tall. That is the piece size before the border.
Tier edge widths before border (blocked): Tier 1 is 2.6 in (6.6 cm), Tier 2 is 3.2 in (8.1 cm), Tier 3 is 3.8 in (9.7 cm), and Tier 4 is 4.5 in (11.4 cm).
Border
Border gauge: Work 1 sc into the end of each sc row and 5 sc into the end of each dtr row. Work 1 sc into each foundation stitch along the bottom.
A dtr row is 0.75 in (1.9 cm) tall, but its end strand sits at a slant, so the edge there is about 0.77 in (2.0 cm) long. At 6.5 sc per inch, 5 sc fill that length. An sc row is about 0.14 in tall, which is close to the width of one sc, so 1 sc per row end lies flat.
Round 1: Ch 1, then sc in the peak st (Row 19). This is the apex: 1 sc.
Work down the first side along the row ends:
- Tier 1: 1 sc in Row 19, 1 sc in Row 18, 5 sc in Row 17, 1 sc in Row 16 → 8 sc
- Tier 2: 1 sc in Row 15, 5 sc in Row 14, 1 sc in Row 13 → 7 sc
- Tier 3: 1 sc in Row 12, 5 sc in Row 11, 1 sc in Row 10 → 7 sc
- Tier 4: 1 sc in Row 9, 5 sc in Row 8, 1 sc in Row 7 → 7 sc
- Underside of the base extension: 1 sc in each of the 11 base sts (free chain loops on one side, fsc bases on the other) → 11 sc
- Trunk side: 1 sc in each of the row ends of Rows 6 to 1 → 6 sc
Side total: 8 + 7 + 7 + 7 + 11 + 6 = 46 sc.
Along the trunk bottom, work 1 sc in each free loop of the foundation chain: 7 sc.
Work up the second side in mirror order (trunk, underside, Tier 4, Tier 3, Tier 2, Tier 1): 46 sc.
Sl st to the first sc to join. (100 sc: 1 + 46 + 7 + 46)
Round 2: Ch 1. Working from left to right, rev sc in each st around. Sl st to the first rev sc to join. (100 rev sc)
Hanging loop: Ch 18, then sl st into the same apex st. Fasten off, leaving a 6 in (15.2 cm) tail. Weave the tail back through the loop chains to make the loop stronger.
Why the math works: Both sides of the tree have exactly the same row structure, so each side gets the same 46 stitches. Round 2 works one stitch into each stitch of Round 1, so its count stays at 100. Each border round adds about 0.1 in (0.3 cm), so the two rounds add 0.2 in (0.5 cm) to every edge. That turns 4.5 × 5.1 in (11.4 × 13.0 cm) into 4.9 × 5.5 in (12.4 × 14.0 cm).
Final Blocking
- Weave in all ends along the trunk or the band rows, where they won’t show.
- Soak the ornament in cool water for 10 minutes, then roll it in a towel and press out the extra water.
- Lay it flat on the blocking mat and pin the trunk square at 1.5 in (3.8 cm) wide.
- Pin the outer corners of each tier edge symmetrically. Target widths, including the border, are 3.0 in (7.6 cm) for Tier 1, 3.6 in (9.1 cm) for Tier 2, 4.2 in (10.7 cm) for Tier 3, and 4.9 in (12.4 cm) for Tier 4.
- Spread the dtr strands evenly so the open spaces look uniform.
- Pin the peak so the total height measures 5.5 in (14.0 cm).
- If you are using stiffener, brush it on now and let it dry completely, at least 12 hours, before removing the pins.
Final Quality-Control Checklist
- Trunk has 7 sts and sits centered under the base, with 11 sts on each side.
- Fan counts are 15, 13, 11, and 9 dtr, from the bottom tier to the top.
- Band counts are 15, 13, and 11 sc.
- Edge counts are 29, 25, 21, and 17 sc.
- Border Rounds 1 and 2 have 100 sts each.
- Both sides of the tree are mirror images.
- The hanging loop is centered at the apex and holds firmly.
- Blocked size is 4.9 × 5.5 in (12.4 × 14.0 cm).
Troubleshooting
Tiers curl into cups: The increase rows are tight. Block firmly, and work the edge rows with a slightly looser tension.
Fan strands look uneven: Pull each dtr’s first loop to the same height. Count your stitches to confirm you skipped exactly one stitch each time.
Border ripples along the fans: Use 4 sc per dtr row end instead of 5.
Border pulls in along the fans: Use 6 sc per dtr row end. Then add 1 sc per extra stitch to the round total. For example, 6 sc on all 8 fan row ends gives 108 sts.
Trunk is off-center: Recount Row 7. Each side must have 11 sts.
Peak is blunt: Make sure Row 18 has exactly 3 sts before the final sc3tog.
Care
Hand wash in cool water, press flat, and dry pinned to shape. If you stiffened the ornament, store it flat in tissue between seasons.
Final Notes
The measurement chain works like this. The 7-stitch trunk is 1.1 in (2.8 cm) wide, and the 29-stitch base is 4.5 in (11.4 cm) wide. The four tiers then step up to a height of 5.1 in (13.0 cm). The 100-stitch, two-round border adds 0.2 in (0.5 cm) all around, for a finished size of 4.9 × 5.5 in (12.4 × 14.0 cm). The hanging loop adds 1.25 in (3.2 cm). If your gauge matches at the trunk, every later checkpoint should match too.
Happy crocheting!