

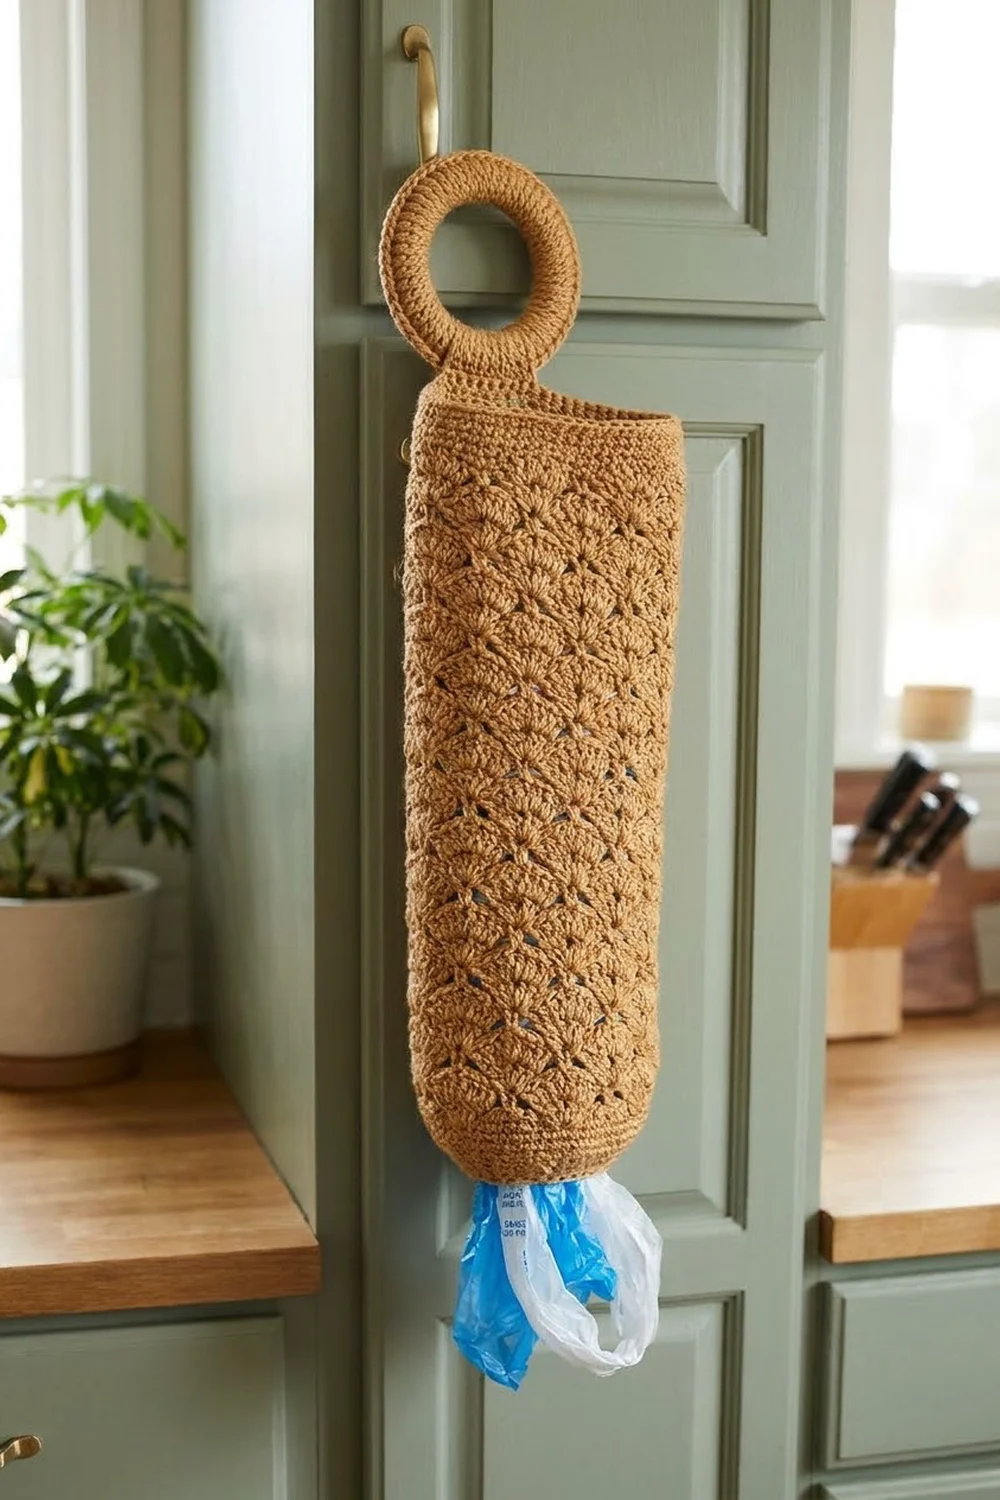
Every kitchen collects plastic bags, and they rarely look tidy. The Caramel Shell Plastic Bag Holder fixes that with a long, soft tube that you stuff from the top and pull from the bottom. It hangs from a single round ring, so it fits on a door hook, a cabinet knob, or a peg by the back door.
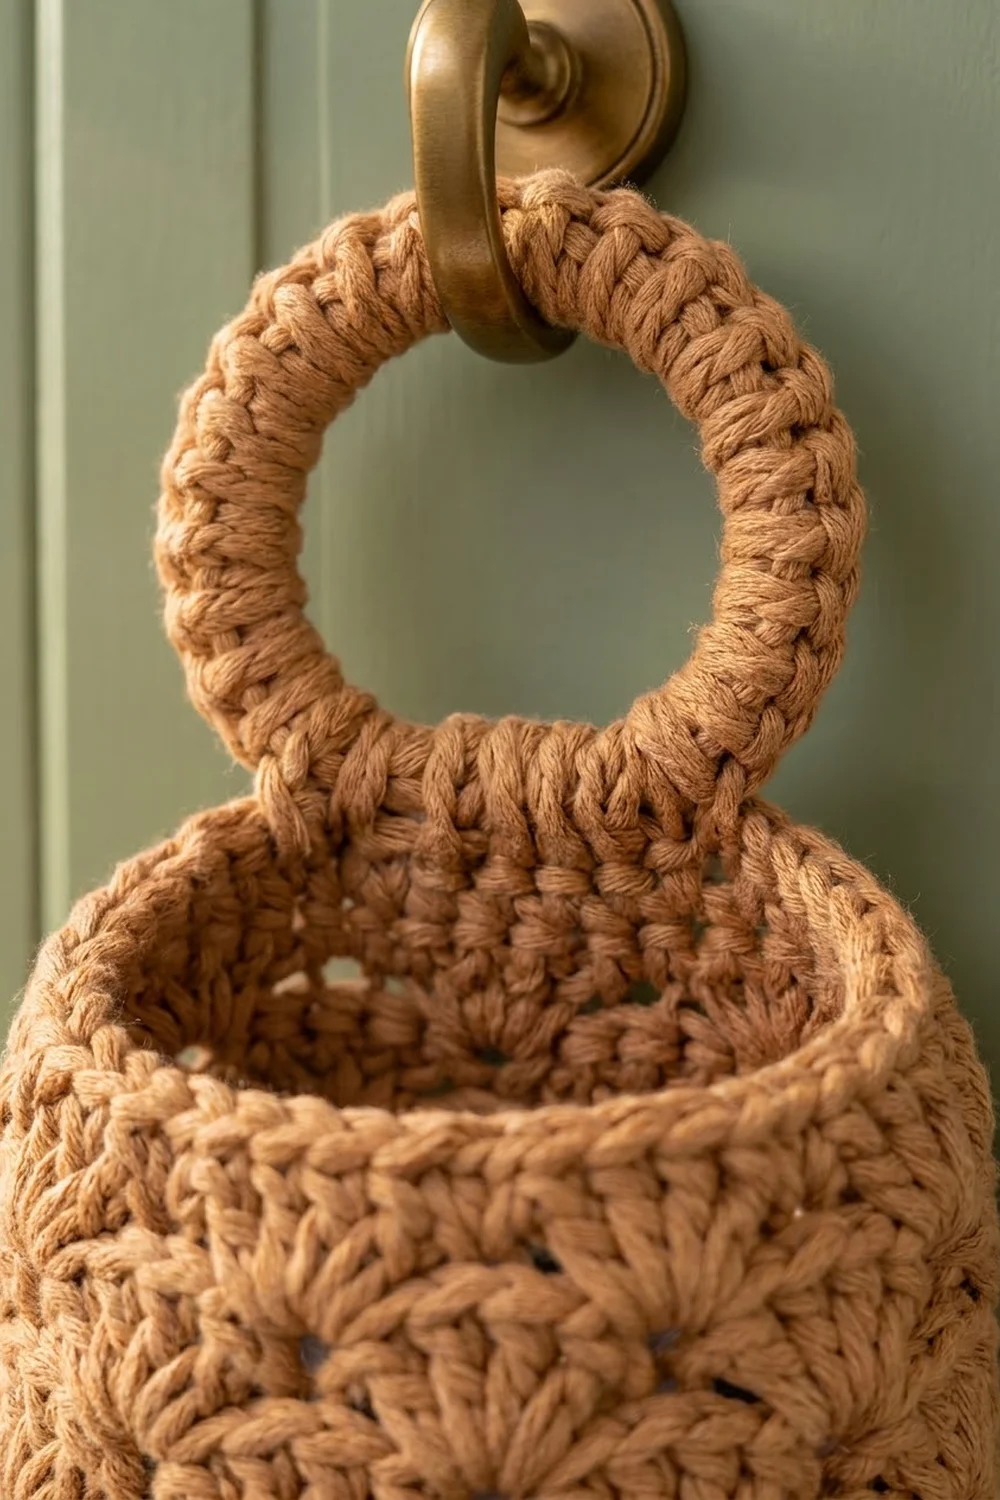
The design is worked in one warm caramel color. The body is covered in staggered shells of 5 double crochet, so each round of fans sits between the fans of the round below. Firm single crochet rounds frame the rim and the small bottom opening, and a thick, packed ring finishes the top.
This pattern uses US crochet terms. The finished holder is 6 in (15.2 cm) wide when flat and 12 in (30.5 cm) around, and the body is 16.75 in (42.5 cm) tall. With the ring, it is about 20.25 in (51.4 cm) tall.
Construction is simple. You start at the bottom opening with a chain ring and add a few single crochet rounds that widen to the full tube. Then you work alternating shell rounds up the body. Three single crochet rounds make the top rim, and the ring is worked straight onto the back of the rim, so there is no sewing.
Finished Size and Construction
- Finished size: 6 in (15.2 cm) wide flat x 16.75 in (42.5 cm) tall body; about 20.25 in (51.4 cm) tall with ring
- Circumference: 12 in (30.5 cm)
- Skill level: Easy
- Terminology: US crochet terms
- Yarn weight: Worsted (#4), cotton or cotton blend
- Hook: 5.0 mm (US H-8)
- Number of pieces: 1 (tube with ring worked on)
- Layout: Seamless tube worked in joined rounds from the bottom up
- Piece size: 6 in (15.2 cm) flat width, 48 stitches around
- Size before top rim: 16 in (40.6 cm) tall after the last shell round
- Top rim depth: 0.75 in (1.9 cm), 3 rounds of single crochet
- Ring: 3.5 in (8.9 cm) outer diameter, 2 in (5.1 cm) opening, 0.75 in (1.9 cm) band
Materials
Choose a smooth worsted weight cotton or cotton blend. Cotton holds the shells crisply and keeps the tube from stretching too much under the weight of the bags. A slightly rounded, plied yarn shows the fan texture best.
- Caramel / tan: 200 g, about 380 m (415 yd)
These amounts include a margin of about 15 to 20 percent for your gauge check and small differences in tension.
Tools:
- 5.0 mm (US H-8) crochet hook
- Stitch marker
- Tapestry needle
- Scissors
- Measuring tape
- Blocking mat and pins
- Spray bottle with water
Abbreviations (US Terms)
- ch – chain
- sl st – slip stitch
- sc – single crochet
- dc – double crochet
- st(s) – stitch(es)
- sk – skip
- rnd(s) – round(s)
- beg – beginning
Special stitch – Shell: Work 5 dc in the same stitch.
Half shell: At the start of a round, ch 3 (counts as dc) and work 2 dc in the same stitch. At the end of that round, work 2 dc in that same stitch. Together they make one full 5-stitch shell split across the join.
Gauge and Checkpoints
Gauge in sc: 16 sts and 16 rnds = 4 in (10.2 cm), so 4 sts and 4 rnds = 1 in (2.5 cm).
Gauge in shell pattern: 2 repeats (12 sts) = 3 in (7.6 cm); 8 rnds = 5 in (12.7 cm).
Because this is a single piece, your first 12 rounds are your test piece. Work them, lay the tube flat, and measure before you go on.
Checkpoints:
- After Rnd 2: the opening measures 3 in (7.6 cm) across when flat, or 6 in (15.2 cm) around.
- After Rnd 4: the tube measures 6 in (15.2 cm) across when flat; total height is 1 in (2.5 cm).
- After Rnd 12: total height is 6 in (15.2 cm).
- After Rnd 20: total height is 11 in (27.9 cm).
- After Rnd 28: total height is 16 in (40.6 cm).
- After Rnd 31: total height is 16.75 in (42.5 cm).
If your piece is too big: go down to a 4.5 mm hook and start again. A wide tube will sag and let bags fall out.
If your piece is too small: go up to a 5.5 mm hook. A narrow tube is hard to stuff.
If the width is right but the height is off: add or remove shell rounds in pairs (one Rnd A plus one Rnd B). Each pair adds or removes 1.25 in (3.2 cm).
Body
Join each round with a sl st to the first stitch. Do not turn. The right side faces you throughout. If it helps, place a marker in the first stitch of each round.
Bottom Opening
Foundation: Ch 24 and join with a sl st to the first ch to form a ring, taking care not to twist the chain.
Rnd 1: Ch 1, sc in each ch around, join. (24 sc)
Rnd 2: Ch 1, sc in each st around, join. (24 sc)
These two rounds form the firm edge of the dispensing opening. The 24 stitches give 6 in (15.2 cm) of circumference, about 1.9 in (4.8 cm) in diameter. That lets one bag pull through at a time.
Widening to the Tube
Rnd 3: Ch 1, sc in next st, 2 sc in next st; repeat from * 12 times total, join. (36 sc)*
Rnd 4: Ch 1, sc in next 2 sts, 2 sc in next st; repeat from * 12 times total, join. (48 sc)*
These two increase rounds create the gently rounded bottom. The tube is now at its full 48 stitches and 12 in (30.5 cm) around.
Shell Pattern
The shell pattern is a 6-stitch repeat: one sc plus one 5-dc shell. 48 stitches hold exactly 8 repeats. Rnd A places shells over the sc stitches below. Rnd B places shells over the sc stitches of Rnd A, so every new shell sits between two shells of the round below.
Rnd 5 (Rnd A): Ch 1, sc in first st, sk 2 sts, 5 dc in next st, sk 2 sts, sc in next st; repeat from * 7 more times, leaving out the final sc on the last repeat, join to first sc. (8 shells and 8 sc = 48 sts)*
Rnd 6 (Rnd B): Ch 3 (counts as dc), 2 dc in same st as join (half shell made), sk 2 dc, sc in center dc of next shell, sk 2 dc, 5 dc in next sc; repeat from * 6 more times, sk 2 dc, sc in center dc of last shell, sk 2 dc, 2 dc in same st as beg ch-3, join to top of beg ch-3. (7 full shells + 2 half shells of 3 and 2 sts + 8 sc = 48 sts)*
Rnd 7 (Rnd A): Ch 1, sc in top of beg ch-3 (the center of the split shell), sk 2 dc, 5 dc in next sc, sk 2 dc, sc in center dc of next shell; repeat from * 7 more times, leaving out the final sc on the last repeat, join to first sc. (8 shells and 8 sc = 48 sts)*
Rnds 8–28: Work Rnd B on even rounds and Rnd A (as in Rnd 7) on odd rounds, ending with a Rnd B on Rnd 28. (48 sts in every round)
You now have 24 shell rounds: 12 of Rnd A and 12 of Rnd B. At 8 rounds per 5 in (12.7 cm), they add 15 in (38.1 cm), for a total height of 16 in (40.6 cm).
Count your shells every few rounds. There should always be 8 per round, counting the split shell in Rnd B as one. If you find 7 or 9, a skip was missed, and you should rip back to that round.
Top Rim and Hanging Ring
This section works like a border. It frames the open top and anchors the ring.
Rim gauge: 4 sc per 1 in (2.5 cm) and 4 rnds per 1 in (2.5 cm), the same as the bottom.
Top Rim
Rnd 29 (trim): Ch 1, sc in each st around, join. (48 sts worked 1 per existing st + 0 extra = 48 sc)
When you flatten the tube, the front holds 24 sc and the back holds 24 sc. Work into the top of the ch-3 just as you would any other dc.
Rnd 30: Ch 1, sc in each st around, join. (48 sc; 24 per side)
Rnd 31: Ch 1, sc in each st around, join. (48 sc; 24 per side)
Fasten off and weave in the end. The rim adds 0.75 in (1.9 cm), so the body is now 16.75 in (42.5 cm) tall.
Why the math works: 24 sc per side at 4 sts per inch gives 6 in (15.2 cm) per side. That is exactly the flat width of the shell body, which has 4 repeats of 6 sts per side, or 24 sts. Because no stitches are added, the rim stays the same width and does not flare or pull in.
Hanging Ring
Flatten the tube so the beginning-of-round join sits at one side fold. Find the 2 center stitches of the back side (stitches 12 and 13 of the 24 back stitches).
Set-up: With the right side facing, join yarn with a sl st in back stitch 11. Ch 28. Without twisting, sl st in back stitch 14. You now have a chain loop anchored across 4 rim stitches.
Ring Rnd 1: Working over the ch-28 loop (into the loop space, not into the chains), work 48 sc, packing them tightly so they cover the chain completely. Sl st in the next rim stitch (back stitch 15). Turn. (48 sc)
Ring Rnd 2: Ch 1, sc in next 3 sc, 2 sc in next sc; repeat from * 12 times total, sl st in back stitch 10 of the rim. (48 sts worked 1 per existing st + 12 extra = 60 sc)*
The 12 increases let the outer edge spread around the larger outer curve without cupping. The finished ring has a 2 in (5.1 cm) opening and a 0.75 in (1.9 cm) wide band, for an outer diameter of 3.5 in (8.9 cm). Its base covers back stitches 10–15 of the rim, which spreads the load across 6 stitches.
Fasten off. Weave the tail down through the rim and into the first shell round on the inside so it cannot pull loose.
Final Blocking
- Weave in all ends on the inside of the tube.
- Mist the whole holder lightly with water until it is damp, not soaking.
- Roll a towel to about 3.75 in (9.5 cm) across and slide it into the tube to hold it round.
- Lay the holder flat on a blocking mat. Pin the body to 6 in (15.2 cm) wide and 16.75 in (42.5 cm) tall.
- Shape the ring into a smooth circle 3.5 in (8.9 cm) across and pin it flat.
- Gently open each shell with your fingers so the fans lie evenly.
- Let the holder dry completely, then remove the towel and pins.
Final Quality-Control Checklist
- The body measures 6 in (15.2 cm) wide flat and 16.75 in (42.5 cm) tall.
- Every shell round has 8 shells, and every round has 48 sts.
- The shells are staggered, with each fan sitting between two fans below.
- The bottom opening is 3 in (7.6 cm) across flat and has no gaps.
- The top rim is straight and does not flare.
- The ring is 3.5 in (8.9 cm) across, solid, and anchored over 6 rim stitches.
- All ends are woven in on the inside.
Troubleshooting
The shells drift or spiral. Join each round into the correct stitch and start each round in the same spot. Do not turn.
The tube flares at the top. Your shells may be loose. Go down a hook size for the rim only, and check that Rnd 29 has exactly 48 sc.
The bottom bulges. Rnds 3–4 may be too loose. Rework them with firmer tension.
Bags fall out of the bottom. The opening is too loose. Rework Rnds 1–2 with a 4.5 mm hook, then switch back to 5.0 mm for Rnd 3.
The ring stretches. Pack more sc into Ring Rnd 1, or work one more round of sl st around the outer edge.
There are gaps at the join. Pull each joining sl st snug and work the first stitch of each round firmly.
Care
Hand wash in cool water with mild soap and lay flat to dry, reshaping while damp. Don’t hang it while wet, because the weight of the water will stretch the tube.
Final Notes
The measurements build in a short, easy-to-check chain. A 24-stitch opening measures 6 in (15.2 cm) around. Two increase rounds bring the tube to 48 stitches, 12 in (30.5 cm) around or 6 in (15.2 cm) flat. Twenty-four shell rounds add 15 in (38.1 cm). The three-round rim adds 0.75 in (1.9 cm) for a 16.75 in (42.5 cm) body. The 3.5 in (8.9 cm) ring brings the full holder to about 20.25 in (51.4 cm).
Check your gauge after Rnd 12 and count your shells as you go, and the rest of the holder should come out to size.
Happy crocheting!