

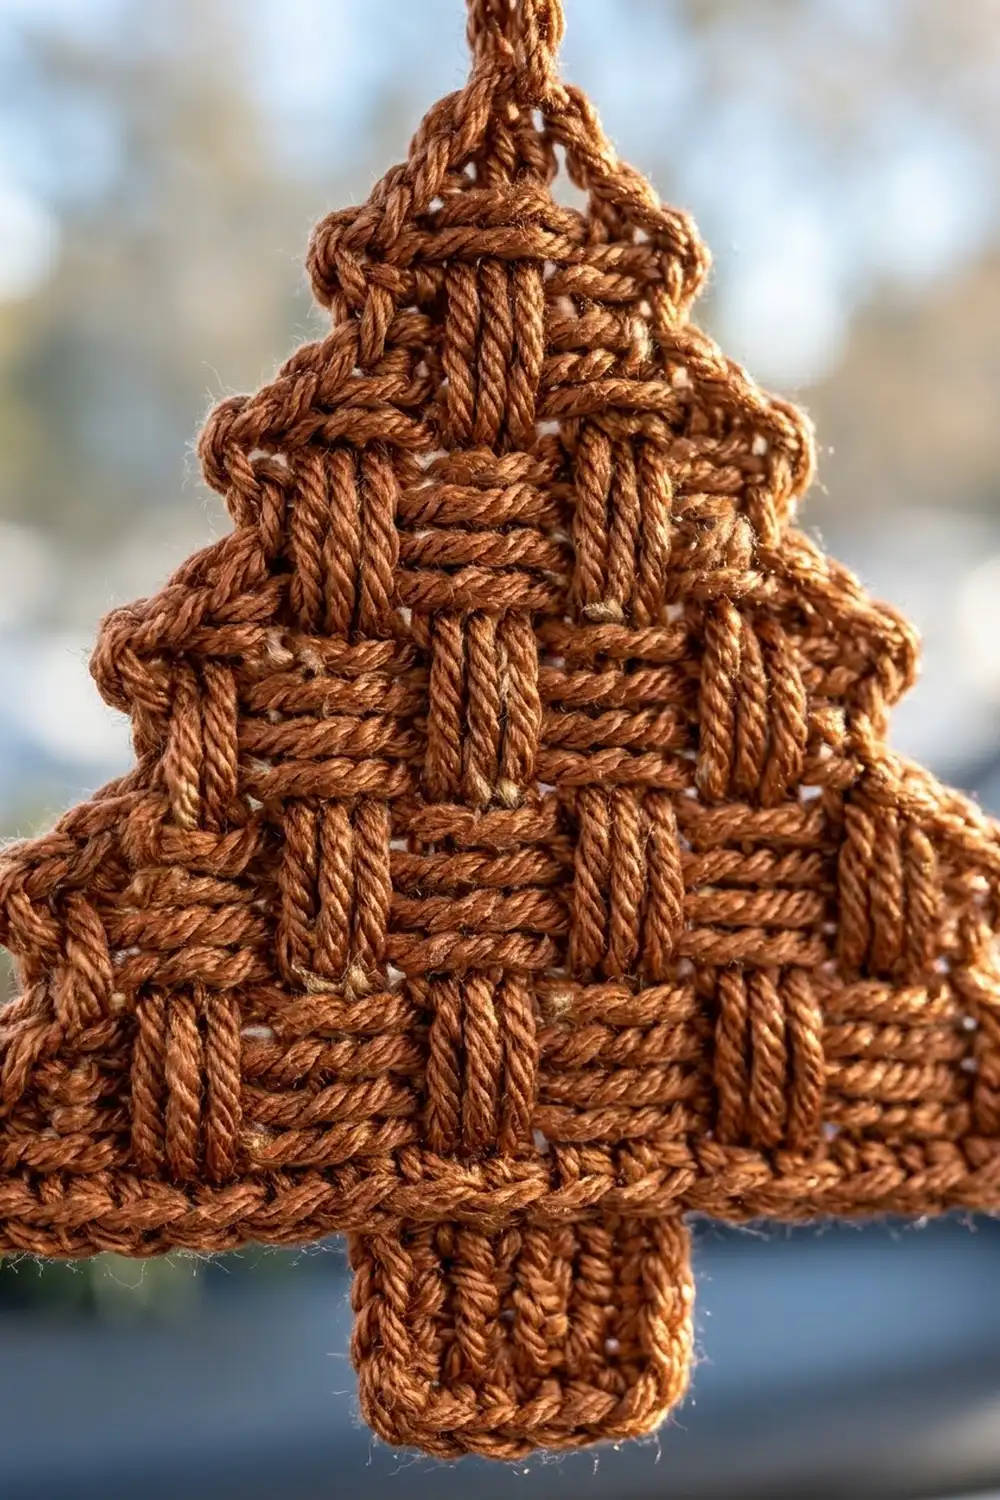
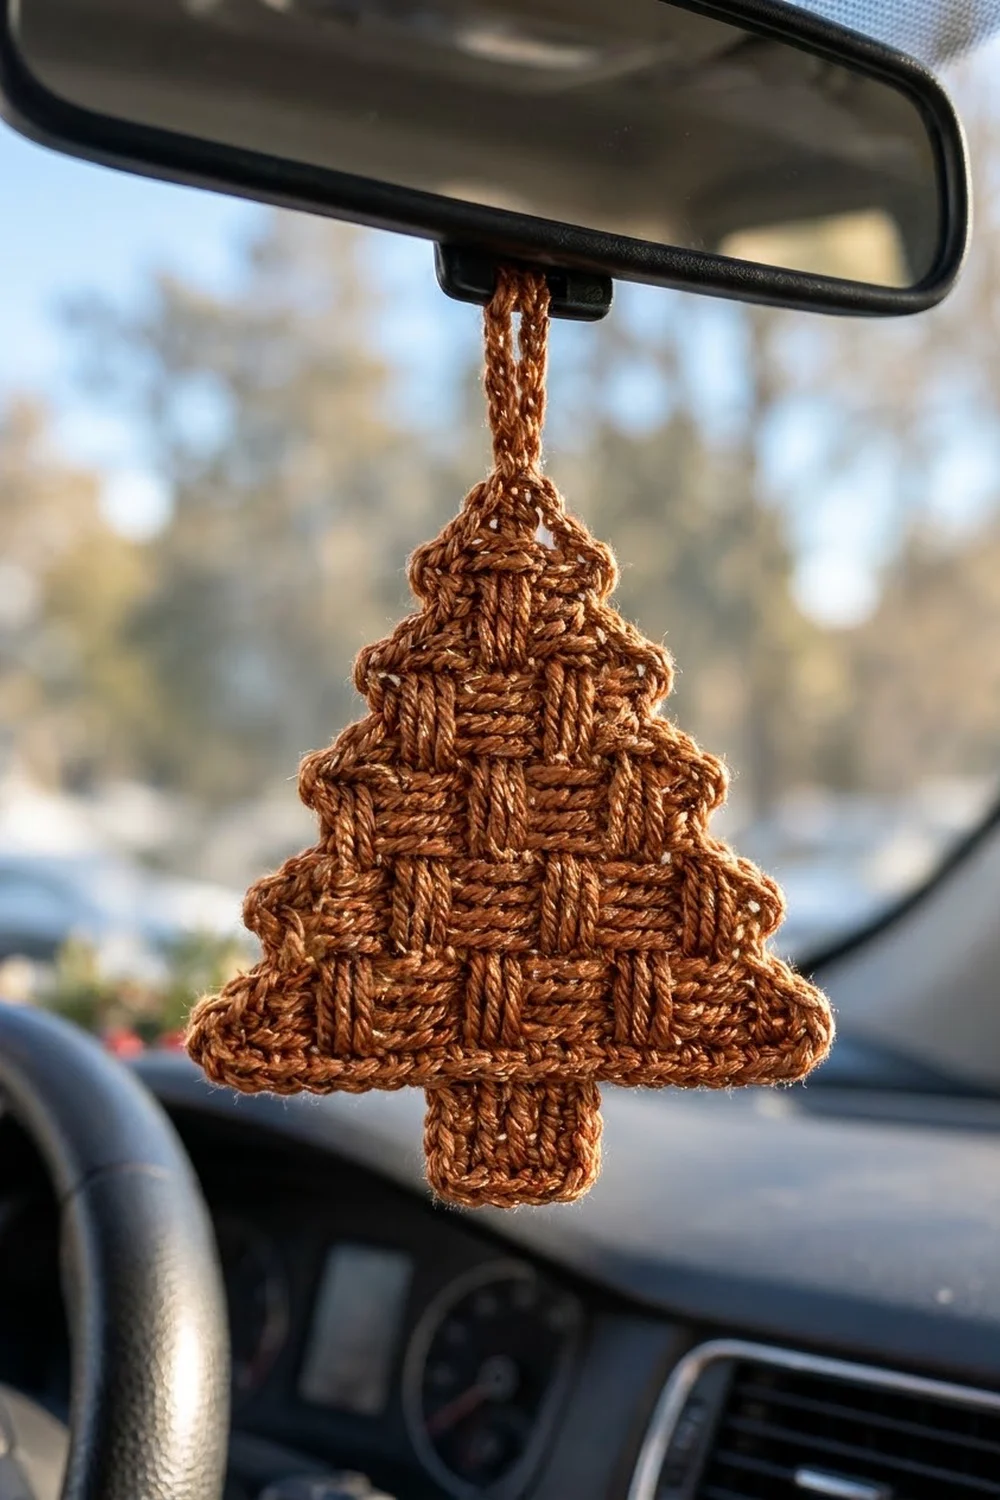
This little tree is a cozy, textured charm made to hang from a rearview mirror, a hook or a doorknob. Its checkerboard basketweave looks woven, and the stepped sides give it a clean, tiered tree shape without any extra pieces.
The sample uses one solid rust-copper yarn. A single warm color shows off the texture best: the raised post blocks catch the light, and the recessed ridges sit in shadow. Cinnamon, terracotta, forest green or cream would all work just as well.
The pattern uses US crochet terms. The finished charm is about 5.0 in (12.7 cm) wide and 5.9 in (15.0 cm) tall without the hanging loop. The loop adds about 2 in (5.1 cm).
You work the tree flat in rows from the bottom up. The rows are front and back post double crochet, stepping in by one 3-stitch block at each edge every 2 rows. Then you add a 2-row trunk to the foundation chain, work one round of single crochet around the whole shape, and make the chain loop at the top center.
Finished Size and Construction
- Finished size: 5.0 in wide × 5.9 in tall (12.7 × 15.0 cm), plus a 2 in (5.1 cm) loop
- Skill level: Easy-intermediate (post stitches, simple shaping)
- Terminology: US
- Yarn weight: DK (#3)
- Hook: 3.5 mm (E-4)
- Number of pieces: 1 (single flat piece)
- Layout: One tree with 4 stepped tiers, a centered trunk and a top loop
- Piece size before border: 4.6 in wide × 5.5 in tall (11.7 × 14.0 cm), trunk included
- Border depth: 1 round of sc, about 0.2 in (0.5 cm) on every edge
Materials
Yarn: Use a smooth DK yarn with good stitch definition. Mercerized cotton or a cotton blend looks most like the sample and holds its shape when hanging. Acrylic also works, but it makes a softer charm. Avoid fuzzy or brushed yarns, because they blur the basketweave.
- Rust/copper (main color): 15 g, about 35 m (38 yd)
Quantities include a margin for the gauge swatch and tails. The charm itself uses about 11 g.
Tools:
– 3.5 mm (E-4) crochet hook
– Tapestry needle
– Scissors
– Stitch markers (2)
– Ruler or tape measure
– Blocking mat, rust-proof pins and a spray bottle
– Optional: fabric stiffener, or a 50/50 mix of white glue and water
Abbreviations (US Terms)
- ch: chain
- sl st: slip stitch
- sc: single crochet
- dc: double crochet
- FPdc: front post double crochet
- BPdc: back post double crochet
- st(s): stitch(es)
- RS / WS: right side / wrong side
- rep: repeat
Special stitches:
– FPdc: Yarn over and insert the hook from front to back to front around the post of the stitch below. Yarn over, pull up a loop, then [yarn over, pull through 2 loops] twice. The stitch is pushed toward you.
– BPdc: Yarn over and insert the hook from back to front to back around the post of the stitch below. Finish like a dc. The stitch is pushed away from you.
– Block: 3 sts worked the same way (3 FPdc or 3 BPdc).
Turning chains: A ch-3 at the start of a row counts as the first dc (the edge stitch). At the end of each row, work the last dc into the top of the turning chain.
Gauge and Checkpoints
Gauge: 20 sts and 8 rows = 4 in (10.2 cm) in basketweave. That works out to:
– 1 st = 0.2 in (0.5 cm)
– 1 block of 3 sts = 0.6 in (1.5 cm) wide
– 1 row = 0.5 in (1.3 cm) tall
Test first: Work Rows 1–3 below and measure before you go on. Those 3 rows are your gauge test, and they are already part of the finished piece.
Checkpoints (before border):
– After Row 1: 23 sts, 4.6 in (11.7 cm) wide
– After Row 3: 1.5 in (3.8 cm) tall
– After Row 5: 2.5 in (6.4 cm) tall; tier 2 is 3.4 in (8.6 cm) wide
– After Row 7: 3.5 in (8.9 cm) tall; tier 3 is 2.2 in (5.6 cm) wide
– After Row 9: 4.5 in (11.4 cm) tall; tier 4 is 1.0 in (2.5 cm) wide
– After the trunk: 5.5 in (14.0 cm) tall in total
If your piece is too big: Go down to a 3.25 mm or 3.0 mm hook, or pull the post stitches a little snugger.
If your piece is too small: Go up to a 3.75 mm hook. Post stitches tend to pull in, so don’t yank each loop tight.
A difference of up to 0.2 in (0.5 cm) across the base is fine for a charm.
Tree Body
The tree has 4 tiers. Each tier is 2 rows tall, plus the plain foundation row under tier 1. Every tier is an odd number of blocks that starts and ends with a raised (FP) block on the RS. Each new tier begins one block in from the last, so the blocks automatically land in a checkerboard.
How to keep the checkerboard: On RS rows, work FPdc over the raised blocks and BPdc over the recessed blocks. On WS rows, reverse them: work BPdc over the blocks that are raised on the RS and FPdc over the recessed ones. Each block then reads the same on the RS for both rows of its tier.
Tier 1 (23 sts, 7 blocks)
Row 1 (WS): Ch 25. Dc in the 4th ch from the hook and in each ch across. The 3 skipped ch count as 1 dc. Turn. (23 sts)
Row 2 (RS): Ch 3 (counts as dc). FPdc in each of the next 3 sts, BPdc in each of the next 3 sts; rep from * 2 more times. FPdc in each of the next 3 sts, then dc in the top of the turning ch. Turn. (23 sts: 1 edge dc + 7 blocks of 3 + 1 edge dc)*
Place a marker on the RS.
Row 3 (WS): Ch 3. BPdc in each of the next 3 sts, FPdc in each of the next 3 sts; rep from * 2 more times. BPdc in each of the next 3 sts, then dc in the top of the turning ch. Turn. (23 sts)*
Checkpoint: 4.6 in (11.7 cm) wide, 1.5 in (3.8 cm) tall. On the RS you should see 4 raised blocks and 3 ridged blocks in between.
Tier 2 (17 sts, 5 blocks)
Row 4 (RS): Sl st in each of the first 4 sts. Ch 3 (counts as dc; this sits in the 4th st). Work [FPdc 3, BPdc 3] twice, then FPdc 3. Dc in the next st, leaving the last 3 sts unworked. Turn. (17 sts: 1 + 15 + 1)
The 3 slipped sts and the 3 unworked sts form the first ledge on each side. Each ledge is 0.6 in (1.5 cm) wide.
Row 5 (WS): Ch 3. Work [BPdc 3, FPdc 3] twice, then BPdc 3. Dc in the top of the turning ch. Turn. (17 sts)
Checkpoint: 3.4 in (8.6 cm) wide, 2.5 in (6.4 cm) total height. The raised blocks of tier 2 should sit directly above the ridged blocks of tier 1.
Tier 3 (11 sts, 3 blocks)
Row 6 (RS): Sl st in each of the first 4 sts, then ch 3. Work FPdc 3, BPdc 3, FPdc 3. Dc in the next st, leaving the last 3 sts unworked. Turn. (11 sts)
Row 7 (WS): Ch 3. Work BPdc 3, FPdc 3, BPdc 3. Dc in the top of the turning ch. Turn. (11 sts)
Checkpoint: 2.2 in (5.6 cm) wide, 3.5 in (8.9 cm) total height.
Tier 4 (5 sts, 1 block)
Row 8 (RS): Sl st in each of the first 4 sts, then ch 3. FPdc 3. Dc in the next st, leaving the last 3 sts unworked. Turn. (5 sts)
Row 9 (WS): Ch 3. BPdc 3. Dc in the top of the turning ch. (5 sts)
Fasten off and weave in the end.
Checkpoint: The top is 1.0 in (2.5 cm) wide, and the body is 4.5 in (11.4 cm) tall. Each side now has 3 ledges of 3 sts.
Trunk
You work the trunk into the free loops of the foundation chain, on the underside of Row 1.
Hold the tree upside down with the RS facing you. Count 9 sts in from each edge along the foundation chain and mark the 10th and 14th sts. The 5 sts between and including the markers are the trunk base.
Row T1 (RS): Join the yarn with a sl st in the free loop at the first marked st. Ch 3 (counts as dc), then dc in each of the next 4 free loops. Turn. (5 sts)
Row T2 (WS): Ch 3, then dc in each of the next 4 sts. (5 sts)
Fasten off and weave in the end.
Checkpoint: The trunk is 1.0 × 1.0 in (2.5 × 2.5 cm). There should be 9 free foundation sts on each side of it. The whole piece is now 4.6 × 5.5 in (11.7 × 14.0 cm).
Border
Border gauge: Work 1 sc in each st along the tops and bottoms. Work 2 sc around each dc row-end, because a 0.5 in (1.3 cm) dc row matches 2 sc at about 4 sc per inch. Add a ch-1 at every outward (convex) corner, and nothing at inward (concave) corners, so that the ledges stay crisp.
Round 1 (RS):
1. Join the yarn with a sc in the center (3rd) st of Row 9. Sc in each of the next 2 sts. (3 top sc)
2. First side: Ch 1 (top corner). Work 4 sc down the row-ends of Rows 9–8. Sc in each of the 3 ledge sts, ch 1, then work 4 sc down the next 2 row-ends; rep from * once more (tiers 3 and 2). Sc in each of the 3 tier-1 ledge sts, ch 1, then work 6 sc down the row-ends of Rows 3–1. Ch 1 (bottom corner).
3. Bottom and trunk: Sc in each of the 9 free foundation loops. Work 4 sc down the trunk row-ends, ch 1, sc in each of the 5 sts along the bottom of Row T2, ch 1, then work 4 sc up the other trunk side. Sc in each of the 9 free foundation loops on that side. Ch 1 (bottom corner).
4. Second side: Work 6 sc up Rows 1–3, ch 1, then sc in each of the 3 ledge sts. Work 4 sc up the next 2 row-ends, ch 1, then sc in each of the 3 ledge sts; rep from * once more. Work 4 sc up Rows 8–9, then ch 1 (top corner).
5. Sc in each of the first 2 sts of Row 9. Sl st to the first sc.
Counts:
– Top: 3 + 2 = 5 sc
– Each side: 4 + 3 + 4 + 3 + 4 + 3 + 6 = 27 sc, so 54 for both sides
– Bottom of the tree: 9 + 9 = 18 sc
– Trunk: 4 + 5 + 4 = 13 sc
– Total: 90 sc and 12 ch-1 corners (2 at the top, 4 on each side, 2 on the trunk)
Why the math works: Each tier’s top has the same number of sc as stitches, so no edge ruffles. Each dc row-end gets 2 sc, which matches its 0.5 in (1.3 cm) height, so the sides don’t pull in. The ch-1 corners give the convex points just enough slack to turn without cupping. With no extra stitches at the concave corners, the ledges stay square.
Hanging Loop
Without fastening off, ch 30. Sl st into the same first sc at the top center. Turn, and sl st in each of the 30 ch around the loop to make a firm cord. Sl st into the first sc again and fasten off. The loop hangs about 2 in (5.1 cm) above the tree.
Final Blocking
- Weave in all the ends along the WS through the post stitches. Then trim them.
- Spray the charm until it is damp but not dripping.
- Pin it RS up to a size of 5.0 in wide × 5.9 in tall (12.7 × 15.0 cm).
- Pin each ledge corner and each trunk corner so they are square.
- Pat the raised blocks with your fingertips so they stand up. Don’t flatten them.
- Let the charm dry completely, which takes about 6–12 hours.
- Optional: brush thinned stiffener onto the WS only, then pin it again and let it dry. A stiffened charm swings less on the mirror and keeps its tiers sharp.
Final Quality-Control Checklist
- [ ] Tier widths are 23, 17, 11 and 5 sts.
- [ ] Each ledge is 3 sts, or 0.6 in (1.5 cm), deep on both sides.
- [ ] The blocks alternate in a checkerboard both across and up the tree.
- [ ] Every tier starts and ends with a raised block on the RS.
- [ ] The trunk is centered, with 9 free sts on each side.
- [ ] The border has 90 sc and 12 ch-1 corners.
- [ ] The finished size is 5.0 × 5.9 in (12.7 × 15.0 cm).
- [ ] The loop is centered and firm.
- [ ] All ends are hidden on the WS.
Troubleshooting
The blocks form stripes instead of a checkerboard. You probably worked FPdc on the WS row over raised blocks. On WS rows, raised blocks get BPdc.
The tree leans to one side. Check that you skip exactly 3 sts at the end of Rows 4, 6 and 8, and slip stitch across exactly 4 sts at the start.
The edges are wavy. Your post stitches may be looser than the edge dc. Work the ch-3 and the last dc a little more snugly.
The piece curls. Post-stitch fabric often curls before blocking. Block it firmly, and stiffen it if needed.
The border puckers along the sides. Rework it with exactly 2 sc per row-end, or go up 0.5 mm for the border round only.
The ledge corners look rounded. Make sure you included the ch-1 at each outer ledge corner.
Care
Hand wash in cool water, press out the water in a towel, and dry flat while reshaping the tiers. If you used stiffener, spot clean only and keep the charm out of long hours of direct dashboard sun.
Final Notes
Here is the measurement chain:
– Gauge: 5 sts and 2 rows per inch (2.5 cm)
– 23 sts give a 4.6 in (11.7 cm) base
– Four 2-row tiers, each 3 sts narrower on each side, reach 4.5 in (11.4 cm)
– The 1.0 in (2.5 cm) trunk brings the piece to 4.6 × 5.5 in (11.7 × 14.0 cm)
– The 0.2 in (0.5 cm) sc border finishes it at 5.0 × 5.9 in (12.7 × 15.0 cm)
If you hit each checkpoint, the finished tree will come out to size. Make one for your own car, or a few as quick gifts.
Happy crocheting!