

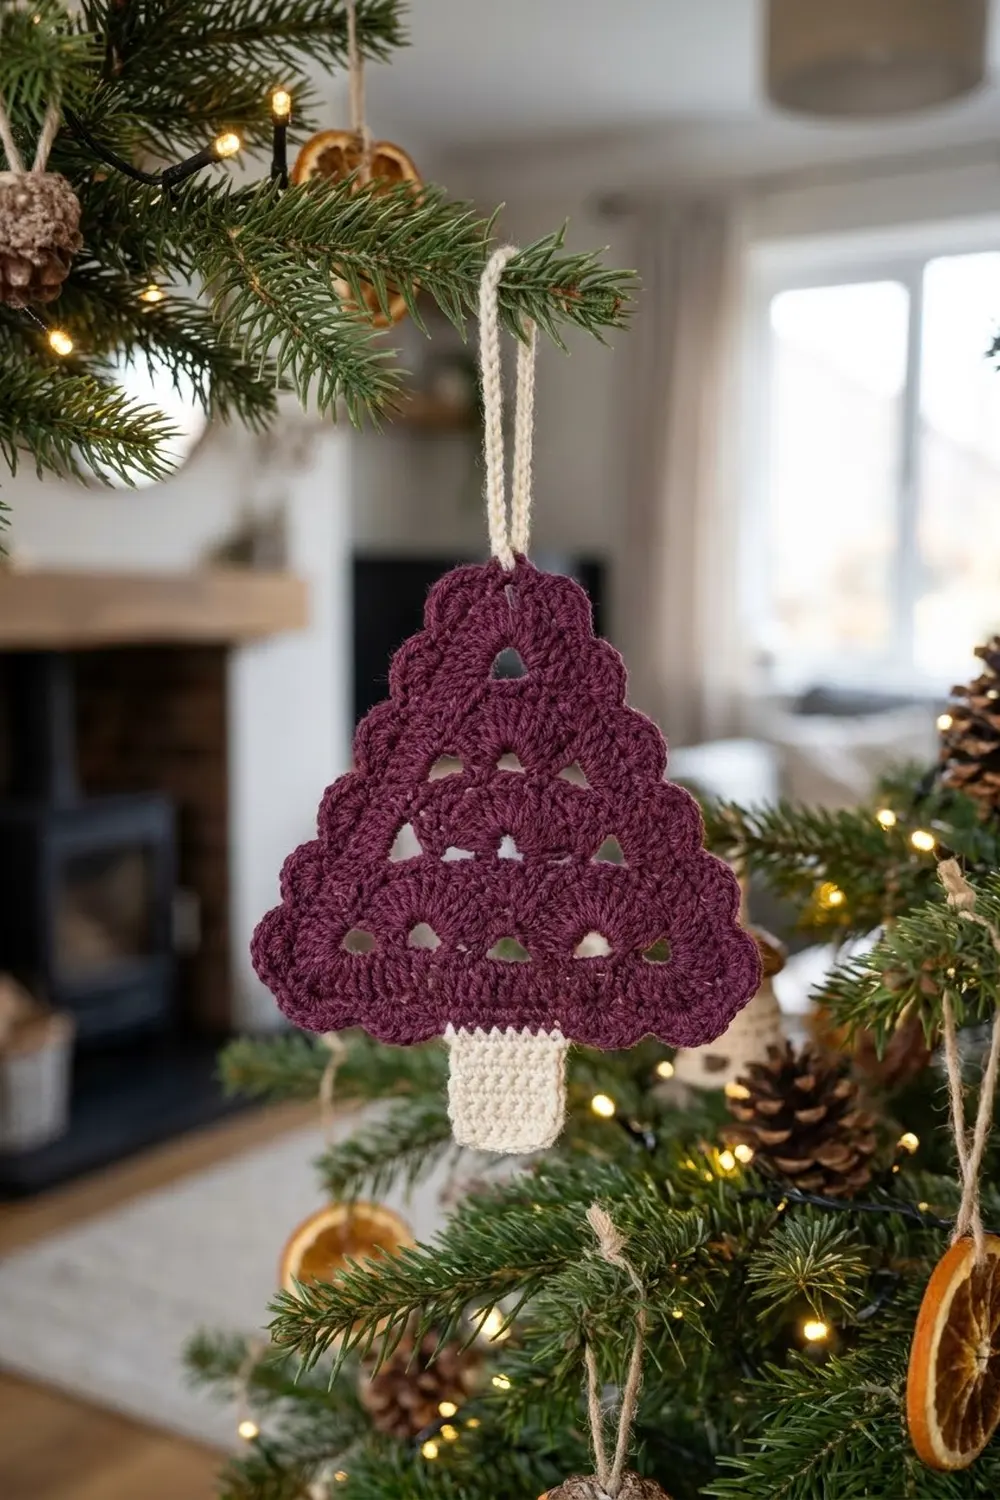
The Mulberry Lace Tree is a flat, lacy Christmas tree ornament. Rows of fan shells stack into a neat triangle, and small triangular windows open between the fans so light shows through. A scalloped border softens all three edges, and a solid cream trunk and matching cream hanging loop finish it.
The colors are a deep plum (mulberry) for the tree and a warm cream for the trunk and loop. The look is cozy and a little vintage. It suits a tree branch, a gift tag, a window, or a hoop display with greenery.
This pattern uses US crochet terms. The finished tree measures about 6 in (15.2 cm) wide at the base and 5.5 in (14.0 cm) tall. With the trunk it is 6.5 in (16.5 cm) tall. Including the hanging loop, it hangs about 8 in (20.3 cm) long.
You work the tree body bottom-up in rows, with one fewer shell in each row. Then you add a two-round scalloped border around all three sides. The trunk is a small single-crochet rectangle sewn to the back of the bottom edge, and the loop is worked straight off the tip.
Finished Size and Construction
- Finished size: 6 in (15.2 cm) wide × 5.5 in (14.0 cm) tall; 6.5 in (16.5 cm) tall with trunk
- Skill level: Easy to intermediate
- Terminology: US crochet terms
- Yarn weight: DK (light worsted, #3)
- Hook: 3.5 mm (US E-4)
- Number of pieces: 1 ornament (tree body plus a small trunk patch sewn on)
- Layout: Single triangle; trunk centered below the base; loop at the tip
- Tree body before border: 4.5 in (11.4 cm) wide × 4 in (10.2 cm) tall
- Border depth: about 0.5 in (1.3 cm)
- Trunk: 1.2 in (3.0 cm) wide × 1.25 in (3.2 cm) tall; 1 in (2.5 cm) visible below the tree
Materials
Choose a smooth, tightly plied DK yarn in cotton, a cotton blend, or acrylic. Plied yarn shows the fan stitches clearly and holds the scallops well. Avoid fuzzy or very splitty yarn, because it blurs the lace windows.
- Color A (Plum/Mulberry): 15 g, about 35 m
- Color B (Cream): 4 g, about 9 m
Both quantities include a safety margin of roughly 20%.
Tools:
– 3.5 mm (US E-4) crochet hook
– Tapestry needle
– Scissors
– Rustproof pins and a foam blocking mat
– Spray bottle with water
– Ruler or tape measure
Abbreviations (US Terms)
- ch – chain
- sl st – slip stitch
- sc – single crochet
- dc – double crochet
- sk – skip
- sp – space
- st(s) – stitch(es)
- RS – right side
- sh – shell
Special stitch – Shell (sh): Work 5 dc in the same stitch or space. The 3rd dc is the center dc.
Gauge and Checkpoints
Gauge matters for a small ornament because the border counts are matched to the edge lengths. Work Rows 1–2 and measure before you continue.
- Shell gauge: 1 shell repeat (sc to next sc) = 0.9 in (2.3 cm)
- Row gauge: 1 shell row = 0.8 in (2.0 cm) tall
- Trunk gauge: 20 sc × 22 rows = 4 in (10.2 cm)
Checkpoints:
1. After Row 1: 4.5 in (11.4 cm) wide.
2. After Row 2: 1.6 in (4.1 cm) tall.
3. After Row 5 (body complete): 4.5 in (11.4 cm) wide × 4 in (10.2 cm) tall.
4. After the border, blocked: 6 in (15.2 cm) wide × 5.5 in (14.0 cm) tall.
If your piece is too big: go down to a 3.25 mm hook, or work the chains more snugly.
If your piece is too small: go up to a 3.75 mm hook. Tight starting chains are the most common cause, so try loosening only the foundation chain first.
Tree Body
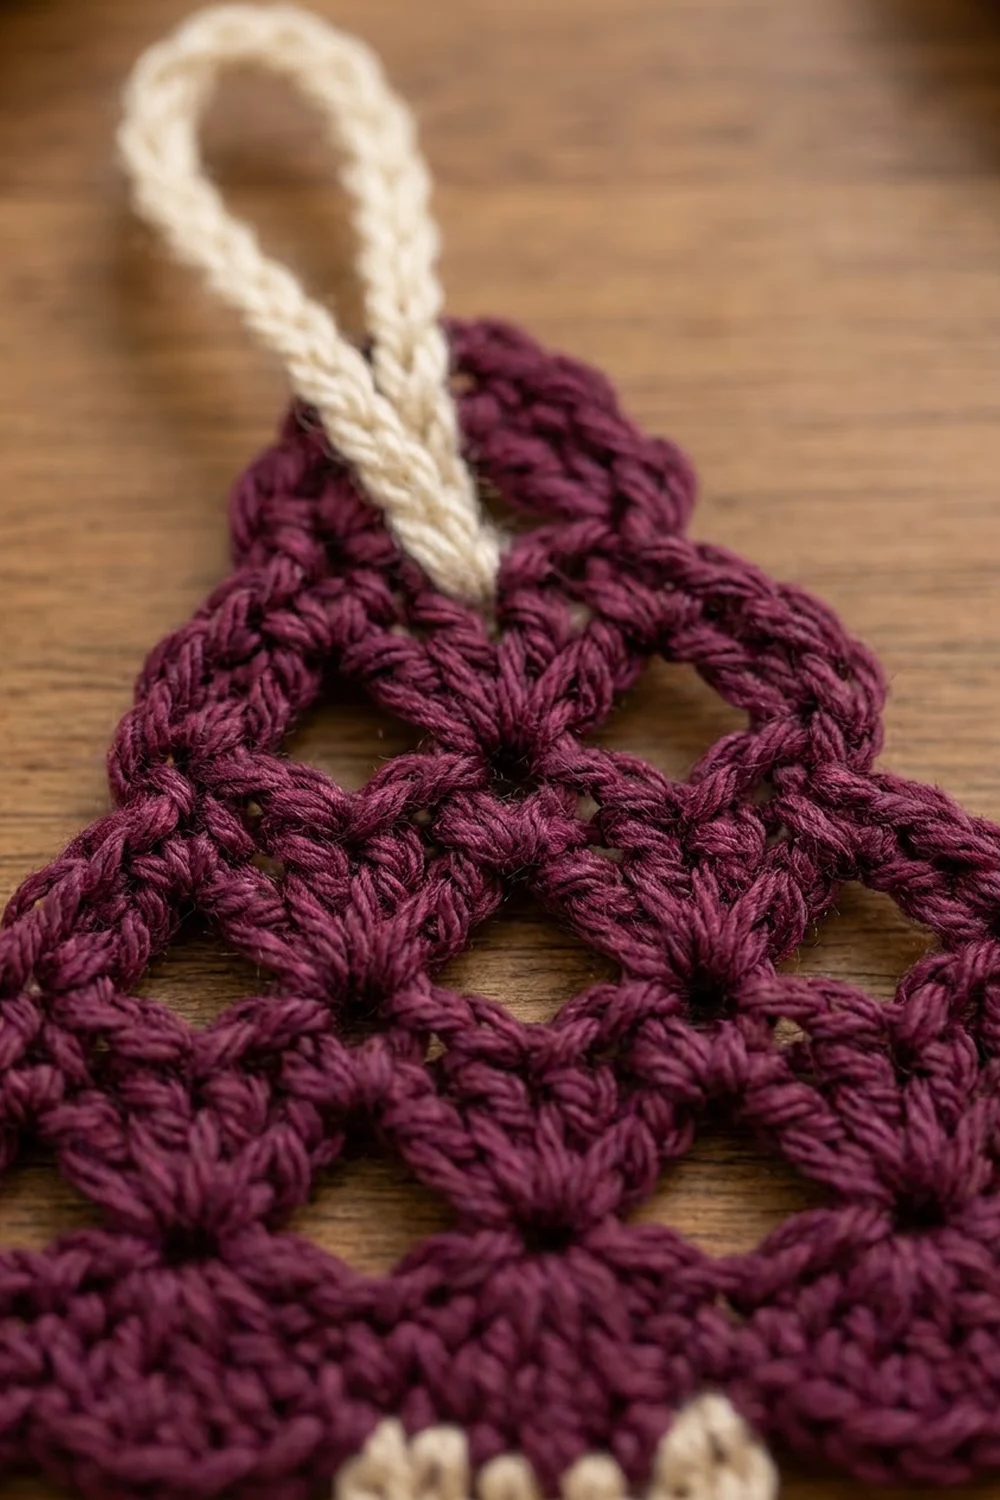
Work with Color A. The body has 5 rows. Each row keeps the same structure: sc, then (shell, sc) repeated, with ch-1 spaces beside each shell from Row 2 on. Each row loses one shell, so it narrows into a triangle.
Foundation: Ch 32.
Row 1 (RS): Sc in 2nd ch from hook, sk 2 ch, sh in next ch, sk 2 ch, sc in next ch; rep from * 4 more times. Turn.
(5 shells, 6 sc = 31 sts)*
Row 2: Sl st in first sc and in next 3 dc (you are now in the center dc of the first shell). Ch 1, sc in same center dc, ch 1, sh in next sc, ch 1, sc in center dc of next shell; rep from * 3 more times. Leave the remaining 2 dc and 1 sc unworked. Turn.
(4 shells, 5 sc = 25 sts, plus 8 ch-1 sps)*
Row 3: Sl st in first sc, in next ch-1 sp, and in next 3 dc. Ch 1, sc in same center dc, ch 1, sh in next sc, ch 1, sc in center dc of next shell; rep from * 2 more times. Leave the rest unworked. Turn.
(3 shells, 4 sc = 19 sts, plus 6 ch-1 sps)*
Row 4: Sl st in first sc, in next ch-1 sp, and in next 3 dc. Ch 1, sc in same center dc, ch 1, sh in next sc, ch 1, sc in center dc of next shell; rep from * once more. Leave the rest unworked. Turn.
(2 shells, 3 sc = 13 sts, plus 4 ch-1 sps)*
Row 5: Sl st in first sc, in next ch-1 sp, and in next 3 dc. Ch 1, sc in same center dc, ch 1, sh in next sc, ch 1, sc in center dc of next shell. Leave the rest unworked.
(1 shell, 2 sc = 7 sts, plus 2 ch-1 sps)
Fasten off.
Count check: Each row has 6 sts per shell repeat plus 1 sc, so the counts are 31, 25, 19, 13 and 7. Each row loses exactly one repeat of 6, half from each side, which makes the even triangle.
The center dc of the Row 5 shell is the tip. Each shell in a new row sits in a sc between two shells below it, and each new sc sits on a center dc. This offset makes the triangular windows between the fans.
Trunk
Work with Color B.
Foundation: Ch 7.
Row 1: Sc in 2nd ch from hook and in each ch across. Turn. (6 sc)
Rows 2–7: Ch 1, sc in each st across. Turn. (6 sc)
Fasten off and leave a 10 in (25.4 cm) tail for sewing. The trunk measures 1.2 in (3.0 cm) wide × 1.25 in (3.2 cm) tall. You attach it after the border is finished.
Border
The border has two rounds in Color A. Round 1 sets an equal sc count on all three sides. Round 2 turns that count into scallops.
Border gauge: about 7 sc per 1 in (2.5 cm) along the edges, which gives 31 sc on each 4.5 in (11.4 cm) side.
Round 1: With RS facing, turn the body so the foundation chain is at the top. Join Color A with a sc in the free loop of the first foundation ch at the right-hand end. This is bottom sc 1.
- Bottom side: Sc in the free loop of each of the next 29 ch (bottom sc 2–30). In the last ch, work (sc, ch 2, sc). The first sc is bottom sc 31; the second sc is left-side sc 1.
- First slanted side: Work 6 sc evenly along the end of each of Rows 1–4 (24 sc), then 5 sc along the end of Row 5, climbing to the tip (29 sc). In the center dc of the tip shell, work (sc, ch 2, sc). The first sc is side sc 31; the second sc is next-side sc 1.
- Second slanted side: Work 5 sc down the end of Row 5 and 6 sc along the end of each of Rows 4–1 (29 sc). In the foundation ch that holds bottom sc 1, work (sc, ch 2). The sc is side sc 31.
- Sl st to the first sc to join.
(31 sc on each side, 93 sc in all, plus 3 corner ch-2 sps)
How the corners are counted: In this pattern, each corner is a ch-2 space. Each side’s 31 sc includes the sc on both sides of its corner spaces. Corner sc are never counted twice.
Round 2: Ch 1. On each side, work: sc in first sc, sk 2 sc, sh in next sc, sk 2 sc, sc in next sc; rep from * 4 more times, ending in the side’s 31st sc. Then work a sh in the corner ch-2 sp. Repeat on all three sides. Sl st to the first sc to join.
(Per side: 6 sc + 5 shells = 31 sts; plus 3 corner shells. Total: 18 sc + 18 shells = 108 sts)*
Fasten off.
Why the math works: One scallop repeat uses 6 stitches (sk 2, sh, sk 2, sc). Five repeats use 30 sts, and the first sc makes 31, which exactly matches Round 1. The corner shells sit in the ch-2 spaces, outside the side counts. That gives three rounded points, at the two base corners and at the tip.
Hanging Loop
With RS facing, join Color B with a sl st in the center dc of the tip corner shell. Ch 16, then sl st in the same dc. Turn and sl st in the back bump of each of the 16 ch. Sl st in the tip dc again and fasten off.
The loop is about 1.5 in (3.8 cm) long when folded.
Attach the Trunk
Center the trunk under the middle shell of the bottom edge (the 3rd of the 5 bottom-side shells). Place it on the wrong side, with the top 0.25 in (0.6 cm) behind Round 1. Whipstitch along the top row of the trunk and up both short sides of the overlap.
Make sure the stitches go only through the back layer of the border. About 1 in (2.5 cm) of trunk shows below the scallops.
Final Blocking
- Weave in all ends along the stitches of matching color before blocking.
- Lay the ornament RS up on the blocking mat.
- Pin the three corner shells first: the base corners 6 in (15.2 cm) apart, and the tip 5.5 in (14.0 cm) above the bottom edge.
- Pin the center of each scallop so the curves are even.
- Open each lace window gently with a fingertip.
- Pin the trunk square and straight, with its sides square to the base.
- Mist until damp but not soaked.
- Leave to dry completely, at least 4 hours, before removing the pins.
- For a crisper finish with cotton, use a light spray starch while the piece is pinned.
Final Quality-Control Checklist
- Body rows count 31, 25, 19, 13 and 7 sts.
- Each row has exactly one fewer shell than the row below.
- Border Round 1 has 31 sc per side and 3 corner ch-2 spaces.
- Border Round 2 has 5 shells per side and 3 corner shells (18 shells in all).
- Blocked size is 6 in (15.2 cm) × 5.5 in (14.0 cm).
- The trunk is centered under the middle bottom shell.
- 1 in (2.5 cm) of trunk is visible below the scallops.
- The loop is centered on the tip shell and does not twist.
- No ends show on the right side.
Troubleshooting
The bottom edge ruffles. The Round 1 sc are too loose for the foundation chain, or the chain is loose. Use a smaller hook for Round 1 only.
The bottom edge cups or pulls in. The foundation chain is too tight. Remake it with a hook one size larger, then switch back for Row 1.
The slanted sides wave. You worked too many sc per row end. Keep to 6 per row end, and 5 along Row 5.
The slanted sides pull tight. You squeezed the sc together. Spread them evenly from the bottom of each row end to the top.
The tree leans to one side. You probably slip-stitched over the wrong number of stitches at the start of a row. Each decrease row should start in the center dc of the first shell.
The scallops look flat. Make sure you skip 2 sts on each side of every shell, and block with pins at each scallop center.
The lace windows close up. Don’t skip the ch-1 spaces beside each shell from Row 2 on, and open the windows during blocking.
Care
Hand wash in cool water with mild soap, press out the water in a towel, and dry flat, re-pinning if needed. Store flat or hanging, away from crushing weight, so the scallops keep their shape.
Final Notes
The measurement chain goes like this:
- The 31-stitch foundation row sets a 4.5 in (11.4 cm) base.
- Five shrinking shell rows build a 4.5 in (11.4 cm) × 4 in (10.2 cm) triangle.
- Round 1 places 31 sc on each side.
- Round 2 turns those 31 sts into five scallops per side, plus three corner shells.
- Blocking sets the tree at 6 in (15.2 cm) × 5.5 in (14.0 cm).
- The trunk adds 1 in (2.5 cm) below, and the loop adds 1.5 in (3.8 cm) above.
Check your counts at each stage and the ornament will come out even.
Happy crocheting!