

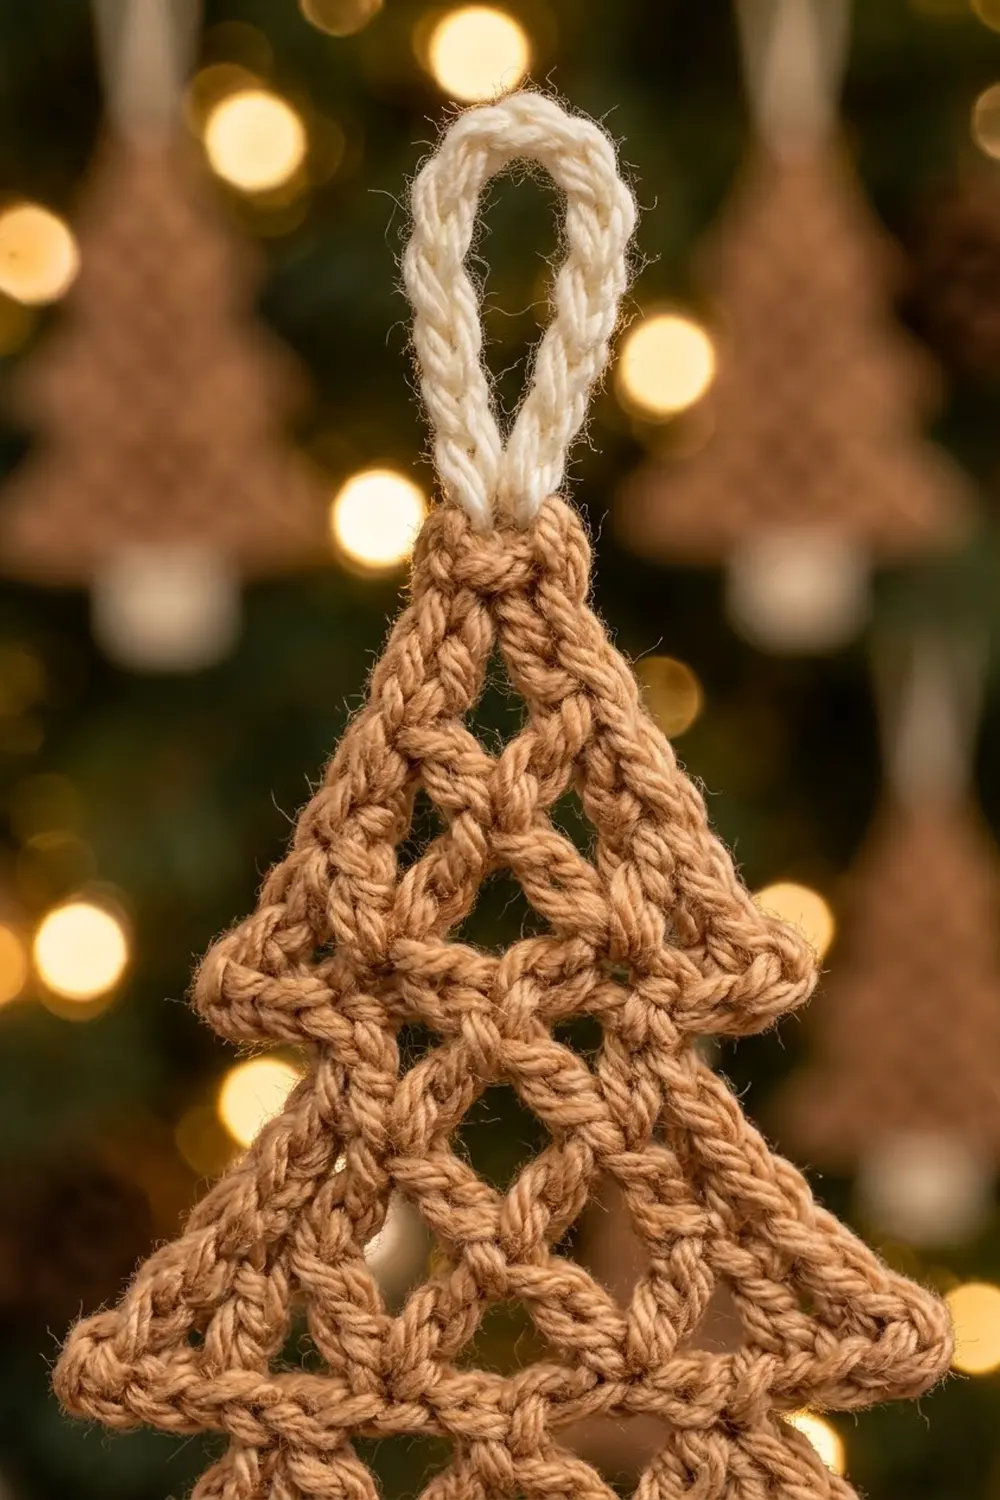
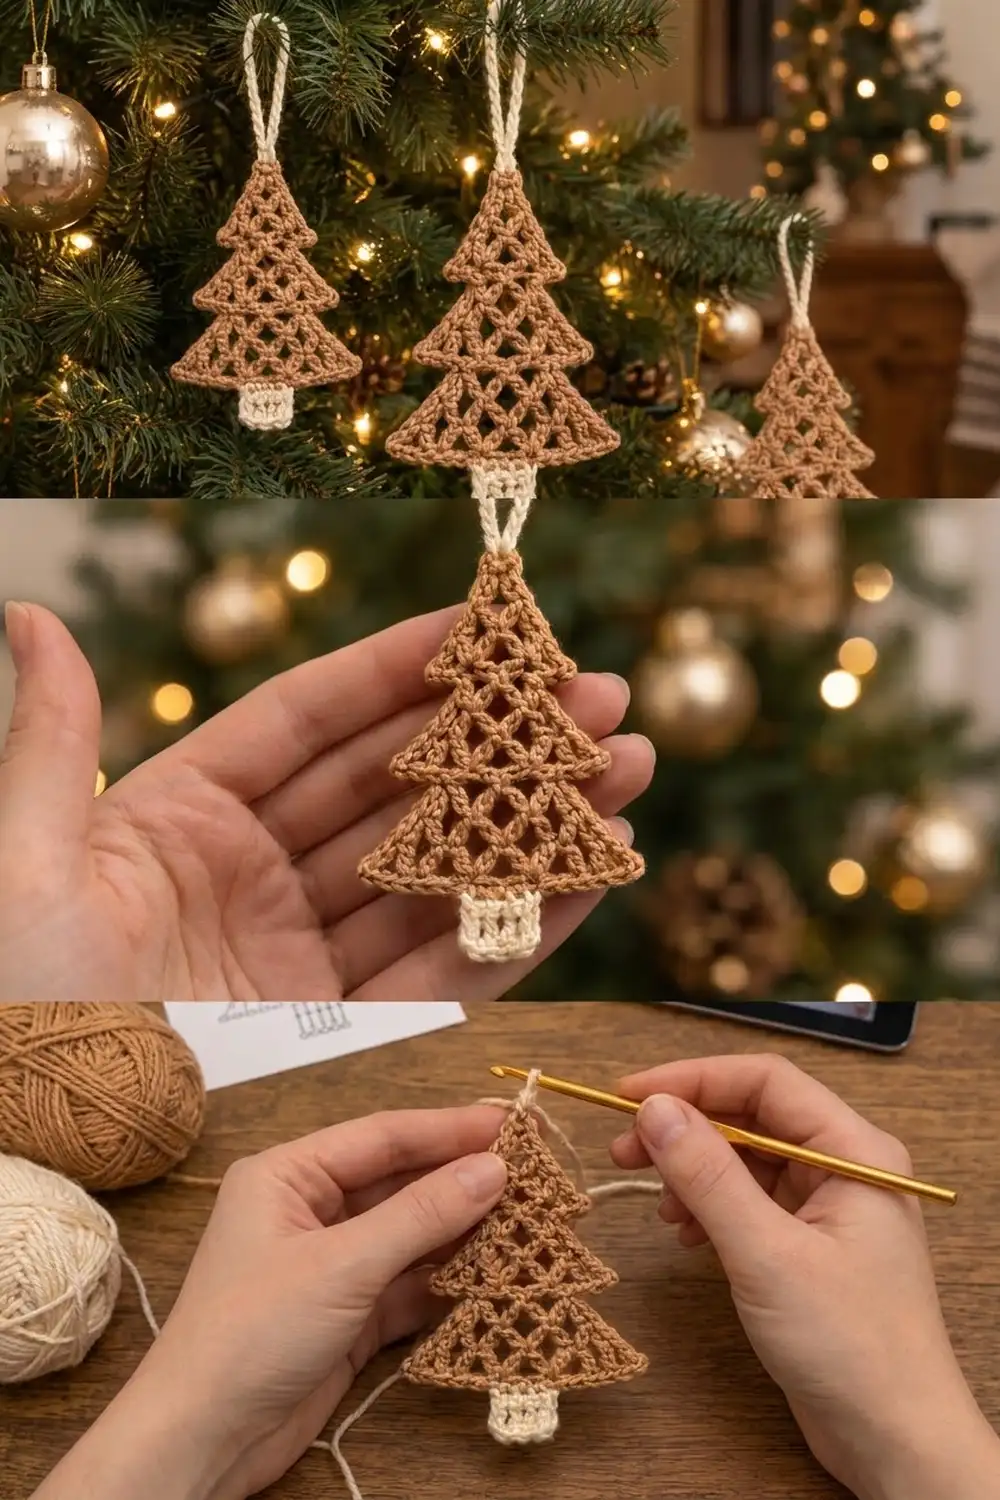
This little ornament is a flat Christmas tree with three tiers in a warm caramel tan, filled with an open lattice of crossed double crochet stitches. A neat single crochet outline traces every tier, a small cream trunk sits at the bottom, and a cream hanging loop finishes the tip.
The look is soft and rustic. From across the room it reads as handmade lace, and against tree lights the open crosses let a little glow through. You only need two colors: caramel tan for the tree and cream for the trunk and loop.
The pattern uses US crochet terms. The finished tree is 4.25 in (10.8 cm) wide and 4.5 in (11.4 cm) tall including the trunk. With the loop, the ornament hangs 6 in (15.2 cm) long.
Construction is simple. You work the tree in one piece from the tip down, in turned rows. Each tier grows outward and then ends with a single crochet row. The next tier starts a few stitches in from each edge, which creates the stepped “ledges.” A one-round border outlines the whole shape, and then the trunk and loop are worked directly onto the border. There is no sewing.
Finished Size and Construction
- Finished size: 4.25 in (10.8 cm) wide x 4.5 in (11.4 cm) tall, plus a 1.5 in (3.8 cm) loop
- Skill level: Advanced beginner
- Terminology: US crochet terms
- Yarn weight: Sport (CYC 2), cotton or cotton blend
- Hook: 2.75 mm (US C-2)
- Number of pieces: 1 (the trunk and loop are worked onto the tree)
- Layout: One flat ornament, three stacked tiers
- Piece size before border: 4 in (10.2 cm) wide x 3.5 in (8.9 cm) tall
- Border depth: 1 round of sc, about 0.125 in (0.3 cm) on each edge
- Trunk: 1 in (2.5 cm) wide x 0.75 in (1.9 cm) tall
Materials
Choose a smooth cotton in sport weight, either mercerized or matte. Cotton keeps the crossed stitches crisp and blocks flat. A light brown, caramel or camel shade gives a gingerbread look, but any solid color works.
- Color A, caramel tan: 8 g, about 26 m (28 yd)
- Color B, cream: 3 g, about 10 m (11 yd)
These quantities include a margin of about 30 percent for a test tier and weaving in ends. One 50 g ball of each color makes many ornaments.
Tools:
- 2.75 mm (US C-2) crochet hook
- Tapestry needle
- Scissors
- Stitch marker (optional, for the tip)
- Blocking mat, rust-proof pins and a spray bottle
Abbreviations (US Terms)
- ch: chain
- sl st: slip stitch
- sc: single crochet
- dc: double crochet
- st(s): stitch(es)
- sk: skip
- RS / WS: right side / wrong side
Special stitch, X-st (crossed double crochet): Sk the next st and dc in the following st. Then, working in front of the dc you just made, dc in the skipped st. One X-st covers 2 sts and makes 2 sts.
Turning chain: At the start of a dc row, the ch-3 counts as the first dc. In the next row, the top of that ch-3 counts as the last st.
Gauge and Checkpoints
Gauge: 24 dc and 12 dc rows = 4 in (10.2 cm). That works out to 6 sts and 3 dc rows per 1 in (2.5 cm). Each sc row adds about 0.17 in (0.4 cm).
Gauge matters more here than in most ornaments because the stepped tiers come from stitch counts. Being off by 0.5 in (1.3 cm) in width changes the whole silhouette.
The ornament itself is the best test piece. Work Tier 1 (Rows 1–4), flatten it with your fingers, and measure:
- After Row 4: 12 sts wide = 2 in (5.1 cm); tier height about 1.2 in (3.0 cm)
- After Row 8: 18 sts wide = 3 in (7.6 cm); total height about 2.3 in (5.8 cm)
- After Row 12: 24 sts wide = 4 in (10.2 cm); total height 3.5 in (8.9 cm)
- After the border: 4.25 in (10.8 cm) x 3.75 in (9.5 cm)
- After the trunk: 4.5 in (11.4 cm) tall
Too big? Go down 0.25 mm in hook size, or try a slightly thinner sport cotton.
Too small? Go up 0.25 mm in hook size. The X-sts look best when they aren’t worked tightly, so a bigger hook is often the right fix.
Tree Body (Color A)
The tree is worked from the tip down in turned rows. Every dc row increases by 4 sts: 3 dc in the first st (+2) and 3 dc in the last st (+2). X-sts cover all the sts between those edge groups, so the middle section is always an even number.
Tier 1
Row 1: With Color A, ch 4, then work 3 dc in the 4th ch from the hook. Turn. (4 sts; the skipped ch-3 counts as the first dc)
Row 2: Ch 3 (counts as dc), 2 dc in first st, X-st over next 2 sts, 3 dc in top of turning ch. Turn. (8 sts)
Row 3: Ch 3, 2 dc in first st, X-st 3 times over next 6 sts, 3 dc in top of turning ch. Turn. (12 sts)
Row 4: Ch 1, sc in each st across. Turn. (12 sc)
Checkpoint: Tier 1 is a small triangle 2 in (5.1 cm) wide. The sc row forms the solid bottom edge of the tier.
Tier 2
The first row of each new tier starts 3 sts in from the edge. The 3 unworked sts on each side become the ledge where the upper tier overhangs the lower one.
Row 5: Do not ch. Sl st in each of the first 4 sts. Ch 3 (counts as dc), 2 dc in same (4th) st, X-st twice over next 4 sts, 3 dc in next st (9th st), and leave the last 3 sts unworked. Turn. (10 sts)
Check: 3 sts stay unworked at each end (sts 1–3 under the sl sts, and sts 10–12), and 3 + 4 + 3 = 10.
Row 6: Ch 3, 2 dc in first st, X-st 4 times over next 8 sts, 3 dc in top of turning ch. Turn. (14 sts)
Row 7: Ch 3, 2 dc in first st, X-st 6 times over next 12 sts, 3 dc in top of turning ch. Turn. (18 sts)
Row 8: Ch 1, sc in each st across. Turn. (18 sc)
Checkpoint: Tier 2 is 3 in (7.6 cm) wide at the bottom and sticks out 0.5 in (1.3 cm) past Tier 1 on each side.
Tier 3
Row 9: Do not ch. Sl st in each of the first 4 sts. Ch 3, 2 dc in same (4th) st, X-st 5 times over next 10 sts, 3 dc in next st (15th st), and leave the last 3 sts unworked. Turn. (16 sts)
Check: sts 1–3 and 16–18 stay unworked, and 3 + 10 + 3 = 16.
Row 10: Ch 3, 2 dc in first st, X-st 7 times over next 14 sts, 3 dc in top of turning ch. Turn. (20 sts)
Row 11: Ch 3, 2 dc in first st, X-st 9 times over next 18 sts, 3 dc in top of turning ch. Turn. (24 sts)
Row 12: Ch 1, sc in each st across. (24 sc) Fasten off.
Checkpoint: The tree body is 4 in (10.2 cm) wide x 3.5 in (8.9 cm) tall. You should see three stepped tiers, each filled with a diagonal lattice of crosses.
Border (Color A)
Border gauge: Work 2 sc into the side of each dc row, since one dc row is about two sc tall. Work 1 sc into each st along the ledges and the bottom. Work 3 sc into each corner st and into the tip.
The border is one round, starting at the tip. With RS facing, join Color A with a sl st at the tip (the base of the Row 1 dc group).
Rnd 1:
- Tip: Ch 1, 3 sc in tip. (3 sc) Place a marker in the center sc of this group.
- Left side, Tier 1: Working down, 2 sc in the side of each of Rows 1–3 (6 sc). 3 sc in the corner st of Row 4. 1 sc in each of the next 2 ledge sts. (11 sc)
- Left side, Tier 2: 2 sc in the side of each of Rows 5–7 (6 sc). 3 sc in the corner st of Row 8. 1 sc in each of the next 2 ledge sts. (11 sc)
- Left side, Tier 3: 2 sc in the side of each of Rows 9–11 (6 sc). 3 sc in the corner st of Row 12. (9 sc)
- Bottom: 1 sc in each of the 22 sts between the corners. (22 sc)
- Right side, Tier 3: 3 sc in the corner st of Row 12. Working up, 2 sc in the side of each of Rows 11–9 (6 sc). (9 sc)
- Right side, Tier 2: 1 sc in each of the 2 ledge sts. 3 sc in the corner st of Row 8. 2 sc in the side of each of Rows 7–5 (6 sc). (11 sc)
- Right side, Tier 1: 1 sc in each of the 2 ledge sts. 3 sc in the corner st of Row 4. 2 sc in the side of each of Rows 3–1 (6 sc). (11 sc)
- Sl st to the first sc. Fasten off.
Total: 87 sc (3 tip + 31 left + 22 bottom + 31 right).
Why the math works:
- Each ledge has 3 unworked sts. The outer one becomes the 3-sc corner and the other 2 get 1 sc each, so all 3 ledge sts are used with no gaps.
- Each side of every tier has 3 dc rows. At 2 sc per row that’s 6 sc. Three dc rows are 1 in (2.5 cm) tall, and 6 sc match the gauge of 6 sts per inch, so the edge lies flat instead of ruffling or pulling.
- Along the bottom, Row 12 has 24 sts. Corner sts 1 and 24 each take 3 sc, which are counted in the side totals, so 24 – 2 = 22 sc go along the bottom.
- Each side totals 9 + 11 + 11 = 31 sc. The two sides mirror each other, so the tree stays symmetrical.
The border adds 0.125 in (0.3 cm) to each edge, which brings the tree to 4.25 in (10.8 cm) wide x 3.75 in (9.5 cm) tall.
Trunk (Color B)
With RS facing, find the 22 bottom sc and count them starting from the left corner group. The trunk is worked over the center 6, which are sc 9 through 14. That leaves 8 sc free on each side (8 + 6 + 8 = 22).
Row 1: Join Color B with a sl st in the 9th bottom sc. Ch 1, sc in the same st and in each of the next 5 sc. Turn. (6 sc)
Rows 2–5: Ch 1, sc in each st across. Turn. (6 sc)
Fasten off after Row 5.
Checkpoint: The trunk is 1 in (2.5 cm) wide x 0.75 in (1.9 cm) tall and centered under Tier 3. From the tip to the bottom of the trunk, the tree is 4.5 in (11.4 cm) tall.
Hanging Loop (Color B)
Step 1: Join Color B with a sl st in the marked center sc at the tip. Ch 20, then sl st in the same sc. (1 ch-20 loop)
Step 2: Ch 1 and work 26 sc over the ch-20 loop so it is fully covered. Sl st in the same tip sc. Fasten off. (26 sc)
The covered loop stands 1.5 in (3.8 cm) above the tip, for a full hanging length of 6 in (15.2 cm). Packing 26 sc over 20 chains keeps the cord firm and rounded, which helps the ornament hang straight.
Final Blocking
- Weave in all ends. Run each tail through the solid sc rows or the border, not the open lattice, where it would show.
- Spray the ornament lightly with water until it’s damp but not dripping.
- Lay it RS up on a blocking mat. Pin the tip first, then pin the bottom of the trunk so the tree is 4.5 in (11.4 cm) tall.
- Pin the bottom corner of each tier on both sides. Including the border, Tier 3 is 4.25 in (10.8 cm) across, Tier 2 is about 3.25 in (8.3 cm) and Tier 1 is about 2.25 in (5.7 cm).
- Pin each ledge so the tiers step out cleanly and the sc rows lie straight.
- Use a pin tip or your fingers to nudge each X-st open so the lattice is even.
- Let it dry completely. For a stiffer ornament, spray it lightly with fabric stiffener before it dries.
- Unpin it and straighten the hanging loop with your fingers.
Final Quality-Control Checklist
- Stitch counts match: 12, 18 and 24 sts at the bottom of each tier.
- Each tier has 3 unworked ledge sts on each side, so the tiers step out evenly.
- The border has 87 sc, with no skipped corners.
- The tree lies flat, with no cupping or rippling edges.
- The trunk is centered, with 8 border sc free on each side.
- The loop is attached at the exact center of the tip.
- Measurements: 4.25 in (10.8 cm) wide, 4.5 in (11.4 cm) tall, 6 in (15.2 cm) with the loop.
- All ends are woven in securely and hidden.
Troubleshooting
The tree is cupping. Your dc rows are tighter than your increases. Go up a hook size, or work the 3-dc edge groups a little looser.
The edges ruffle. Either your edge tension is loose or the border has too many sc. Recount: each tier side should have exactly 6 sc.
The tiers don’t step out. Check that Rows 5 and 9 began in the 4th st and left 3 sts unworked at the end. Starting in the 2nd or 3rd st makes the ledge disappear.
The X-sts look solid, not open. Your tension is tight. A 3.0 mm hook usually opens up the lattice; recheck your width checkpoints afterward. Nudging the stitches open with a pin during blocking also helps.
The ornament hangs crooked. Either the loop is off-center or the trunk is shifted. Reattach the loop to the center sc at the tip and recount the 8-6-8 split along the bottom.
My count is off by 2. Check that you worked into the top of the turning ch at the end of each dc row. Missing it loses an edge stitch and its increase.
Care
Hand wash in cool water with mild soap, press the water out in a towel, and pin it flat again to dry. Store it flat or hanging, away from heavy ornaments that could crush the lattice.
Final Notes
The measurement chain is short and easy to check. At 6 sts per 1 in (2.5 cm), Tier 1 ends at 12 sts and 2 in (5.1 cm), Tier 2 at 18 sts and 3 in (7.6 cm), and Tier 3 at 24 sts and 4 in (10.2 cm). Before the border, the tree is 3.5 in (8.9 cm) tall. One border round of 87 sc brings it to 4.25 in (10.8 cm) x 3.75 in (9.5 cm). The 6-sc trunk adds 0.75 in (1.9 cm) for a total height of 4.5 in (11.4 cm), and the covered loop brings the hanging length to 6 in (15.2 cm).
You can make one in an evening, then make a whole set for your tree or to top gifts.
Happy crocheting!