

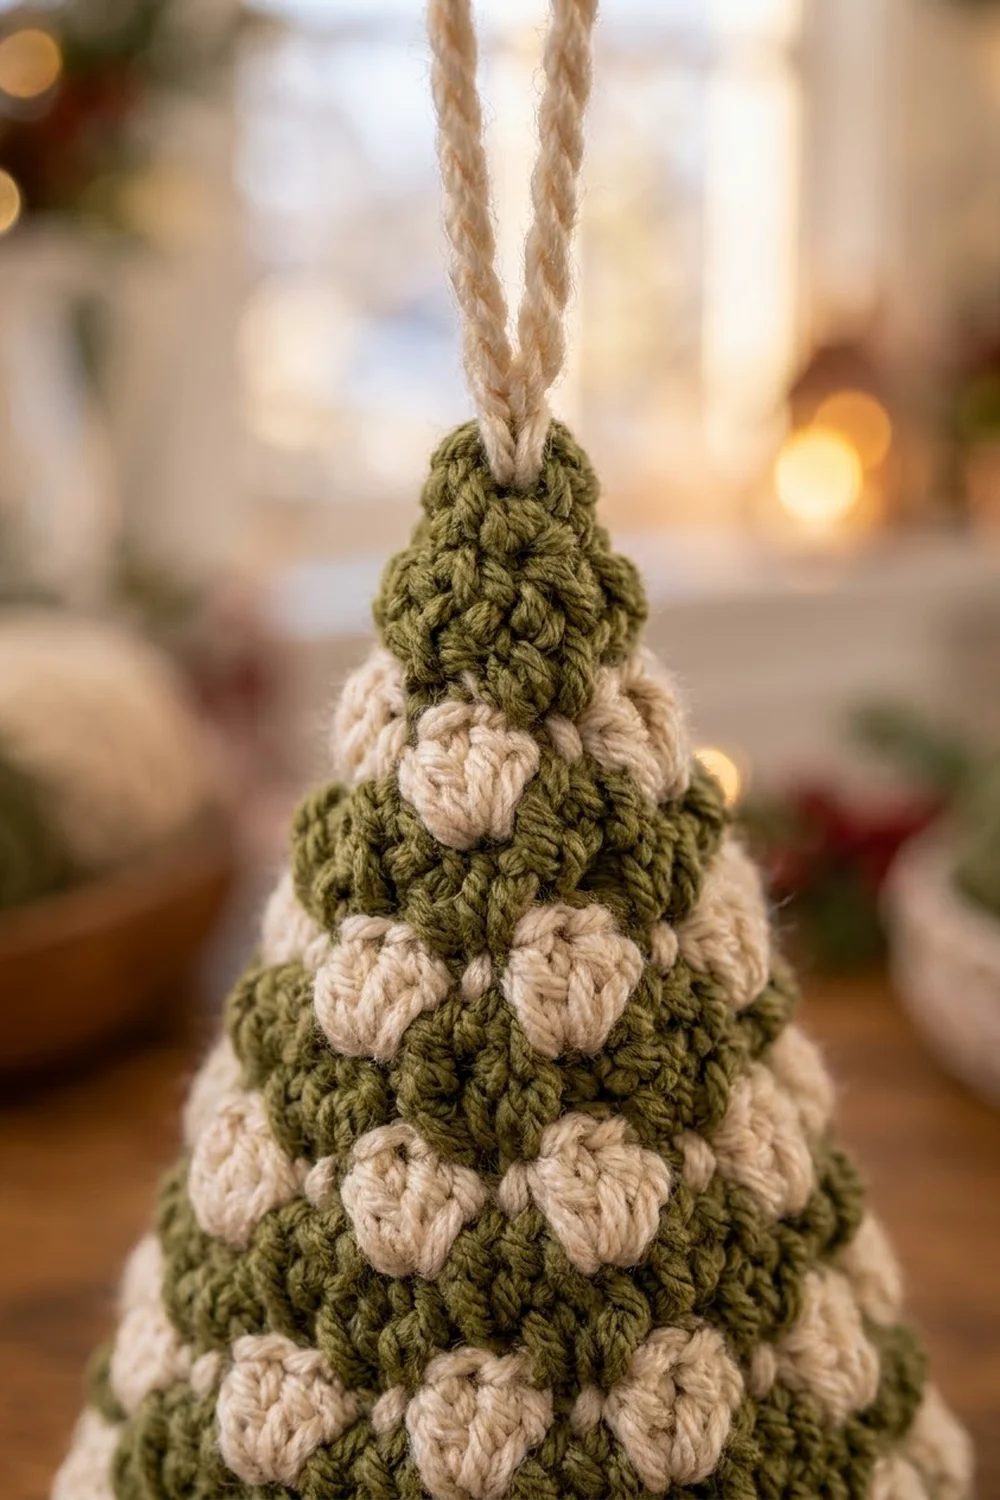
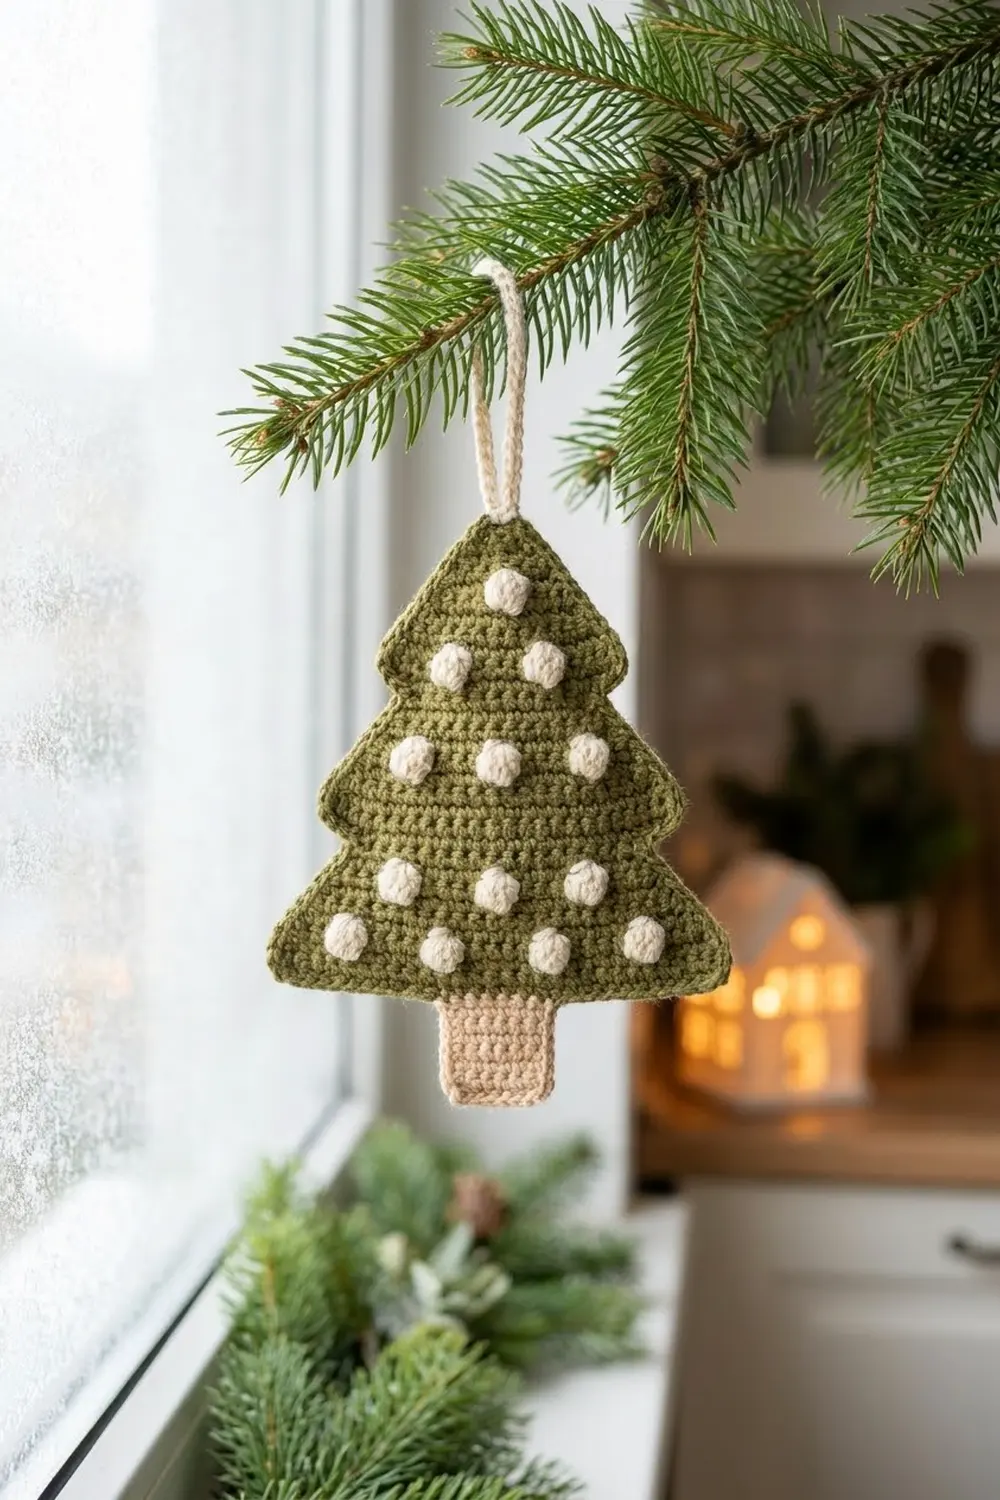
This little tree is a flat, triangular ornament with rows of cream bobbles that pop forward from an olive-green background. It has a tan trunk at the bottom and a cream loop at the top for hanging. It looks cozy and Scandinavian-rustic, and it fits on a tree, a window, a garland hook or a gift package.
The colors are simple: olive green for the tree, cream for the bobbles and loop, and light tan for the trunk. The bobbles shift by one stitch on every bobble row, so the dots stagger naturally as the tree gets narrower.
The pattern uses US crochet terms. The finished ornament measures 4 in (10.2 cm) wide by 4.75 in (12.1 cm) tall including the trunk, or about 7.25 in (18.4 cm) tall including the loop.
How it’s made: you work the tree flat in rows from the bottom up, with even decreases on the right-side rows. The bobbles are worked on wrong-side rows so they push out to the right side. Then you add one round of single crochet edging, work the trunk down from the center of the base, and finish with a slip-stitched hanging loop.
Finished Size and Construction
- Finished size: 4 in (10.2 cm) wide × 4.75 in (12.1 cm) tall, without the loop
- Skill level: Advanced beginner
- Terminology: US crochet terms
- Yarn weight: Worsted (#4)
- Hook: 4.0 mm (G-6)
- Number of pieces: 1 (single flat ornament)
- Layout: One triangle with an attached trunk and loop
- Tree size before border: 3.75 in (9.5 cm) wide × 3.5 in (8.9 cm) tall
- Border depth: about 0.125 in (0.3 cm) on each edge
- Tree size after border: 4 in (10.2 cm) wide × 3.75 in (9.5 cm) tall
- Trunk: about 1.1 in (2.8 cm) wide × 1 in (2.5 cm) long
Materials
Use a smooth worsted-weight cotton or cotton blend. Cotton shows the bobbles clearly and holds a crisp triangle shape. An acrylic yarn works too, but the result will be a little softer and fuzzier.
- Color A – Olive green: 10 g (about 17 m)
- Color B – Cream: 6 g (about 10 m)
- Color C – Light tan: 3 g (about 5 m)
These amounts are for one ornament and include a small safety margin for swatching and weaving in ends.
Tools:
– 4.0 mm (G-6) crochet hook
– Tapestry needle
– Scissors
– Stitch markers (2)
– Ruler or tape measure
– Blocking mat and rust-proof pins
Abbreviations (US Terms)
- ch – chain
- sl st – slip stitch
- sc – single crochet
- sc2tog – single crochet 2 together (1 stitch decreased)
- sc3tog – single crochet 3 together (2 stitches decreased)
- yo – yarn over
- st(s) – stitch(es)
- RS / WS – right side / wrong side
Special stitch – Bobble (bob): With Color B, *yo, insert hook in the next st, yo and pull up a loop, yo and draw through 2 loops; repeat from * 3 more times in the same st (5 loops on hook), yo and draw through all 5 loops. A bobble counts as 1 st.
Color changes: to switch colors, work the stitch before the change until 2 loops are left on the hook, then finish it with the new color. Carry the color you aren’t using along the tops of the stitches and work over it so it stays hidden.
Gauge and Checkpoints
Gauge: 18 sc × 20 rows = 4 in (10.2 cm) in Color A.
Make one test tree before you make several. Ornaments are small, so a small gauge difference changes the shape quickly.
Checkpoints:
– After Row 2: the strip should measure 3.75 in (9.5 cm) wide.
– After Row 10: the piece should measure about 2 in (5.1 cm) tall from the foundation edge.
– After Row 17: the triangle should measure 3.5 in (8.9 cm) tall and 3.75 in (9.5 cm) across the base.
– After the border: 4 in (10.2 cm) wide × 3.75 in (9.5 cm) tall.
– After the trunk: 4.75 in (12.1 cm) total height.
If your tree is too big, go down a half or full hook size (3.75 mm or 3.5 mm). If it’s too small, go up to 4.5 mm. If only the height is off, check your bobbles: tight bobbles pull the rows shorter, and loose ones make them taller.
Tree Body
With Color A, ch 18.
Row 1 (RS): Sc in 2nd ch from hook and in each ch across. (17 sts)
Row 2 (WS): Ch 1, turn, sc in each st across. (17 sts)
Check that the strip is 3.75 in (9.5 cm) wide.
From here on, carry Color B along the row and work over it in every row through Row 16.
Row 3 (RS – decrease): Ch 1, turn, sc2tog, sc in next 11 sts, sc2tog. (1 + 11 + 1 = 13 sts)
Wait — check: 17 stitches minus 2 stitches each for the two sc2tog leaves 13 to work, so the middle section is 13 sts, not 11. The correct row is:
Row 3 (RS – decrease): Ch 1, turn, sc2tog, sc in next 13 sts, sc2tog. (1 + 13 + 1 = 15 sts)
Row 4 (WS – bobble row): Ch 1, turn, sc in first st with A, bob in next st with B, sc in next st with A; repeat from * 6 more times. (7 bobbles + 8 sc = 15 sts)*
Row 5 (RS): Ch 1, turn, sc2tog, sc in next 11 sts, sc2tog. (1 + 11 + 1 = 13 sts)
Row 6 (WS): Ch 1, turn, sc 1 with A, bob with B, sc 1 with A; repeat from * 5 more times. (6 bobbles + 7 sc = 13 sts)*
Row 7 (RS): Ch 1, turn, sc2tog, sc in next 9 sts, sc2tog. (1 + 9 + 1 = 11 sts)
Row 8 (WS): Ch 1, turn, sc 1, bob, sc 1; repeat from * 4 more times. (5 bobbles + 6 sc = 11 sts)*
Row 9 (RS): Ch 1, turn, sc2tog, sc in next 7 sts, sc2tog. (1 + 7 + 1 = 9 sts)
Row 10 (WS): Ch 1, turn, sc 1, bob, sc 1; repeat from * 3 more times. (4 bobbles + 5 sc = 9 sts)*
Checkpoint: about 2 in (5.1 cm) tall.
Row 11 (RS): Ch 1, turn, sc2tog, sc in next 5 sts, sc2tog. (1 + 5 + 1 = 7 sts)
Row 12 (WS): Ch 1, turn, sc 1, bob, sc 1; repeat from * 2 more times. (3 bobbles + 4 sc = 7 sts)*
Row 13 (RS): Ch 1, turn, sc2tog, sc in next 3 sts, sc2tog. (1 + 3 + 1 = 5 sts)
Row 14 (WS): Ch 1, turn, sc 1, bob, sc 1; repeat from * once more. (2 bobbles + 3 sc = 5 sts)*
Row 15 (RS): Ch 1, turn, sc2tog, sc in next st, sc2tog. (1 + 1 + 1 = 3 sts)
Row 16 (WS): Ch 1, turn, sc 1, bob, sc 1. (1 bobble + 2 sc = 3 sts) Cut Color B.
Row 17 (RS): Ch 1, turn, sc3tog. (1 st)
Don’t fasten off. Continue straight into the border.
Why the bobbles stagger: every decrease row takes 1 stitch off each end, so the stitch grid shifts half a step inward. Each bobble row starts and ends with an sc, so its bobbles land between the bobbles of the row below. That gives the polka-dot pattern. Because every row also starts and ends with an sc, the side edges are smooth, single-crochet-height row ends, which makes the border easy to work.
Bobble count: 7 + 6 + 5 + 4 + 3 + 2 + 1 = 28 bobbles.
Border
The border is one round of sc in Color A. It tidies the slanted sides and adds about 0.125 in (0.3 cm) on every edge.
Border gauge: work 1 sc per row end along the sides and 1 sc per foundation chain along the bottom. Every row is single-crochet height, so 1 sc per row end matches the fabric and the edge lies flat.
Round 1 (RS facing): Ch 1. Work 3 sc in the Row 17 stitch at the top point. Then:
– Left side: work 15 sc, 1 in each row end of Rows 16 through 2.
– Bottom left corner: work 3 sc in the first foundation ch.
– Bottom edge: work 15 sc, 1 in each of the next 15 foundation chs.
– Bottom right corner: work 3 sc in the last foundation ch.
– Right side: work 15 sc, 1 in each row end of Rows 2 through 16.
Sl st to the first sc. (54 sts) Fasten off and leave a 4 in (10.2 cm) tail.
Count per side: each 3-sc corner group is 1 side stitch, 1 corner stitch and 1 side stitch. That makes each side 1 + 15 + 1 = 17 sts between the corner stitches, or 19 sts including both corner stitches. Each of the 3 corner stitches is shared by two sides: 3 × 19 − 3 = 54 sts in total. The other way to count gives the same answer: 3 corners × 3 sc + 3 sides × 15 sc = 9 + 45 = 54. ✓
Why the math works: the bottom has 17 foundation chs. The two corner chs each get 3 sc, and the 15 chs between them get 1 sc each, so the base doesn’t flare or pull in. Each side has 17 row ends. Row 1 and Row 17 sit inside the corner groups, which leaves Rows 2–16 (15 row ends) for 15 sc.
Checkpoint: 4 in (10.2 cm) wide × 3.75 in (9.5 cm) tall.
Trunk
Turn the tree upside down with the RS facing you. Count the 15 border sc along the bottom edge between the corner groups, and place markers in sc #6 and sc #10. The trunk is worked into these 5 center stitches.
Row 1: Join Color C with a sl st in marked sc #6, ch 1, sc in the same st and in the next 4 sts. (5 sts)
Rows 2–5: Ch 1, turn, sc in each st across. (5 sts)
Fasten off. The trunk should measure about 1.1 in (2.8 cm) wide × 1 in (2.5 cm) long. Total ornament height is now 4.75 in (12.1 cm).
Hanging Loop
With the RS facing, join Color B with a sl st in the center stitch of the 3-sc group at the top point.
Ch 20. Sl st into the same top stitch to close the loop. Then sl st in each of the 20 chs around the loop, working back toward the top. (20 sl sts) Sl st once more into the top stitch and fasten off.
The slip stitches turn the chain into a firm, cord-like loop that hangs about 2.5 in (6.4 cm) above the point.
Final Blocking
- Weave in all ends on the WS. Hide the green tails in the border, the tan tails in the trunk, and the cream tails behind nearby bobbles.
- Lightly mist the ornament with water, or soak it briefly and press out the extra water in a towel.
- Lay it face up on a blocking mat.
- Pin the 3 corners first. The base should be 4 in (10.2 cm) wide and the height from the base to the point 3.75 in (9.5 cm).
- Pin the trunk straight down from the center of the base.
- Use your fingertips to push each bobble forward from the back, so it isn’t flattened.
- Leave the ornament to dry completely before you unpin it.
Final Quality-Control Checklist
- Tree body has 17 rows, with 28 bobbles in 7 bobble rows.
- Bobbles stagger from row to row, and none sit at a row edge.
- Rows 1–2 make a solid green band along the base.
- Border has exactly 54 sts: 19 per side including the corners.
- Width is 4 in (10.2 cm), and the tree body is 3.75 in (9.5 cm) tall after the border.
- Trunk is centered on border sts 6–10 and is 5 sts × 5 rows.
- Total height is 4.75 in (12.1 cm) without the loop.
- Loop is firmly attached and centered at the point.
- No cream strands show through on the RS.
Troubleshooting
Bobbles sink to the back: bobbles must be worked on WS rows (the even rows). Check that Row 1 is the RS.
Cream shows between the green stitches: the carried strand is too loose or sitting too high. Keep it snug along the tops of the stitches and work over it firmly.
Sides ripple after the border: your edging is looser than your rows. Go down a hook size for the border only.
Sides pull inward: the border is too tight. Go up a hook size for the border only, and check that you worked 15 sc per side.
Tree leans to one side: you may have missed a decrease at one end. Count each RS row: 15, 13, 11, 9, 7, 5, 3, 1.
Trunk is off-center: recount the bottom border sc. There are 15 between the corner groups, and the trunk uses #6 to #10.
Holes beside the bobbles: pull the green sc after each bobble snug so the bobble is held firmly in place.
Care
Hand wash in cool water, press out the water gently, and dry flat, reshaping the point and corners. Store flat or hang it up so the bobbles don’t get crushed.
Final Notes
Here’s the full measurement chain. A gauge of 18 sc × 20 rows = 4 in (10.2 cm) gives a 17-stitch base of 3.75 in (9.5 cm). Seventeen rows that decrease down to 1 stitch make a triangle 3.5 in (8.9 cm) tall. The 54-stitch border brings it to 4 in (10.2 cm) × 3.75 in (9.5 cm). The 5 × 5 trunk adds 1 in (2.5 cm) for a total of 4.75 in (12.1 cm), and the loop hangs 2.5 in (6.4 cm) above the point. If each stage matches its checkpoint, your tree will come out the same size and shape every time. Make one, check it, and then make a whole little forest.
Happy crocheting!