

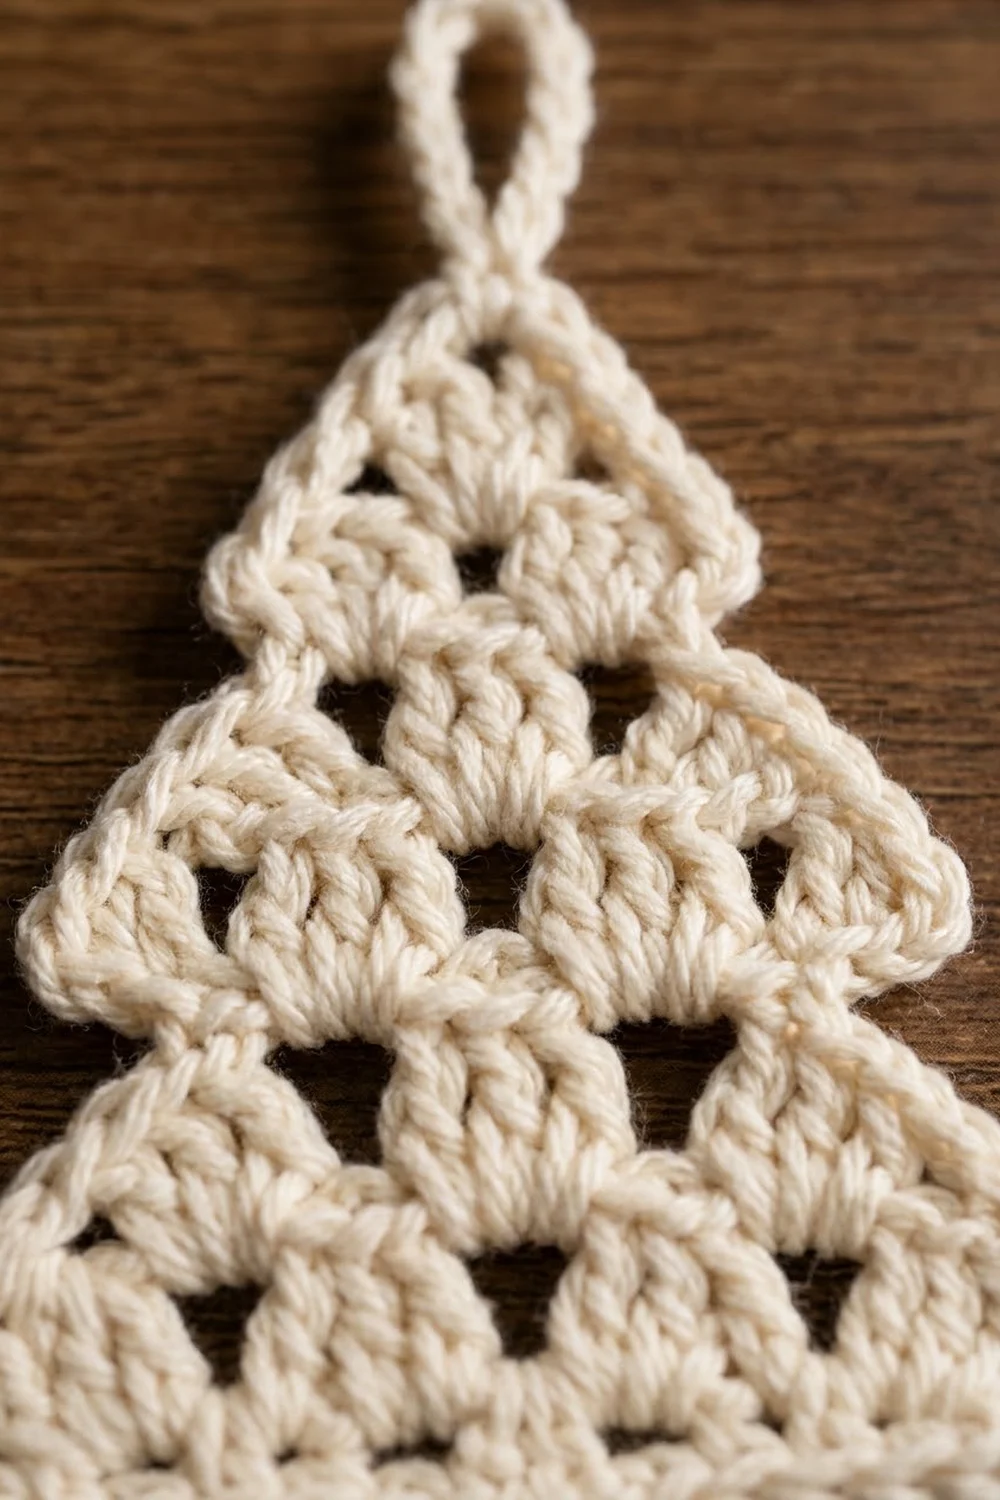
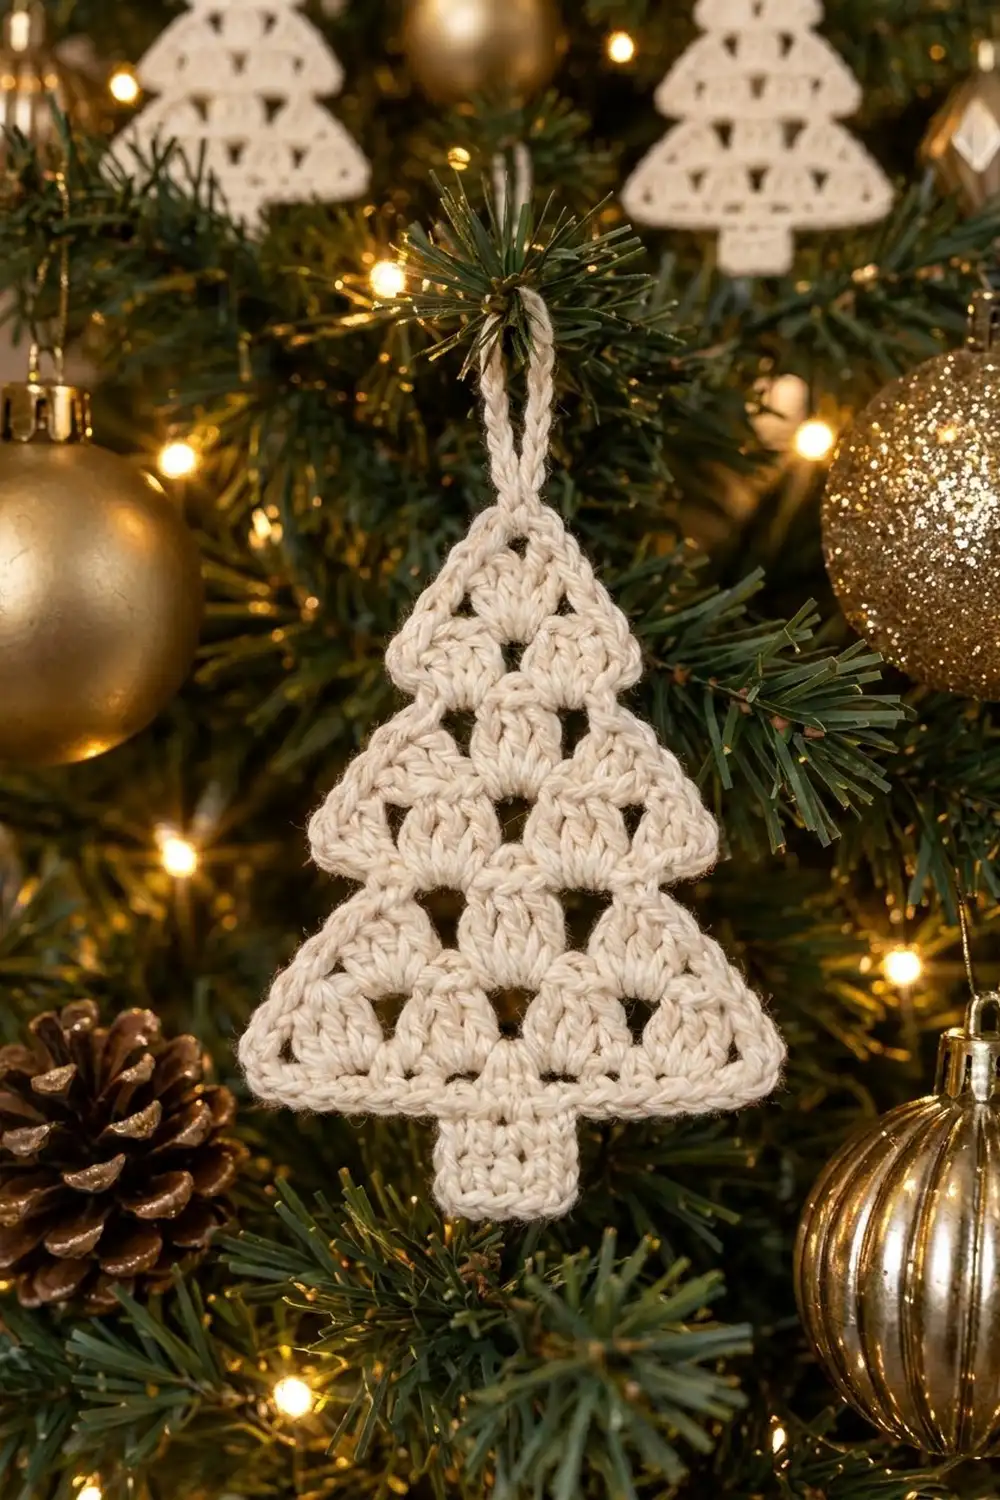
This little tree is a lacy ornament made in one piece from a single soft cream yarn. Rows of three-double-crochet clusters stack into a two-tier triangle. The chain spaces between the clusters leave rows of small triangular windows, and a notch on each side marks where the top tier overhangs the lower one.
A smooth single crochet border outlines the whole shape, including the short rectangular trunk. A plain chain loop at the tip lets you hang it on a tree, a gift, or a window hook.
The pattern uses US crochet terms. The finished ornament is about 4.75 in (12.1 cm) wide and 5 in (12.7 cm) tall, not counting the hanging loop, which adds about 2 in (5.1 cm).
You work the tree from the tip down in turned rows, adding one cluster per row. One “step” row starts the second tier. Then you work the trunk in rows off the center of the last row. Finally, one round of single crochet goes around everything, and you chain the hanging loop at the tip during that round.
Finished Size and Construction
- Finished size: about 4.75 in (12.1 cm) wide x 5 in (12.7 cm) tall, plus a 2 in (5.1 cm) loop
- Skill level: Easy / advanced beginner
- Terminology: US crochet terms
- Yarn weight: worsted (weight 4), cotton or cotton blend
- Hook: 4.0 mm (US G-6)
- Number of pieces: 1 (a single ornament, no joining)
- Layout: one two-tier tree with a trunk and hanging loop
- Tree size before border: 4.25 in (10.8 cm) wide x 3.5 in (8.9 cm) tall
- Trunk before border: 1 in (2.5 cm) wide x 1 in (2.5 cm) tall
- Border depth: 0.25 in (0.6 cm) on every edge
Materials
Choose a smooth worsted-weight cotton in cream, ivory, or natural. Cotton shows the cluster texture clearly and holds its shape after blocking. Soft acrylic also works, but the tree will be a little floppier and you may want to stiffen it.
- Cream, worsted cotton: 12 g, about 21 m (23 yd)
Tools:
- 4.0 mm (US G-6) crochet hook
- Tapestry needle
- Scissors
- Stitch marker (optional, to mark the trunk center)
- Blocking mat and rust-proof pins
- Spray bottle with water (optional: fabric stiffener)
The yarn amount includes a margin of about 40 percent for tails, a test piece, and any re-dos. One ornament uses about 8 g.
Abbreviations (US Terms)
- ch – chain
- sl st – slip stitch
- sc – single crochet
- dc – double crochet
- sp – space
- st(s) – stitch(es)
- RS – right side
Special stitch – Cluster (cl): 3 dc worked into the same ch-1 sp. Each cl counts as 3 sts.
Turning chain: A ch 4 at the start of a row counts as 1 dc + ch 1. Work the last dc of each row into the 3rd ch of the previous row’s ch-4.
Gauge and Checkpoints
Make your first ornament as a test piece. It’s small enough to work as your gauge swatch too.
Gauge: 1 cl + ch 1 = 0.75 in (1.9 cm) wide; 1 dc row = 0.5 in (1.3 cm) tall; 5 sc = 1 in (2.5 cm); 5 sc rows = 1 in (2.5 cm).
Checkpoints:
- After Row 3: about 2.75 in (7.0 cm) wide x 1.5 in (3.8 cm) tall
- Row 4 by itself: about 2 in (5.1 cm) wide, clearly narrower than Row 3
- After Row 7: about 4.25 in (10.8 cm) wide x 3.5 in (8.9 cm) tall
- After the trunk: total height about 4.5 in (11.4 cm)
- After the border: about 4.75 in (12.1 cm) x 5 in (12.7 cm)
If your tree is too big, change to a 3.75 mm (US F-5) hook. If it’s too small, change to a 4.5 mm (US 7) hook. If only the height is off, adjust how tall you make your dc by pulling the first loop up a little higher or lower. The ch-1 spaces control most of the width, so keep them snug but not tight.
Tree Body
You work the tree from the tip down in turned rows. Each growth row has one more cluster than the row before. The “dc” counts below include the turning chain and both edge dc.
Row 1: Make a magic ring. Ch 4 (counts as dc + ch 1), 3 dc in ring, ch 1, dc in ring. Pull the ring tightly closed. (1 cl, 5 dc, 2 ch-1 sps)
Row 2: Turn. Ch 4 (counts as dc + ch 1), cl in first ch-1 sp, ch 1, cl in next ch-1 sp, ch 1, dc in 3rd ch of turning ch. (2 cl, 8 dc, 3 ch-1 sps)
Row 3: Turn. Ch 4, [cl in next ch-1 sp, ch 1] 3 times, dc in 3rd ch of turning ch. (3 cl, 11 dc, 4 ch-1 sps)
Row 3 is the bottom of the top tier. Its two edge dc become the overhanging points of that tier.
Row 4 (step row): Turn. Skip the first dc and sl st into the first ch-1 sp. Ch 4 in that same sp (counts as dc + ch 1). [Cl in next ch-1 sp, ch 1] 2 times, dc in last ch-1 sp. Leave Row 3’s turning-chain dc unworked. (2 cl, 8 dc, 3 ch-1 sps)
This row starts the second tier. Its edge dc sit inside Row 3’s edge spaces, so Row 3’s outer dc stick out on both sides and form the notches.
Row 5: Turn. Ch 4, [cl in next ch-1 sp, ch 1] 3 times, dc in 3rd ch of turning ch. (3 cl, 11 dc, 4 ch-1 sps)
Row 6: Turn. Ch 4, [cl in next ch-1 sp, ch 1] 4 times, dc in 3rd ch of turning ch. (4 cl, 14 dc, 5 ch-1 sps)
Row 7: Turn. Ch 4, [cl in next ch-1 sp, ch 1] 5 times, dc in 3rd ch of turning ch. (5 cl, 17 dc, 6 ch-1 sps)
Fasten off, leaving a 6 in (15.2 cm) tail.
Row 7 stitch map (23 sts total): edge dc, sp, cl 1 (3), sp, cl 2 (3), sp, cl 3 (3), sp, cl 4 (3), sp, cl 5 (3), sp, edge dc. That’s 17 dc + 6 sps = 23. The trunk goes on the center 5 sts (sp, cl 3, sp), which leaves 9 sts on each side.
Trunk
You work the trunk into the tops of Row 7, so it hangs from the center of the lower tier.
Trunk Row 1: With the last row of the tree facing you, join yarn in the ch-1 sp just before cl 3. Ch 1, sc in same sp, sc in each of the 3 dc of cl 3, sc in next ch-1 sp. (5 sc)
Trunk Rows 2–5: Ch 1, turn, sc in each st across. (5 sc per row)
Don’t fasten off. The trunk should measure 1 in (2.5 cm) wide x 1 in (2.5 cm) tall.
Border
The border is one round of sc. It sharpens the outline, evens out the row ends, and adds 0.25 in (0.6 cm) to every edge.
Border gauge: 2 sc per dc row-end, 1 sc per sc row-end, 1 sc per st or ch-1 sp along stitch tops, and 3 sc in every outer corner.
Border Round: Ch 1, turn. Keep the same side facing for the rest of the round.
- Trunk bottom (9 sc): 3 sc in first st, sc in next 3 sts, 3 sc in last st.
- First trunk side (5 sc): 1 sc in each of the 5 trunk row-ends, working toward the tree.
- First bottom edge (8 sc): Working along the tops of Row 7, sc in the ch-1 sp next to the trunk, in the 3 dc of the next cl, in the next sp, and in the 3 dc of the outer cl: sp + 3 + sp + 3 = 8 sc.
- Lower corner (3 sc): 3 sc in the edge dc of Row 7.
- Lower tier side (8 sc): 2 sc in each row-end of Rows 7, 6, 5, and 4.
- Ledge (1 sc): 1 sc in Row 3’s edge ch-1 sp, next to the base of Row 4.
- Tier corner (3 sc): 3 sc in the exposed edge dc of Row 3.
- Top tier side (6 sc): 2 sc in each row-end of Rows 3, 2, and 1.
- Hanging loop: At the tip, ch 20. Don’t twist the chain.
- Second top tier side (6 sc): 2 sc in each row-end of Rows 1, 2, and 3. The first sc closes the loop.
- Second tier corner (3 sc): 3 sc in the exposed edge dc of Row 3.
- Second ledge (1 sc): 1 sc in Row 3’s edge ch-1 sp.
- Second lower tier side (8 sc): 2 sc in each row-end of Rows 4, 5, 6, and 7.
- Second lower corner (3 sc): 3 sc in the edge dc of Row 7.
- Second bottom edge (8 sc): sc in the 3 dc of the outer cl, the next sp, the 3 dc of the next cl, and the sp next to the trunk.
- Second trunk side (5 sc): 1 sc in each of the 5 trunk row-ends, working toward the bottom.
Sl st to the first sc. Fasten off.
Border count: The first half, up to the tip, is 9 + 5 + 8 + 3 + 8 + 1 + 3 + 6 = 43 sc. The second half is 6 + 3 + 1 + 8 + 3 + 8 + 5 = 34 sc. Total: 77 sc plus the ch-20 loop.
Per side of the tree: Each side (steps 3–8 or 10–15) has 29 sc: 8 along the bottom, 3 + 8 for the lower corner and side, 1 + 3 for the ledge and tier corner, and 6 up the top tier.
Why the math works: A worsted dc row-end is about 0.5 in (1.3 cm) tall. Two sc measure about 0.4 in (1.0 cm) at rest and stretch slightly to fill it, so the sides stay flat without ruffling. The bottom edges use exactly one sc per existing st or sp: 8 + 5 (trunk) + 8 = 21 sts, plus the 2 edge dc that hold the corners, equals Row 7’s 23 sts. The 3-sc corners turn each point cleanly. The single ledge sc fills the small gap under each tier point, which keeps the notch crisp and stops it puckering.
Final Blocking
- Weave in all ends along the border on the wrong side, then trim.
- Soak the ornament in cool water for 5 minutes, then roll it in a towel to remove extra water.
- Lay it flat on a blocking mat, RS up.
- Pin the tip first, then the two lower corners, so the bottom edge is straight and 4.75 in (12.1 cm) wide.
- Pin the two tier corners outward so the notches show clearly.
- Pin the trunk square, with its bottom edge parallel to the bottom of the tree.
- Gently open each triangular window with a fingertip.
- Lay the hanging loop straight above the tip so it doesn’t dry crooked.
- Let it dry completely. For a firmer ornament, spray lightly with fabric stiffener before it dries.
Final Quality-Control Checklist
- Tree is 4.75 in (12.1 cm) wide and 5 in (12.7 cm) tall without the loop
- Row 7 has exactly 5 clusters and 23 sts
- Row 4 is clearly narrower than Row 3, with a notch on both sides
- Trunk is centered under cl 3 and has 5 sc per row
- Border totals 77 sc plus the ch-20 loop
- Both sides match in length and corner shape
- All ends are woven in and can’t be seen from the RS
- Loop is centered at the tip and not twisted
Troubleshooting
Sides ruffle: You’re working too many sc into the row-ends, or your border tension is loose. Keep exactly 2 sc per dc row-end, or use a 3.75 mm (US F-5) hook for the border only.
Sides pull in or curve: Your sc are too tight. Loosen your tension or go up one hook size for the border.
Notches disappear: Check that Row 4 started with a sl st into the edge sp and ended in the last ch-1 sp, not in the turning chain.
Trunk is off-center: Count Row 7 from both ends. The trunk has to start in the 3rd ch-1 sp from either edge dc.
Magic ring loosens: Weave the starting tail through the ring once in each direction before you trim it.
Tree is lopsided: The turning chain is often looser than a real dc. Make the ch-4 a little snugger.
Care
Hand wash in cool water with mild soap and lay flat to dry, reshaping the tier points. Store flat or hanging, away from heavy ornaments that could crush the clusters.
Final Notes
The measurements build on each other and are easy to check. Each cluster plus its ch-1 is 0.75 in (1.9 cm) wide, and each dc row is 0.5 in (1.3 cm) tall. Three rows make a top tier 2.75 in (7.0 cm) wide. The step row narrows the work to 2 in (5.1 cm), and three more rows widen the tree to 4.25 in (10.8 cm) by 3.5 in (8.9 cm). The trunk adds 1 in (2.5 cm). The 0.25 in (0.6 cm) border brings the ornament to 4.75 in (12.1 cm) by 5 in (12.7 cm), with a 2 in (5.1 cm) loop on top.
Once your first tree measures right, the rest go quickly.
Happy crocheting!