

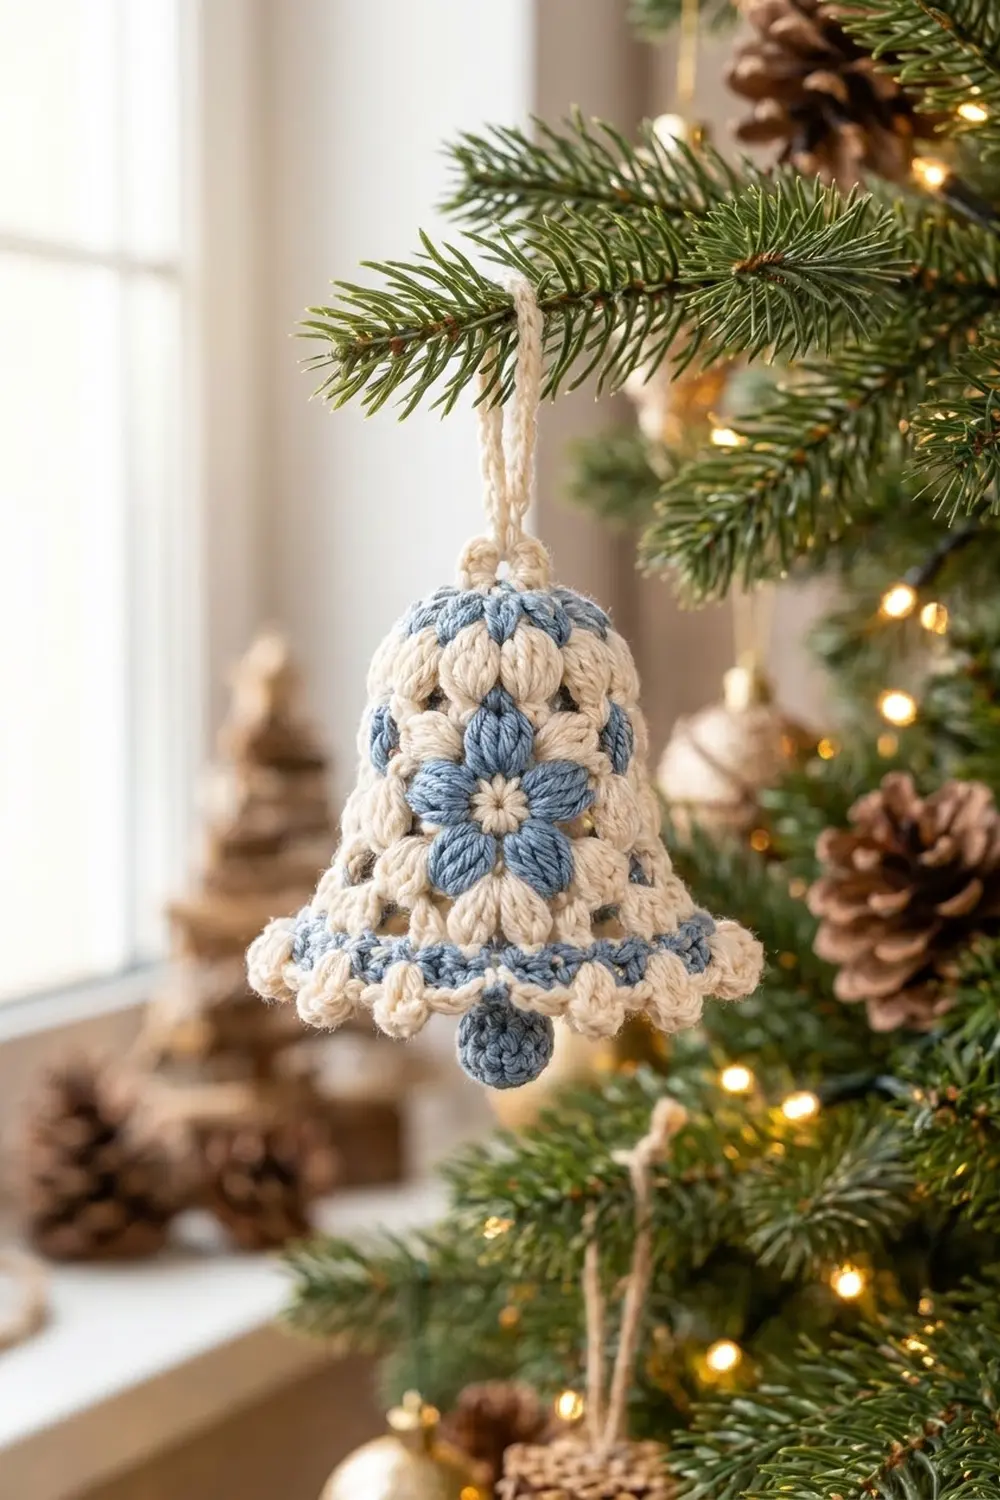
This little bell ornament has a soft, wintry look. The body is cream puff-stitch openwork that lets the tree lights shine through. It has a dusty-blue crown at the top, a blue band at the hem, and a scalloped edging of cream bobbles. A six-petal blue flower sits on the front, and a small blue ball clapper peeks out below the hem.
The style is cozy Scandinavian: two quiet colors, lots of texture, and a shape you can recognize from across the room. It makes a good gift-tag topper or tree ornament. It’s also easy to repeat once you’ve made the first bell.
This pattern uses US crochet terms. The finished bell is 3.5 in (8.9 cm) tall from the crown to the bottom of the bobble edging, and 4.5 in (11.4 cm) wide across the hem when laid flat. The hanging loop adds 2 in (5.1 cm).
You work the bell top-down in joined rounds without turning. First you make a flat blue crown, then you grow cream puff rounds outward into a flare and close them with a blue sc band and a cream bobble edging. You crochet the hanging loop directly onto the crown. You then make the flower and the clapper separately and sew them on.
Finished Size and Construction
- Finished size: 3.5 in (8.9 cm) tall × 4.5 in (11.4 cm) wide at the hem, measured flat
- Skill level: Easy–Intermediate
- Terminology: US crochet terms
- Yarn weight: DK / light worsted (#3), cotton or cotton blend
- Hook: 3.5 mm (E-4)
- Number of pieces: 1 ornament: the bell body (with the loop worked on), plus 2 small sewn-on pieces (flower and clapper)
- Layout: Single standalone bell; no joining of multiple motifs
- Crown size: 1.25 in (3.2 cm) across after Round 2
- Size before edging: 3 in (7.6 cm) tall × 4 in (10.2 cm) wide flat (circumference 8 in / 20.3 cm)
- Edging depth: 0.5 in (1.3 cm) in height, and about 0.25 in (0.6 cm) of extra width on each side
Materials
Choose a smooth, mercerized or soft matte cotton in DK weight. Cotton shows the puff stitches clearly and holds the bell shape well after blocking. Avoid fuzzy yarns, which hide the openwork.
- Color A – Cream: 10 g (about 24 m)
- Color B – Dusty Blue: 6 g (about 14 m)
- 3.5 mm (E-4) crochet hook
- Tapestry needle
- Scissors
- Stitch marker
- A small pinch of polyester fiberfill for the clapper
- Spray bottle and blocking pins
- Optional: a small foam cone, or a rolled towel shaped into a cone, for blocking
The quantities include a margin of about 20% for gauge swatching and weaving in ends.
Abbreviations (US Terms)
- ch – chain
- sl st – slip stitch
- sc – single crochet
- dc – double crochet
- sc2tog – single crochet 2 together
- MR – magic ring
- sp – space
- st(s) – stitch(es)
- yo – yarn over
Special stitches
- Puff: (Yo, insert hook in the indicated st or sp, yo, pull up a loop to about 0.4 in / 1.0 cm) 3 times, yo, pull through all 7 loops on the hook. Ch 1 tightly to lock it; this locking ch is part of the puff and is not counted.
- Bobble: (Yo, insert hook in the indicated st, yo, pull up a loop, yo, pull through 2 loops) 4 times, yo, pull through all 5 loops on the hook.
Gauge and Checkpoints
Gauge: 20 sc and 22 rounds = 4 in (10.2 cm) with a 3.5 mm hook.
Make the flower first, because it works as your gauge test. A finished flower should measure 1.5 in (3.8 cm) across from petal tip to petal tip. If it does, your puff height will match the bell.
Checkpoints during the bell:
- After Round 2: the crown is 1.25 in (3.2 cm) across.
- After Round 6: the bell is 2.25 in (5.7 cm) tall, measured from the top center of the crown.
- After Round 7: 2.75 in (7.0 cm) tall.
- After Round 8: 3 in (7.6 cm) tall and 4 in (10.2 cm) wide flat.
- After Round 9 (edging): 3.5 in (8.9 cm) tall and 4.5 in (11.4 cm) wide flat.
If your pieces are too big: go down to a 3.25 mm hook, and pull up the puff loops to a shorter, even height.
If your pieces are too small: go up to a 3.75 mm hook. Don’t add stitches, because every round count below depends on the 10-repeat structure.
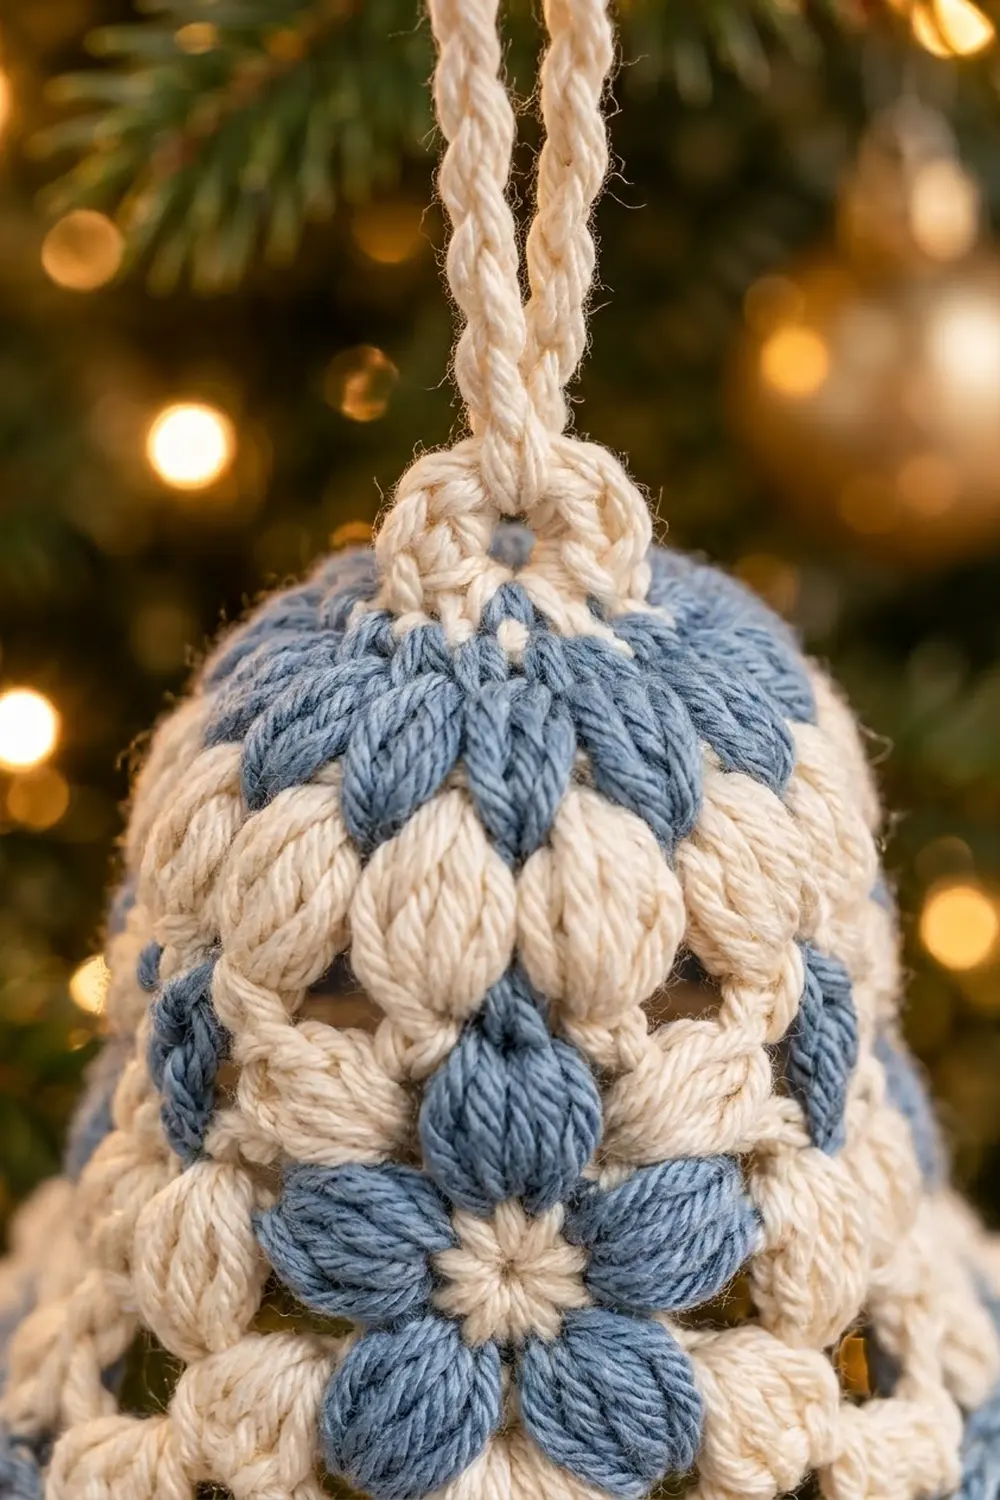
Flower Appliqué
Make 1.
Round 1 (Color A): MR, ch 1, 6 sc in the ring. Pull the ring tight and sl st to the first sc to join. Fasten off A. (6 sc)
Round 2 (Color B): Join B in any sc. Ch 2 (does not count as a st), puff in the same st, ch 2, puff in the next st, ch 2; repeat from * 4 more times. Sl st to the top of the first puff. (6 puffs, 6 ch-2 sps)
Round 3 (Color B): In each ch-2 sp work (sl st, ch 1, sl st). This round pinches the gaps between the petals so that each petal is a separate teardrop shape. Fasten off and leave a 10 in (25.4 cm) tail for sewing. (6 petals)
Checkpoint: 1.5 in (3.8 cm) across, lying flat. Weave in the cream tail on the back.
Bell Body
You work the bell top-down in joined rounds and don’t turn. The right side faces you throughout.
Round 1 (Color B): MR, ch 1, 10 sc in the ring. Pull the ring tight and sl st to the first sc. (10 sc)
Round 2 (Color B): Ch 1, 2 sc in each st around. Sl st to the first sc. Fasten off B. (20 sc)
Checkpoint: the crown is a flat disk 1.25 in (3.2 cm) across.
Round 3 (Color A): Join A in any sc. Ch 2 (does not count), puff in the same st, ch 1, skip the next st, puff in the next st, ch 1, skip the next st; repeat from * 8 more times. Sl st to the top of the first puff. (10 puffs, 10 ch-1 sps = 20 sts)
This round turns the flat crown downward and starts the sides of the bell.
Round 4: Sl st into the next ch-1 sp. Ch 2, puff in the same sp, ch 2, puff in the next ch-1 sp, ch 2; repeat from * 8 more times. Sl st to the first puff. (10 puffs, 10 ch-2 sps = 30 sts)
Round 5: Sl st into the next ch-2 sp. Ch 2, puff in the same sp, ch 2, puff in the next ch-2 sp, ch 2; repeat from * 8 more times. Sl st to the first puff. (10 puffs, 10 ch-2 sps = 30 sts)
This is a straight round, so the sides of the bell drop vertically here.
Round 6: Sl st into the next ch-2 sp. Ch 2, puff in the same sp, ch 3, puff in the next ch-2 sp, ch 3; repeat from * 8 more times. Sl st to the first puff. (10 puffs, 10 ch-3 sps = 40 sts)
Checkpoint: 2.25 in (5.7 cm) tall.
Round 7 (flare): Sl st into the next ch-3 sp. Ch 2, (puff, ch 1, puff, ch 1) in the same sp, (puff, ch 1, puff, ch 1) in the next ch-3 sp; repeat from * 8 more times. Sl st to the first puff. Fasten off A. (20 puffs, 20 ch-1 sps = 40 sts)
Doubling the puffs while keeping the stitch total at 40 pushes the fabric outward into the bell’s skirt.
Checkpoint: 2.75 in (7.0 cm) tall.
Round 8 (Color B, band): Join B in the top of any puff. Ch 1, sc in the top of the puff, sc in the next ch-1 sp; repeat from * around. Sl st to the first sc. Fasten off B. (40 sc)
Count: 20 sc worked into puffs + 20 sc worked into ch-1 sps = 40 sc. That’s one sc per existing stitch, with nothing added.
Checkpoint: 3 in (7.6 cm) tall and 4 in (10.2 cm) wide flat, with a circumference of 8 in (20.3 cm).
Hanging Loop
With the bell upside down, join A with a sl st around any sc of Round 1 at the center of the crown. Ch 20, then sl st around the sc on the opposite side of the center. Sl st back along the chain if you want a sturdier, doubled look. Fasten off and weave in the end.
The loop measures 2 in (5.1 cm) tall when hanging, because 20 ch at about 5 ch per inch gives 4 in (10.2 cm) folded in half.
Clapper Ball
Round 1 (Color B): MR, 6 sc. Don’t join; work in a spiral and mark the first st. (6 sc)
Round 2: 2 sc in each st around. (12 sc)
Rounds 3–4: Sc in each st around. (12 sc)
Round 5: Sc2tog 6 times. (6 sc)
Stuff lightly. Fasten off, thread the tail through the front loops of the last 6 sts, and pull to close. Don’t cut the tail.
Checkpoint: about 0.75 in (1.9 cm) across.
Attaching: Thread the ball’s tail up through the inside of the bell and out through the center of the crown. Adjust it so the center of the ball sits level with the bottom of the bobble edging. The ball should hang about 0.5 in (1.3 cm) below the hem. The free strand inside should be roughly 3.25 in (8.3 cm) long. Knot the strand securely under the loop and weave in the end.
Border (Bobble Edging)
Border gauge: Round 8 has 40 sc. When the bell lies flat, each side (front and back) shows 20 sc. The edging uses a 2-stitch repeat, so every side holds exactly 10 repeats.
Round 9 (Color A): Join A in any sc of Round 8. Ch 1, sc in the same st, ch 1, bobble in the next st, ch 1, sc in the next st, ch 1, bobble in the next st, ch 1; repeat from * 18 more times. Sl st to the first sc. Fasten off.
Count: 40 sts worked one-per-existing-stitch (20 sc + 20 bobbles), plus 40 ch-1 added between them, for a total of 80 sts.
Per side, laid flat: 20 base sts become 10 sc + 10 bobbles + 20 ch-1, so each side shows 10 bobble scallops.
Why the math works: 40 is evenly divisible by the 2-stitch repeat, which gives 20 repeats with no partial repeat at the join. The ch-1 on each side of each bobble gives it room to stand proud without ruffling. That adds about 0.25 in (0.6 cm) of width on each side and 0.5 in (1.3 cm) of height. The bell goes from 4 in (10.2 cm) to 4.5 in (11.4 cm) wide and from 3 in (7.6 cm) to 3.5 in (8.9 cm) tall.
Sewing on the Flower
Lay the bell flat with the joining seam centered at the back. Center the flower on the front so that it covers Rounds 4–6. The flower’s cream center should sit about 1.5 in (3.8 cm) below the top of the crown. Turn it so one petal points straight up.
Using the blue tail, sew through the base of each petal and through a puff or chain behind it. Make 2 small stitches per petal. Keep the petal tips loose so they stay puffy. Weave in the end on the inside of the bell.
Final Blocking
- Weave in all the remaining ends inside the bell before you block.
- Lightly mist the bell with water until it’s damp but not wet.
- Slip it over a foam cone, or a towel rolled into a cone, that’s about 4 in (10.2 cm) across at the base.
- Ease the puff columns so that they line up vertically, with 10 columns evenly spaced around the bell.
- Pull the blue band gently into a smooth circle 8 in (20.3 cm) around.
- Pin each bobble downward and slightly outward so the scallops flare evenly.
- Press the flower petals flat with your fingers, then let them spring back.
- Let it dry completely, about 6 hours. Then remove the pins and check that the bell is 3.5 in (8.9 cm) tall and 4.5 in (11.4 cm) wide flat.
Final Quality-Control Checklist
- Crown: 20 sc in blue, flat and closed at the center.
- Rounds 3–6: 10 puff columns, evenly spaced.
- Round 7: 20 puffs, in 10 evenly paired V shapes.
- Round 8: exactly 40 blue sc, with no gaps at the join.
- Round 9: 20 bobbles, 10 visible on each side when flat.
- The flower is centered on the front with one petal pointing up.
- The clapper hangs centered, with about 0.5 in (1.3 cm) showing below the hem.
- The loop is secure, 2 in (5.1 cm) tall, and centered on the crown.
- All ends are woven in on the inside.
Troubleshooting
- Puffs look flat or uneven: pull every loop up to the same height before you close the puff, and always lock it with the ch 1.
- The bell flares too early: check that Rounds 4–5 have ch-2 sps, not ch-3.
- The hem ruffles: your edging chains are too loose. Work the ch-1s tighter, or go down to a 3.25 mm hook for Round 9 only.
- The hem cups inward: you skipped a ch-1 in Round 9. Recount to 80 sts.
- The join seam drifts sideways: start each round with a sl st into the next sp, exactly as written.
- The clapper twists to one side: anchor the strand at the exact center of Round 1, not off to one side.
Care
Hand wash in cool water with mild soap, press out the water in a towel, and reshape over a cone to dry. Store the ornament flat or hanging, away from heavy items that could crush the puffs.
Final Notes
The measurement chain is simple to follow:
- The crown is 1.25 in (3.2 cm) across.
- The puff rounds grow the bell to 2.75 in (7.0 cm) tall.
- The 40-stitch blue band sets the hem at 4 in (10.2 cm) wide flat.
- The bobble edging finishes the bell at 3.5 in (8.9 cm) tall and 4.5 in (11.4 cm) wide.
If you hit each checkpoint, the flower and clapper will fall into place exactly as shown. Make one, and you’ll probably want a whole row of them on the tree.
Happy crocheting!