

The Evergreen Lace Tree is a flat ornament with a strong shape and a light, lacy look. Deep teal double crochet rows dip into a V at the center, so the tree has soft chevron stripes. Three open rows of spaced posts divide it into four tiers. Each tier’s outer corners flare into small points, which gives the classic stacked fir-tree outline.
A light beige trunk and a beige chain loop finish the ornament. The teal and beige look calm and natural and suit both rustic and modern decorations. The tree looks good hanging on branches, tied to a gift, or clipped to a garland.
This pattern uses US crochet terms. The finished tree body measures 4.5 in (11.4 cm) wide and 5.5 in (14.0 cm) tall. With the trunk, the ornament is 6.25 in (15.9 cm) tall, and the loop adds 1.75 in (4.4 cm) above the tip.
To make it, you work the body from the tip down in turned rows with a center increase in every row. Each lace row starts a few stitches in from the edge, which creates the tiers. A one-round single-crochet border adds the flared points. Then you make the trunk and loop separately and sew them on.
Finished Size and Construction
- Finished size: 4.5 in (11.4 cm) wide × 5.5 in (14.0 cm) tall (tree body); 6.25 in (15.9 cm) tall with trunk
- Skill level: Easy / advanced beginner
- Terminology: US crochet terms
- Yarn weight: Sport (#2)
- Hook: 3.25 mm (US D-3)
- Number of pieces: 1 tree body, plus 1 trunk and 1 hanging loop sewn on
- Layout: Single ornament, no joining
- Piece size before border: 4.3 in (10.9 cm) wide × 5.3 in (13.5 cm) tall
- Border depth: about 0.1 in (0.3 cm) all around
Materials
Choose a smooth sport-weight cotton or cotton blend. Cotton holds the chevron lines and flared points crisply and blocks flat. Avoid fuzzy yarns, which blur the open rows.
- Color A, deep teal: 7 g (about 22 m), for the tree body and border
- Color B, light beige: 2 g (about 6 m), for the trunk and hanging loop
These amounts include a safety margin for gauge swatches and weaving in ends.
Tools:
– 3.25 mm (US D-3) crochet hook
– Tapestry needle
– Scissors
– Stitch marker
– Rust-proof pins and a blocking mat or folded towel
– Spray bottle with water
Abbreviations (US Terms)
- ch – chain
- sl st – slip stitch
- sc – single crochet
- dc – double crochet
- sk – skip
- sp – space
- st(s) – stitch(es)
- tch – turning chain
- RS – right side
Special stitch – Flare point: (sc, ch 2, sc) all in the same stitch or space.
Stitch-count note: A “half” means the stitches from the outer edge to the center ch-1 sp. In lace rows, each ch-1 counts as one position, so a lace row has the same kind of count as a solid row. The center ch-1 sp is never counted.
Gauge and Checkpoints
Stitch gauge: 22 dc = 4 in (10.2 cm) with a 3.25 mm hook.
Make one tree body before buying more yarn for a batch. Check it at each stage, measuring height straight down the center line from the top of the ring:
- After Row 3: 1.0 in (2.5 cm) tall, 1.3 in (3.3 cm) wide corner to corner
- After Row 7: 2.4 in (6.1 cm) tall, 2.3 in (5.8 cm) wide
- After Row 11: 3.8 in (9.7 cm) tall, 3.3 in (8.4 cm) wide
- After Row 15: 5.3 in (13.5 cm) tall, 4.3 in (10.9 cm) wide
- After border: 5.5 in (14.0 cm) tall, 4.5 in (11.4 cm) wide
If your piece is more than 0.2 in (0.5 cm) too big at the Row 7 checkpoint, go down half a hook size. If it is too small, go up half a size. If the V rows ruffle, your center increases are too tight compared to your other stitches, so loosen the (dc, ch 1, dc) slightly.
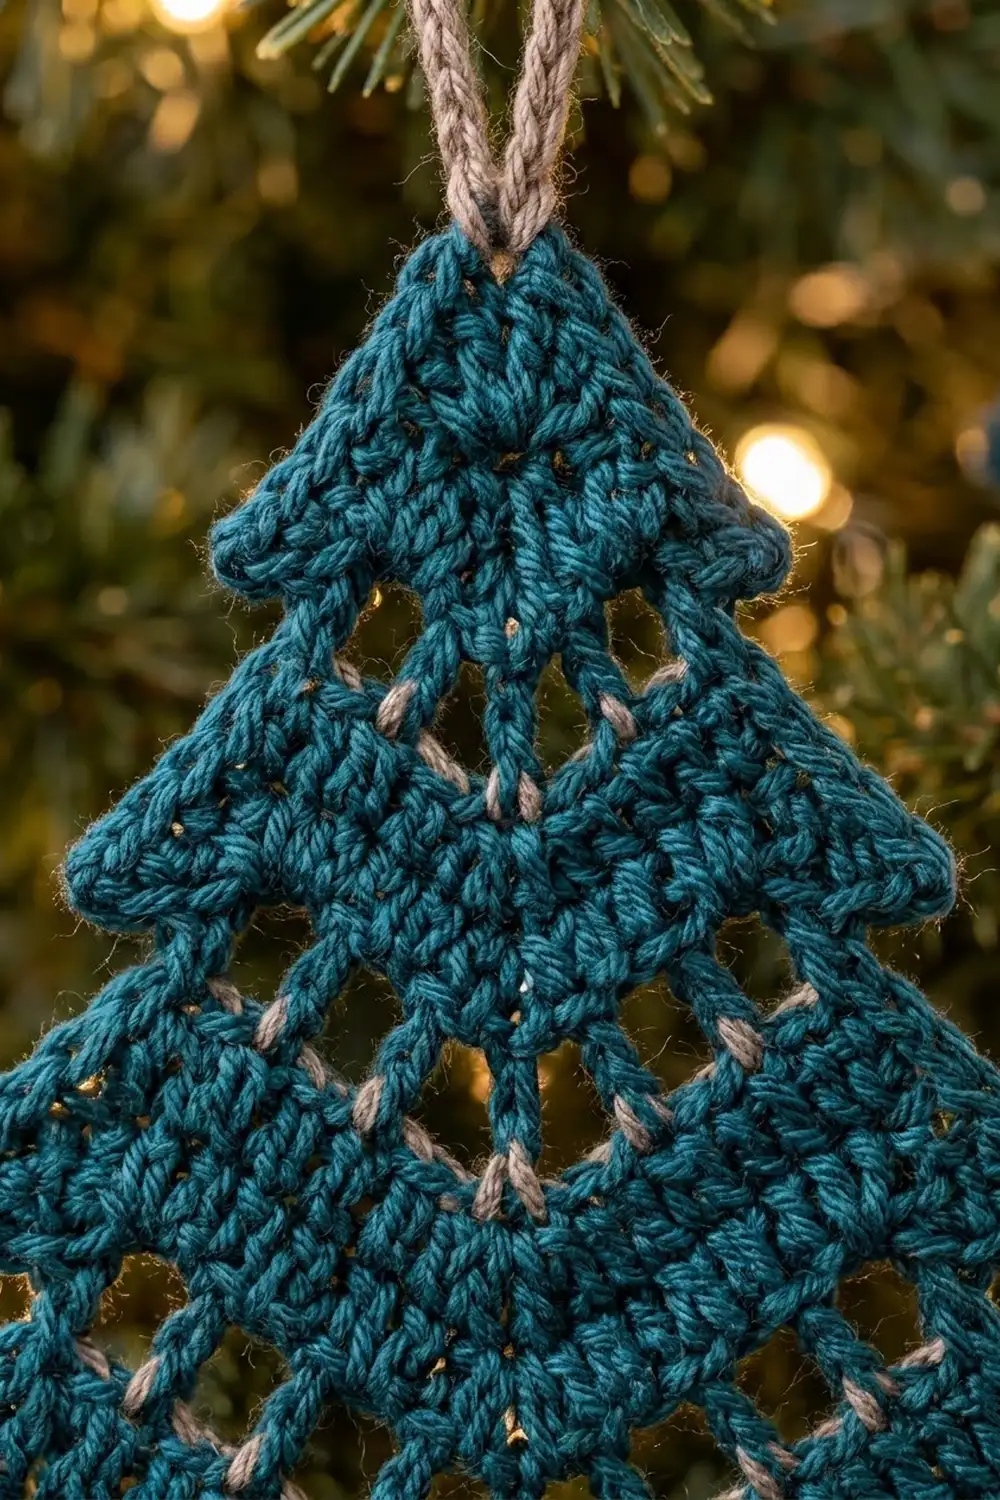
Tree Body
Use Color A. Turn at the end of every row. Ch 3 at the start of a row counts as the first dc. Ch 4 at the start of a lace row counts as dc + ch 1.
Tier 1 (Top)
Row 1: Make a magic ring. Ch 3, work 3 dc in the ring, ch 1, then 4 dc in the ring. Pull the ring closed firmly. (8 dc, center ch-1 sp; half = 4)
Row 2: Ch 3, dc in next 3 dc, (dc, ch 1, dc) in center sp, dc in next 3 dc, dc in top of tch. (10 dc; half = 5)
Row 3: Ch 3, dc in each st to center sp, (dc, ch 1, dc) in sp, dc in each st to end, ending in top of tch. (12 dc; half = 6)
Checkpoint: 1.0 in (2.5 cm) tall.
Tier 2
Row 4 (lace step row): Sl st in first 3 sts. The ch 4 rises from the 3rd st. Ch 4, sk next st, dc in next st, ch 1, sk next st; repeat from * to center sp. Work (dc, ch 1, dc) in sp. Ch 1, sk next st, dc in next st; repeat from ** until 2 sts remain, and leave those 2 unworked. (6 dc and 4 ch-1 positions = 10; half = 5)*
The 2 unworked stitches at each end form the ledge where Tier 1 sticks out past Tier 2, about 0.35 in (0.9 cm).
Row 5: Ch 3, dc in each ch-1 sp and each dc to center sp, (dc, ch 1, dc) in sp, dc in each dc and ch-1 sp to end, ending in 3rd ch of ch-4. (12 dc; half = 6)
Row 6: Same as Row 3. (14 dc; half = 7)
Row 7: Same as Row 3. (16 dc; half = 8)
Checkpoint: 2.4 in (6.1 cm) tall.
Tier 3
Row 8 (lace step row): Work as Row 4. (8 dc and 6 ch-1 positions = 14; half = 7)
Row 9: Work as Row 5. (16 dc; half = 8)
Row 10: Same as Row 3. (18 dc; half = 9)
Row 11: Same as Row 3. (20 dc; half = 10)
Checkpoint: 3.8 in (9.7 cm) tall.
Tier 4 (Bottom)
Row 12 (lace step row): Work as Row 4. (10 dc and 8 ch-1 positions = 18; half = 9)
Row 13: Work as Row 5. (20 dc; half = 10)
Row 14: Same as Row 3. (22 dc; half = 11)
Row 15: Same as Row 3. (24 dc; half = 12)
Fasten off. Checkpoint: 5.3 in (13.5 cm) tall, 4.3 in (10.9 cm) wide.
Count logic: Every row adds 1 stitch per half at the center. Each lace row also removes 2 edge stitches per half. Lace rows start when a half has an even count, so the alternating dc/ch pattern always lands on a dc right before the center increase.
Trunk
Use Color B.
Row 1: Ch 7, sc in 2nd ch from hook and in each ch across. (6 sc)
Rows 2–6: Ch 1, sc in each sc across. (6 sc)
Fasten off, leaving a 10 in (25.4 cm) tail for sewing. The trunk measures 1.1 in (2.8 cm) wide × 1.0 in (2.5 cm) tall.
Hanging Loop
Use Color B. Ch 20, then sl st in 2nd ch from hook and in each ch across. (19 sl sts)
Fasten off, leaving an 8 in (20.3 cm) tail. The cord is about 3.5 in (8.9 cm) long and folds into a 1.75 in (4.4 cm) loop.
Border
Border gauge: One dc row-end is about as tall as 2 sc are wide, so you work 2 sc into every dc row-end. Along the bottom edge, work 1 sc into each dc, plus 3 sc at the V point so the corner can turn.
Round 1: With RS facing and Color A, join with sc in the last st of Row 15 (the bottom outer corner). Ch 2, sc in the same st, which makes the first flare point.
Bottom edge: Sc in next 11 dc, 3 sc in center sp, sc in next 11 dc, then a flare point in the last st. (25 sc between the corner points)
First slanted side, going up:
– 2 sc in each row-end of Rows 15, 14, 13, and 12 (8 sc)
– Sc in the 2nd ledge st of Row 11, flare point in the outer corner st of Row 11 (1 sc + flare)
– 2 sc in each row-end of Rows 11–8 (8 sc)
– Sc in the 2nd ledge st of Row 7, flare point in the outer corner st (1 sc + flare)
– 2 sc in each row-end of Rows 7–4 (8 sc)
– Sc in the 2nd ledge st of Row 3, flare point in the outer corner st (1 sc + flare)
– 2 sc in each row-end of Rows 3–1 (6 sc)
Apex: Work a flare point around the ring at the tip.
Second slanted side, going down:
– 2 sc in each row-end of Rows 1–3 (6 sc)
– Flare point in the outer corner st of Row 3, sc in the next ledge st
– 2 sc in each row-end of Rows 4–7 (8 sc)
– Flare point in the outer corner st of Row 7, sc in the next ledge st
– 2 sc in each row-end of Rows 8–11 (8 sc)
– Flare point in the outer corner st of Row 11, sc in the next ledge st
– 2 sc in each row-end of Rows 12–15 (8 sc)
Sl st to the first sc. Fasten off.
Round totals:
– Bottom edge: 25 sc.
– Each slanted side: 8 + 1 + 8 + 1 + 8 + 1 + 6 = 33 sc, plus 3 flare points.
– There are 9 flare points (2 bottom corners, 6 tier corners, 1 apex) with 2 sc each, for 18 sc.
– Total: 25 + 33 + 33 + 18 = 109 sc and 9 ch-2 sps.
Why the math works: The ch-2 in each flare point pushes that corner out, so the bottom corner of each tier sticks out past the tier below. The single ledge sc keeps the step neat without ruffling. The border adds about 0.1 in (0.3 cm) at the tip and bottom, which takes the height from 5.3 in (13.5 cm) to 5.5 in (14.0 cm). The flares add width at the corners, taking the width from 4.3 in (10.9 cm) to 4.5 in (11.4 cm).
Assembly
- Center the trunk under the bottom V point, behind the tree. Overlap it 0.25 in (0.6 cm) so that 0.75 in (1.9 cm) shows below the border.
- Whipstitch the top row of the trunk to the back of Row 15 with the beige tail. Keep the stitches out of sight from the front.
- Thread one end of the loop cord through the apex ch-2 sp. Fold the cord in half and sew both ends together behind the tip.
Final Blocking
- Weave in all ends along stitches of the same color.
- Mist the ornament until it is damp, not soaked.
- Lay it face down on the mat and smooth the center line straight.
- Pin the apex and the two bottom corners so the piece is 5.5 in (14.0 cm) tall and 4.5 in (11.4 cm) wide.
- Pin out each flare point, the same on both sides.
- Open each lace row gently with your fingertips so the posts stand straight.
- Let it dry completely, at least 6 hours, before you unpin it.
Final Quality-Control Checklist
- Stitch counts: Row 15 = 24 dc, Round 1 = 109 sc and 9 ch-2 sps
- The center V line runs straight from the tip to the bottom point
- All three lace rows have their posts evenly spaced
- The ledges match on both sides
- All 9 flare points are crisp and even
- The trunk is centered and shows 0.75 in (1.9 cm)
- The loop is secure and 1.75 in (4.4 cm) tall
- The tree lies flat with no cupping or ruffling
Troubleshooting
The tree cups at the center. Your center increases are too tight. Work the ch 1 more loosely, or block firmly.
The edges ruffle. You may have worked extra stitches into the row-ends. Use exactly 2 sc per dc row-end.
Lace posts lean. Pull up evenly on each dc, then nudge the posts straight while blocking.
The tiers don’t stick out. Make sure you worked 3 sl sts at the start of the lace row and left 2 sts unworked at the end.
The trunk sits off-center. Line up its center between the 3 sc at the bottom V point before you sew.
The loop twists. Untwist the cord before sewing the ends together.
Care
Hand-wash in cool water with mild soap, then press out the water in a towel. Lay flat and reshape to the blocked size to dry.
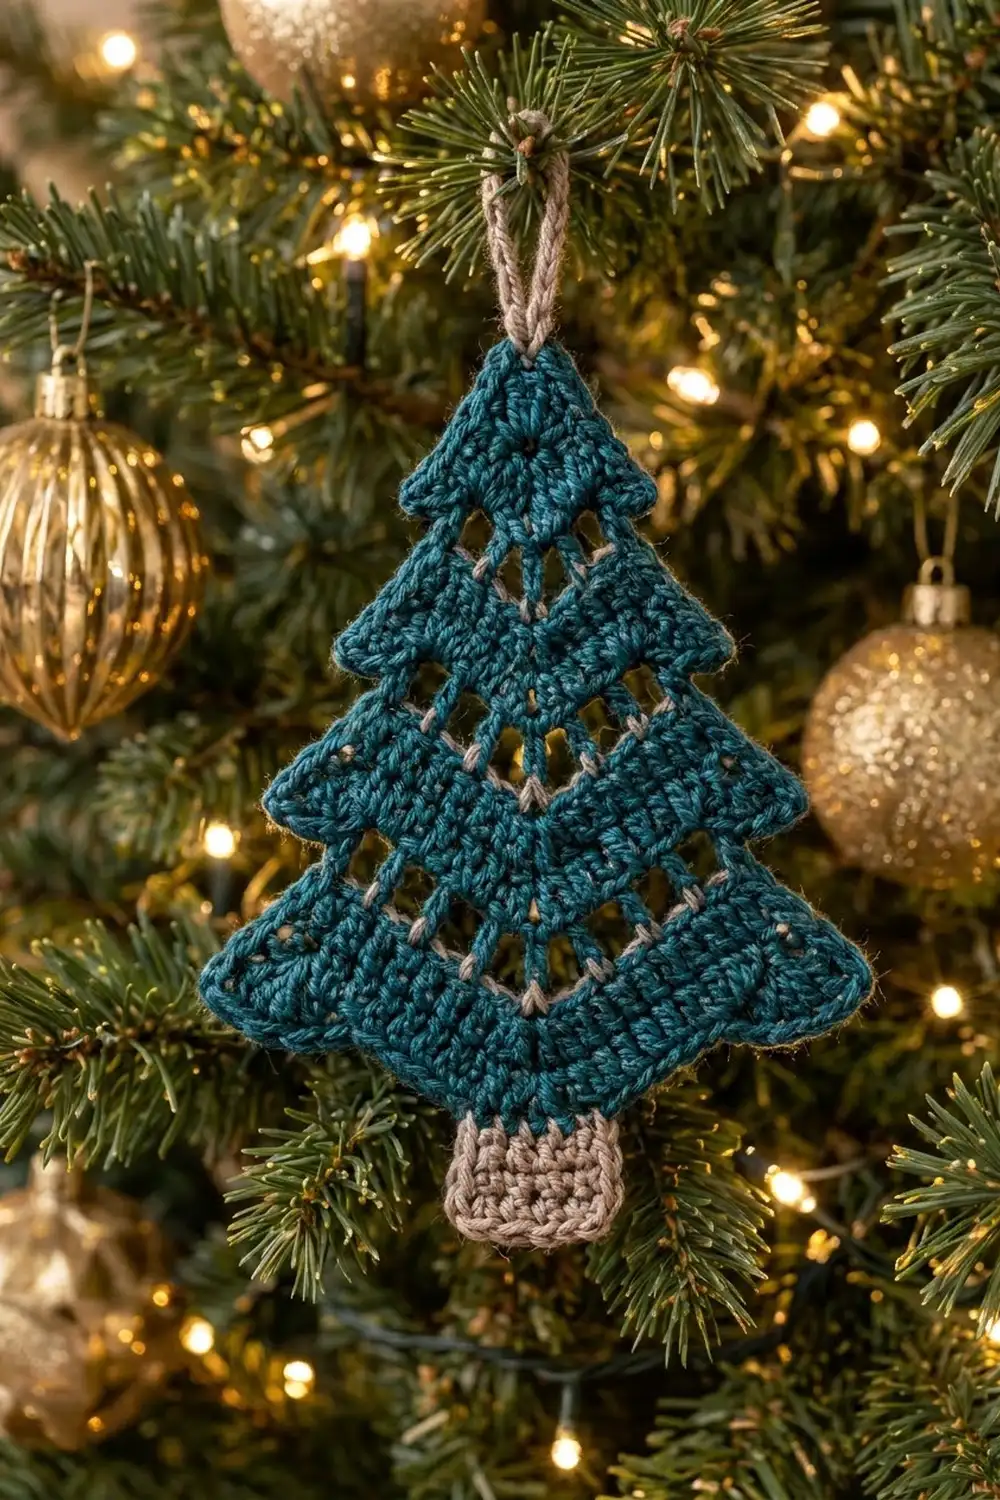
Final Notes
The measurement chain runs like this:
– Rows 1–3 reach 1.0 in (2.5 cm).
– Each 4-row tier adds about 1.4 in (3.6 cm).
– Row 15 finishes at 5.3 in (13.5 cm) × 4.3 in (10.9 cm).
– The border brings the body to 5.5 in (14.0 cm) × 4.5 in (11.4 cm).
– The trunk takes the total to 6.25 in (15.9 cm).
If your first tree matches each checkpoint, every tree after it will match too.
Happy crocheting!