

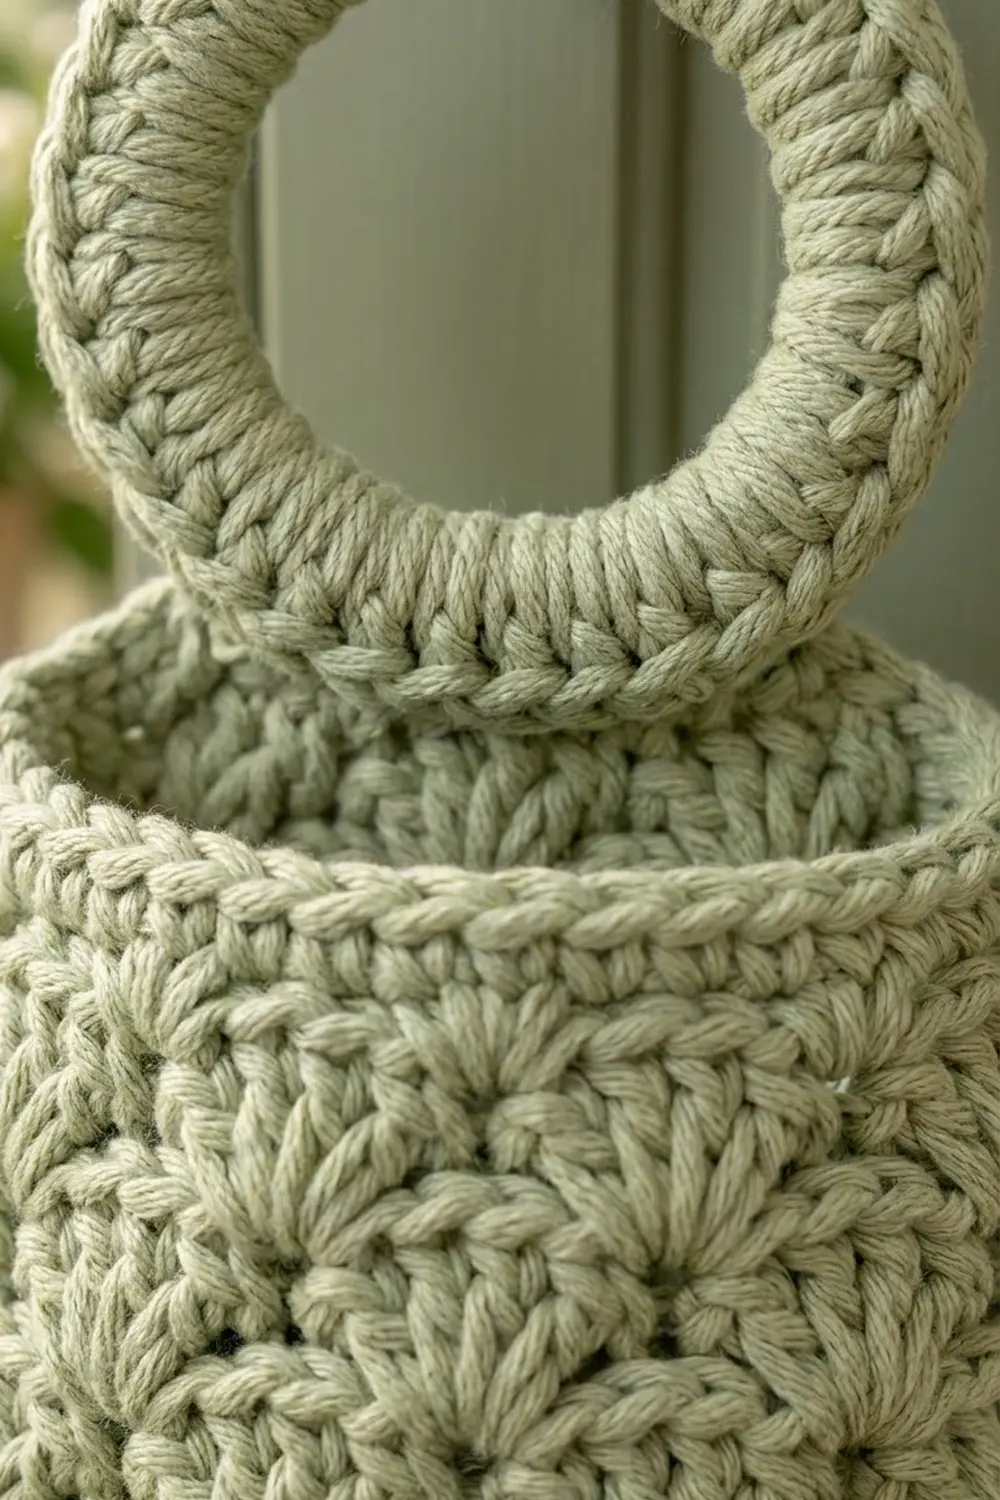
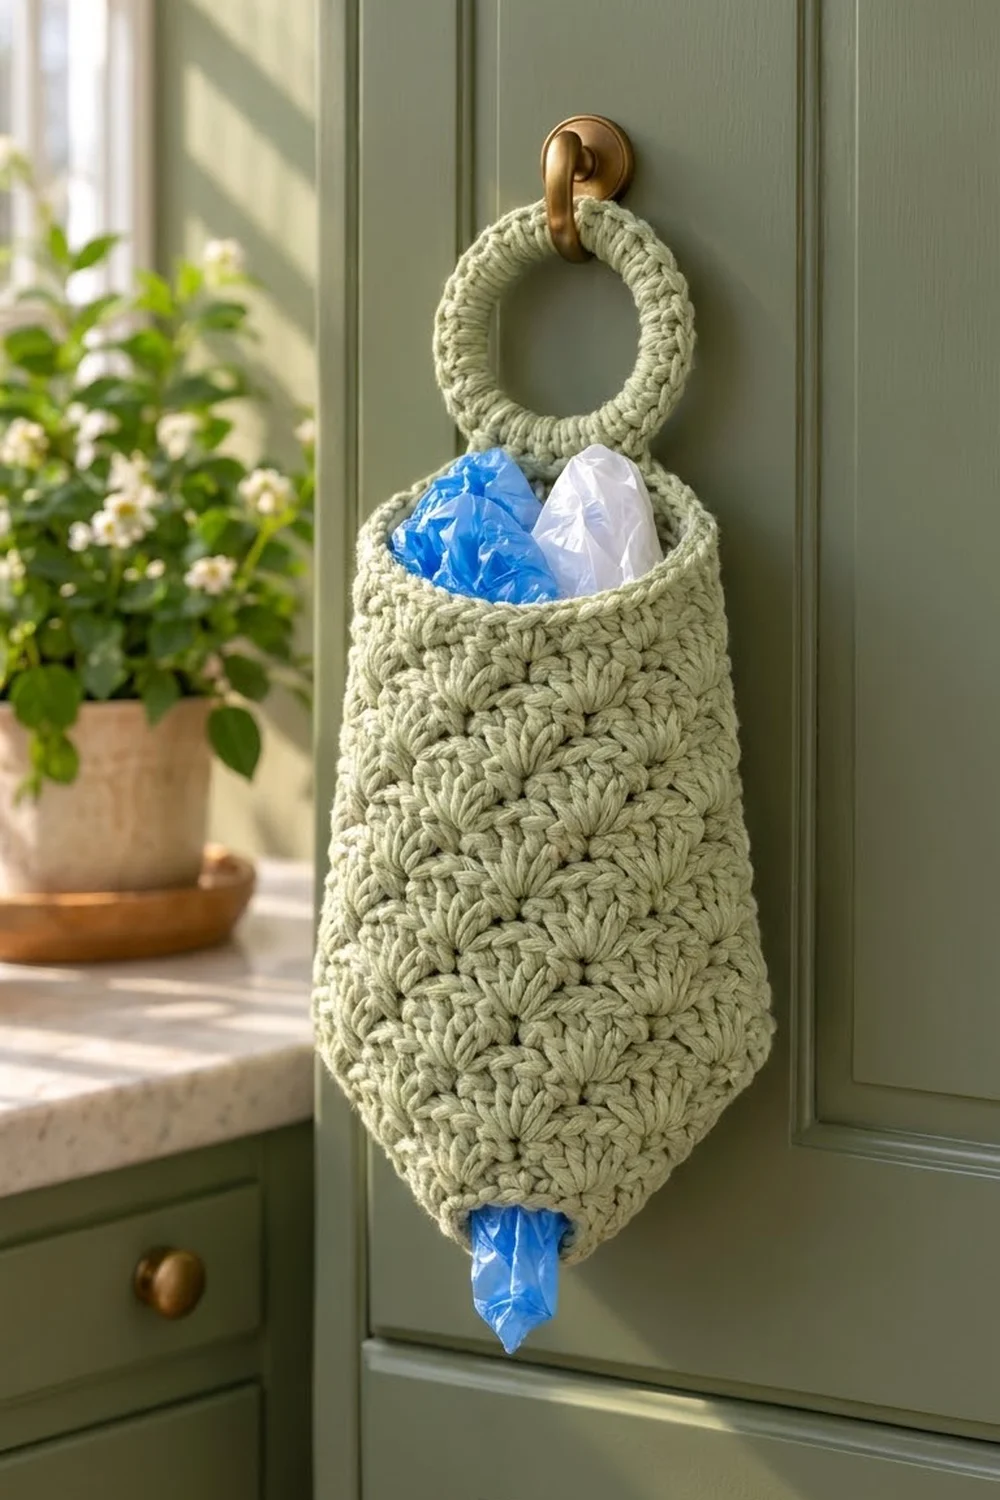
The Sage Shell Bag Keeper is a hanging plastic bag holder with a soft, scalloped texture. It is a tube that you stuff with grocery bags from the top. You pull them out one at a time from a small opening at the pointed bottom. A covered ring at the top lets it hang from a door hook, cabinet knob, or pantry peg.
The whole holder is made in one color, a muted sage green worsted-weight cotton. Rounds of 5-dc shells sit offset from each other, so the fabric looks like overlapping fans. A plain single crochet band finishes the top edge, and a firm single crochet band closes in the bottom opening.
This pattern uses US crochet terms. Laid flat, the finished body measures 9 in (22.9 cm) wide and 13.625 in (34.6 cm) long from rim to point. The ring and its tab add 4 in (10.2 cm) above the rim, so the holder hangs about 17.625 in (44.8 cm) long overall.
You work the body top-down in joined rounds from a foundation chain. The shell rounds run straight first, then four decrease rounds shape the V-point. After that, you add the top border into the foundation chain, cover a ring with single crochet, and sew the ring to the inside back of the rim.
Finished Size and Construction
- Finished size (flat): 9 in (22.9 cm) wide x 13.625 in (34.6 cm) long, not counting the ring
- Overall hanging length: about 17.625 in (44.8 cm)
- Skill level: Easy-Intermediate
- Terminology: US crochet terms
- Yarn weight: Worsted (#4), cotton or cotton blend
- Hook: 5.0 mm (H-8)
- Number of pieces: 1 body + 1 hanger ring, sewn together into one item
- Layout: Single item, no motifs or grid
- Body circumference: 72 sts = 18 in (45.7 cm)
- Size before border: 9 in (22.9 cm) wide x 12.625 in (32.1 cm) long
- Border depth: 1 in (2.5 cm), 4 rounds of sc
- Bottom opening (flat): 2 in (5.1 cm)
Materials
Yarn: Use a smooth worsted-weight cotton or cotton blend. Cotton shows the shell texture clearly, doesn’t sag much when the holder is full, and washes easily. Avoid very fuzzy yarns, because they hide the shells.
- Sage Green: 200 g, about 384 m (420 yd)
This amount includes a margin of about 15 percent for your gauge swatch and any ripping back.
Tools:
- 5.0 mm (H-8) crochet hook
- One 3 in (7.6 cm) wooden or plastic ring
- 2 locking stitch markers
- Tapestry needle
- Scissors
- Tape measure
- Rust-proof pins and a blocking mat or folded towel
Abbreviations (US Terms)
- ch – chain
- sl st – slip stitch
- sc – single crochet
- sc2tog – single crochet 2 together
- dc – double crochet
- st(s) – stitch(es)
- rnd(s) – round(s)
- sk – skip
- shell – 5 dc worked into the same stitch
Special stitch: shell decrease (shell-dec). Insert your hook in the center dc of the next shell, yarn over and pull up a loop. Skip the last 2 dc of that shell, the next sc, and the first 2 dc of the following shell. Insert your hook in the center dc of the following shell, yarn over and pull up a loop (3 loops on hook). Yarn over and pull through all 3 loops. A shell-dec counts as 1 sc and removes one full shell repeat (6 sts) from the round.
Gauge and Checkpoints
Shell pattern gauge: 4 shell repeats (24 sts) = 6 in (15.2 cm), and 8 shell rnds = 5 in (12.7 cm). Each shell round adds 0.625 in (1.6 cm).
Sc gauge: 16 sc = 4 in (10.2 cm), and 4 sc rnds = 1 in (2.5 cm).
Make a test swatch first.
- Ch 25.
- Row 1: Sc in 2nd ch from hook, sk 2 ch, 5 dc in next ch, sk 2 ch, sc in next ch 4 times. (4 shells, 5 sc)
- Row 2: Ch 3 (counts as dc), turn, 2 dc in first sc, sc in center dc of next shell, 5 dc in next sc, sc in center dc of next shell 3 times, 3 dc in last sc.
- Row 3: Ch 1, turn, sc in first dc, 5 dc in next sc, sc in center dc of next shell 3 times, 5 dc in next sc, sc in top of turning ch.
- Repeat Rows 2 and 3 until you have 8 rows.
Measure along a Row 3 from the first sc to the fifth sc. That span should be 6 in (15.2 cm), and the swatch should be 5 in (12.7 cm) tall.
If your swatch is too big, go down to a 4.5 mm hook. If it is too small, go up to a 5.5 mm hook. Every 0.25 in (0.6 cm) of error over 6 in (15.2 cm) changes the body circumference by about 0.75 in (1.9 cm).
Checkpoints (measured flat, from the foundation chain):
- After Rnd 4: 2.5 in (6.4 cm) long, 9 in (22.9 cm) wide
- After Rnd 12: 7.5 in (19.1 cm) long, still 9 in (22.9 cm) wide
- After Rnd 15: about 6 in (15.2 cm) wide at the lower edge
- After Rnd 19: 11.875 in (30.2 cm) long, 3 in (7.6 cm) wide at the lower edge
- After Rnd 22: 12.625 in (32.1 cm) long, 2 in (5.1 cm) wide at the opening
- After the border: 13.625 in (34.6 cm) long
Body
Work in joined rounds without turning, with the right side facing you the whole time. The round joins stack up at the center back, and the decreases form the two side folds.
Count every round before you join it. Shell fabric hides a missed stitch well, and the mistake only shows up later as a lean or a puckered seam.
Foundation: Ch 72. Without twisting the chain, sl st in the first ch to form a ring.
Rnd 1 (set-up shells): Ch 1, sc in same ch as join, sk 2 ch, 5 dc in next ch, sk 2 ch, sc in next ch 11 times, sk 2 ch, 5 dc in next ch, sk 2 ch, join with sl st to first sc. (12 shells, 12 sc = 72 sts)
Rnd 2 (A round): Ch 3 (counts as dc), 2 dc in same st as join, sc in center dc of next shell, 5 dc in next sc, sc in center dc of next shell 11 times, 2 dc in same st as beginning ch-3, join with sl st to top of ch-3. (12 shells, 12 sc = 72 sts) The beginning ch-3 is now the center stitch of a split shell.
Rnd 3 (B round): Ch 1, sc in same st as join, 5 dc in next sc, sc in center dc of next shell 11 times, 5 dc in next sc, join with sl st to first sc. (12 shells, 12 sc = 72 sts)
Rnds 4–12: Repeat Rnds 2 and 3 four more times, then work Rnd 2 once more. (72 sts in each round) The body is now 7.5 in (19.1 cm) long.
Shaping the Point
Each decrease round is a B round with two shell-decs on opposite sides of the tube. Each shell-dec removes 6 sts, so each decrease round has 12 fewer sts than the round before it. The A rounds in between keep the same count.
Before you start Rnd 13, flatten the tube so the round join sits in the center of one face. Place a marker at each side fold. The shell-decs will land at these markers.
Rnd 13 (decrease): Ch 1, sc in same st as join, 5 dc in next sc, sc in center dc of next shell, 5 dc in next sc, shell-dec, 5 dc in next sc, sc in center dc of next shell, 5 dc in next sc 4 times, shell-dec, 5 dc in next sc, sc in center dc of next shell, 5 dc in next sc 2 times, join to first sc. (10 shells, 10 sc = 60 sts) Lower edge width: about 7.5 in (19.1 cm).
Rnd 14: Work as Rnd 2, but repeat from * 9 times instead of 11. (10 shells, 10 sc = 60 sts)
Rnd 15 (decrease): Ch 1, sc in same st as join, 5 dc in next sc, sc in center dc of next shell, 5 dc in next sc, shell-dec, 5 dc in next sc, sc in center dc of next shell, 5 dc in next sc 3 times, shell-dec, 5 dc in next sc, sc in center dc of next shell, 5 dc in next sc, join to first sc. (8 shells, 8 sc = 48 sts)
Rnd 16: Work as Rnd 2, but repeat from * 7 times. (8 shells, 8 sc = 48 sts)
Rnd 17 (decrease): Ch 1, sc in same st as join, 5 dc in next sc, sc in center dc of next shell, 5 dc in next sc, shell-dec, 5 dc in next sc, sc in center dc of next shell, 5 dc in next sc 2 times, shell-dec, 5 dc in next sc, join to first sc. (6 shells, 6 sc = 36 sts) Lower edge width: about 4.5 in (11.4 cm).
Rnd 18: Work as Rnd 2, but repeat from * 5 times. (6 shells, 6 sc = 36 sts)
Rnd 19 (decrease): Ch 1, sc in same st as join, 5 dc in next sc, shell-dec, 5 dc in next sc, sc in center dc of next shell, 5 dc in next sc, shell-dec, 5 dc in next sc, join to first sc. (4 shells, 4 sc = 24 sts)
Bottom Band
Rnd 20: Ch 1, sc in each st around, counting each shell-dec as 1 st, join. (24 sc)
Rnd 21 (trim round): Ch 1, sc in next st, sc2tog 8 times, join. (8 sc worked 1 per stitch + 8 sc2tog = 16 sts)
Rnd 22: Ch 1, sc in each st around, join. (16 sc) Fasten off and weave in the end.
The 16 sc make a circumference of 4 in (10.2 cm), so the opening is 2 in (5.1 cm) wide when flat. That is small enough to hold the bags in but big enough to pull one out with two fingers.
Hanger Ring
Rnd 1: Make a slip knot on your hook. Hold the ring, insert your hook through its center, and work 60 sc over the ring. Push the sts together as you go so the ring is fully covered. Join with sl st to first sc. (60 sc)
Tab, Row 1: Ch 1, sc in each of the next 8 sts along the outer edge. (8 sc)
Rows 2–6: Ch 1, turn, sc in each st across. (8 sc)
Fasten off, leaving a 12 in (30.5 cm) tail for sewing. The tab is 2 in (5.1 cm) wide and 1.5 in (3.8 cm) long. The covered ring is about 3.5 in (8.9 cm) across the outside, with a center opening of about 2.5 in (6.4 cm).
Border
The border is the top rim. You work it into the free loops on the other side of the foundation chain.
Border gauge: 4 sc = 1 in (2.5 cm) wide, and 4 rnds = 1 in (2.5 cm) deep.
Hold the body with the right side facing and the point hanging down. Join yarn at the center back, in the free loop at the base of the first sc of Rnd 1.
Border Rnd 1: Ch 1, sc in each free loop of the foundation chain, join. (72 sc: 36 on the front, 36 on the back)
Border Rnds 2–4: Ch 1, sc in each st around, join. (72 sc in each round: 36 front, 36 back)
Fasten off and weave in the end.
Why the math works: The foundation has 72 chains, and Rnd 1 uses all of them (12 repeats x 6 chains). Working 1 sc in each chain gives exactly 72 sc. At 4 sc per inch, that is 18 in (45.7 cm), the same as the 18 in (45.7 cm) shell circumference. A tube has no corners, so the border needs no extra corner stitches. The rim lies flat without ruffling or pulling in.
Attach the ring: Flatten the body with the round joins centered on the back. Place the tab inside the back of the rim, centered over the joins. Let 0.5 in (1.3 cm) of the tab rise above the rim and 1 in (2.5 cm) overlap the inside of the border. Whipstitch all four edges of the overlapping part to the border. Then sew a second line along the top edge of the rim. Catch only the inner layer so no stitches show on the front.
Final Blocking
- Weave in all ends securely, keeping them inside the stitches.
- Soak the holder in cool water for 10 minutes, then gently press out the water. Don’t wring it.
- Roll it in a towel to remove more moisture.
- Lay it flat with the decrease lines on the two side folds and the round joins centered on the back.
- Pin the top edge to 9 in (22.9 cm) wide and the length to 13.625 in (34.6 cm). Shape the sides so they angle in evenly from the full 9 in (22.9 cm) width down to the 2 in (5.1 cm) opening.
- Ease each shell open with your fingertips so the fans sit evenly.
- Lay the ring flat next to the body and let everything dry completely.
Final Quality-Control Checklist
- The body measures 9 in (22.9 cm) wide and 13.625 in (34.6 cm) long when flat.
- Rnds 1–12 each have 72 sts, and the shells stack in clean, offset columns.
- The decrease rounds have 60, 48, 36, and 24 sts.
- The two edges of the V-point are the same length.
- The bottom opening is 2 in (5.1 cm) wide.
- Every border round has 72 sc and lies flat.
- The ring tab is centered at the back and sewn securely through the inner layer only.
- No yarn ends show on the right side.
Troubleshooting
The rim ruffles: You probably worked extra sc. Count for 72 and redo Border Rnd 1.
The rim pulls in: Your border sc are too tight. Redo the border with a hook one size larger.
The point twists to one side: A shell-dec is probably off its marker. Check that each decrease round has two shell-decs exactly half a round apart.
The shells lean or drift: Make sure each A round ends with 2 dc in the same st as the ch-3, and each B round starts in the top of that ch-3.
A decrease round has the wrong count: Count the shells between the two shell-decs. They should be equal on both halves of the round.
Bags fall out: Add one round of sc 2, sc2tog 4 times (12 sts). This makes the opening 1.5 in (3.8 cm) wide.
Bags are hard to pull out: Skip Rnd 21 and work Rnd 22 over 24 sts for a 3 in (7.6 cm) opening.
The ring wobbles: Add a second line of stitching across the tab at the top of the rim.
Care
Machine wash on cold and gentle in a mesh bag, then reshape and dry flat. Don’t put it in the dryer, because heat can shrink cotton unevenly.
Final Notes
Each measurement builds on the one before it. A swatch where 4 shells measure 6 in (15.2 cm) gives you 72 sts = 18 in (45.7 cm) around, or 9 in (22.9 cm) wide when flat. Twelve straight rounds reach 7.5 in (19.1 cm). Seven shaping rounds bring you to 11.875 in (30.2 cm). The bottom band adds 0.75 in (1.9 cm), for 12.625 in (32.1 cm). The 1 in (2.5 cm) border makes the body 13.625 in (34.6 cm) long. Check these numbers at each stage and your holder will come out the right size.
Happy crocheting!