

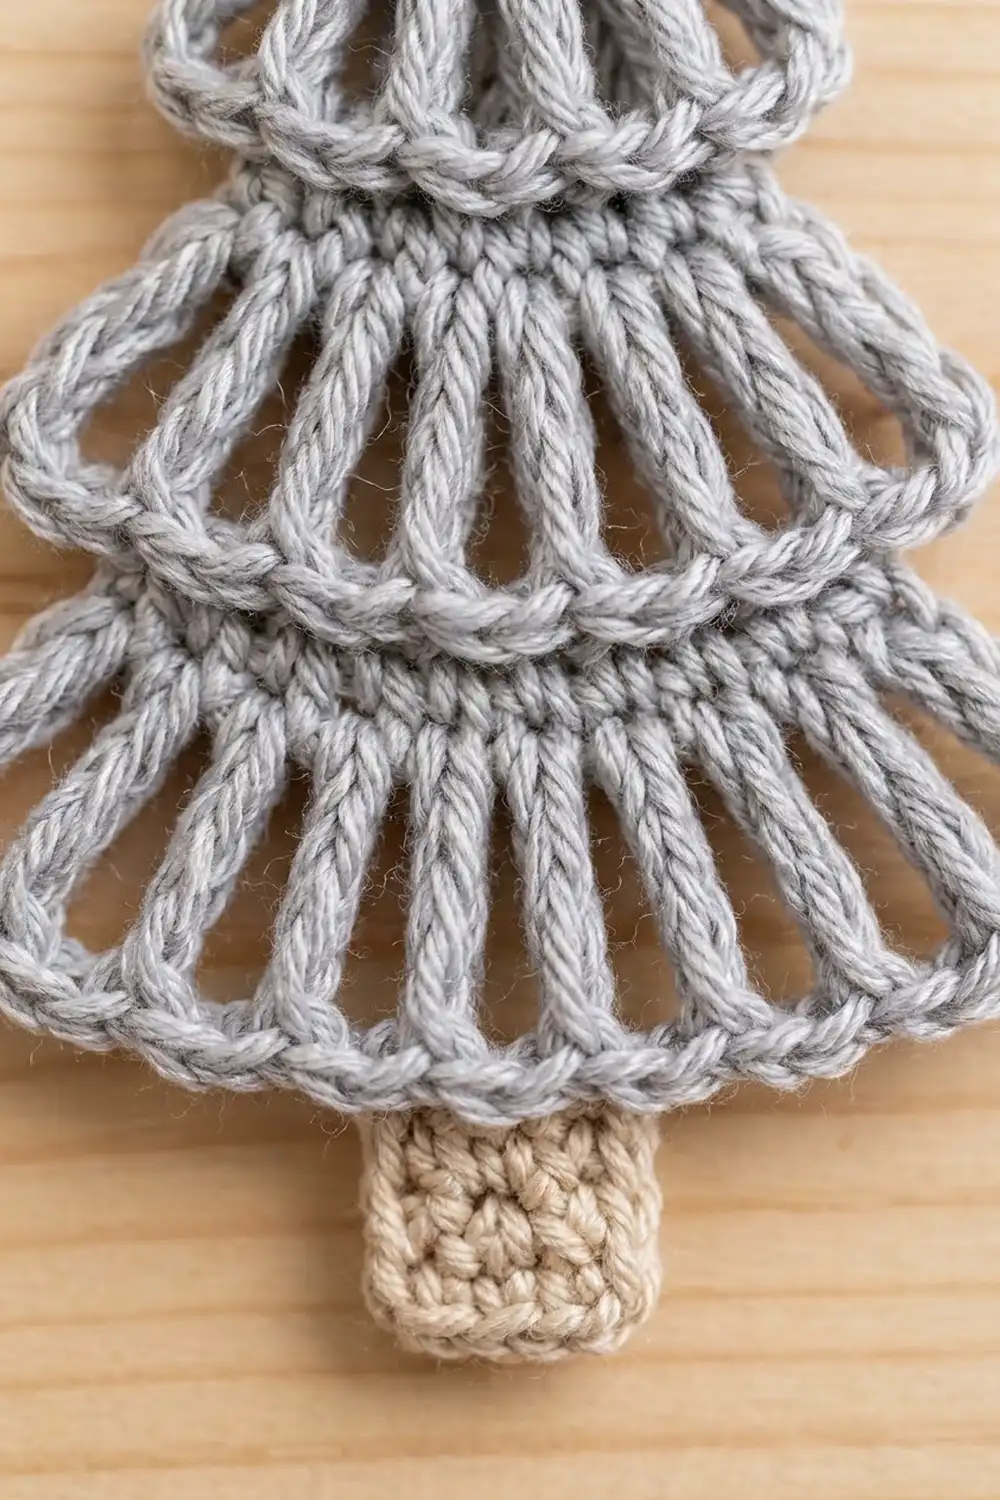
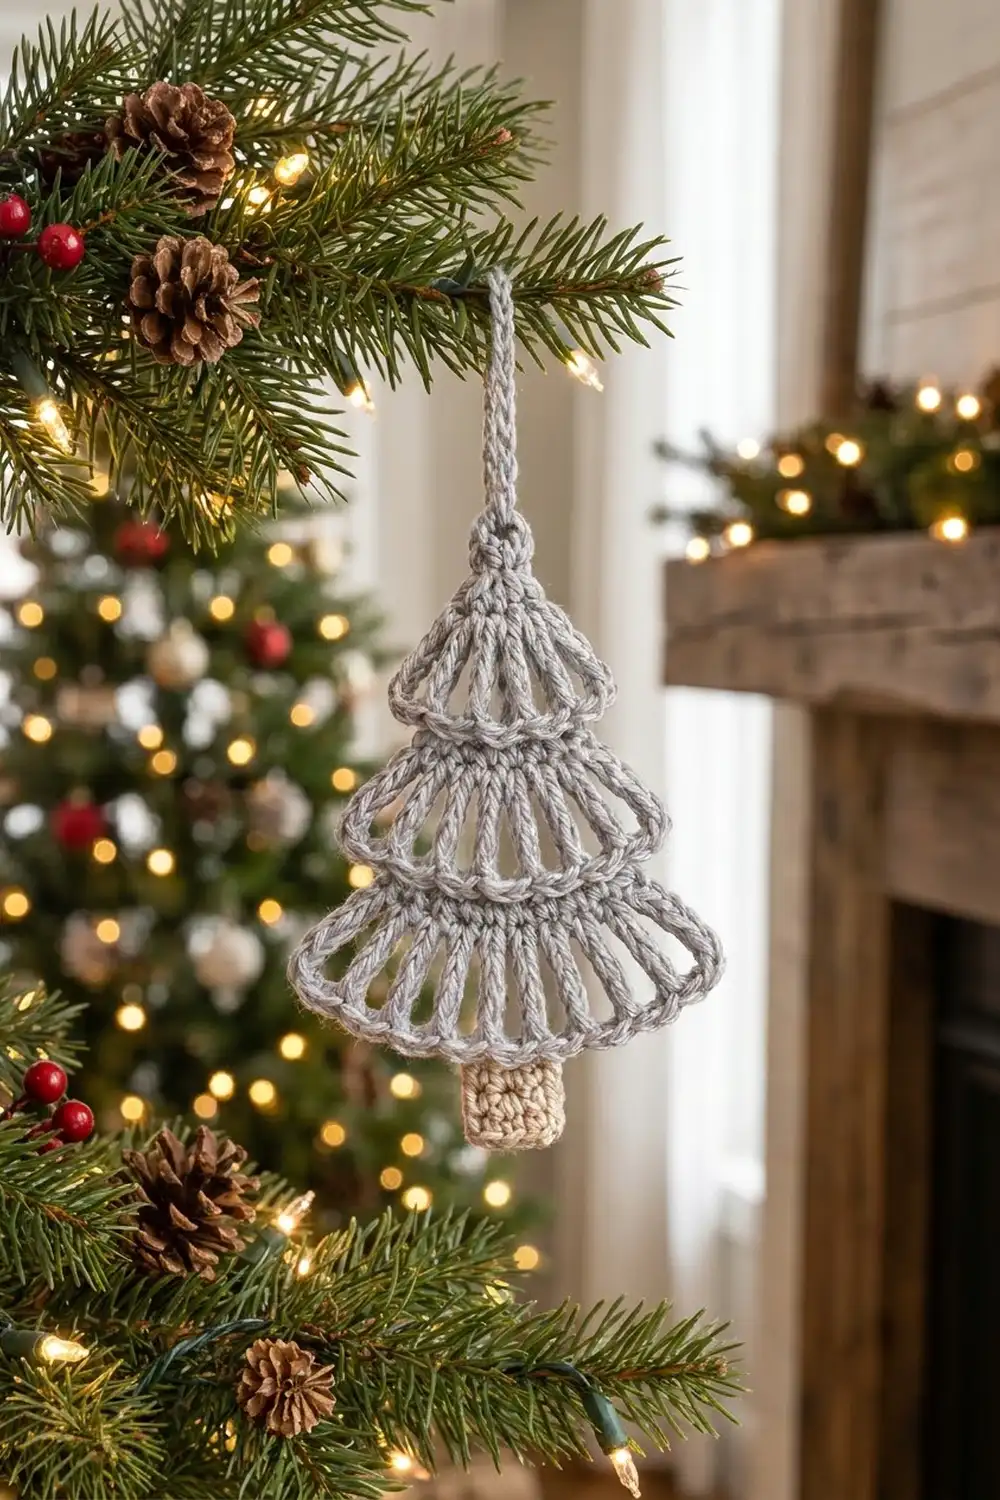
The Silver Spoke Tree is a small, airy Christmas tree ornament. Three fan-shaped tiers of tall open spokes stack on top of each other, and each one ends in a rounded rim. The spokes let light through, so the tree looks lacy on a branch. The rims give it a clean, graphic outline.
This version uses soft light silver-gray for the tiers and warm beige for the trunk. The look is Scandinavian and quiet. It suits natural wood, pinecones and white lights, and it also makes a nice gift-tag topper.
The pattern uses US crochet terms. The finished ornament measures about 3.5 in (8.9 cm) wide at the bottom tier and 4 in (10.2 cm) tall from tip to trunk. The hanging loop adds about 1.5 in (3.8 cm).
The whole tree is one flat piece worked in rows from the top down. You work a tiny single-crochet tip, then three tiers. Each tier has one row of treble-crochet spokes and one row of single-crochet rim. Then you add the trunk in beige and the hanging loop in gray. You don’t need to sew anything except the yarn tails.
Finished Size and Construction
- Finished size: 3.5 in (8.9 cm) wide x 4 in (10.2 cm) tall, plus a 1.5 in (3.8 cm) loop
- Skill level: Easy
- Terminology: US crochet terms
- Yarn weight: DK (light, #3)
- Hook: 3.5 mm (E-4)
- Number of pieces: 1
- Layout: Single flat ornament, worked top-down in rows
- Piece size: 3.5 in x 4 in (8.9 cm x 10.2 cm)
- Size before border: Doesn’t apply. The rims are built into each tier.
- Border depth: One single-crochet rim per tier, about 0.2 in (0.5 cm) deep
Materials
Yarn: Use a smooth DK yarn with good stitch definition. Mercerized cotton or a cotton blend keeps the spokes crisp. A soft acrylic works too but needs a bit more blocking. Avoid fuzzy or brushed yarns, because they fill in the open spaces.
- Color A, light silver-gray (tiers, tip, loop): 10 g, about 23 m
- Color B, beige (trunk): 3 g, about 7 m
These quantities include a margin for your gauge swatch and yarn tails. One tree uses less than this.
Tools:
- 3.5 mm (E-4) crochet hook
- Tapestry needle
- Scissors
- Stitch marker
- Rust-proof pins and a foam blocking mat
- Spray bottle with water (optional: spray starch for a firmer ornament)
Abbreviations (US Terms)
- ch – chain
- sc – single crochet
- tr – treble crochet (yarn over twice, insert hook, pull up a loop, [yarn over, pull through 2 loops] 3 times)
- sl st – slip stitch
- st(s) – stitch(es)
- sk – skip
- sp – space
- FLO – front loop only (the loop closer to you as you look at the work)
- RS / WS – right side / wrong side
Special stitch – Spoke: One tr with a ch-1 sp next to it. Each tier is a fan of spokes. Later, the ch-1 sps become stitches in the rim, and that is what makes each tier wider than the one above it.
Gauge and Checkpoints
Gauge: 20 sc and 22 sc rows = 4 in (10.2 cm) with a 3.5 mm hook. One tr row is about 0.75 in (1.9 cm) tall.
Make one complete test tree before you make a batch. It’s small, so it works better as a swatch than a flat square. Measure at these checkpoints:
- After Row 3 (tip): 1 in (2.5 cm) wide, about 0.5 in (1.3 cm) tall
- After Row 5 (Tier 1): rim measures 2.6 in (6.6 cm) along its curve, and the tree is about 1.5 in (3.8 cm) tall
- After Row 7 (Tier 2): rim measures 3.4 in (8.6 cm) along its curve, and the tree is about 2.4 in (6.1 cm) tall
- After Row 9 (Tier 3): rim measures 4.2 in (10.7 cm) along its curve and 3.5 in (8.9 cm) straight across, and the tree is about 3.3 in (8.4 cm) tall
- After the trunk: 4 in (10.2 cm) total height
If your tree is too big: go down to a 3.25 mm or 3 mm hook. Also check that your tr stitches aren’t loose and tall. Pull each loop snug before the next yarn over.
If your tree is too small: go up to a 3.75 mm or 4 mm hook.
Stitch counts matter more than exact size here. A tree that is 0.25 in (0.6 cm) off in either direction still looks right as long as all three tiers are in proportion.
Pattern
Tip
With Color A, leave a 6 in (15.2 cm) tail.
Row 1 (RS): Ch 4, sc in 2nd ch from hook and in each of the next 2 ch. (3 sc)
Row 2 (WS): Ch 1, turn, 2 sc in first st, sc in next st, 2 sc in last st. (5 sc)
Row 3 (RS): Ch 1, turn, sc in each st across. (5 sc)
The tip is a small solid wedge. It should feel firm, because the whole tree hangs from it.
Tier 1
Row 4 (WS): Ch 5 (counts as tr and ch 1), tr in same first st, [ch 1, tr in next st] 3 times, ch 1, (tr, ch 1, tr) in last st. (7 tr, 6 ch-1 sps)
This gives 2 spokes in each end st and 1 spoke in each of the 3 center sts, so the fan opens evenly from the narrow tip.
Row 5 (RS, rim): Ch 1, turn, sc in first tr, [sc in next ch-1 sp, sc in next tr] 6 times, working the last sc in the 4th ch of the turning ch. (7 sc into tr + 6 sc into sps = 13 sc)
Don’t skip any spaces. The rim should curve gently downward like an umbrella edge.
Tier 2
In the next row, you work into the front loops only. Since you’re on the WS, the unused back loops stay on the RS as a thin ridge right under the Tier 1 rim. The rim then sits over the top of Tier 2, which creates the stacked look.
Row 6 (WS): Ch 5 (counts as tr and ch 1), working in FLO: tr in same first st, [ch 1, sk 1 st, tr in next st] 6 times, ch 1, tr in same last st. (9 tr, 8 ch-1 sps)
Check: the 6 repeats place trs in sts 3, 5, 7, 9, 11 and 13. The two end sts each hold 2 spokes. 2 + 5 + 2 = 9 spokes.
Row 7 (RS, rim): Ch 1, turn, working in both loops, sc in first tr, [sc in next ch-1 sp, sc in next tr] 8 times, working the last sc in the 4th ch of the turning ch. (9 sc into tr + 8 sc into sps = 17 sc)
Tier 3
Row 8 (WS): Ch 5 (counts as tr and ch 1), working in FLO: tr in same first st, [ch 1, sk 1 st, tr in next st] 8 times, ch 1, tr in same last st. (11 tr, 10 ch-1 sps)
Check: the 8 repeats place trs in sts 3, 5, 7, 9, 11, 13, 15 and 17. Both end sts hold 2 spokes. 2 + 7 + 2 = 11 spokes.
Row 9 (RS, rim): Ch 1, turn, working in both loops, sc in first tr, [sc in next ch-1 sp, sc in next tr] 10 times, working the last sc in the 4th ch of the turning ch. (11 sc into tr + 10 sc into sps = 21 sc)
Fasten off and leave a 6 in (15.2 cm) tail.
Trunk
The trunk is 5 sts wide and centered on the 21-st bottom rim. It uses sts 9 through 13, so there are 8 sts free on each side.
Row 10 (WS): With the WS facing, count 8 sts in from the right end of Row 9. Join Color B with a sl st in the front loop of the 9th st. Ch 1, sc in FLO of the same st and the next 4 sts. (5 sc)
Rows 11–13: Ch 1, turn, sc in each st across. (5 sc each row)
Fasten off and leave an 8 in (20.3 cm) tail. The trunk is 1 in (2.5 cm) wide and about 0.7 in (1.8 cm) long. The Tier 3 rim sits slightly over its top edge.
Hanging Loop
With the RS facing, find the center of the foundation chain at the top of Row 1. This is the ch the middle sc was worked into. Join Color A with a sl st around it. Ch 18, then sl st in the same place. Fasten off and leave a 6 in (15.2 cm) tail. Thread this tail through the base of the loop twice to lock it.
The loop measures about 3 in (7.6 cm) around and hangs about 1.5 in (3.8 cm) above the tip.
Border: The Tier Rims
This tree doesn’t have a separate outer border. Each tier’s sc rim is its border, and you’ve already worked all three. Here is how they work and why the counts fit together.
Rim gauge: 5 sc per inch (2 sc per cm), the same as the main sc gauge.
- Tier 1 rim (Row 5): 13 sc = 2.6 in (6.6 cm) along the curve
- Tier 2 rim (Row 7): 17 sc = 3.4 in (8.6 cm) along the curve
- Tier 3 rim (Row 9): 21 sc = 4.2 in (10.7 cm) along the curve, which lies about 3.5 in (8.9 cm) straight across
Why the math works: A rim always has one sc per spoke plus one sc per gap. A fan of n spokes has n − 1 gaps, so the rim count is 2n − 1. Tier 1 has 7 spokes, so 13 sc. Tier 2 has 9 spokes, so 17 sc. Tier 3 has 11 spokes, so 21 sc.
Each spoke row is worked into every other rim st, plus 1 extra spoke at each end. A rim of 2n − 1 sts holds n spokes in the alternate sts, and the 2 end doubles bring that to n + 2. So each tier has 2 more spokes and 4 more rim sts than the one above it. That’s 0.8 in (2.0 cm) more rim each time, which gives the steady triangular outline.
The rim is 1 sc row, about 0.2 in (0.5 cm) deep. Together with the free loops from the next spoke row, it reads as a thick, rounded ledge.
Final Blocking
- Weave in all tails along the WS. Hide them inside the tip, along a rim or through the trunk, never across an open gap.
- Spray the ornament until it’s damp but not dripping. For a stiffer ornament, use light spray starch instead of plain water.
- Lay it RS up on the blocking mat.
- Pin the tip straight and the trunk straight, lined up on one vertical center line.
- Gently spread each tier into an even fan. The spokes should point out from the top like the ribs of an open umbrella, with the gaps all the same width.
- Pin each rim into a smooth curve. Measure Tier 3 at 3.5 in (8.9 cm) straight across and the full tree at 4 in (10.2 cm) tall.
- Let each rim overlap the top of the tier below it by about 1/8 in (0.3 cm). Nudge it with your fingertip if it lies flat.
- Let it dry completely, at least 6 hours, before you unpin it.
Final Quality-Control Checklist
- Stitch counts are 3, 5, 5 sc for the tip.
- Spokes are 7, 9 and 11, and rims are 13, 17 and 21 sc.
- The ch-1 gaps are even, and no space was skipped in any rim.
- Spoke rows 6 and 8 were worked in FLO, so the free-loop ridge shows on the RS under each rim.
- The trunk is centered, with 8 rim sts free on each side.
- The tree measures 3.5 in (8.9 cm) wide and 4 in (10.2 cm) tall.
- The hanging loop is secure, centered and about 1.5 in (3.8 cm) tall.
- All tails are hidden, and none show through the open spokes.
Troubleshooting
Tiers cup or ruffle: Your tr stitches are probably too short for the rim. Loosen your yarn-overs a little, or check that every ch-1 sp is a single chain, not two.
Tiers pull in and won’t fan out: You may have missed a sc in a ch-1 sp. Recount the rim. It should be 13, 17 or 21.
Tree leans to one side: You probably forgot one of the end doubles in Row 4, 6 or 8. Each end st of a spoke row must hold 2 spokes.
Tiers look flat, with no layering: Work Rows 6 and 8 in front loops only, then block with the rim pushed slightly over the tier below.
Trunk is off-center: Count again from the end of Row 9. There must be 8 free sts on each side of the 5 trunk sts.
Loop twists: Before blocking, roll the chain flat between your fingers. Lightly starch it if needed.
Care
Hand wash in cool water with mild soap, then press out the water in a towel and reblock flat. Store flat or hanging, away from heavy decorations that could crush the tiers.
Final Notes
The measurement chain is simple. A 1 in (2.5 cm) tip opens into rims of 2.6 in (6.6 cm), 3.4 in (8.6 cm) and 4.2 in (10.7 cm). That makes a tree 3.5 in (8.9 cm) wide. Add the 0.7 in (1.8 cm) trunk and the tree is 4 in (10.2 cm) tall, with a 1.5 in (3.8 cm) hanging loop on top.
If your rim counts are 13, 17 and 21 and your test tree matches the checkpoints, every tree in your batch will match. Make one for the tree, a handful for gift wrapping, or a row of three on a wooden dowel for a quiet seasonal display.
Happy crocheting!