

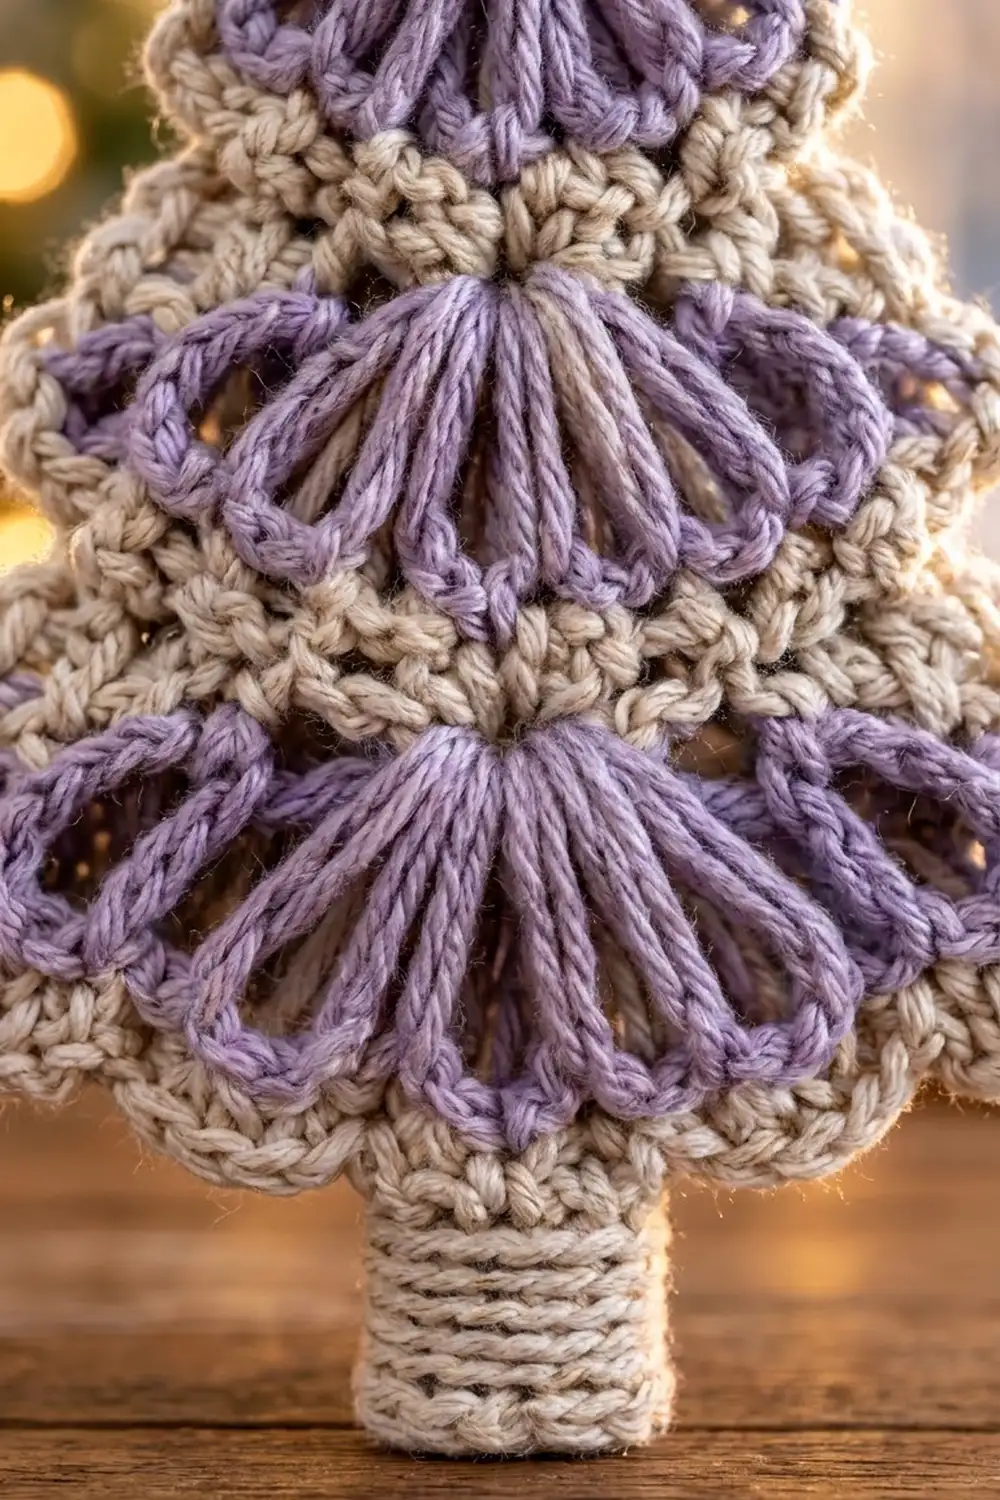
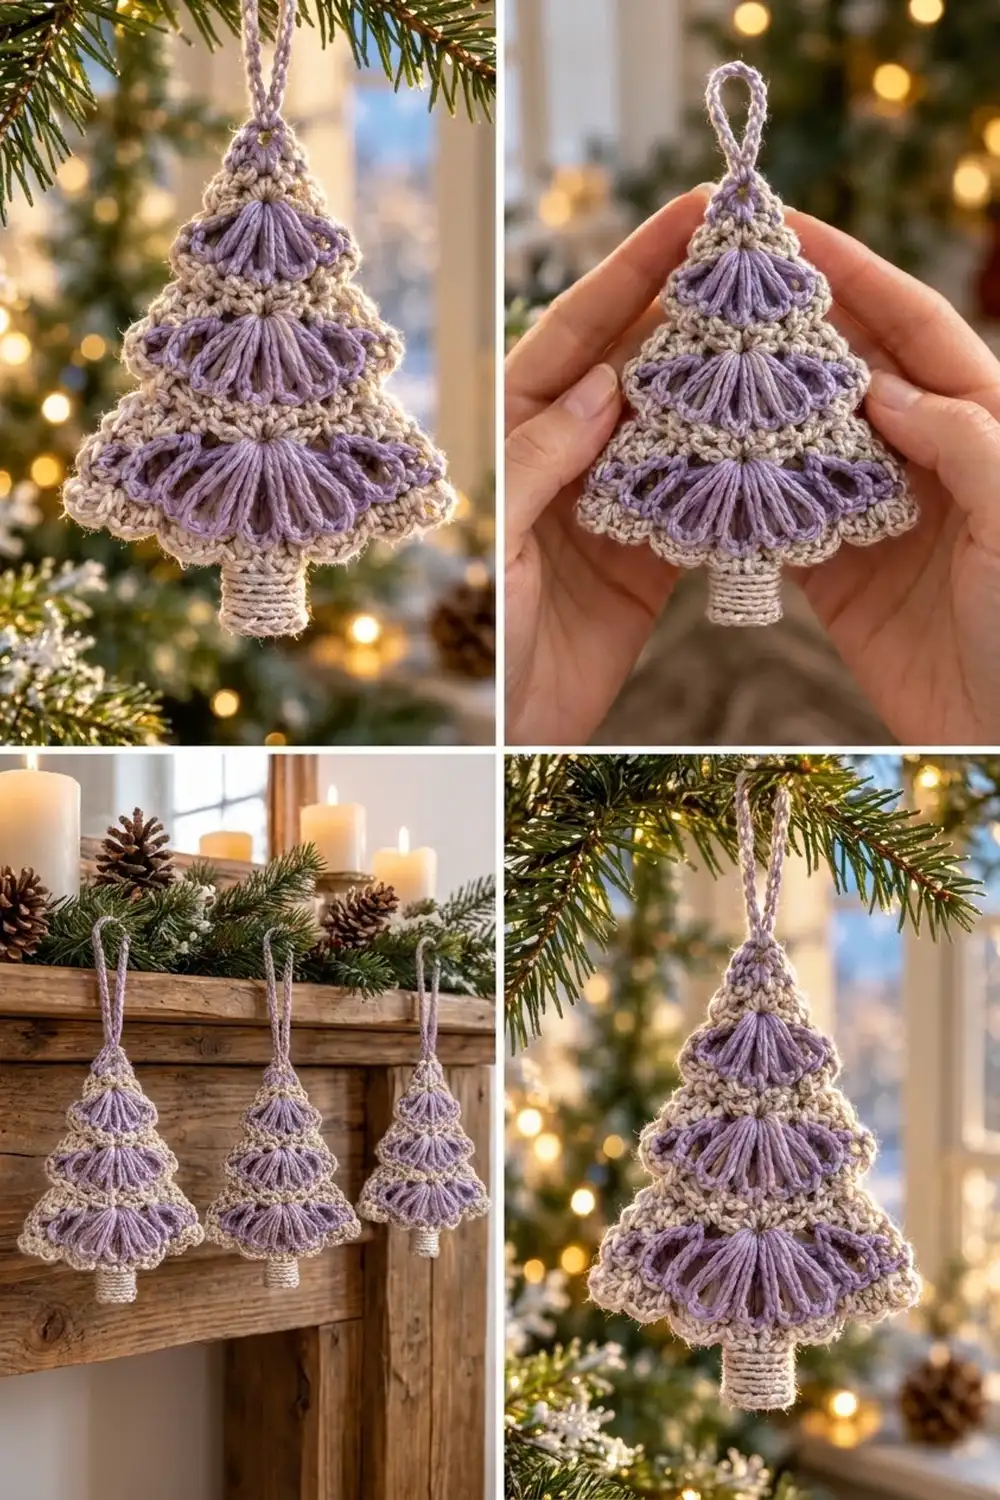
This little flat Christmas tree has three stacked tiers. Each tier ends in a row of lavender fans that spread downward like layered branches. A crisp oatmeal-cream rim runs along the lower edge of every tier, and a beaded crab-stitch border goes around the whole outline. A short ribbed cream trunk and a lavender cord loop finish it, so it is ready to hang.
The colors are soft and wintry: warm cream for the body, rims, border, and trunk, and dusty lavender for the fans and the loop. It looks good on a real tree, on a gift, or on a window garland. This pattern uses US crochet terms throughout.
The finished ornament is about 4.4 in (11.2 cm) wide and 5.1 in (13.0 cm) tall from the tip to the bottom of the trunk. The loop adds another 1.5 in (3.8 cm).
It is made in one piece. You work the body flat in rows from the tip down. Single crochet rows widen each tier, then a fan row and a cream edging row finish it. Each new tier starts with a small decrease, which gives the tree its stepped outline. After the body you work one border round, add the trunk directly onto the bottom edge, then finish with a crab-stitch round that edges both the tree and the trunk.
Finished Size and Construction
- Finished size: 4.4 in (11.2 cm) wide × 5.1 in (13.0 cm) tall, not counting the loop
- Skill level: Easy-intermediate
- Terminology: US crochet terms
- Yarn weight: Fingering / super fine (#1) cotton
- Hook: 2.25 mm (US B-1)
- Number of pieces: 1 (the trunk and loop are worked directly onto the body)
- Layout: One flat triangular tree with 3 fan tiers
- Body size before border: 3.9 in (9.9 cm) wide × 3.9 in (9.9 cm) tall
- Border depth: 2 rounds, about 0.25 in (0.6 cm) all around
- Trunk: 0.9 in (2.3 cm) wide × 0.7 in (1.8 cm) tall
Materials
Choose a smooth fingering-weight cotton, either mercerized or matte. Cotton holds the fan shapes well after blocking and doesn’t fuzz on the tree. Avoid fluffy or very stretchy yarns, because they blur the fan spokes.
- Color A – Cream (oatmeal): 6 g, about 20 m (22 yd)
- Color B – Lavender: 3 g, about 10 m (11 yd)
These amounts include extra for your gauge test and yarn tails. One ornament uses a little less.
Tools:
- 2.25 mm (US B-1) crochet hook
- Tapestry needle
- Scissors
- 2 stitch markers
- Ruler or tape measure
- Blocking mat, rust-proof pins, and a spray bottle
- Optional: fabric stiffener or diluted craft glue
Abbreviations (US Terms)
- ch – chain
- sl st – slip stitch
- sc – single crochet
- sc2tog – single crochet 2 together (decrease)
- tr – treble crochet
- BLO – back loop only
- rev sc – reverse single crochet (crab stitch)
- st(s) – stitch(es)
- RS / WS – right side / wrong side
- rep – repeat
Special stitches
- Fan: 5 tr in the same stitch. Because the rows run from the tip downward, the 5 tr meet at the top and spread out at the bottom, like a branch.
- Half fan (start): ch 4 (counts as 1 tr), 2 tr in the same stitch = 3 sts.
- Half fan (end): 3 tr in the last stitch = 3 sts.
- Rev sc (crab stitch): Working from left to right, insert the hook in the next stitch to the right, yo, pull up a loop, yo, pull through both loops.
Gauge and Checkpoints
Gauge: 32 sc and 36 rows = 4 in (10.2 cm), which is 8 sc and 9 rows per 1 in (2.5 cm). One fan row is 0.5 in (1.3 cm) tall.
Use Tier 1 as your test piece. Work Rows 1–11, then measure before you go on. If it matches, keep going. If it doesn’t, pull it out and change your hook size.
Checkpoints:
- After Row 9: 19 sts, 2.4 in (6.1 cm) wide, 1 in (2.5 cm) tall
- After Row 11 (Tier 1 done): 1.6 in (4.1 cm) tall
- After Row 16: 25 sts, 3.1 in (7.9 cm) wide
- After Row 18 (Tier 2 done): 2.8 in (7.1 cm) tall
- After Row 25 (body done): 31 sts, 3.9 in (9.9 cm) wide × 3.9 in (9.9 cm) tall
Measure the width across the last sc row, not across the fans. The fans flare a little and will give you a measurement that’s too wide.
If the piece is too big, go down to a 2.0 mm hook. If it is too small, go up to a 2.5 mm hook. If only the fan rows are off, work your tr a little looser or tighter. Don’t change the stitch counts.
Body (Rows 1–25)
Work flat in rows. Unless stated otherwise, the ch 1 at the start of each sc row does not count as a stitch. Increase rows always put 2 sc in the first stitch and 2 sc in the last stitch.
Tier 1
With Color A:
Row 1: Ch 2, 3 sc in 2nd ch from hook. Turn. (3 sts)
Row 2: Ch 1, 2 sc in first st, sc in next st, 2 sc in last st. Turn. (5 sts)
Row 3: Ch 1, 2 sc in first st, sc in each st to last st, 2 sc in last st. Turn. (7 sts)
Rows 4–9: Rep Row 3. Each row has 2 more sts than the row before. Row 4: 9, Row 5: 11, Row 6: 13, Row 7: 15, Row 8: 17, Row 9: 19 sts. On the last yo of Row 9, pull through Color B. Don’t cut Color A; leave it hanging at this edge. Turn.
Row 10 (fan row): With Color B, work a half fan in the first st (ch 4, 2 tr in same st). Sk 2 sts, sc in next st, sk 2 sts, Fan in next st. Rep from * to * once more. Sk 2 sts, sc in next st, sk 2 sts, 3 tr in last st (half fan). (19 sts: 3 + 1 + 5 + 1 + 5 + 1 + 3)
This gives 2 full fans and a half fan at each edge. Fasten off Color B, leaving a 4 in (10.2 cm) tail.
Row 11 (edging row): Do not turn. Pick up Color A at the edge where you left it, carrying it loosely up the side of the half fan. Ch 1, then sc in the top ch of the turning ch-4 and in each st across. (19 sts)
Because Row 11 goes in the same direction as Row 10, you don’t need to cut and rejoin the cream. Turn at the end.
Tier 2
Row 12 (step row): Ch 1, sc2tog, sc in next 15 sts, sc2tog. Turn. (17 sts)
This decrease pulls the new tier in slightly under the rim above, which makes the stepped branch edge.
Rows 13–16: Rep Row 3. Row 13: 19, Row 14: 21, Row 15: 23, Row 16: 25 sts. On the last yo of Row 16, change to Color B. Turn.
Row 17 (fan row): Half fan in first st. Sk 2, sc in next, sk 2, Fan in next. Rep from * to * 2 more times. Sk 2, sc in next, sk 2, 3 tr in last st. (25 sts: 3 + 6 × 3 + 1 + 3)
This gives 3 full fans and 2 half fans. Fasten off Color B.
Row 18 (edging row): Do not turn. Bring up Color A and work as for Row 11. (25 sts) Turn.
Tier 3
Row 19 (step row): Ch 1, sc2tog, sc in next 21 sts, sc2tog. Turn. (23 sts)
Rows 20–23: Rep Row 3. Row 20: 25, Row 21: 27, Row 22: 29, Row 23: 31 sts. Change to Color B on the last yo. Turn.
Row 24 (fan row): Half fan in first st. Sk 2, sc in next, sk 2, Fan in next. Rep from * to * 3 more times. Sk 2, sc in next, sk 2, 3 tr in last st. (31 sts: 3 + 6 × 4 + 1 + 3)
This gives 4 full fans and 2 half fans. Fasten off Color B.
Row 25 (edging row): Do not turn. Bring up Color A and work as for Row 11. (31 sts) Fasten off.
Fan-row check: Each fan row has (6 × number of full fans) + 7 sts, which equals the count of the row before it: 6 × 2 + 7 = 19, 6 × 3 + 7 = 25, and 6 × 4 + 7 = 31.
The body now has 22 sc rows and 3 fan rows. At gauge, 22 sc rows ÷ 9 rows per inch ≈ 2.4 in, and 3 fan rows × 0.5 in = 1.5 in. Together that’s about 3.9 in (9.9 cm) tall. Weave in the Color B tails now, along the back of the cream rows.
Border
Border gauge: the same as the body, 8 sc per 1 in (2.5 cm). Use the neater face as the RS.
Round 1 (Color A): With RS facing, join Color A in the first st of Row 25.
- Bottom corner: Ch 1, 3 sc in the same st.
- Bottom edge: Sc in the next 29 sts.
- Bottom corner: 3 sc in the last st.
- Side 1: Working up the side into the row ends, work 1 sc in each sc row end and 4 sc in each fan-row end. (22 + 12 = 34 sc)
- Tip: 3 sc in the free loops of the foundation ch at the tip.
- Side 2: Work down the other side the same way. (34 sc)
- Sl st to the first sc.
Total: 3 + 29 + 3 + 34 + 3 + 34 = 106 sts. The three 3-sc groups are corners. They are counted separately from the 34 sts on each side and the 29 sts on the bottom edge.
Place markers in the 12th and 18th of the 29 bottom-edge sc. They mark the center 7 sts. Fasten off.
Trunk
Row 1: Turn the tree upside down. With RS facing, join Color A in the back loop of the 12th bottom sc. Ch 1, sc BLO in the same st and in the next 6 sts. Turn. (7 sts)
Rows 2–6: Ch 1, sc BLO in each st. Turn. (7 sts) Fasten off after Row 6.
Working in the back loops makes horizontal ridges that look like bark rings. At 9 rows per inch, 6 rows are about 0.7 in (1.8 cm) tall, and 7 sts are about 0.9 in (2.3 cm) wide.
Round 2 (rev sc): Join Color A in any side st of Round 1. Working from left to right, rev sc in each st around the tree. When you reach the trunk, rev sc down one side of the trunk (6 sts, 1 per row end), across Row 6 (7 sts), and up the other side (6 sts). Then continue around the tree. Sl st to the first st and fasten off.
Total: 106 − 7 (covered by the trunk) + 6 + 7 + 6 = 118 sts.
Why the math works: Each slanted side runs from the tip to a bottom corner and is about 4.4 in (11.2 cm) long. 34 sts over that length is about 7.8 sts per inch, very close to the gauge of 8 sc per inch, so the edge neither ruffles nor cups. On the bottom, the 29 sts and the two corner groups sit on the 31 sts of Row 25. The 4 sc in each fan-row end fill the fan row’s 0.5 in (1.3 cm) height. The 3-sc corners let the border turn at the tip and the base without pulling.
Hanging Loop
Join Color B in the center sc of the tip corner. Ch 30, then sl st into the same st to form a loop. Sl st in each ch around the loop (30 sl sts) to make it look like a firm cord. Sl st into the tip again and fasten off. The loop hangs about 1.5 in (3.8 cm) above the tree.
Weave in all ends along the back of the cream rows, away from the fans.
Final Blocking
- Lightly spray the ornament with water until it is damp but not soaked.
- Lay it RS up on the blocking mat.
- Pin the tip and the two bottom corners so the tree body (not counting the trunk) measures 4.4 in (11.2 cm) wide across the base and 4.4 in (11.2 cm) tall from tip to base.
- Pin the outer point of each half fan so the tiers flare evenly on both sides.
- With your fingertips, spread each full fan into an even arc with evenly spaced spokes.
- Pin the trunk straight and centered, 0.7 in (1.8 cm) long.
- Let it dry completely, about 6 hours.
- Optional: For a stiffer ornament, brush on diluted fabric stiffener, pin it again, and let it dry.
Final Quality-Control Checklist
- Fan rows have 19, 25, and 31 sts
- Tiers have 2, 3, and 4 full fans, with a half fan at each end of every tier
- The step rows (Rows 12 and 19) visibly tuck in under each rim
- Border Round 1 = 106 sts; Round 2 = 118 sts
- Body is 4.4 in (11.2 cm) wide after the border
- Total height is 5.1 in (13.0 cm) without the loop
- Trunk is centered on the bottom edge
- No lavender tails show on either side
- The loop is secure and the ornament hangs straight
Troubleshooting
The fans curl or cup: Your tr are too tight. Pull each loop up to its full height, or use more water when you block the fans.
The sides of the tree ruffle: You added extra sts to the side border. Recount: 1 sc in each sc row end and 4 sc in each fan-row end.
The tiers look like one smooth triangle: Check that you worked the sc2tog decreases on Rows 12 and 19.
The trunk is off-center: Recount the bottom edge, starting after the corner group. The trunk must start in sc 12 of 29.
The ornament hangs crooked: The loop isn’t in the center sc of the tip. Move it, or block the sides to match.
The carried cream strand shows at the side: Keep it loose and close to the edge. Round 1 of the border will cover it.
Care
Hand wash in cool water with mild soap. Press out the water in a towel and lay the ornament flat in shape to dry. If you used stiffener, wipe it clean gently instead of washing it.
Final Notes
The measurements are easy to check as you go. The gauge is 8 sc and 9 rows per inch. Tier 1 ends at 19 sts, 2.4 in (6.1 cm) wide. Tier 2 ends at 25 sts, 3.1 in (7.9 cm) wide. Tier 3 ends at 31 sts, and the body measures 3.9 in (9.9 cm) wide and 3.9 in (9.9 cm) tall. Two border rounds bring the body to 4.4 in (11.2 cm), and the trunk brings the total height to 5.1 in (13.0 cm). If each checkpoint matches, the finished tree will match too.
Make one for your own tree, or make a few to tie onto gifts. Happy crocheting!