

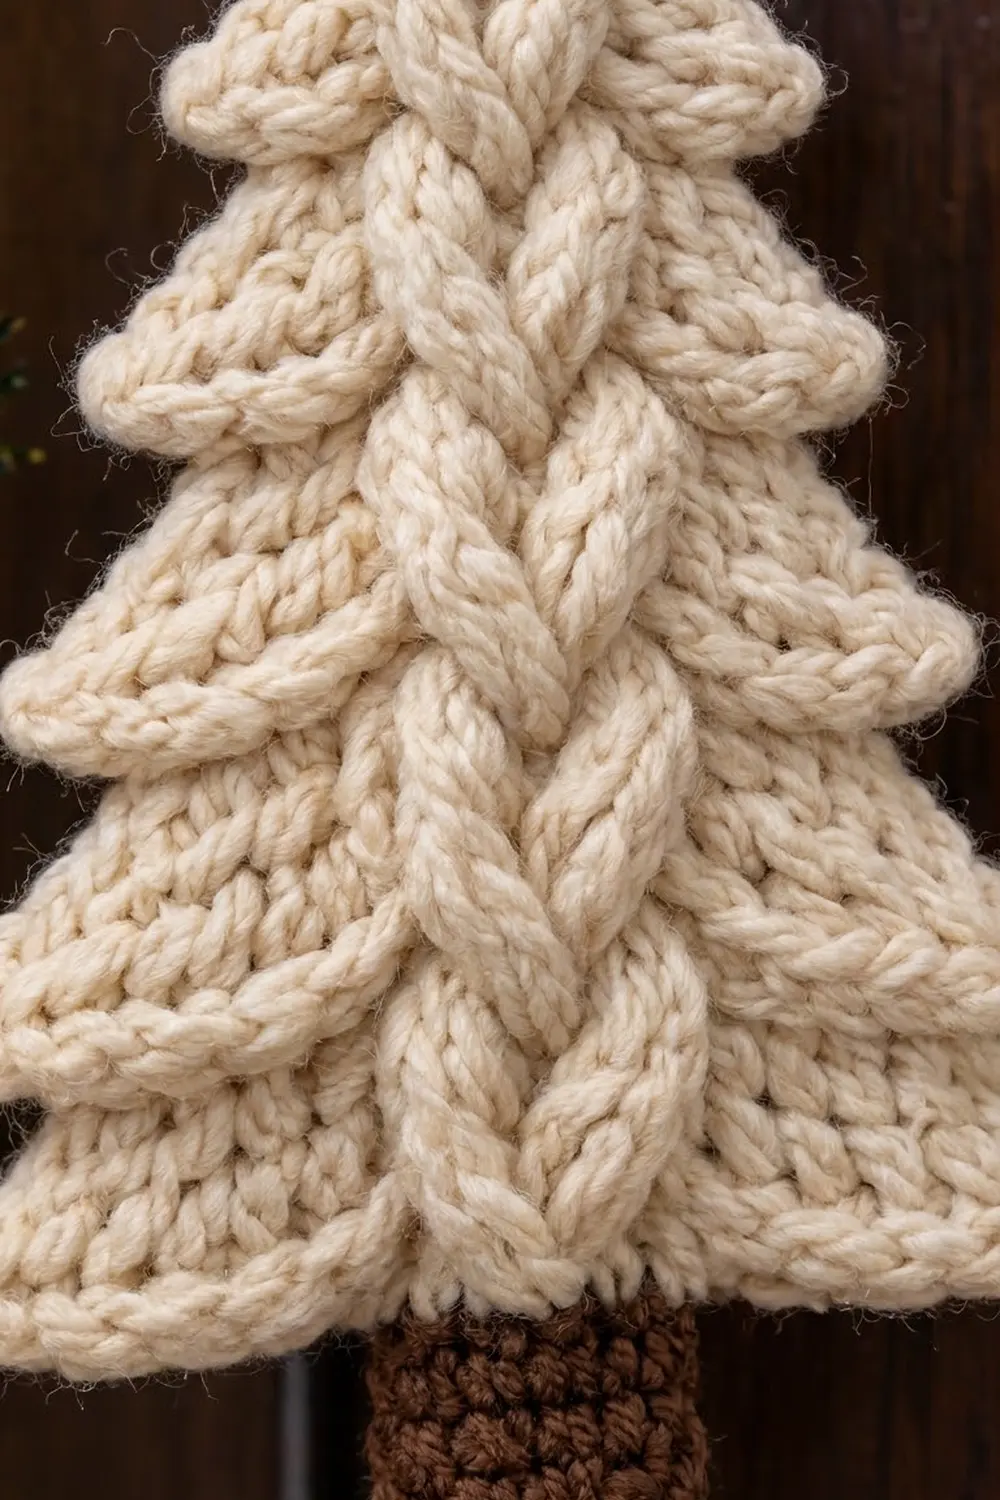
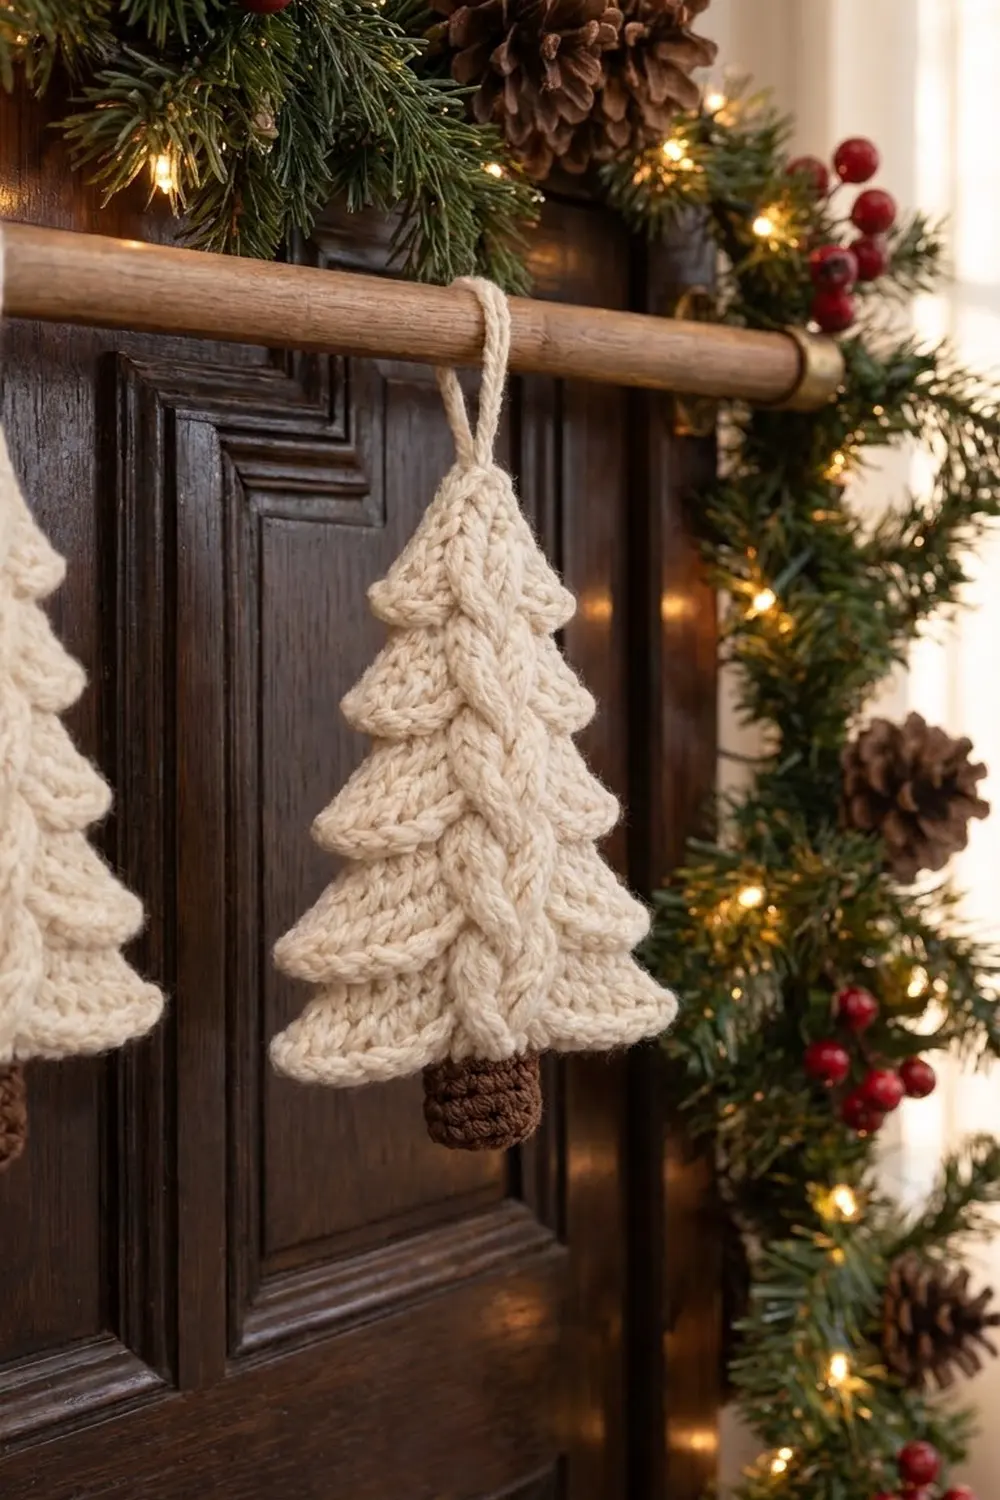
This little tree is made for hanging. A thick braided cable runs up its center, and five stepped tiers flare out into soft, rounded tips. A small brown trunk sits at the bottom. In cream yarn it looks like a cozy fisherman sweater shaped into a tree.
The palette is just two colors: warm cream for the tree and chocolate brown for the trunk. Behind the braid, the background uses a knit-look half double crochet that forms neat V-shaped ridges, so the cable stands out clearly. The style is rustic, simple, and suits wood and greenery.
This pattern uses US crochet terms. The finished ornament measures about 4.75 in (12.1 cm) wide at the widest tips and 6.25 in (15.9 cm) tall from the top point to the bottom of the trunk. The hanging loop adds about 1.25 in (3.2 cm) above that.
Construction overview: You work the tree body flat in rows from the top point down to the bottom. Each tier grows by increases and then steps back in to start the next tier. A one-pass single crochet edging adds the rounded tips and makes the hanging loop. Last, you work the trunk in rows off the center stitches of the final row.
Finished Size and Construction
- Finished size: 4.75 in (12.1 cm) wide × 6.25 in (15.9 cm) tall, plus a 1.25 in (3.2 cm) loop
- Skill level: Intermediate (front-post cables, simple shaping)
- Terminology: US
- Yarn weight: Worsted (#4)
- Hook: 5.0 mm (H-8)
- Number of pieces: 1
- Layout: Single flat piece; trunk and edging are worked directly onto the body
- Body size before edging: 4.25 in (10.8 cm) wide × 5 in (12.7 cm) tall
- Edging depth: about 0.125 in (0.3 cm) on straight edges; tips flare about 0.25 in (0.6 cm)
Materials
Choose a smooth worsted yarn with good stitch definition, so the braid reads clearly. A cotton blend or soft acrylic both work well. Avoid fuzzy or very splitty yarns, because they hide the cable crosses.
- Cream (tree, edging, loop): 20 g, about 40 m (44 yd)
- Chocolate brown (trunk): 5 g, about 10 m (11 yd)
These amounts include a safety margin of about 30%, so you will have yarn left over for a gauge swatch.
Tools:
– 5.0 mm (H-8) crochet hook
– Tapestry needle
– Scissors
– 2 stitch markers
– Blocking mat and pins
– Spray bottle with water
Abbreviations (US Terms)
- ch – chain
- st(s) – stitch(es)
- sl st – slip stitch
- sc – single crochet
- hdc – half double crochet
- FPdc – front post double crochet
- FPtr – front post treble crochet
- RS / WS – right side / wrong side
Special stitches:
- hdc3 (third-loop hdc): Work a hdc into the horizontal bar just below the top two loops, on the side facing you. On WS rows this pushes the top V to the RS, which creates the knit-look ridges.
- RC (Right Cross, over 3 sts): Skip next st, FPtr around next st. Working in front of the st just made, FPtr around the skipped st. Then FPdc around the next st.
- LC (Left Cross, over 3 sts): FPdc around next st. Skip next st, FPtr around next st. Working in front of the st just made, FPtr around the skipped st.
Alternating RC and LC on RS rows makes a three-strand braid.
Gauge and Checkpoints
Gauge: 16 sts and 12 rows = 4 in (10.2 cm) in the body pattern (hdc on RS rows, hdc3 on WS rows). That works out to 4 sts and 3 rows per inch.
Gauge matters here because the tier width and the edging spacing both depend on it. Make one ornament first and measure it at each checkpoint:
- After Row 3: 9 sts, 2.25 in (5.7 cm) wide, 1 in (2.5 cm) tall
- After Row 9: 13 sts, 3.25 in (8.3 cm) wide, 3 in (7.6 cm) tall
- After Row 15: 17 sts, 4.25 in (10.8 cm) wide, 5 in (12.7 cm) tall
- After edging and trunk: 4.75 in (12.1 cm) × 6.25 in (15.9 cm)
If your piece is too big, go down to a 4.5 mm hook. If it is too small, go up to a 5.5 mm hook. Measure width at the widest row of a tier, not at the flared tips.
Tree Body
With cream, ch 6.
Row 1 (WS): Hdc in 2nd ch from hook and in each ch across. Turn. (5 sts)
The 3 center sts are always the cable column. On every row, the background sts are split evenly on both sides of the cable.
The turning ch 1 never counts as a stitch.
Tier 1 (top)
Row 2 (RS, increase): Ch 1, 2 hdc in first st, RC over next 3 sts (work the posts around the Row 1 sts), 2 hdc in last st. Turn. (7 sts: 2 background, 3 cable, 2 background)
Row 3 (WS, increase): Ch 1, 2 hdc3 in first st, hdc3 in each st to last st, 2 hdc3 in last st. Turn. (9 sts)
Tier 2
Row 4 (RS, tier start): Ch 1, skip first st, hdc in next 2 sts, LC, hdc in next 2 sts. Leave the last st unworked. Turn. (7 sts)
The two skipped end sts of Row 3 become the first tier’s ledge.
Row 5 (WS, increase): Ch 1, 2 hdc3 in first st, hdc3 in each st to last st, 2 hdc3 in last st. Turn. (9 sts)
Row 6 (RS, increase): Ch 1, 2 hdc in first st, hdc in next 2 sts, RC, hdc in next 2 sts, 2 hdc in last st. Turn. (11 sts)
Tier 3
Row 7 (WS, tier start): Ch 1, skip first st, hdc3 in each st to last st. Leave the last st unworked. Turn. (9 sts)
Row 8 (RS, increase): Ch 1, 2 hdc in first st, hdc in next 2 sts, LC, hdc in next 2 sts, 2 hdc in last st. Turn. (11 sts)
Row 9 (WS, increase): Ch 1, 2 hdc3 in first st, hdc3 in each st to last st, 2 hdc3 in last st. Turn. (13 sts)
Tier 4
Row 10 (RS, tier start): Ch 1, skip first st, hdc in next 4 sts, RC, hdc in next 4 sts. Leave the last st unworked. Turn. (11 sts)
Row 11 (WS, increase): Ch 1, 2 hdc3 in first st, hdc3 in each st to last st, 2 hdc3 in last st. Turn. (13 sts)
Row 12 (RS, increase): Ch 1, 2 hdc in first st, hdc in next 4 sts, LC, hdc in next 4 sts, 2 hdc in last st. Turn. (15 sts)
Tier 5 (bottom)
Row 13 (WS, tier start): Ch 1, skip first st, hdc3 in each st to last st. Leave the last st unworked. Turn. (13 sts)
Row 14 (RS, increase): Ch 1, 2 hdc in first st, hdc in next 4 sts, RC, hdc in next 4 sts, 2 hdc in last st. Turn. (15 sts)
Row 15 (WS, increase): Ch 1, 2 hdc3 in first st, hdc3 in each st to last st, 2 hdc3 in last st. (17 sts) Fasten off.
Row count summary: 5, 7, 9 / 7, 9, 11 / 9, 11, 13 / 11, 13, 15 / 13, 15, 17. Each tier ends 2 sts wider than the one above it. Each new tier starts 2 sts narrower than the row before it, and that step creates the notch.
Cable check: RC appears on Rows 2, 6, 10, and 14. LC appears on Rows 4, 8, and 12. That makes 7 crosses in total.
Place a marker in the 7th and 11th sts of Row 15. The 5 sts from the first marker to the second (sts 7–11) are reserved for the trunk. That leaves 6 outer sts on each side (6 + 5 + 6 = 17).
Edging (Border)
Border gauge: 4 sc per inch along the edges.
You work the edging in one pass, with RS facing. It starts at one side of the trunk sts, goes up the first side, across the top, and down the second side.
Join cream in the first outer st of Row 15, right next to the trunk sts.
Side A (from the bottom up):
- Tier 5: Sc in each of the 6 outer sts. Work (sc, hdc, sc) in the row-end of Row 15 for the tip. Sc in the row-ends of Rows 14 and 13. (11 sts)
- Tier 4: Sc in the skipped end st of Row 12 (the ledge). Work (sc, hdc, sc) in the row-end of Row 12. Sc in the row-ends of Rows 11 and 10. (6 sts)
- Tier 3: Repeat the Tier 4 sequence using the ledge st and row-end of Row 9, then the row-ends of Rows 8 and 7. (6 sts)
- Tier 2: Repeat using Row 6, then Rows 5 and 4. (6 sts)
- Tier 1: Repeat using Row 3, then Rows 2 and 1. (6 sts)
Side A total: 35 sts
Top: Work in the free loops of the foundation ch. Sc in the first 2 ch. In the center ch, work (sc, ch 10, sc) to form the hanging loop. Sc in the last 2 ch. (6 sc + ch-10 loop)
Side B: Mirror Side A, working top to bottom:
– Sc in the row-ends of Rows 1 and 2, (sc, hdc, sc) in the row-end of Row 3, then sc in the ledge st of Row 3.
– Repeat that sequence for Rows 4–6, 7–9, and 10–12.
– Finish with sc in the row-ends of Rows 13 and 14, (sc, hdc, sc) in the row-end of Row 15, and sc in each of the 6 outer sts.
Side B total: 35 sts. Fasten off.
Edging total: 35 + 6 + 35 = 76 sts plus the loop.
Why the math works: Each tier’s sloped edge covers 3 rows. That is 1 in (2.5 cm) of height plus 0.25 in (0.6 cm) of outward growth, or about 1.25 in (3.2 cm) of edge. You place 5 sts along that edge (2 sc plus the 3-st tip), which matches the 4-per-inch border gauge.
The tier 5 bottom has 6 hdc tops, which measure 1.5 in (3.8 cm), so 6 sc fit exactly. The single ledge sc rounds the underside of each tip without pulling the notch closed. On the top, the 5 foundation ch get 6 sc plus the loop, which adds just enough fullness to make a point.
Trunk
With RS facing, join brown in the first marked st of Row 15 (st 7).
Row 1: Ch 1, sc in sts 7–11. Turn. (5 sc)
Rows 2–4: Ch 1, sc in each st across. Turn. (5 sc)
Fasten off after Row 4. The trunk measures 1.25 in (3.2 cm) wide × 1 in (2.5 cm) tall.
Weave in all ends on the WS. Run the brown tails through the trunk only, so no brown shows through the cream.
Final Blocking
- Lightly mist the ornament with water until it is damp, not soaked.
- Lay it RS up on the blocking mat.
- Pin the top point and the trunk so the center line is straight. Total height should be 6.25 in (15.9 cm).
- Pin out the tier 5 tips to 4.75 in (12.1 cm) across.
- Pin each smaller tier’s tips so the notches sit evenly on both sides.
- Gently shape the braid with your fingers so each cross sits raised and centered. Do not flatten it.
- Lay the hanging loop flat and straight above the tip.
- Let it dry completely, then unpin.
Final Quality-Control Checklist
- Body before edging measures 4.25 in (10.8 cm) × 5 in (12.7 cm)
- Row 15 has 17 sts, with 6 outer sts on each side of the trunk
- Seven cable crosses alternate RC/LC with no repeats in a row
- Both edging sides have 35 sts and match tip for tip
- All five tiers have rounded (sc, hdc, sc) tips on both sides
- The loop is centered over the cable
- The trunk is 5 sc wide and centered under the braid
- All ends are woven in invisibly
Troubleshooting
Cable looks flat: Your FPtr sts are too tight. Pull the first loop up slightly taller, or use a hook 0.5 mm larger for the post sts only.
Edges ripple: Too many sts in the edging. Check that you used only 1 sc per row-end outside the tips.
Edges cup or pull in: Your edging is too tight. Loosen your tension or go up a hook size for the edging only.
Tiers look uneven: Re-count the tier-start rows. Each should be exactly 2 sts narrower than the row before it.
Braid twists the wrong way: Check that you crossed in front of the st just made, and that RC and LC alternate.
Trunk is off-center: Re-count Row 15 from both ends. There should be 6 outer sts on each side.
Care
Hand wash in cool water with mild soap, press out the water in a towel, and dry flat. Reshape the tips while damp if needed.
Final Notes
The measurement chain is short and predictable:
- Gauge of 4 sts and 3 rows per inch
- Body of 17 sts × 15 rows = 4.25 in (10.8 cm) × 5 in (12.7 cm)
- Edging of 35 + 6 + 35 sts, which adds the flared tips and brings the width to 4.75 in (12.1 cm)
- Trunk of 5 sc × 4 rows, which brings the total height to 6.25 in (15.9 cm)
If you hit each checkpoint, every tree comes out the same size, which matters if you are making a set for gifts or a mantel display.
Happy crocheting!