

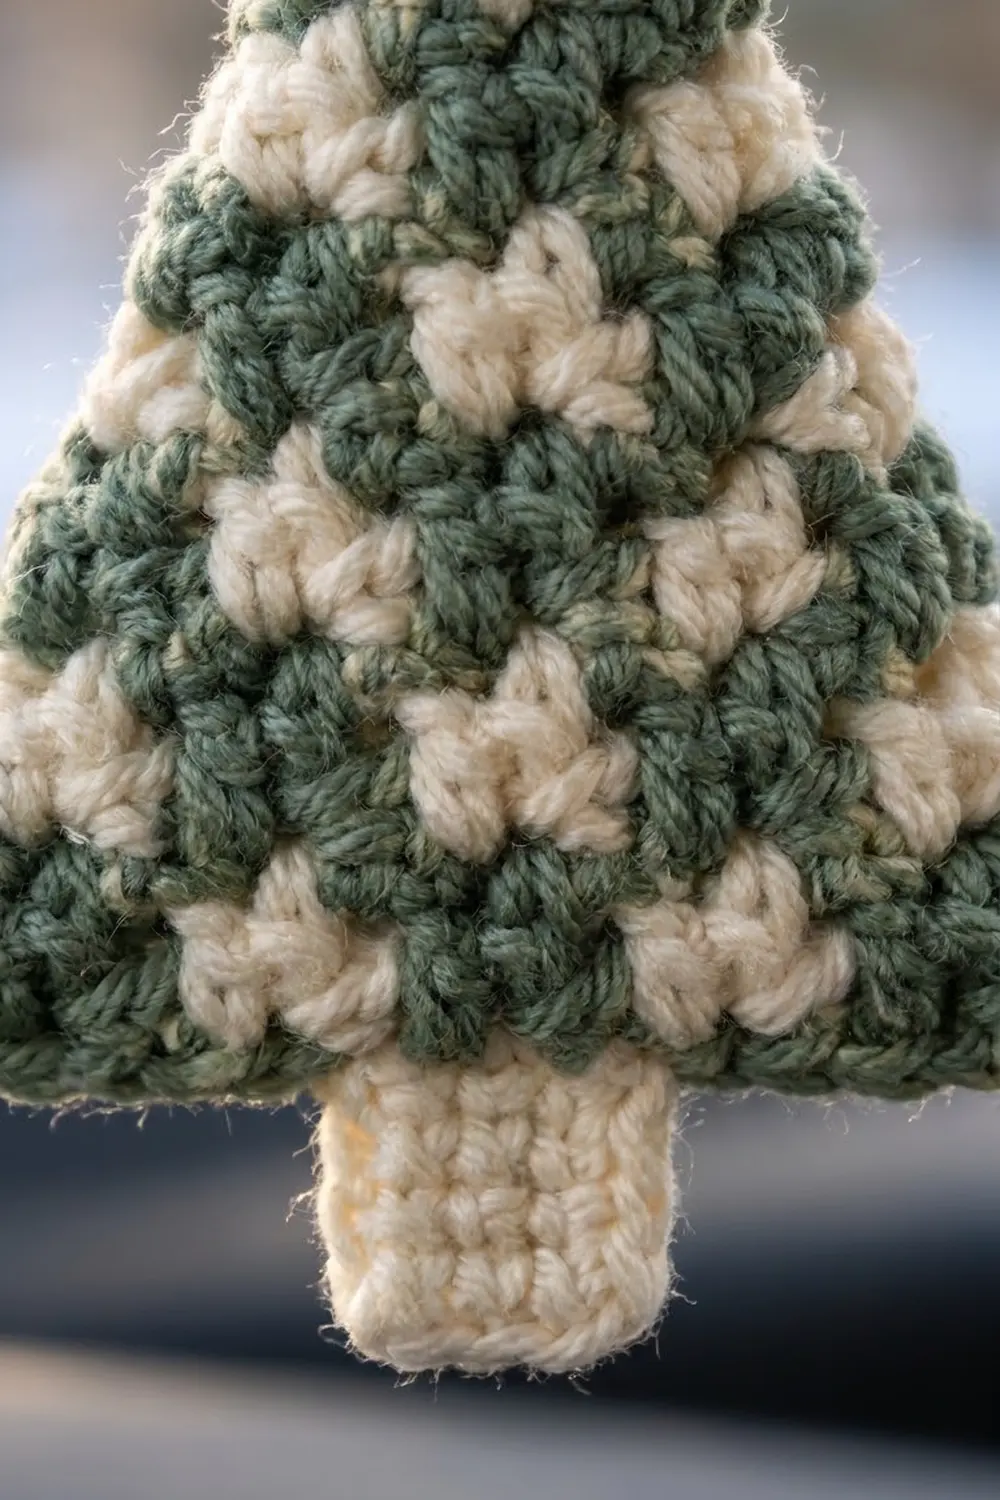
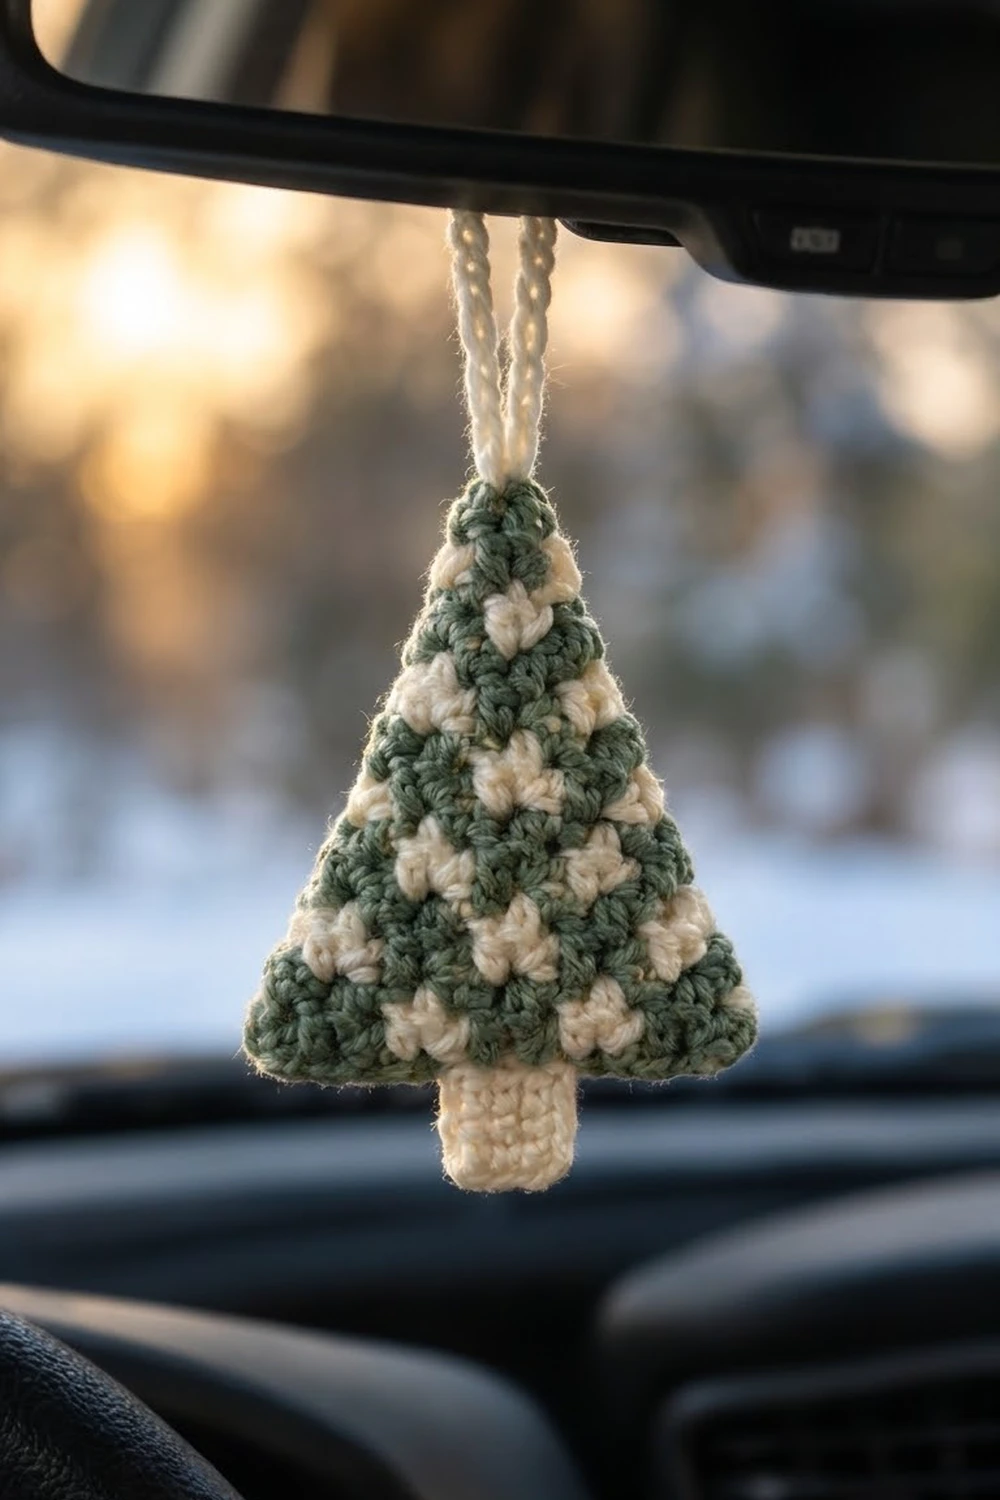
This little tree hangs from a rear-view mirror. It’s a flat triangle in sage green with staggered cream dots that look a bit like snow caught in the branches. A cream trunk and a cream loop finish it.
The design uses just two colors, sage green and soft cream. The dots come from simple tapestry-style color changes in single crochet, so the fabric stays dense and flat and holds its shape when it swings.
The pattern uses US crochet terms throughout. The finished tree measures about 4 in (10.2 cm) wide and 4.8 in (12.2 cm) tall without the loop. The loop adds about 4 in (10.2 cm) of drop.
The tree is one piece, worked flat from the bottom up. You decrease at both edges every other row until you reach the point. Then you work one round of green border, add the trunk to the bottom edge, and add the loop at the top. There’s nothing to sew together.
Finished Size and Construction
- Finished size: 4 in (10.2 cm) wide × 4.8 in (12.2 cm) tall, not including the loop
- Skill level: Easy-intermediate (two-color single crochet)
- Terminology: US
- Yarn weight: DK (light worsted, #3)
- Hook: 3.5 mm (E-4)
- Number of pieces: 1
- Layout: One triangle, with the trunk worked directly onto it
- Tree body before border: 3.6 in (9.1 cm) wide × 3.5 in (8.9 cm) tall
- Border depth: 1 round of single crochet, about 0.2 in (0.5 cm)
- Trunk: 1.2 in (3.0 cm) wide × 0.9 in (2.3 cm) tall
- Loop: about 8 in (20.3 cm) around, hanging about 4 in (10.2 cm)
Materials
Use a smooth cotton or cotton-blend DK yarn. Cotton gives crisp stitch definition, keeps the dots sharp, and doesn’t stretch out of shape while it hangs. Avoid fuzzy yarns, because they blur the dots.
- Color A, sage green: 8 g, about 18 m (about 20 yd)
- Color B, cream: 5 g, about 12 m (about 13 yd)
These quantities include a margin for your gauge swatch and for the yarn you carry inside the stitches.
Tools:
– 3.5 mm (E-4) crochet hook
– Tapestry needle
– Scissors
– 2 locking stitch markers
– Ruler or tape measure
– Blocking mat and rust-proof pins
– Spray bottle with water
Abbreviations (US Terms)
- ch – chain
- sc – single crochet
- sc2tog – single crochet 2 together: insert hook in next st, yarn over, pull up a loop, insert hook in following st, yarn over, pull up a loop, yarn over, pull through all 3 loops
- sl st – slip stitch
- st(s) – stitch(es)
- rep – repeat
- A – sage green
- B – cream
Special technique: tapestry color change. To change color, work the last stitch in the old color until 2 loops remain on the hook. Then yarn over with the new color and pull through. Lay the unused color along the tops of the stitches and work over it so it’s carried inside the next stitches. In the instructions, “2 B” means 2 sc in cream and “2 A” means 2 sc in green. “B sc2tog” means you work the decrease in cream.
Gauge and Checkpoints
Gauge: 20 sc × 22 rows = 4 in (10.2 cm) in two-color single crochet, with the unused color carried. That’s 5 sts and 5.5 rows per inch (2.5 cm).
Test the piece first. Work Rows 1–4 of the tree, then stop and measure. Keep the stitches tight enough that the carried yarn doesn’t show through.
Checkpoints:
– After Row 1: the base measures 3.6 in (9.1 cm) across 18 sts.
– After Row 9: the body is 1.6 in (4.1 cm) tall.
– After Row 19: the body is 3.5 in (8.9 cm) tall.
– After the border: the tree is 4 in (10.2 cm) wide and 3.9 in (9.9 cm) tall.
– After the trunk: the total height is 4.8 in (12.2 cm).
If the piece is too big (more than 0.1 in or 0.3 cm wide at Row 1), go down one hook size, to 3.25 mm. If it’s too small, go up to 3.75 mm. Don’t change the stitch counts. The dot placement and border math depend on them.
Tree Body
Work flat in rows. Ch 1 and turn at the end of every row. The ch-1 never counts as a stitch. Every band row is symmetrical, so it reads the same from either end. Carry the unused color through every row, including the solid green rows, so the fabric has the same thickness all over.
All stitch counts are complete counts for that row.
Foundation: With A, ch 19.
Row 1 (A): Sc in 2nd ch from hook and in each ch across. Pick up B and carry it from here on. (18 sts)
Row 2 (dot band 1): 2 B, *2 A, 2 B; rep from * 3 more times. (18 sts: 5 cream dots)
Row 3 (decrease, dot band 1): B sc2tog, *2 A, 2 B; rep from * 2 more times, 2 A, B sc2tog. (16 sts)
Row 4 (A): Sc in each st across. (16 sts)
Row 5 (decrease, dot band 2): B sc2tog, 1 B, 2 A, 2 B, 2 A, 2 B, 2 A, 1 B, B sc2tog. (14 sts)
Row 6 (dot band 2): 2 B, *2 A, 2 B; rep from * 2 more times. (14 sts: 4 cream dots)
Row 7 (decrease, A): Sc2tog, sc in next 10 sts, sc2tog. (12 sts)
Row 8 (dot band 3): 1 A, 2 B, 2 A, 2 B, 2 A, 2 B, 1 A. (12 sts)
Row 9 (decrease, dot band 3): B sc2tog, 1 B, 2 A, 2 B, 2 A, 1 B, B sc2tog. (10 sts: 3 cream dots)
Row 10 (A): Sc in each st across. (10 sts)
Row 11 (decrease, dot band 4): A sc2tog, 2 B, 2 A, 2 B, A sc2tog. (8 sts)
Row 12 (dot band 4): 1 A, 2 B, 2 A, 2 B, 1 A. (8 sts: 2 cream dots)
Row 13 (decrease, A): Sc2tog, sc in next 4 sts, sc2tog. (6 sts)
Row 14 (dot band 5): 2 A, 2 B, 2 A. (6 sts)
Row 15 (decrease, dot band 5): A sc2tog, 2 B, A sc2tog. (4 sts: 1 cream dot)
Cut B and leave a 4 in (10.2 cm) tail to weave in later.
Row 16 (A): Sc in each st across. (4 sts)
Row 17 (A): Sc2tog twice. (2 sts)
Row 18 (A): Sc in each st across. (2 sts)
Row 19 (A): Sc2tog. (1 st)
Don’t fasten off. Go straight into the border.
Why the dots line up: Each dot is 2 sts wide and 2 rows tall, and the bands alternate between two sets of column positions. The edge decreases only ever remove outer stitches, so the dots stay stacked in a staggered pattern. The bands hold 5, 4, 3, 2 and 1 dots, which follows the taper of the triangle. The tip stays solid green.
Border
Border gauge: On the slanted sides, work 1 sc into each row end. At 5 sc per inch, 19 sc covers 3.8 in (9.7 cm). The slanted edge of the body measures about 3.9 in (9.9 cm), so the edge lies flat without ruffling or cupping.
Round 1 (A): Ch 1. Work 3 sc in the single st of Row 19 for the top corner. Place a marker in the center sc.
Working down the first slanted side, sc in the end of each row from Row 18 to Row 2. (17 sc)
At the bottom corner, work 3 sc in the first foundation st. Mark the center sc.
Working across the bottom of the foundation chain, sc in each of the next 16 sts. (16 sc)
Work 3 sc in the last foundation st. Mark the center sc.
Working up the second slanted side, sc in the end of each row from Row 2 to Row 18. (17 sc)
Join with a sl st to the first sc. Fasten off and weave in the ends.
Round 1 totals:
– Corner centers: 3
– Slanted side, between corner centers: 1 + 17 + 1 = 19 sts
– Bottom, between corner centers: 1 + 16 + 1 = 18 sts
– Total: 3 + 19 + 19 + 18 = 59 sts
Per side, counting both corner centers: each slanted side has 21 sts and the bottom has 20 sts. Each corner is shared by two sides, so 21 + 21 + 20 − 3 = 59. The two counting methods match.
Why the math works: The bottom edge has the same 18 stitches as Row 1, plus the corner groups. The extra stitches on either side of each corner center let the corner turn without pulling. After the border, the tree measures 4 in (10.2 cm) wide and 3.9 in (9.9 cm) tall.
Trunk
The bottom edge has 18 sts between the two bottom corner centers. Counting from either corner center, skip the first 6 sts and join B in the 7th st. The trunk uses the middle 6 sts, which are sts 7–12, so 6 sts are left free on each side.
Row 1 (B): Ch 1, sc in the same st and in the next 5 sts. (6 sts)
Rows 2–5 (B): Ch 1, turn, sc in each st across. (6 sts)
Fasten off. The trunk measures 1.2 in (3.0 cm) wide × 0.9 in (2.3 cm) tall. Weave the tails into the trunk’s side edges so they don’t show.
Hanging Loop
Join B with a sl st in the top corner center sc of the border (the marked st).
Ch 45. The chain should measure about 8 in (20.3 cm). Sl st into the same top st to close the loop.
Turn and sl st in each of the 45 ch back around the loop. This doubles the cord and gives it a firm, braided look. Sl st into the top st again and fasten off. Weave the tail down into the green tip.
The finished loop is about 8 in (20.3 cm) around and hangs about 4 in (10.2 cm) above the tree. That’s long enough to slip over a mirror arm.
Final Blocking
- Weave in every tail. Trim them only after blocking.
- Spritz the tree evenly with water until it’s damp all the way through.
- Lay it face up on the blocking mat.
- Pin the three corners of the triangle so it’s 4 in (10.2 cm) wide at the base and 3.9 in (9.9 cm) from the base to the tip.
- Ease the slanted sides straight between the pins. Add one pin halfway along each side if it curves.
- Pin the trunk square, centered, at 1.2 in (3.0 cm) wide.
- Let it dry completely, usually 6–12 hours.
- Unpin it and trim the woven tails flush.
Final Quality-Control Checklist
- [ ] The body has 19 rows, ending in a single tip stitch.
- [ ] The dot bands contain 5, 4, 3, 2 and 1 cream dots.
- [ ] No cream strands show between stitches on either side.
- [ ] The border has exactly 59 sts, with 3-sc groups at all three corners.
- [ ] The tree is 4 in (10.2 cm) wide and 3.9 in (9.9 cm) tall without the trunk.
- [ ] The trunk is centered, 6 sts wide and 5 rows tall.
- [ ] The total height without the loop is 4.8 in (12.2 cm).
- [ ] The loop is securely attached at the tip, and all ends are hidden.
Troubleshooting
Cream shows through the green. Your tension is too loose around the carried strand. Go down a hook size or tug the carried yarn gently every few stitches.
The triangle leans to one side. You probably missed a decrease at one end. Count each decrease row against the stitch counts listed in the pattern.
The edges ripple. You worked more than one sc into some row ends. Use exactly 17 sc on each slanted side.
The edges pull in or the corners curl. The border is too tight. Work Round 1 with a hook one size larger.
The dots look smeared. You changed color too late. Pick up the new color on the final yarn over of the stitch before the color change.
The trunk is off-center. Recount the 18 bottom sts between the corner centers. The trunk must start in st 7.
Care
Hand wash in cool water with mild soap, press out the water in a towel, and dry flat. Keep the tree away from long periods of direct sun on the dashboard so the sage green doesn’t fade.
Final Notes
Here’s the measurement chain from start to finish:
- 18 sts at 5 sts per inch give a 3.6 in (9.1 cm) base.
- 19 rows at 5.5 rows per inch give a 3.5 in (8.9 cm) body.
- One 59-st border round brings the tree to 4 in (10.2 cm) × 3.9 in (9.9 cm).
- A 6-st, 5-row trunk takes the total height to 4.8 in (12.2 cm).
If your Row 1 measurement is right, everything after it will fall into place. This tree makes a quick gift and a cheerful winter accent for any car.
Happy crocheting!