

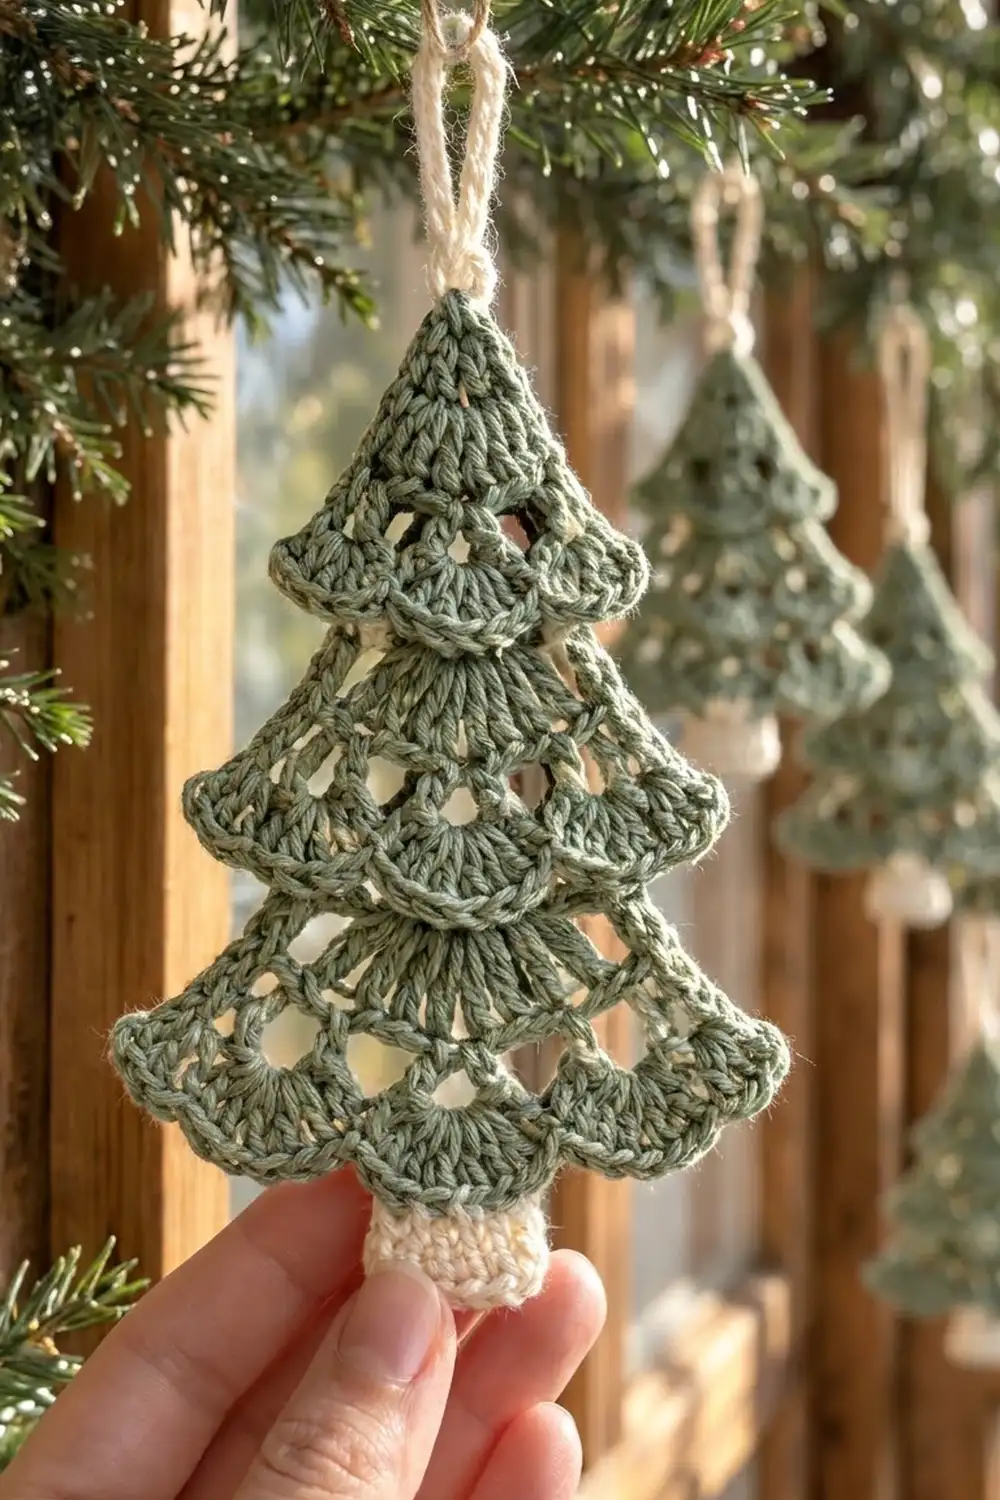
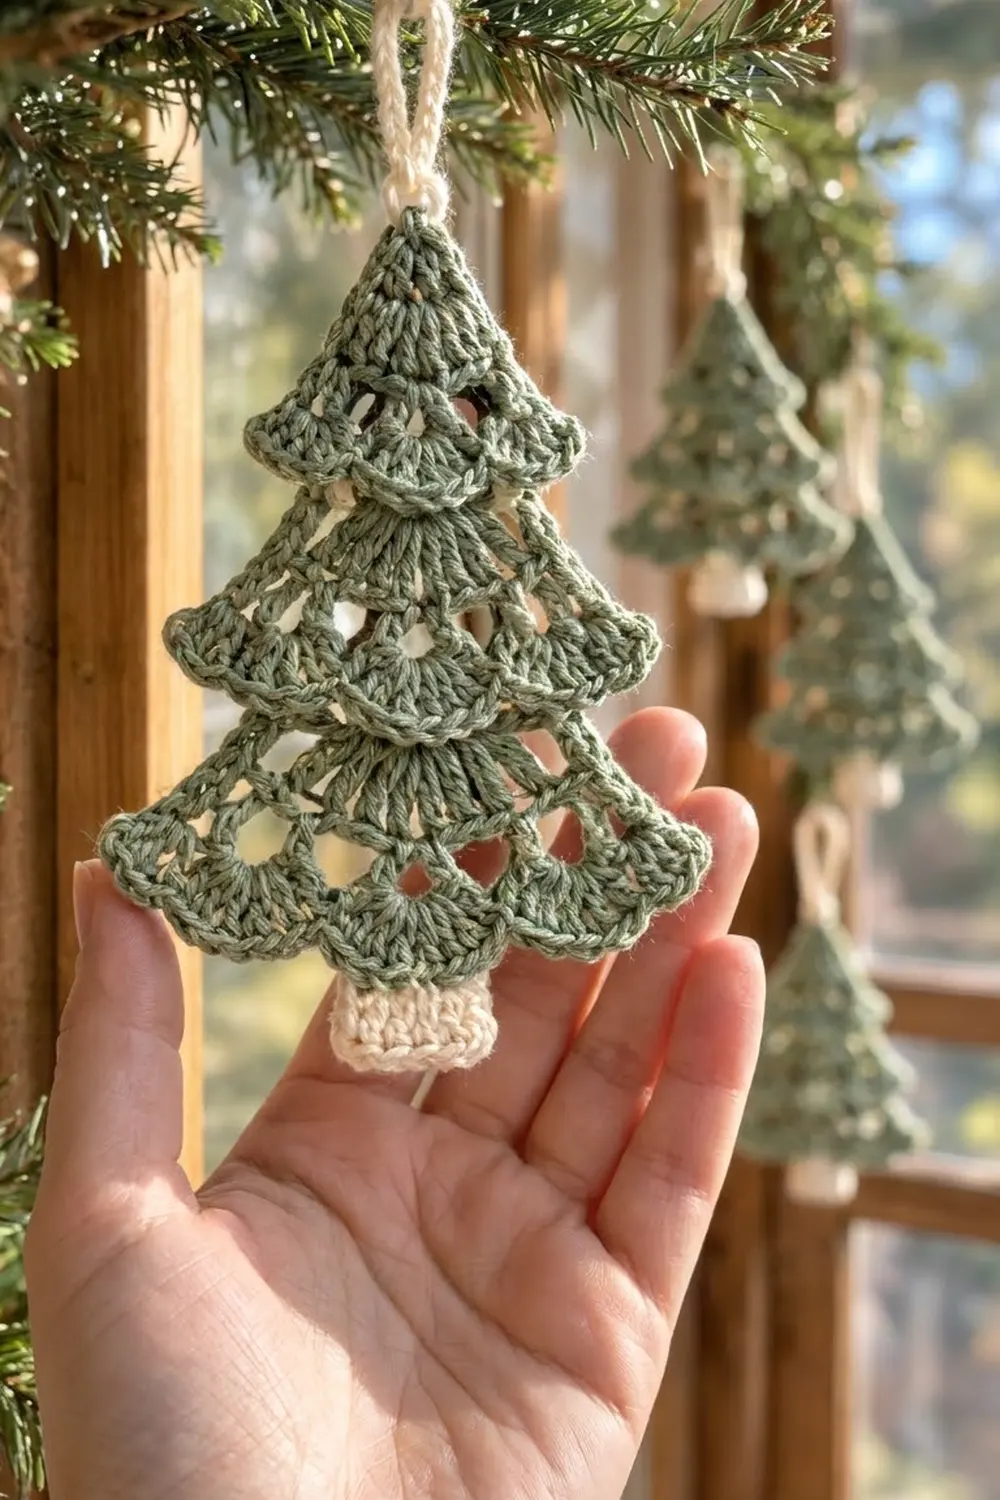
This little tree ornament is soft sage green with three tiers of lacy openwork. Each tier ends in a row of rounded shell scallops that hangs over the tier below, so the flat tree looks layered. A cream trunk and a sturdy cream hanging loop finish it in a calm, Scandinavian-inspired style.
The pattern uses US crochet terms throughout. The finished ornament measures 4 in (10.2 cm) wide at the bottom scallops and 5 in (12.7 cm) tall from tip to trunk. The hanging loop adds another 1.25 in (3.2 cm).
The tree is worked flat in rows from the tip down. Each tier follows the same order: growth rows, an arch row, and a shell row. Between tiers, a row of chain loops is worked behind the shells, so the scallops float freely in front. The trunk is a small single-crochet rectangle sewn to the back, and the loop is crocheted onto the tip.
This makes a quick one-evening project and a good way to use up leftover cotton.
Finished Size and Construction
- Finished size: 4 in (10.2 cm) wide × 5 in (12.7 cm) tall, plus a 1.25 in (3.2 cm) loop
- Skill level: Easy–Intermediate
- Terminology: US crochet terms
- Yarn weight: Sport (2), cotton
- Hook: 3.0 mm
- Number of pieces: 1 tree body, plus a sewn-on trunk tab and a worked-on loop
- Layout: Three tiers stacked vertically, each scalloped edge overlapping the tier below
- Body height: 4.5 in (11.4 cm), tip to bottom scallops
- Size before border (Row 12): 3.8 in (9.7 cm) wide × 4.1 in (10.4 cm) tall
- Border depth (shell row): 0.4 in (1.0 cm)
Materials
Use a smooth, mercerized or combed cotton in sport weight. Cotton shows the shell stitches clearly and holds its shape after blocking. Avoid fuzzy yarns, because they blur the open arches.
- Sage green (MC): 12 g, about 36 m
- Cream (CC): 4 g, about 12 m
Tools:
- 3.0 mm crochet hook
- Tapestry needle
- Scissors
- 1 stitch marker
- Rust-proof pins
- Blocking mat or folded towel
- Spray bottle
These quantities include a margin of about 30% for your gauge swatch and weaving in ends.
Abbreviations (US Terms)
- ch – chain
- sl st – slip stitch
- sc – single crochet
- dc – double crochet
- sp – space
- tch – turning chain
- st(s) – stitch(es)
- RS / WS – right side / wrong side
Special stitches:
- Shell: 5 dc in the same space.
- Arch: ch 2, skip 2 sts, dc in the next st.
- Behind-loop: a ch-5 made on a WS row that runs from one sc to the next behind a shell, so the shell hangs over it on the RS.
The ch-3 at the start of a dc row counts as 1 dc. The ch-1 at the start of an sc row does not count as a stitch.
Gauge and Checkpoints
Gauge: 22 dc and 11 dc rows = 4 in (10.2 cm), which is 11 dc = 2 in (5.1 cm).
Work Tier 1 (Rows 1–5) first and measure it before going on. It works as your gauge test.
Checkpoints:
- After Row 4: 2.2 in (5.6 cm) wide across the arch row.
- After Row 5: 1.8 in (4.6 cm) tall from the tip to the bottom of the scallops.
- After Row 9: 3.1 in (7.9 cm) tall; Row 8 is 2.7 in (6.9 cm) wide.
- After Row 12: 3.8 in (9.7 cm) wide.
- After Row 13: 4.5 in (11.4 cm) tall.
If your tree is too big, go down to a 2.75 mm hook. If it is too small, go up to a 3.25 mm hook. Change the hook rather than the stitch counts, because the arch and shell math depends on exact numbers.
Tier 1 (Top)
With MC:
Row 1 (RS): Ch 4, sl st in the first ch to form a ring. Ch 3 (counts as dc), 5 dc in ring. Turn. (6 dc)
Row 2 (WS): Ch 3, dc in the st at the base of the ch, dc in the next 4 sts, 2 dc in the top of the tch. Turn. (8 dc)
Row 3 (RS): Ch 3, dc at the base, dc in the next 6 sts, 2 dc in the top of the tch. Turn. (10 dc)
Row 4 (WS, arch row): Ch 3, dc at the base, [ch 2, skip 2, dc in the next st] twice, ch 2, skip 2, 2 dc in the top of the tch. Turn. (6 dc, 3 ch-2 sps)
Check: 1 + (2 × 3) + 3 = 10 stitches used. The finished width is 12 stitches.
Row 5 (RS, shell row): Ch 1, sc in the first dc, skip the next dc, [shell in the next ch-2 sp, sc in the next dc] twice, shell in the last ch-2 sp, skip the next dc, sc in the top of the tch. Turn. (3 shells, 4 sc = 19 sts)
You now have the first three scallops.
Tier 2 (Middle)
Row 6 (WS, loop row): Ch 1, sc in the first sc, [ch 5, sc in the next sc] 3 times. Turn. (4 sc, 3 ch-5 loops)
As you work each ch-5, fold the shell away from you toward the RS, so the chain runs behind it. The shells stay free and become the overlapping scallops.
Row 7 (RS, growth row): Ch 3 (counts as dc in the first sc), [3 dc in the next ch-5 loop, dc in the next sc] 3 times. Turn. (13 dc)
Check: 1 + (3 × 4) = 13.
Row 8 (WS, arch row): Ch 3, dc at the base, [ch 2, skip 2, dc in the next st] 3 times, ch 2, skip 2, 2 dc in the top of the tch. Turn. (7 dc, 4 ch-2 sps)
Check: 1 + (3 × 3) + 3 = 13.
Row 9 (RS, shell row): Ch 1, sc in the first dc, skip the next dc, [shell in the next ch-2 sp, sc in the next dc] 3 times, shell in the last ch-2 sp, skip the next dc, sc in the top of the tch. Turn. (4 shells, 5 sc = 25 sts)
Tier 3 (Bottom)
Row 10 (WS, loop row): Ch 1, sc in the first sc, [ch 5, sc in the next sc] 4 times, keeping each chain behind its shell. Turn. (5 sc, 4 ch-5 loops)
Row 11 (RS, growth row): Ch 3, dc in the first sc, [3 dc in the next loop, dc in the next sc] 3 times, 3 dc in the last loop, 2 dc in the last sc. Turn. (19 dc)
Check: 2 + 12 + 3 + 2 = 19. The extra dc at each end makes this tier wider than Tier 2, which is what keeps the stepped silhouette.
Row 12 (WS, arch row): Ch 3, dc at the base, [ch 2, skip 2, dc in the next st] 5 times, ch 2, skip 2, 2 dc in the top of the tch. Turn. (9 dc, 6 ch-2 sps)
Check: 1 + (5 × 3) + 3 = 19. The width is 21 sts, or 3.8 in (9.7 cm).
Row 13 (RS, shell row): Ch 1, sc in the first dc, skip the next dc, [shell in the next ch-2 sp, sc in the next dc] 5 times, shell in the last ch-2 sp, skip the next dc, sc in the top of the tch. (6 shells, 7 sc = 37 sts)
Fasten off and leave a 4 in (10.2 cm) tail.
The center sc of Row 13 (the 4th sc) sits between shells 3 and 4. Mark it now; you will center the trunk on it.
Trunk Tab
With CC:
Ch 6.
Row 1: Sc in the 2nd ch from the hook and in each ch across. Turn. (5 sc)
Rows 2–5: Ch 1, sc in each st across. Turn. (5 sc)
Fasten off and leave a 10 in (25.4 cm) tail for sewing. The tab measures 0.9 in (2.3 cm) wide × 0.8 in (2.0 cm) tall.
Turn the tree WS up. Center the tab under the marked sc. Tuck the top 2 rows, about 0.3 in (0.8 cm), behind Rows 12–13, so 3 rows, about 0.5 in (1.3 cm), show below the scallops.
Whipstitch the top edge and the hidden part of both sides to the back of the Row 12 stitches. Do not stitch through the shells, so the scallops can still sit over the trunk.
Hanging Loop
With CC, join with a sl st into the ring at the tip of the tree.
Ch 16, then sl st into the same spot to form a loop.
Work 22 sc over the chain loop, then sl st into the first sc. Fasten off.
The covered loop is about 1.25 in (3.2 cm) tall. The thick join at its base gives the small cream knot at the tip.
Border
This tree has no separately added border. The three shell rows (Rows 5, 9, and 13) are the edging, and the bottom shell row works as the main border.
Border gauge: Each shell is about 0.65 in (1.7 cm) across the scallop and 0.4 in (1.0 cm) deep. A shell row adds that full 0.4 in (1.0 cm) depth to the bottom of each tier.
Counts per edge:
- Tier 1 edge (Row 5): 6 dc and 3 ch-2 sps become 3 shells + 4 sc = 19 sts.
- Tier 2 edge (Row 9): 7 dc and 4 ch-2 sps become 4 shells + 5 sc = 25 sts.
- Tier 3 edge (Row 13): 9 dc and 6 ch-2 sps become 6 shells + 7 sc = 37 sts.
Why the math works: Each arch row has k spaces and k + 3 dc. The shell row puts one shell in each space (k shells). It puts 1 sc on each of the k − 1 single dc between spaces, plus 1 sc at each end, for k + 1 sc in total. The two skipped dc are the second dc at each end, so the edge stays balanced.
Each shell spreads 5 sts over a span that was only 3 sts wide (ch 2 + 1 dc). That extra fullness makes the edge curve into a scallop and flare out beyond the tier. For the bottom tier, it takes the width from 3.8 in (9.7 cm) to about 4 in (10.2 cm) when blocked.
Final Blocking
- Weave in all ends on the WS, running MC tails through MC stitches and CC tails through CC stitches.
- Mist the tree with water until it is damp but not dripping.
- Lay it RS up on the mat.
- Pin the tip, then pin the outer shell of each tier, checking that the two sides are symmetrical.
- Pin the bottom row: 4 in (10.2 cm) wide, 4.5 in (11.4 cm) from tip to bottom scallop, with each scallop rounded evenly.
- Lift each upper tier’s shells slightly so they lie over the tier below rather than tucking under it.
- Straighten the trunk so it hangs centered, with 0.5 in (1.3 cm) showing.
- Let it dry completely, usually 4–6 hours, before unpinning.
Final Quality-Control Checklist
- Tiers have 3, 4, and 6 scallops from top to bottom.
- Each shell has exactly 5 dc.
- The arch rows show 3, 4, and 6 open spaces.
- No loop-row chains show on the RS.
- The scallops overlap the tier below.
- The widest point is 4 in (10.2 cm).
- The overall height is 5 in (12.7 cm) without the loop.
- The trunk is centered under the marked sc.
- The loop is firmly attached and stands upright.
- All ends are secured on the WS.
Troubleshooting
Shells lie flat instead of overlapping: Loop-row chains were worked in front of the shells. Redo the loop row, folding the shells toward the RS before each ch-5.
Arch row count is off: Recount the growth row; it must be 10, 13, or 19 sts. One missing stitch shifts every arch.
Tree leans to one side: Make sure you work into the top of the tch at the end of every dc row.
Scallops ruffle too much: Your shells are too loose. Go down a hook size for the shell rows only, or block more firmly.
Loop flops over: Pack the sc more tightly over the chain, adding up to 2 more sc.
Care
Hand wash in cool water with mild soap, press out the water in a towel, and reshape it flat to dry. Store the ornament flat so the scallops keep their shape.
Final Notes
Here is the measurement chain to keep in mind as you work:
- Gauge is 22 dc = 4 in (10.2 cm).
- Tier 1 should be 2.2 in (5.6 cm) wide and 1.8 in (4.6 cm) tall.
- After Tier 2, the tree is 3.1 in (7.9 cm) tall.
- Row 12 is 3.8 in (9.7 cm) wide.
- The bottom shell row brings it to 4 in (10.2 cm) wide and 4.5 in (11.4 cm) tall.
- The trunk adds 0.5 in (1.3 cm), for a total of 5 in (12.7 cm).
If each checkpoint matches, the finished tree will match.
Happy crocheting!