

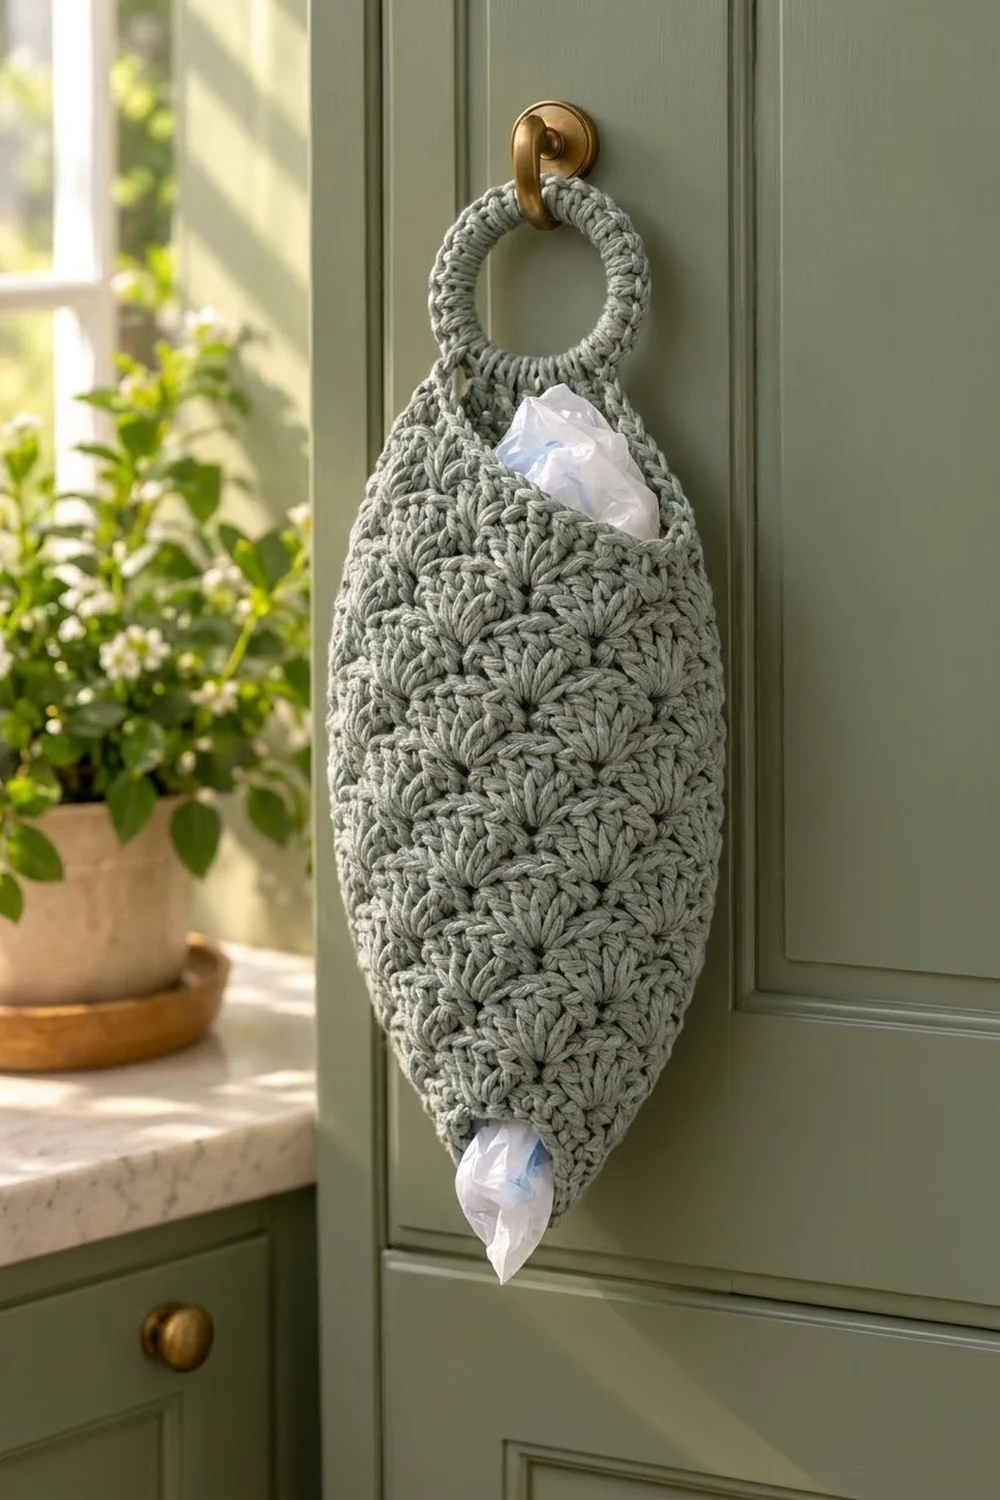
Plastic bags tend to pile up in a drawer. This holder keeps them tidy and close at hand. You stuff bags in at the top and pull them out one at a time through the small opening at the bottom.
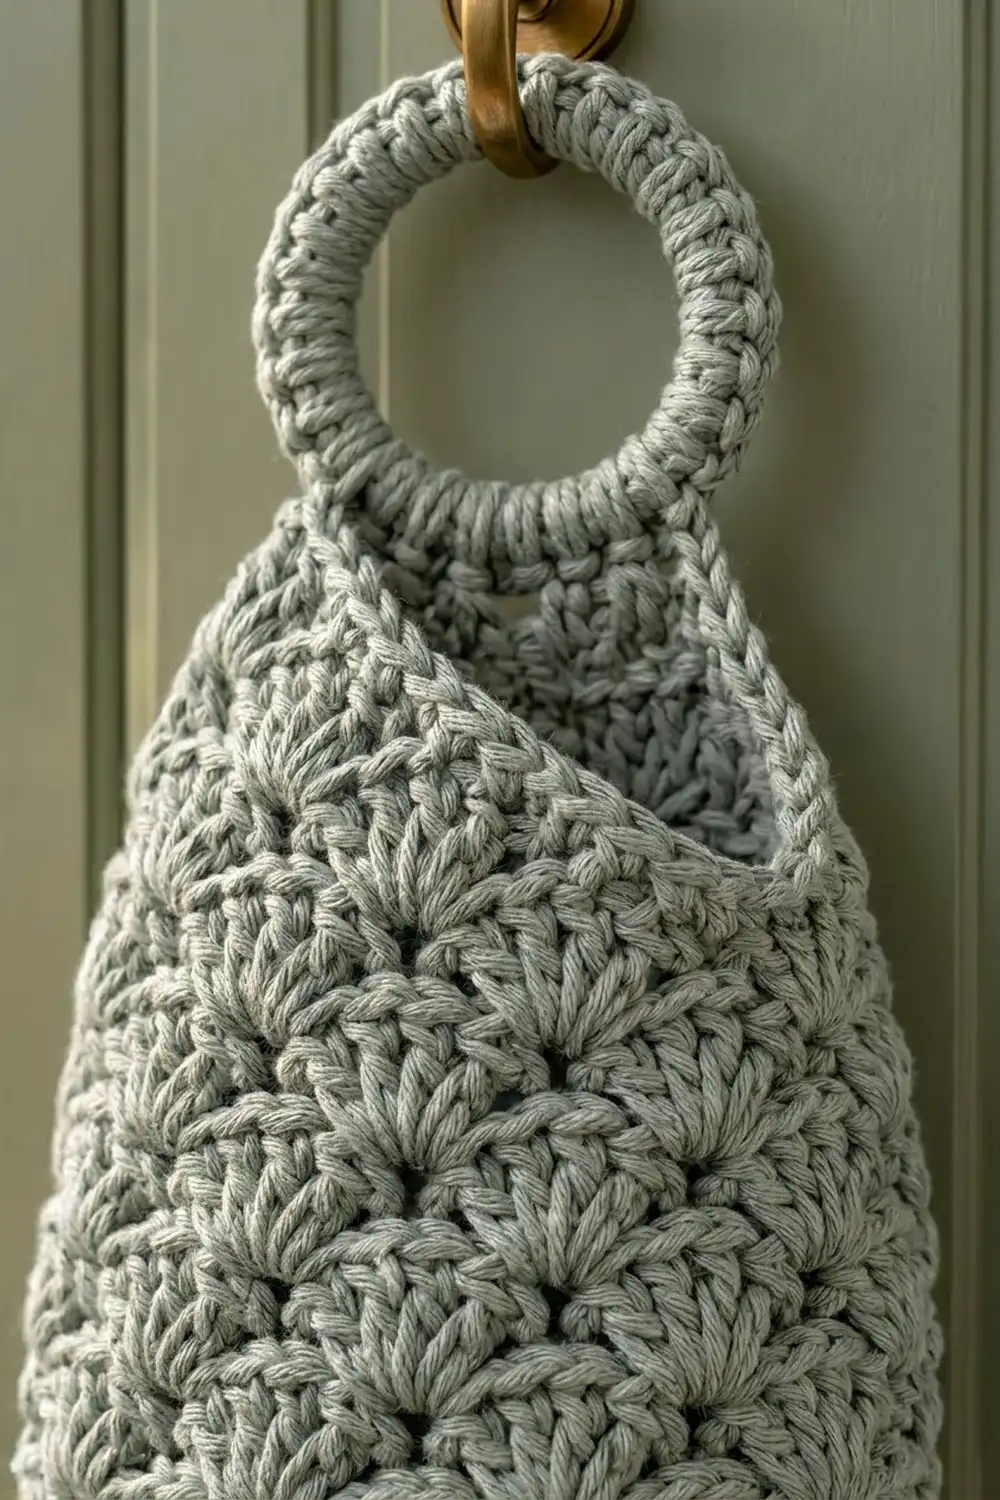
The Sage Leaf Shell Bag Holder is worked in one soft sage green cotton. An all-over shell stitch covers it in rows of small fans. The body is shaped like a long leaf: narrow at the bottom, full in the middle, and tapered at the top. A ring wrapped in single crochet lets it hang from a cabinet knob, door hook, or pantry peg.
This pattern uses US crochet terms. The finished body measures about 7.5 in (19.1 cm) wide at its widest point and 16 in (40.6 cm) long. With the ring, the holder hangs about 19.5 in (49.5 cm) long.
The body is worked from the bottom up in joined rounds, so there are no side seams. You start with a chain ring, increase the shell repeats out to full width, work straight, then decrease toward the top. Two rounds of single crochet finish the top opening. A short tab rises from the back, folds over the covered ring and is sewn down.
Finished Size and Construction
- Finished size: 7.5 in (19.1 cm) wide x 16 in (40.6 cm) long (body, laid flat); about 19.5 in (49.5 cm) long including the ring
- Skill level: Intermediate
- Terminology: US crochet terms
- Yarn weight: Worsted (#4), cotton or cotton blend
- Hook: 5.0 mm (H-8)
- Number of pieces: 1 body (worked in the round) plus 1 covered ring
- Layout: Single piece; no grid or assembly
- Piece size: 7.5 in (19.1 cm) wide at the widest point, 15 in (38.1 cm) around
- Size before border: 15.25 in (38.7 cm) long
- Border depth: Top edging 0.5 in (1.3 cm); bottom edging 0.25 in (0.6 cm)
Materials
Choose a smooth, firm worsted cotton. Cotton keeps the shells crisp and stops the holder from stretching once it is full of bags. Acrylic works too, but the holder will sag a little more.
- Sage Green: 150 g, about 255 m (279 yd)
This amount includes a margin of about 15 percent for your gauge swatch and small differences in tension.
Tools:
- 5.0 mm (H-8) crochet hook
- 1 metal or wooden ring, 3 in (7.6 cm) across
- 4 stitch markers
- Tapestry needle
- Scissors
- Tape measure
- Rust-proof pins and a towel for blocking
Abbreviations (US Terms)
- ch – chain
- sl st – slip stitch
- sc – single crochet
- sc2tog – single crochet 2 together
- dc – double crochet
- st(s) – stitch(es)
- sk – skip
- rep – repeat
- Rnd(s) – round(s)
Special stitches:
- Shell: 5 dc in the same stitch.
- Repeat (unit): 1 sc plus 1 shell = 6 sts. Every shell round is made of these units, so a round’s stitch count is always 6 times its number of units.
- Inc-shell: Worked into one shell of the previous round instead of a plain sc: sc in the 2nd dc, shell in the center (3rd) dc, sc in the 4th dc. It adds 1 sc + 1 shell (6 sts), so the round gains exactly one unit.
- Dec: Insert hook in the center dc of the next shell, yarn over and pull up a loop. Skip the sc that follows, insert hook in the center dc of the following shell, yarn over and pull up a loop. Yarn over and pull through all 3 loops. The shell that would have gone into the skipped sc is left out, so the round loses exactly one unit (6 sts).
Gauge and Checkpoints
Shell gauge: 4 units = 6 in (15.2 cm) wide; 4 shell rounds = 3 in (7.6 cm) tall. One unit = 1.5 in (3.8 cm). One shell round = 0.75 in (1.9 cm).
Sc gauge: 16 sc = 4 in (10.2 cm); 4 sc rounds = 1 in (2.5 cm).
Test with a flat swatch first. Ch 26. Row 1: sc in 2nd ch from hook, sk 2 ch, shell in next ch, sk 2 ch, sc in next ch; rep from * 3 more times (25 sts, 4 shells). Work 3 more rows of offset shells, then measure the 4 units across the middle.
Checkpoints on the holder (measure flat, gently smoothed):
- After Rnd 1: bottom opening 3 in (7.6 cm) across flat, 6 in (15.2 cm) around.
- After Rnd 7: width 7.5 in (19.1 cm); length 4.75 in (12.1 cm).
- After Rnd 18: width still 7.5 in (19.1 cm); length 13 in (33.0 cm).
- After Rnd 21: top 6 in (15.2 cm) across; length 15.25 in (38.7 cm).
- After the edging: length 16 in (40.6 cm).
Too big? Go down one hook size, to 4.5 mm (7). Too small? Go up to 5.5 mm (I-9). Use the new hook for the whole piece so the sc edging still matches the shells.
Body
Work the body in joined rounds with the right side facing. Do not turn.
Each shell round starts the same way. Sl st in the next 3 sts to reach the center dc of the first shell. Ch 1 (does not count as a st) and sc in that same center dc. The start of each round shifts half a unit, which is normal.
Plain round (used below): Ch 1, sc in center dc of first shell, shell in next sc, sc in center dc of next shell, shell in next sc; rep from * around, sl st to first sc.
Foundation: Ch 24, join with a sl st to form a ring, taking care not to twist.
Rnd 1: Ch 1, sc in each ch around, sl st to first sc. (24 sc)
Rnd 2 (set-up): Ch 1, sc in first st, sk 2, shell in next st, sk 2, sc in next st; rep from * 2 more times, sk 2, shell in next st, sk 2, sl st to first sc. (4 units, 24 sts)
Lay the piece flat and place one marker at each side fold. Work each round’s increases or decreases next to these markers, and move the markers up as you go.
Rnd 3 (growth): Sl st to center dc of first shell. Ch 1, sc in same st, shell in next sc, inc-shell in next shell, shell in next sc, sc in center dc of next shell, shell in next sc, inc-shell in next shell, shell in next sc, sl st to first sc. (6 units, 36 sts)
Rnd 4: Plain round. (6 units, 36 sts)
Rnd 5 (growth): Sl st to center dc of first shell. Ch 1, sc in same st, shell in next sc, inc-shell in next shell, shell in next sc, [sc in center dc of next shell, shell in next sc] 2 times, inc-shell in next shell, shell in next sc, sc in center dc of next shell, shell in next sc, sl st to first sc. (8 units, 48 sts)
Rnd 6: Plain round. (8 units, 48 sts)
Rnd 7 (growth): Sl st to center dc of first shell. Ch 1, sc in same st, shell in next sc, inc-shell in next shell, shell in next sc, [sc in center dc of next shell, shell in next sc] 3 times, inc-shell in next shell, shell in next sc, [sc in center dc of next shell, shell in next sc] 2 times, sl st to first sc. (10 units, 60 sts)
Checkpoint: 7.5 in (19.1 cm) wide, 4.75 in (12.1 cm) long.
Rnds 8–18: Plain round. (10 units, 60 sts each round)
Checkpoint: 13 in (33.0 cm) long. This straight section is the full middle of the leaf.
Rnd 19 (decrease): Sl st to center dc of first shell. Ch 1, sc in same st, shell in next sc, [sc in center dc of next shell, shell in next sc] 2 times, dec, shell in next sc, [sc in center dc of next shell, shell in next sc] 3 times, dec, shell in next sc, sl st to first sc. (8 units, 48 sts)
To check: the first part of the round uses shells 1–3 and the first dec uses shells 4 and 5. The next part uses shells 6–8 and the second dec uses shells 9 and 10. That makes 1 + 2 + 1 + 3 + 1 = 8 units.
Rnds 20–21: Plain round. (8 units, 48 sts each round)
Checkpoint: 6 in (15.2 cm) across the top, 15.25 in (38.7 cm) long. Do not fasten off.
Covered Ring
Make a slip knot on the hook. Hold the ring and work sc over it, pushing the stitches close together as you go. Work about 60 sc, or as many as you need to hide the ring completely. Sl st to first sc. Fasten off and weave in the ends.
Border (Top and Bottom Edging)
Border gauge: 16 sc = 4 in (10.2 cm), so 4 sc = 1 in (2.5 cm).
Top Edging
Rnd 22 (conversion): Ch 1, sc in each st around (1 sc in every sc and every dc), sl st to first sc. (48 + 0 = 48 sc; 24 sc per side)
Rnd 23: Ch 1, sc in each st around, sl st to first sc. (48 sc; 24 sc per side) Fasten off.
Why the math works: The last shell round has 8 units at 1.5 in (3.8 cm) each, so it measures 12 in (30.5 cm) around. At 4 sc per inch, 48 sc also measures 12 in (30.5 cm). The edging lies flat with no ruffling or pulling, and each side measures 24 sc = 6 in (15.2 cm).
Back Tab
Lay the holder flat with the side markers at the folds. Choose one side as the back and find its center. Count 5 sts out on each side of the center and mark those 10 sts. The tab is worked in rows, turning at the end of each row. Ch 1 does not count as a st.
Row 1: Join yarn in the first marked st. Ch 1, sc in same st and in next 9 sts, turn. (10 sc)
Row 2: Ch 1, sc in each st across, turn. (10 sc)
Row 3: Ch 1, sc2tog, sc in next 6 sts, sc2tog, turn. (8 sc)
Row 4: Ch 1, sc in each st across, turn. (8 sc)
Row 5: Ch 1, sc2tog, sc in next 4 sts, sc2tog, turn. (6 sc)
Rows 6–10: Ch 1, sc in each st across, turn. (6 sc)
The tab measures 2.5 in (6.4 cm). Fasten off and leave a 12 in (30.5 cm) tail.
Fold the tab from front to back over the covered ring, so the ring sits in the fold. Whipstitch the last row to the inside of the back, just below Rnd 23. The tab lifts the back edge, so the front of the opening dips lower and the top slants.
Bottom Edging
Turn the holder upside down and join yarn in any free loop of the foundation chain.
Bottom Rnd: Ch 1, sc in each free loop around, sl st to first sc. (24 sc; 12 sc per side)
Why the math works: The foundation was 24 ch, which is 4 units of 1.5 in (3.8 cm), or 6 in (15.2 cm) around. Twenty-four sc at 4 sc per inch is also 6 in (15.2 cm). The opening stays firm and lies 3 in (7.6 cm) across when flat. That is small enough to keep bags in but large enough to pull one out.
Fasten off and weave in all ends.
Final Blocking
- Soak the holder in cool water for 10 minutes, then gently press out the water. Do not wring it.
- Roll it in a towel to remove more moisture.
- Lay it flat with the side markers (or the increase lines) at the folds.
- Shape the leaf: pin the widest part to 7.5 in (19.1 cm) and the full body length to 16 in (40.6 cm).
- Pin the top opening to 6 in (15.2 cm) across and the bottom to 3 in (7.6 cm) across.
- Round each shell with your fingers so the fans sit evenly.
- Let it dry completely, then turn it over and check that the back is dry too.
- Wrap the covered ring in a damp cloth and press it lightly into a neat circle.
Final Quality-Control Checklist
- Every shell round has 6 sts per unit: 24, 36, 48, 60, then 48 sts.
- Increases sit at the two side folds, so the body lies flat in a leaf shape.
- Width is 7.5 in (19.1 cm) at the widest point.
- Body length is 16 in (40.6 cm).
- Top edging has 48 sc and lies flat.
- Bottom edging has 24 sc and lets a bag pull through smoothly.
- The ring is completely covered, with no metal or wood showing.
- The tab is centered on the back and sewn down securely.
- All ends are woven in on the inside.
Troubleshooting
The body twists in a spiral. The start shifts half a unit each round, which is normal. Keep the increases and decreases at the side markers, and blocking will straighten it.
Shells look crowded or cupped. Your tension is too tight. Go up half a hook size, or loosen the yarn overs on each dc.
The top edging ruffles. The sc are too loose. Work the edging rounds with a 4.5 mm (7) hook.
The top edging pulls in. Check that you worked 1 sc into every dc as well as every sc, for 48 total.
Bags fall out of the bottom. Add a second bottom round: sc2tog, sc in next 2 sts; rep from * around (18 sc).
The ring shows through. Add more sc and push the stitches together tightly.
The holder tilts on the hook. The tab is off-center. Unpick it and sew it to the true center of the back.
Care
Hand wash in cool water and lay flat to dry, reshaping while damp. Cotton can go in the machine on a gentle cycle in a mesh bag, but block it again afterward.
Final Notes
The measurement chain is short and easy to check. One unit is 1.5 in (3.8 cm) and one shell round is 0.75 in (1.9 cm). Four units give a 6 in (15.2 cm) bottom opening. Ten units give the 15 in (38.1 cm) circumference and the 7.5 in (19.1 cm) width. Eight units close to the 12 in (30.5 cm) top, which matches 48 sc exactly. Twenty shell rounds plus the sc rounds make the 16 in (40.6 cm) body. Measure at each checkpoint, and your holder will hang straight, hold its shape, and give out bags one at a time.
Happy crocheting!