

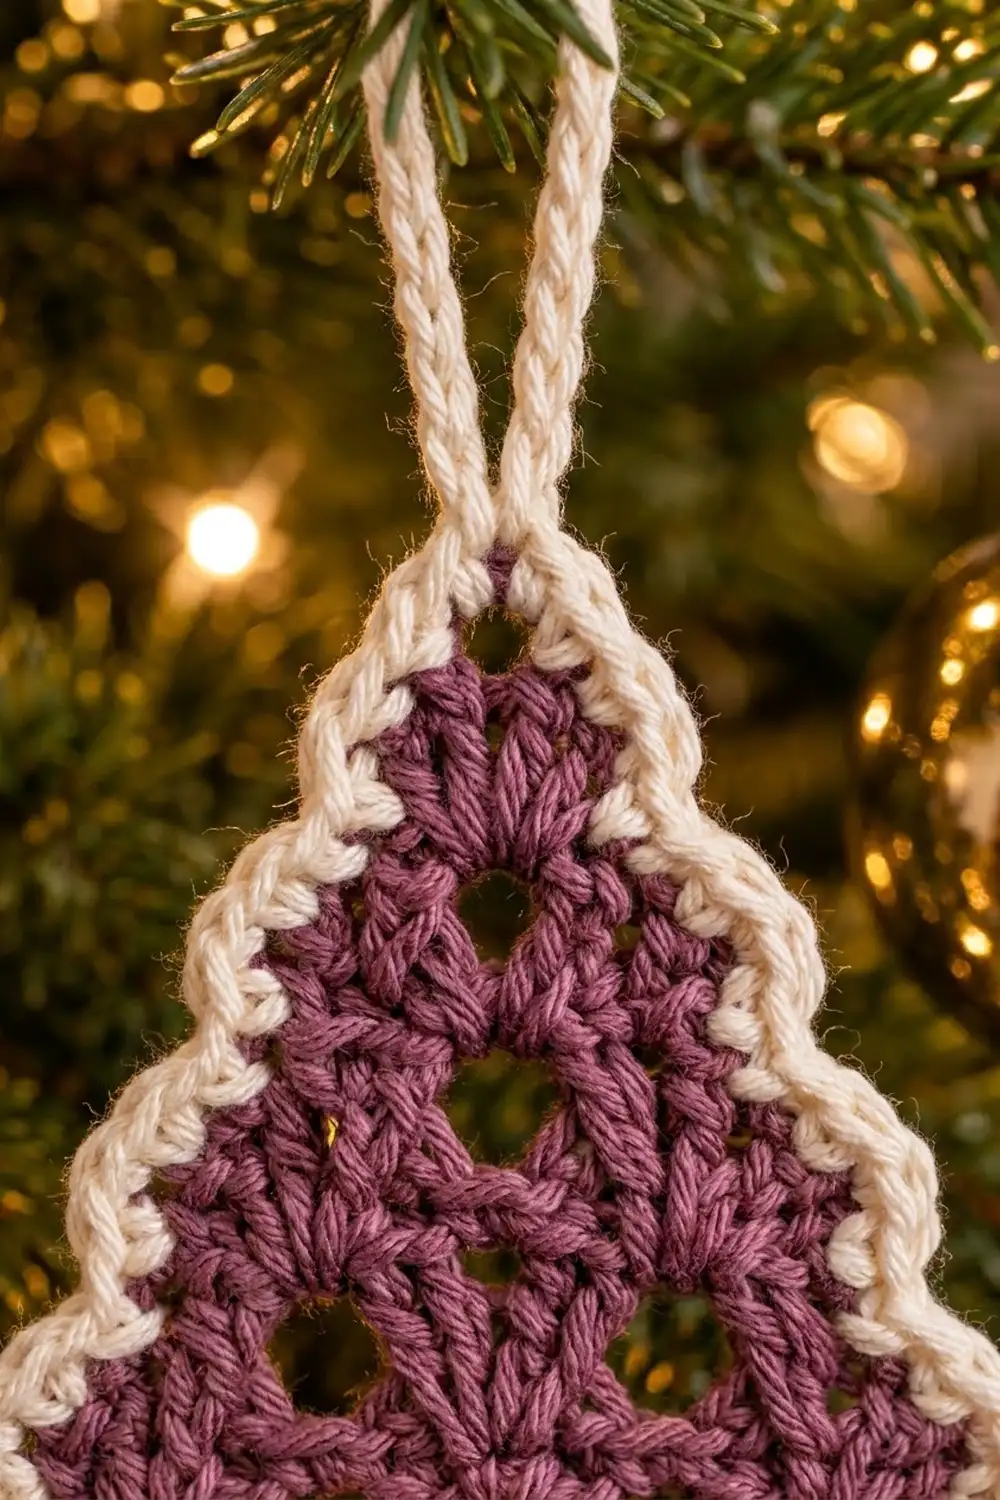
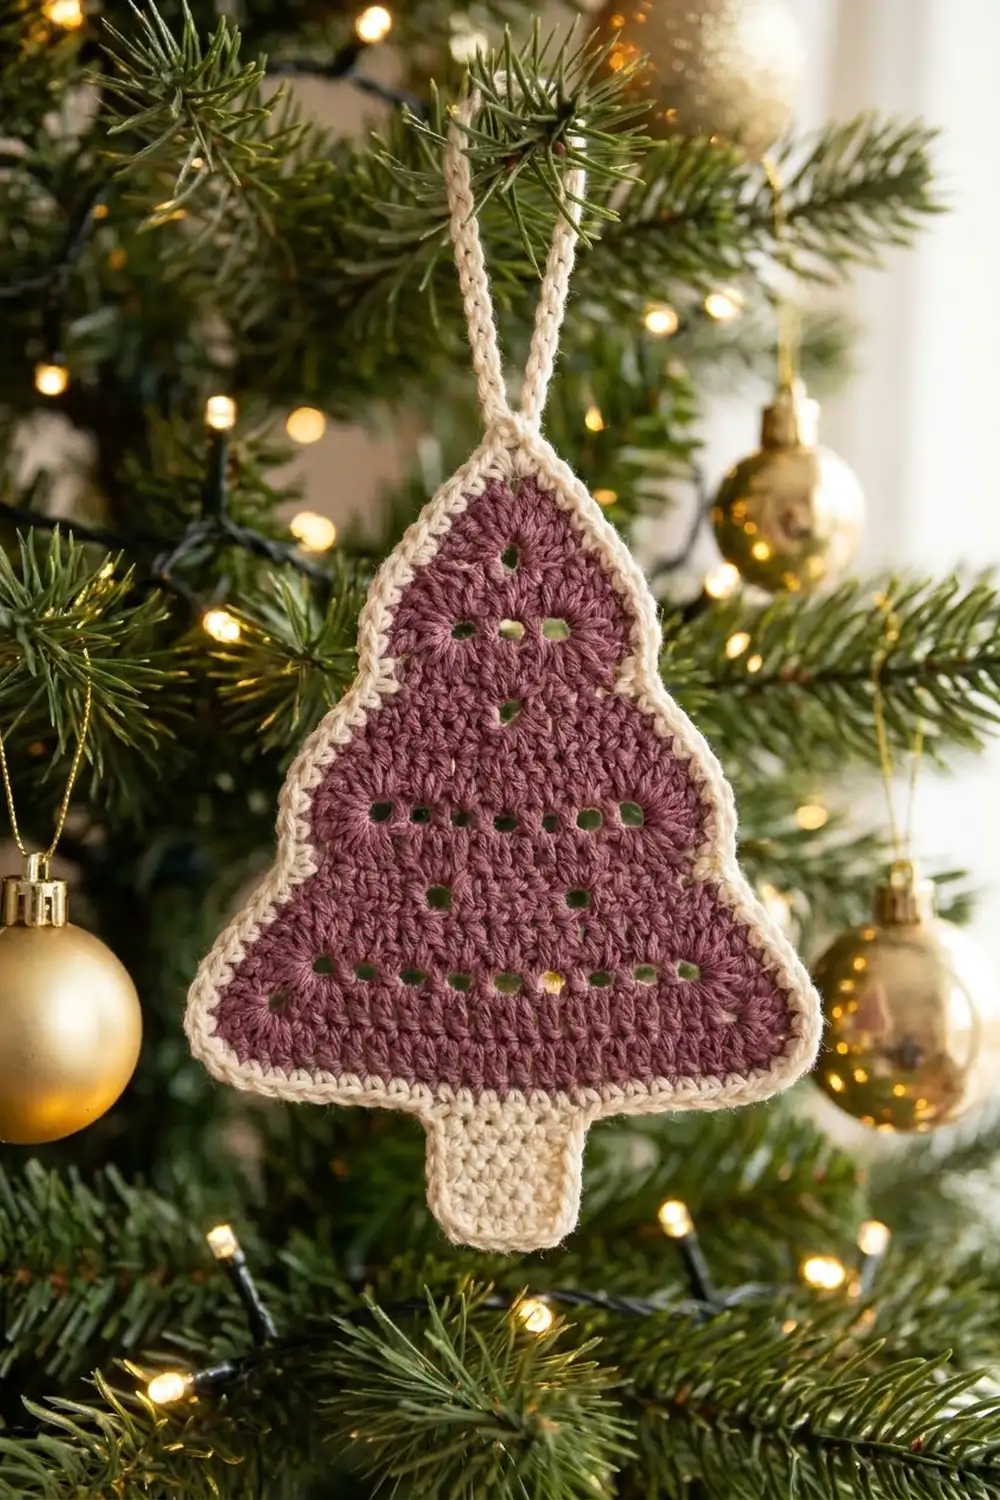
This little tree ornament is a flat, lacy triangle in deep plum with a crisp cream outline, a solid cream trunk, and a sturdy loop at the tip for hanging. Rows of double crochet are broken up by small eyelet holes. Lit from behind on a tree, the holes catch the glow of the lights.
The design uses only two colors: a muted plum (mulberry) for the tree body and a warm cream for the trunk, border, and hanging loop. The style is simple and a little vintage, and it looks good with gold and champagne baubles.
This pattern uses US crochet terms. The finished ornament measures about 3.8 in (9.7 cm) wide and 4.6 in (11.7 cm) tall, not counting the hanging loop, which adds about 1.5 in (3.8 cm).
Construction is straightforward. You work the triangle flat in rows, starting at the tip and increasing at both edges down to the base. You then add the trunk in cream rows across the center of the last row. One cream single-crochet round goes around everything, and the loop is formed and covered as you finish that round. You end up with one piece and only two tails to weave in per color.
Finished Size and Construction
- Finished size: 3.8 in (9.7 cm) wide x 4.6 in (11.7 cm) tall, excluding loop
- Hanging loop: approx. 1.5 in (3.8 cm) tall
- Skill level: Easy / advanced beginner
- Terminology: US crochet terms
- Yarn weight: DK (light worsted / #3), cotton or cotton blend
- Hook: 3.5 mm (E-4)
- Number of pieces: 1 (single ornament)
- Layout: Upright triangle with centered trunk
- Triangle size before border: 3.4 in (8.6 cm) wide x 3.2 in (8.1 cm) tall
- Trunk size before border: 1.0 in (2.5 cm) wide x 1.0 in (2.5 cm) tall
- Border depth: approx. 0.2 in (0.5 cm), 1 round of sc
Materials
Yarn: Use a smooth DK cotton or cotton blend. Cotton keeps the eyelets open and the edges crisp, and it blocks flat. Avoid fuzzy or very stretchy acrylics, because they blur the holes and tend to curl.
- Color A – Plum/Mulberry (tree body): 10 g, approx. 22 m
- Color B – Cream (trunk, border, loop): 5 g, approx. 11 m
These quantities include a generous margin for your gauge swatch and for tails. One ornament actually uses about two-thirds of the listed amounts.
Tools:
- 3.5 mm (E-4) crochet hook
- Tapestry needle
- Scissors
- Stitch markers (2)
- Ruler or tape measure
- Blocking mat and pins
- Spray bottle with water
Abbreviations (US Terms)
- ch – chain
- sl st – slip stitch
- sc – single crochet
- dc – double crochet
- st(s) – stitch(es)
- sk – skip
- sp – space
- tch – turning chain
- RS / WS – right side / wrong side
Special stitch – Eyelet: ch 1, sk next st. The ch-1 sp counts as 1 stitch in all stitch counts. On the next row, work 1 dc into the ch-1 sp.
Edge increase: At the start of each row, ch 3 (counts as dc), then work 1 dc into the first st. At the end of the row, work 2 dc into the top of the tch. That adds 1 stitch at each edge, so every row grows by 2 sts.
Gauge and Checkpoints
Gauge: 20 dc x 10 rows = 4 in (10.2 cm) in Color A. In single crochet with the same hook, aim for about 5 sc and 5 rows per 1 in (2.5 cm).
This ornament is small, so the triangle itself is your swatch. Work through Row 4, lay it flat, and measure.
- After Row 4 (9 sts): base width 1.8 in (4.6 cm), height 1.6 in (4.1 cm)
- After Row 6 (13 sts): base width 2.6 in (6.6 cm), height 2.4 in (6.1 cm)
- After Row 8 (17 sts): base width 3.4 in (8.6 cm), height 3.2 in (8.1 cm)
- After trunk: 1.0 in (2.5 cm) wide x 1.0 in (2.5 cm) tall
- After border: 3.8 in (9.7 cm) x 4.6 in (11.7 cm)
If your piece is too big: go down to a 3.25 mm hook.
If it is too small: go up to a 3.75 mm hook.
A difference of 0.1 in (0.3 cm) at Row 4 grows to about 0.2 in (0.5 cm) by Row 8, so check early.
Tree Body (Color A)
The body is worked in rows from the tip down to the base. The tch counts as a stitch throughout.
Row 1 (RS): Ch 4, work 2 dc in the 4th ch from hook. Turn. (3 sts)
The first 3 ch count as the first dc. The ch where all the stitches meet is the tip of the tree.
Row 2: Ch 3, dc in first st, dc in next st, 2 dc in top of tch. Turn. (5 sts)
Row 3 (eyelet row): Ch 3, dc in first st, dc in next st, ch 1, sk next st, dc in next st, 2 dc in top of tch. Turn. (7 sts: 6 dc + 1 ch-1 sp; 1 eyelet)
The eyelet sits exactly at the center, stitch 4 of 7.
Row 4: Ch 3, dc in first st, dc in each of the next 5 sts (including the ch-1 sp), 2 dc in top of tch. Turn. (9 sts)
Row 5 (eyelet row): Ch 3, dc in first st, dc in next st, ch 1, sk next st, dc in next 3 sts, ch 1, sk next st, dc in next st, 2 dc in top of tch. Turn. (11 sts: 9 dc + 2 ch-1 sps; 2 eyelets)
The middle section is 1 + 1 + 3 + 1 + 1 = 7 sts. The eyelets fall at stitches 4 and 8, two stitches either side of center, so they sit diagonally below the Row 3 eyelet.
Row 6: Ch 3, dc in first st, dc in each of the next 9 sts, 2 dc in top of tch. Turn. (13 sts)
Row 7 (eyelet row): Ch 3, dc in first st, dc in next 2 sts, ch 1, sk next st, dc in next 2 sts, ch 1, sk next st, dc in next 2 sts, ch 1, sk next st, dc in next 2 sts, 2 dc in top of tch. Turn. (15 sts: 12 dc + 3 ch-1 sps; 3 eyelets)
The middle section is 2 + 1 + 2 + 1 + 2 + 1 + 2 = 11 sts. The eyelets fall at stitches 5, 8 (center) and 11, which completes the 1-2-3 pyramid.
Row 8: Ch 3, dc in first st, dc in each of the next 13 sts, 2 dc in top of tch. (17 sts) Fasten off and weave in the tail.
Stitch check: each row is 2 sts more than the one before: 3, 5, 7, 9, 11, 13, 15, 17. Every row is (previous row − 2 edge sts) worked 1-to-1, plus 4 sts from the two edge increases. Example: Row 8 = (15 − 2) + 4 = 17.
The dc between the eyelets lean toward each hole, which creates the small V and fan shapes across the tree.
Trunk (Color B)
Lay the triangle with the tip up and RS facing you. Row 8 is the bottom edge. Count the 17 Row 8 stitches from right to left and place markers in stitches 7 and 11. The trunk sits on stitches 7 through 11, which are the center 5 sts, with 6 sts free on each side.
Row 1: Join Color B with a sl st in st 7. Ch 1, sc in same st and in next 4 sts. Turn. (5 sc)
Rows 2–5: Ch 1, sc in each st across. Turn. (5 sc)
At the end of Row 5, fasten off and weave in the tail. The trunk should measure 1.0 in (2.5 cm) wide x 1.0 in (2.5 cm) tall.
Border and Hanging Loop (Color B)
Border gauge: 2 sc per dc row-end on the slanted sides, 1 sc per stitch along the bottom, and 1 sc per sc row-end on the trunk sides.
Rnd 1: With RS facing, join Color B with a sl st at the tip (the foundation ch at the base of Row 1). Then work around as follows:
- Tip: Ch 1, sc in the tip.
- Left slanted side: Work 2 sc in each of the 8 row-ends. (16 sc)
- Bottom-left corner: 3 sc in st 1 of Row 8. (3 sc)
- Left base: Sc in sts 2–6 of Row 8. (5 sc)
- Trunk left side: 1 sc in each of the 5 trunk row-ends. (5 sc)
- Trunk bottom: 3 sc in the first st of trunk Row 5, sc in next 3 sts, 3 sc in last st. (9 sc)
- Trunk right side: 1 sc in each of the 5 trunk row-ends. (5 sc)
- Right base: Sc in sts 12–16 of Row 8. (5 sc)
- Bottom-right corner: 3 sc in st 17 of Row 8. (3 sc)
- Right slanted side: Work 2 sc in each of the 8 row-ends. (16 sc)
- Tip: Sc in the tip again. (2 sc total at tip)
Border count: 69 sc (2 + 16 + 3 + 5 + 5 + 9 + 5 + 5 + 3 + 16).
Hanging loop: Without turning, ch 16, then sl st into the first sc of the round to close the loop. Work 24 sc into the ch-16 loop, covering the chain completely, and sl st into the first sc again. Fasten off and weave the tail through the base of the loop twice for strength.
Why the math works:
- Bottom edge: this is fully accounted for. Row 8 has 17 sts: 1 corner + 5 base + 5 under the trunk + 5 base + 1 corner = 17.
- Slanted sides: each dc row is about 0.4 in (1.0 cm) tall, and 2 sc at 5 sc/in also equal 0.4 in (1.0 cm). The slanted side is a little longer than the straight height, so the sc pull it in very slightly. That keeps the edge firm and straight instead of wavy.
- Corners: the 3-sc corners give the sharp bottom points enough room to lie flat.
- Loop: 24 sc over 16 ch (1.5 sc per ch) packs the chain tightly, so the loop stays thick and rounded.
Final Blocking
- Weave in all remaining tails along same-color stitches, never across the eyelets.
- Lightly mist the ornament until it is damp but not dripping.
- Lay it RS up on a blocking mat.
- Pin the tip and both bottom corners first, making the base 3.8 in (9.7 cm) wide and the height 4.6 in (11.7 cm) excluding the loop.
- Pin the trunk corners square, 1.4 in (3.6 cm) wide including the border.
- Use a pin or blunt needle to open each eyelet into a round hole.
- Straighten the loop and pin it upright.
- Let it dry completely. Cotton usually takes 2–4 hours.
Final Quality-Control Checklist
- Triangle has 8 rows, ending with 17 sts.
- Eyelets form a centered 1-2-3 pyramid.
- Trunk is exactly centered with 6 Row 8 sts free on each side.
- Border has 69 sc, with 3 sc at each bottom corner.
- Slanted sides are straight, not ruffled or cupped.
- Loop is fully covered with 24 sc and anchored firmly.
- Finished size is 3.8 in (9.7 cm) x 4.6 in (11.7 cm), within 0.1 in (0.3 cm).
- No plum shows through the cream border on the RS.
Troubleshooting
Triangle leans to one side: you probably missed the 2 dc in the tch on one edge. Count every row; each must be 2 sts more than the last.
Eyelets don’t line up: recount the middle section of the eyelet row. In Row 5 it is 7 sts and in Row 7 it is 11 sts. The ch-1 sp always counts as a stitch.
Border ruffles on the sides: your sc are looser than gauge. Go down a hook size for the border only, or work 1 sc in every 4th row-end instead of 2.
Sides cup or pull in: work 3 sc in every 4th row-end instead of 2.
Trunk is off-center: pull it out and recount Row 8. The trunk starts in st 7 and ends in st 11.
Loop is floppy: add more sc into the loop until no chain shows, or work a sl st round over the loop’s sc.
Tip looks blunt: pull the first and last tip sc snugly and pin the point sharply while blocking.
Care
Hand wash in cool water with mild soap, press out the water in a towel, and reshape it flat to dry. Store the ornament flat between tissue paper so the loop and tip keep their shape.
Final Notes
Each stage builds on the one before. Your Row 4 check, 1.8 in (4.6 cm) wide, predicts Row 8 at 3.4 in (8.6 cm) wide by 3.2 in (8.1 cm) tall. The trunk then adds 1.0 in (2.5 cm), and the 0.2 in (0.5 cm) border brings the ornament to 3.8 in (9.7 cm) x 4.6 in (11.7 cm), plus a 1.5 in (3.8 cm) loop. If your early checkpoint is right, the rest follows.
Make one for your tree, tie one onto a gift, or work a few in different colors.
Happy crocheting!