

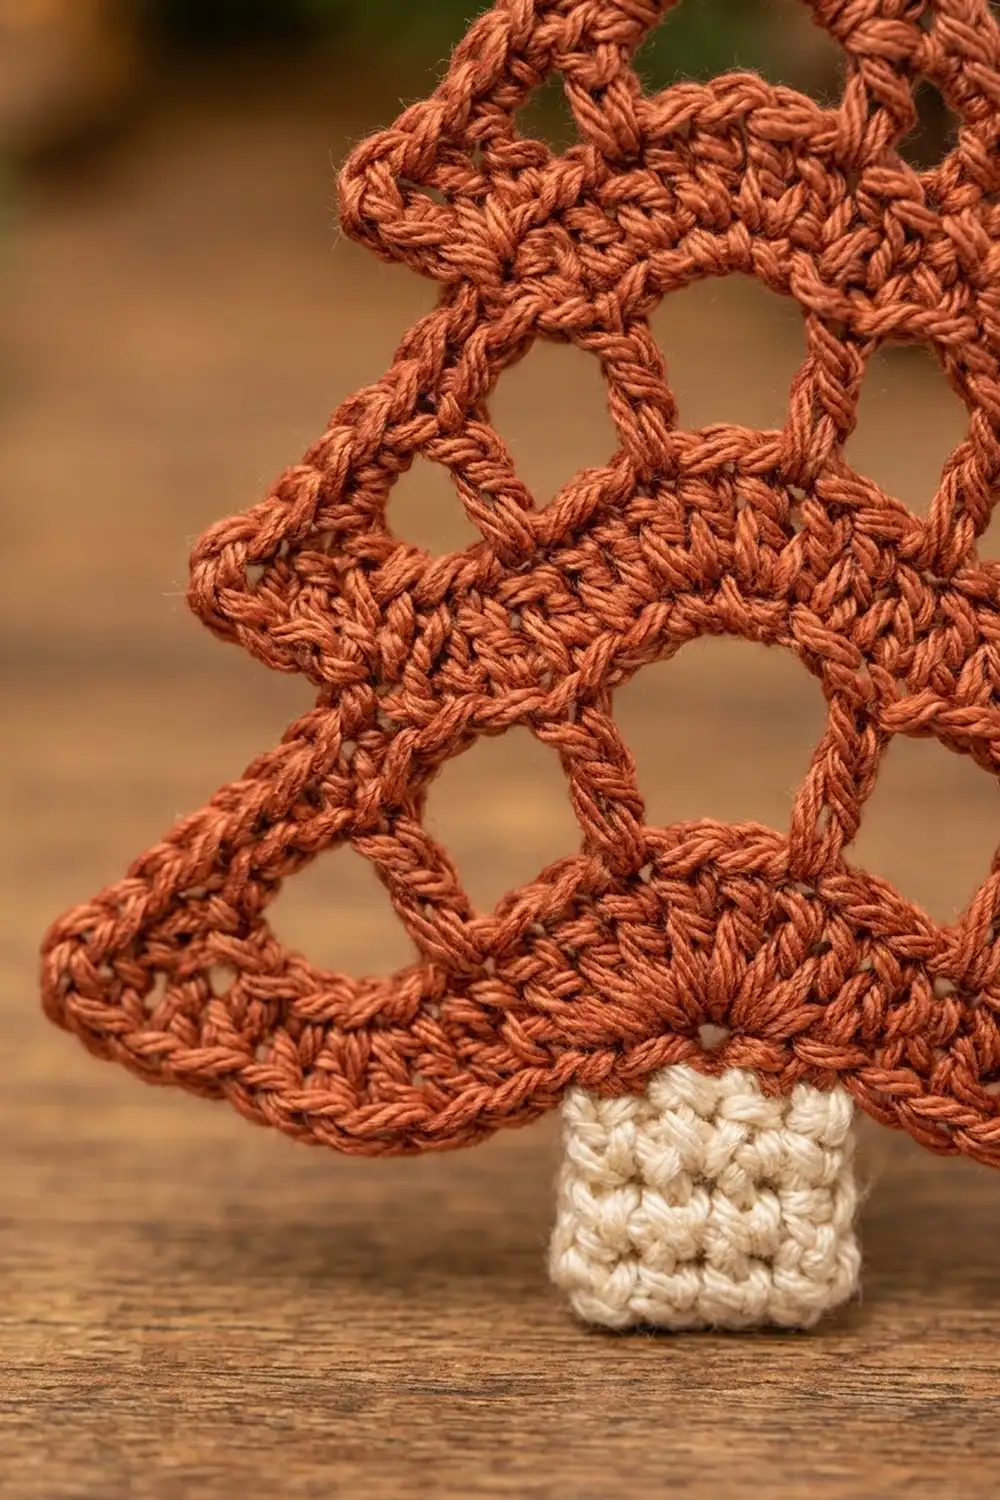
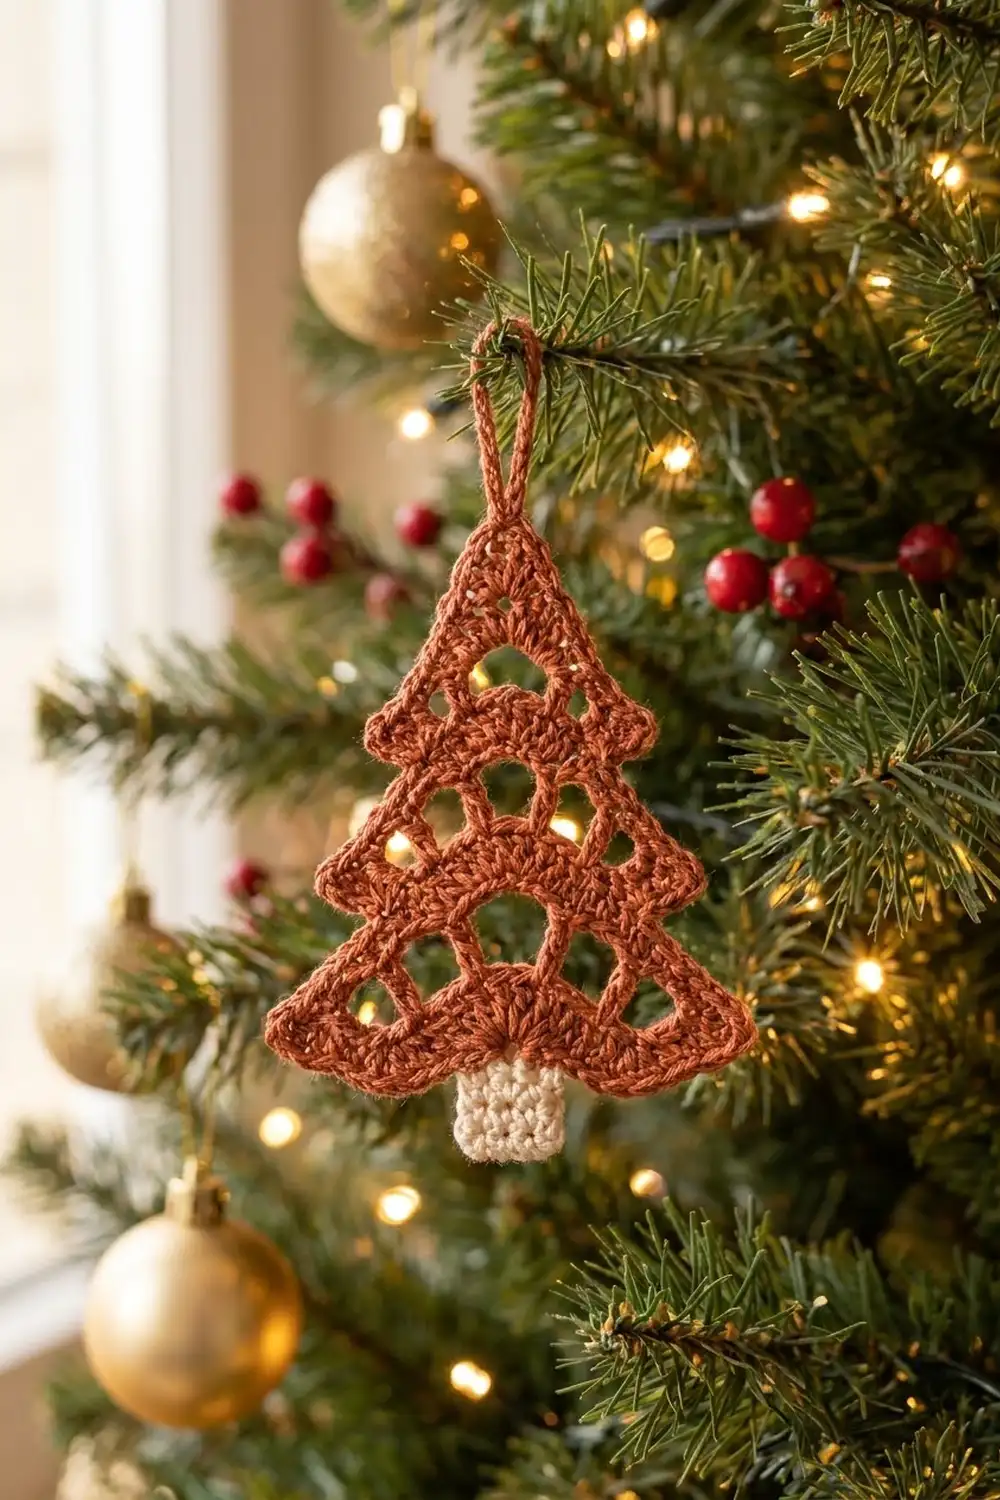
The Copper Pine is a small, lacy Christmas tree ornament with three tiers, a warm rust body and a cream trunk. Open arch windows make each tier light and airy. Each tier ends in pointed corners that tip slightly downward, which gives the tree a classic stepped outline.
The piece uses just two colors. Rust or terracotta cotton makes the tree, and a soft cream makes the trunk. The look is rustic and Scandinavian, and it goes well with natural greenery, pinecones and warm lights. This pattern uses US crochet terms throughout.
The finished ornament measures about 3.5 in (8.9 cm) wide across the bottom tier tips. It is 4.75 in (12.1 cm) tall from the top point to the bottom of the trunk, or about 5.75 in (14.6 cm) including the hanging loop.
Construction is simple. You work the tree in one piece from the top point down, in turned rows of double crochet. The tiers are made by stepping in at the start of each new tier. Next you add the trunk in rows of single crochet into the center of the last row. Finally, one round of rust single crochet border outlines the tree, shapes the tier tips and builds the hanging loop.
Finished Size and Construction
- Finished size: 3.5 in (8.9 cm) wide × 4.75 in (12.1 cm) tall; 5.75 in (14.6 cm) with the loop
- Skill level: Easy–Intermediate
- Terminology: US crochet terms
- Yarn weight: Sport weight (#2) cotton
- Hook: 3.0 mm
- Number of pieces: 1 (single ornament)
- Layout: Three-tier tree, worked top-down; trunk added at the bottom center
- Tree body before border: 3.2 in (8.1 cm) wide × 3.7 in (9.4 cm) tall (Rows 1–11)
- Trunk: 0.8 in (2.0 cm) wide × 0.75 in (1.9 cm) tall
- Border depth: about 0.15 in (0.4 cm) on each edge, plus small pointed tips
Materials
Choose a smooth mercerized or combed sport-weight cotton. It shows the arch windows clearly and holds its shape after blocking. Avoid fuzzy or very stretchy yarns, because they blur the openings and let the tips droop.
- Color A – Rust/terracotta: 8 g, about 24 m (26 yd)
- Color B – Cream: 2 g, about 6 m (7 yd)
These amounts include a small margin for your gauge swatch and weaving in ends. If you plan a whole set of ornaments, multiply them by the number of trees.
Tools:
– 3.0 mm crochet hook
– Tapestry needle
– Scissors
– 2 stitch markers
– Blocking mat and rust-proof pins
– Spray bottle; spray starch is optional
Abbreviations (US Terms)
- ch – chain
- sl st – slip stitch
- sc – single crochet
- dc – double crochet
- tr – treble crochet
- sk – skip
- st(s) – stitch(es)
- sp – space
- tch – turning chain
- BLO / FLO – back loop only / front loop only
- RS – right side
Special stitch – Tier tip (sc, ch 2, sc): Work 1 sc, ch 2, and 1 sc all into the same stitch. This makes a small pointed corner at the end of each tier.
Stitch count notes:
– In the dc rows, a ch-3 at the start of a row counts as 1 dc, and a ch-4 counts as 1 tr.
– A ch-3 window counts as 3 positions in a row’s width, but it is not a stitch.
Gauge and Checkpoints
Gauge: 24 dc and 12 rows = 4 in (10.2 cm). That is 6 dc and 3 rows per inch. For a quick check, a 2 in (5.1 cm) square should hold 12 dc × 6 rows.
The best gauge test is the top tier itself. Work Rows 1–4 and measure before you go on.
Checkpoints:
– After Row 4 (Tier 1): 9 stitches, about 1.5 in (3.8 cm) wide and 1.3 in (3.3 cm) tall.
– After Row 8 (Tier 2): 15 stitches, about 2.5 in (6.4 cm) wide and 2.7 in (6.9 cm) tall.
– After Row 11 (Tier 3): 19 stitches, about 3.2 in (8.1 cm) wide and 3.7 in (9.4 cm) tall.
– After the border: 3.5 in (8.9 cm) wide; 4.75 in (12.1 cm) tall without the loop.
If Tier 1 is wider than 1.6 in (4.1 cm): your tension is loose. Go down to a 2.75 mm hook.
If Tier 1 is narrower than 1.4 in (3.6 cm): your tension is tight. Go up to a 3.25 mm hook.
Row height matters as much as width. If your rows are tall and the tree looks stretched, pull each dc snug before finishing it.
Tree Body (Color A)
You work the tree top-down in turned rows. Each row widens by 1 stitch at each end. Each tier ends with a solid “tier edge” row that starts and ends with a tr, so the corners hang lower and make the drooping tips.
Tier 1 (Top)
Row 1 (RS): Ch 4, 2 dc in 4th ch from hook. (3 sts: the skipped 3 ch count as 1 dc.) The foundation chain is the top point of the tree.
Row 2: Ch 3, turn, dc in same st, dc in next st, 2 dc in top of tch. (5 sts)
Row 3 (window row): Ch 3, turn, dc in same st, ch 3, sk next 3 sts, 2 dc in top of tch. (4 dc + 1 ch-3 sp = 7 positions)
This ch-3 space is the triangular window at the top of the tree.
Row 4 (tier edge): Ch 4 (counts as tr), turn, dc in same st, dc in next dc, 3 dc in ch-3 sp, dc in next dc, (dc, tr) in top of tch. (9 sts)
The count is 2 + 1 + 3 + 1 + 2 = 9.
Checkpoint: 1.5 in (3.8 cm) wide.
Tier 2 (Middle)
Row 5 (step-in row): Turn. Sl st in first 2 sts (the tr and the next dc). Ch 3, dc in same st as last sl st, dc in next 5 sts, 2 dc in next st. Leave the last st (the tr) unworked. (9 sts)
This row is worked over the middle 7 stitches of Row 4 and gains 1 stitch at each end, so 2 + 5 + 2 = 9. Each tr from Row 4 is left free on both sides; those free trs become the tips of Tier 1.
Row 6: Ch 3, turn, dc in same st, dc in next 7 sts, 2 dc in top of tch. (11 sts)
Row 7 (window row): Ch 3, turn, dc in same st, ch 3, sk next 3 sts, dc in next 3 sts, ch 3, sk next 3 sts, 2 dc in top of tch. (7 dc + 2 ch-3 sps = 13 positions)
Check that you worked over all 11 stitches of Row 6: 1 + 3 + 3 + 3 + 1 = 11.
Row 8 (tier edge): Ch 4 (counts as tr), turn, dc in same st, dc in next dc, 3 dc in ch-3 sp, dc in next 3 dc, 3 dc in ch-3 sp, dc in next dc, (dc, tr) in top of tch. (15 sts)
The count is 2 + 1 + 3 + 3 + 3 + 1 + 2 = 15.
Checkpoint: 2.5 in (6.4 cm) wide, 2.7 in (6.9 cm) tall from the top point.
Tier 3 (Bottom)
Row 9 (step-in row): Turn. Sl st in first 2 sts. Ch 3, dc in same st as last sl st, dc in next 11 sts, 2 dc in next st. Leave the last st (the tr) unworked. (15 sts)
This row is worked over the middle 13 stitches of Row 8: 2 + 11 + 2 = 15.
Row 10 (window row): Ch 3, turn, dc in same st, [ch 3, sk next 3 sts, dc in next 2 sts] twice, ch 3, sk next 3 sts, 2 dc in top of tch. (8 dc + 3 ch-3 sps = 17 positions)
Check the stitches used from Row 9: 1 + 3 + 2 + 3 + 2 + 3 + 1 = 15.
Row 11 (tier edge): Ch 4 (counts as tr), turn, dc in same st, dc in next dc, [3 dc in ch-3 sp, dc in next 2 dc] twice, 3 dc in ch-3 sp, dc in next dc, (dc, tr) in top of tch. (19 sts)
The count is 2 + 1 + 5 + 5 + 3 + 1 + 2 = 19. Fasten off Color A and leave a 4 in (10.2 cm) tail.
Checkpoint: 3.2 in (8.1 cm) wide, 3.7 in (9.4 cm) tall.
Stitch map for Row 11, numbered 1–19 from the first stitch made:
– St 1: tr
– Sts 2–3: dc
– Sts 4–6: dc group
– Sts 7–8: post
– Sts 9–11: dc group
– Sts 12–13: post
– Sts 14–16: dc group
– Sts 17–18: dc
– St 19: tr
Stitch 10 is the center. Place markers in sts 8 and 12.
Trunk (Color B)
Row 1: With RS facing, join Color B with a sl st in the BLO of st 8 of Row 11. Ch 1, sc in BLO of same st and in BLO of next 4 sts (sts 9–12). (5 sc)
Rows 2–5: Ch 1, turn, sc in each st across. (5 sc)
Fasten off. The trunk measures 0.8 in (2.0 cm) wide × 0.75 in (1.9 cm) tall.
Working the trunk in the back loops keeps the front loops of sts 8–12 free for the border. That way the bottom edge of the tree stays continuous behind the trunk.
Border (Color A)
Border gauge: Work 2 sc into the side of each dc row end, and 2 sc along the post of each tier-edge tr. A dc row is about twice the height of a sc, so 2 sc per row end lies flat without ruffling or pulling. On the bottom edge, work 1 sc into each stitch, so the count matches the row exactly.
Round 1: With RS facing, join Color A with a sl st in the foundation chain at the top point of the tree.
Top: Ch 1, sc in same st, ch 12, sc in same st. (2 sc + ch-12 loop)
Side A (moving down):
– 2 sc in each row end of Rows 1–3 (6 sc)
– 2 sc along the post of the Row 4 tr (2 sc)
– Tier tip in the top of that tr
– 2 sc in each row end of Rows 5–7 (6 sc)
– 2 sc along the post of the Row 8 tr (2 sc)
– Tier tip in the top of that tr
– 2 sc in each row end of Rows 9–10 (4 sc)
– 2 sc along the post of the Row 11 tr (2 sc)
– Tier tip in st 1 of Row 11
Where the tips fall on the side with the step-in slip stitches, work through the tr and ignore the slip stitch on top of it.
Side A count: 6 + 2 + 2 + 6 + 2 + 2 + 4 + 2 + 2 = 28 sc and 3 ch-2 tips. The tip sc are included in the 28.
Bottom edge:
– Sc in sts 2–7 (6 sc)
– Sl st in the free FLO of sts 8–12, behind the trunk (5 sl st)
– Sc in sts 13–18 (6 sc)
– Tier tip in st 19
Bottom count: 12 sc + 5 sl st between the bottom tips. The tip sc belong to the side counts.
Side B (moving up): Mirror Side A. Start with 2 sc along the post of the Row 11 tr, then 2 sc in each row end of Rows 10–9. Work the tier tip in the Row 8 tr, then 2 sc along its post, and continue upward in the same way to Row 1. Sl st to the first sc. (28 sc, 3 tips)
Round 1 total: 2 (top) + 28 + 28 + 12 = 70 sc, plus 6 ch-2 tips, 5 sl st and the ch-12 loop.
Loop cover: Sl st into the ch-12 loop, work 18 sc over the loop, then sl st into the sc at the top point. Fasten off.
Why the math works:
– The ch-12 loop folds to about 1 in (2.5 cm).
– 18 sc cover 12 chains at a 3:2 ratio, which is enough to curve around the loop without ruffling.
– Every tier-edge tr gets exactly one tip, so all six tips are the same and the tree stays symmetrical.
Final Blocking
- Weave in all ends along stitches of the same color. Hide the cream ends inside the trunk.
- Spray the ornament with water until it is evenly damp, but not dripping.
- Lay it RS up on the blocking mat.
- Pin the top point and the center of the trunk so the tree is 4.75 in (12.1 cm) tall.
- Pin the two bottom tips 3.5 in (8.9 cm) apart, level with each other.
- Pin the middle and top tips so they mirror each other and angle slightly downward.
- Open each arch window gently with a fingertip or a pin.
- Pin the hanging loop straight up. Add a light mist of spray starch if you like.
- Let it dry completely before you unpin it.
Final Quality-Control Checklist
- [ ] The rows have 3, 5, 7, 9 / 9, 11, 13, 15 / 15, 17, 19 positions.
- [ ] The top tier has 1 window, the middle tier 2 and the bottom tier 3.
- [ ] All six tier tips are the same size and point slightly downward.
- [ ] The trunk is centered under st 10 and is 5 sc wide.
- [ ] The border has 28 sc on each side and 12 sc across the bottom.
- [ ] The width is 3.5 in (8.9 cm) and the height is 4.75 in (12.1 cm) without the loop.
- [ ] The loop is centered, fully covered, and about 1 in (2.5 cm) tall.
- [ ] All ends are secure and invisible from the RS.
Troubleshooting
The tree leans to one side. You probably missed a stitch at the start of a step-in row. Check that you slip stitched into exactly 2 stitches and left exactly 1 stitch unworked at the far end.
The windows look closed. Your chains are too tight. Make the ch-3 chains a little looser, or chain with a hook half a size larger.
The tips curl up. Block with starch and pin each tip downward. Also check that the tier-edge rows start with ch 4, not ch 3.
The sides ruffle. Use 2 sc per row end, never 3. If they still ruffle, work the border with a 2.75 mm hook.
The bottom edge puckers behind the trunk. Keep the 5 slip stitches loose, and work them into the front loops only.
The trunk is off-center. Count Row 11 again and move your markers to sts 8 and 12.
Care
Hand wash in cool water with a mild soap, press out the water in a towel, and dry flat. Re-block if needed. Store the ornament flat so the tips keep their shape.
Final Notes
The Copper Pine follows one simple measurement chain:
– Gauge: 6 dc per inch
– Tier 1: 1.5 in (3.8 cm)
– Tier 2: 2.5 in (6.4 cm)
– Tier 3: 3.2 in (8.1 cm)
– After the border: 3.5 in (8.9 cm) wide and 4.75 in (12.1 cm) tall
Check your Tier 1 measurement first, and the rest of the tree follows. Make one in rust and cream, or make a whole forest in your favorite holiday colors.
Happy crocheting!