

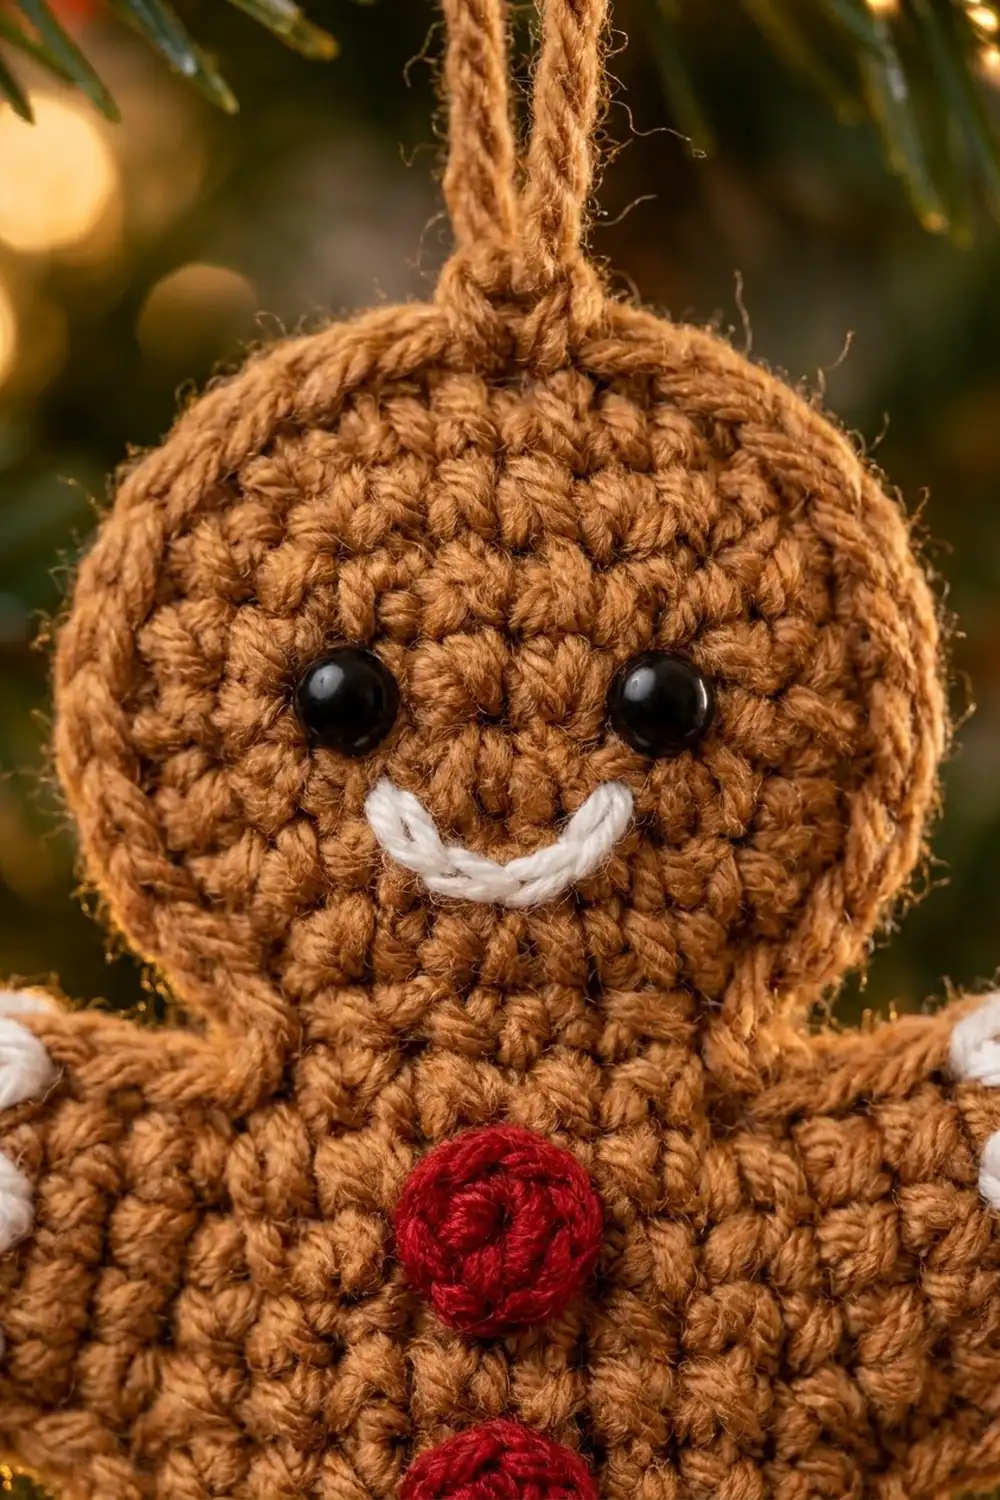
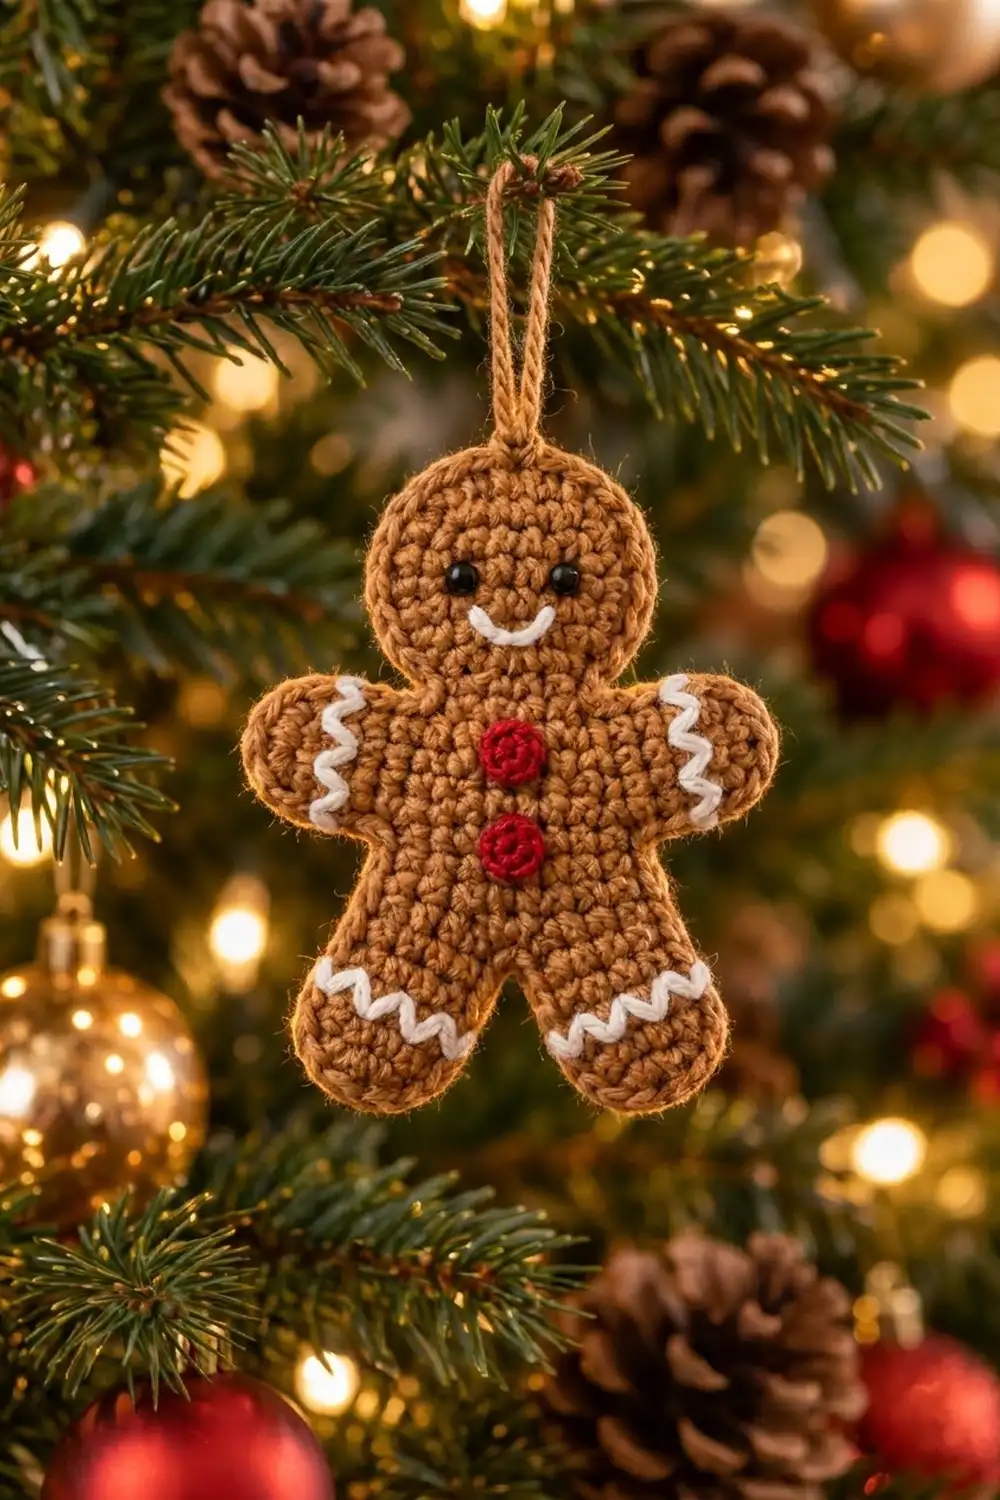
This little gingerbread man is a flat, cookie-style ornament worked in warm caramel brown. He has white zigzag icing at his wrists and ankles, a stitched white smile, round black eyes and two raised red buttons down his front. A simple brown chain loop at the top makes him ready for the tree.
The style is classic bakery-cookie charm: a smooth single crochet surface, a rounded outline and just enough detail to read clearly from across the room. All instructions use US crochet terms.
The finished ornament measures about 5.0 in (12.7 cm) tall and 3.9 in (9.9 cm) wide, not counting the hanging loop. The loop adds about 2 in (5.1 cm).
Construction is straightforward. You crochet the head as a flat circle in joined rounds. Then you work the body in rows straight off the bottom of the head, adding the arms with a chain on one side and foundation single crochet on the other, and splitting the work for the legs. One round of single crochet outlines the whole shape. The buttons, face and icing go on last.
Finished Size and Construction
- Finished size: 5.0 in (12.7 cm) tall × 3.9 in (9.9 cm) wide, without the loop
- Skill level: Easy (advanced beginner)
- Terminology: US crochet terms
- Yarn weight: DK (light worsted, #3)
- Hook: 3.5 mm (US E-4)
- Number of pieces: 1 main piece, plus 2 tiny sewn-on buttons
- Layout: Single ornament, no joining
- Piece size before border: 4.7 in (11.9 cm) tall × 3.6 in (9.1 cm) wide
- Border depth: about 0.15 in (0.4 cm) on each edge, adding 0.3 in (0.8 cm) to the total height and width
Materials
Yarn: Use a smooth DK yarn so the stitches stay crisp. Cotton or a cotton blend gives the sharpest cookie edge, and soft acrylic works well too. Avoid fuzzy or very splitty yarns, because the icing embroidery needs clean stitches to sit on.
- Caramel brown (main): 12 g, about 28 m
- White (icing and smile): 2 g, about 5 m
- Dark red (buttons): 2 g, about 5 m
- Black (eyes, only if embroidering): 1 g, about 2 m
All quantities include a margin for your gauge swatch and weaving in ends.
Tools:
- 3.5 mm (US E-4) crochet hook
- Two 6 mm black safety eyes, or black yarn for French knots
- Tapestry needle
- 2 stitch markers
- Scissors
- Ruler or tape measure
- Pins and a foam blocking mat
Abbreviations (US Terms)
- ch – chain
- sc – single crochet
- sl st – slip stitch
- st(s) – stitch(es)
- MR – magic ring
- sc2tog – single crochet 2 together: (insert hook in next st, yarn over, pull up a loop) twice, yarn over, pull through all 3 loops
- fsc – foundation single crochet (see below)
Special stitch – foundation single crochet (fsc): Insert your hook into the base (the “chain” part) of the last stitch made. Yarn over and pull up a loop (2 loops on hook). Yarn over and pull through 1 loop; this forms the chain. Yarn over and pull through both loops; this forms the sc. Each fsc adds 1 stitch and builds its own base chain as it goes, so you can add arm stitches at the far end of a row.
Gauge and Checkpoints
Gauge: 20 sc and 22 rows = 4 in (10.2 cm) in rows, which is 5 sc and 5.5 rows per 1 in (2.5 cm).
Gauge matters more here than the total yardage does, because the head and body have to match in size. Make one ornament as your test piece and check it at each stage:
- After head Round 5: The circle measures 1.8 in (4.6 cm) across and lies flat.
- After body Row 2: The full arm span measures 3.6 in (9.1 cm) across.
- After body Row 10: The hips measure 2.0 in (5.1 cm) across, and the body measures 1.8 in (4.6 cm) from the bottom of the head.
- After the second leg: The whole piece measures 4.7 in (11.9 cm) tall × 3.6 in (9.1 cm) wide.
- After the border: The ornament measures 5.0 in (12.7 cm) × 3.9 in (9.9 cm).
If your piece is too big by more than 0.1 in (0.3 cm) at any checkpoint, go down to a 3.25 mm hook. If it is too small, go up to a 3.75 mm hook. Restart from the head rather than adjusting partway through, so the proportions stay true.
Head
Worked in joined rounds with caramel brown. The ch 1 at the start of each round does not count as a stitch. Join each round with a sl st to the first sc. The increases are staggered so the circle stays round, not hexagonal.
Round 1: Make a MR, ch 1, 6 sc in ring, join. (6 sts)
Round 2: Ch 1, 2 sc in each st around, join. (12 sts)
Round 3: Ch 1, [sc in next st, 2 sc in next st] 6 times, join. (18 sts)
Round 4: Ch 1, [sc in next st, 2 sc in next st, sc in next st] 6 times, join. (24 sts)
Round 5: Ch 1, [sc in next 3 sts, 2 sc in next st] 6 times, join. (30 sts)
Checkpoint: 1.8 in (4.6 cm) across. Number the Round 5 stitches 1–30 in your head, with st 1 being the stitch you just joined into. Stitches 1–8 become the neck. The top center of the head falls between sts 19 and 20. Do not fasten off.
Body
Worked in rows, starting from the bottom of the head. Ch 1 at the start of a row does not count as a stitch.
Row 1 (neck): Ch 1, do not turn. Sc in the same st as the join and in the next 7 sts (sts 1–8). (8 sts)
Row 2 (arms): Turn, ch 6. Sc in the 2nd ch from the hook and in the next 4 ch (5 arm sts). Sc in each of the 8 neck sts. Then work 5 fsc, starting the first one in the base of the last sc made. (18 sts: 5 + 8 + 5)
Checkpoint: 3.6 in (9.1 cm) from hand to hand.
Rows 3–6: Ch 1, turn, sc in each st across. (18 sts)
The arms are now 5 rows tall, about 0.9 in (2.3 cm).
Row 7 (shape underarms): Turn, do not ch. Sl st loosely in the first 5 sts. Ch 1, sc in the next 8 sts. Leave the last 5 sts unworked. (8 sts)
Rows 8–9: Ch 1, turn, sc in each st across. (8 sts)
The torso measures 1.6 in (4.1 cm) wide.
Row 10 (hips): Ch 1, turn, 2 sc in the first st, sc in the next 6 sts, 2 sc in the last st. (10 sts)
Checkpoint: The hips measure 2.0 in (5.1 cm) across, and the body measures 1.8 in (4.6 cm) from the head.
First Leg
The inner edge is the edge next to the center of the body. The outer edge is the hip side. The shift rows move the leg outward by 1 st without changing the count, which gives the legs their slight spread.
Row 11: Ch 1, turn, sc in the next 5 sts. Leave the remaining 5 sts unworked. (5 sts)
Row 12: Ch 1, turn, sc across. (5 sts)
Row 13 (shift): Ch 1, turn. Work sc2tog at the inner edge, sc in the next 2 sts and 2 sc in the outer-edge st. If this row starts at the outer edge, reverse the order: 2 sc, sc 2, sc2tog. (5 sts)
Row 14: Ch 1, turn, sc across. (5 sts)
Row 15 (shift): Repeat Row 13. (5 sts)
Row 16 (foot): Ch 1, turn, sc2tog, sc in the next st, sc2tog. (3 sts)
Fasten off and weave in the end.
Second Leg
Row 11: With the same side facing as for the first leg’s Row 11, join brown in the next unworked st of Row 10 (st 6). Ch 1, sc in the same st and the next 4 sts. (5 sts)
Rows 12–16: Work as for the first leg, keeping in mind that the inner edge is now the side next to the first leg. (Row 16: 3 sts)
Fasten off and weave in the end.
Checkpoint: The legs measure about 1.1 in (2.8 cm) long, and the whole piece measures 4.7 in (11.9 cm) × 3.6 in (9.1 cm).
Border
Border gauge: At 5 sts and 5.5 rows per inch, a row end is almost exactly as tall as a stitch is wide. That means 1 sc per stitch and 1 sc per row end lies flat. You round each outer corner by working 3 sc into one stitch, which adds 2 stitches per corner.
Round 1: With the right side facing, join brown with a standing sc in head st 20 (just past top center). Then continue around in this order:
- Head (first half): sc in sts 21–30. (11 sc including the standing sc)
- Neck: 1 sc in the row end of Row 1. (1)
- Arm: Along the top, sc in the first 4 sts and 3 sc in the 5th (outer corner) (7). Down the hand, 1 sc in each of the 5 row ends (5). Along the underside, 3 sc in the first st (outer corner) and sc in the next 4 sts (7). (19 per arm)
- Torso side: 1 sc in each row end of Rows 7–10. (4)
- Leg outer edge: 1 sc in each row end of Rows 11–16. (6)
- Foot: 3 sc in the first st, sc in the middle st, 3 sc in the last st. (7)
- Leg inner edge: 1 sc in each row end of Rows 16–12. (5)
- Crotch: sc2tog across the Row 11 row ends of both legs. (1)
- Second leg: inner edge 5, foot 7, outer edge 6.
- Second torso side: 4. Second arm: 19. Second neck: 1.
- Head (second half): sc in sts 9–19. (11)
Join with a sl st to the standing sc. (107 sts)
Why the math works: The edge has 91 stitch and row-end positions in all: 22 head + 2 neck + 30 arms + 8 torso + 12 outer leg + 6 foot + 10 inner leg = 90 single sc, plus 1 sc2tog at the crotch. That makes 91 border stitches. The 8 outer corners (2 per hand, 2 per foot) each add 2 extra stitches, for 16 more. 91 + 16 = 107.
Hanging loop: Without fastening off, ch 20 and sl st into the same joining st. Fasten off. The loop hangs about 2 in (5.1 cm) tall. For a cord-like look, twist the chain a few turns before you sl st.
Checkpoint: 5.0 in (12.7 cm) × 3.9 in (9.9 cm).
Buttons (Make 2)
With dark red:
Round 1: MR, ch 1, 8 sc in ring. Pull the ring tight and join with a sl st. (8 sts)
Fasten off, leaving an 8 in (20.3 cm) tail. Each button measures about 0.5 in (1.3 cm) across and sits slightly domed.
Sew the first button centered over Rows 3–4 and the second centered over Rows 7–8. Keep the domed side up and stitch only through the outer edge so the buttons stay raised.
Face and Icing
Eyes: Place the eyes 0.6 in (1.5 cm) apart and 0.3 in (0.8 cm) above the center of the head. Fasten the safety-eye washers on the back. For ornaments within reach of children, embroider black French knots instead.
Smile: Thread white yarn onto the needle. Backstitch a shallow U-curve 0.6 in (1.5 cm) wide, centered 0.3 in (0.8 cm) below the center of the head.
Wrist icing: On each arm, work a white zigzag in short diagonal straight stitches. Run it vertically across all 5 arm rows, about 0.4 in (1.0 cm) in from the hand edge.
Ankle icing: On each leg, work a zigzag across all 5 leg stitches between Rows 14 and 15, about 0.4 in (1.0 cm) above the tip of the foot.
Keep the stitches snug but not tight, so the fabric does not pucker. Weave all tails into the back.
Final Blocking
- Lightly spritz the ornament with water, or hold a steam iron 1 in (2.5 cm) above it. Never press acrylic.
- Lay it face up on a blocking mat.
- Pin the top of the head and the center of each foot to a height of 5.0 in (12.7 cm).
- Pin the hand tips to a width of 3.9 in (9.9 cm).
- Nudge the head into a true circle and angle the legs evenly outward.
- Let it dry completely, then remove the pins.
Final Quality-Control Checklist
- Head Round 5 has 30 sts, and the circle lies flat.
- Row 2 has 18 sts, and the two arms are the same length.
- The border has 107 sts, and every outer corner is rounded.
- The legs splay equally.
- The buttons are centered and stacked.
- The eyes are level, and the smile is centered.
- All four icing zigzags are the same size.
- The loop is attached at top center and hangs straight.
- The ornament measures 5.0 in (12.7 cm) × 3.9 in (9.9 cm).
Troubleshooting
- Head cups or ruffles: Check that each round increases by exactly 6. If you are in gauge and the head still cups, go up half a hook size for the head only.
- Arms uneven: The fsc arm is often looser than the chain arm. Work the fsc more firmly, or block the arms to match.
- Border ruffles along the sides: Your rows are shorter than gauge. Work sc2tog once along each torso side.
- Border pulls or puckers: Add 1 extra sc at each underarm.
- Legs point straight down: You missed a shift row. Check that Rows 13 and 15 decrease at the inner edge.
- Gap at the crotch: Close it with the border’s sc2tog, or sew one small stitch from the back.
- Icing sinks into the fabric: Use a full strand of yarn and keep the tension relaxed.
Care
Spot clean with cool water and mild soap, then lay flat to dry. Store flat in a box so the loop and legs keep their shape.
Final Notes
Keep the measurement chain in mind as you work. The head is 1.8 in (4.6 cm). The arm span is 3.6 in (9.1 cm). The body before the border is 4.7 in (11.9 cm) × 3.6 in (9.1 cm), and the 107-stitch border brings it to 5.0 in (12.7 cm) × 3.9 in (9.9 cm). If each checkpoint matches, your gingerbread man will come out the same size and shape every time, ready for the tree, a gift tag or a cookie-themed package topper.
Happy crocheting!