

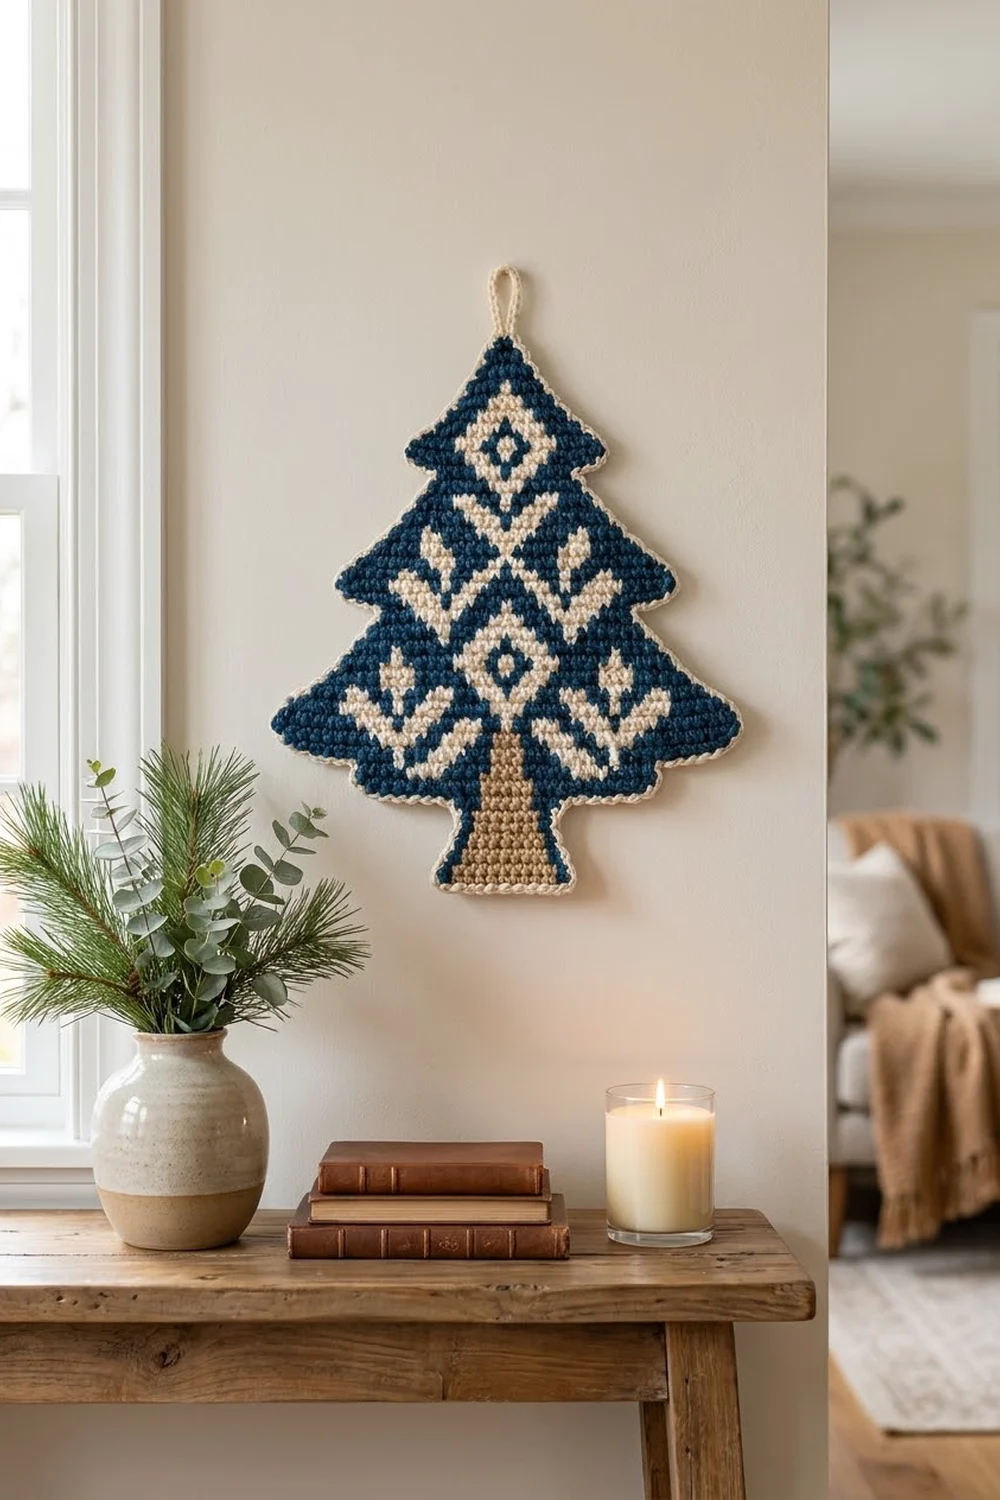
This Nordic Pine tree is a flat, single-piece wall hanging made in tapestry crochet. It has a three-tier stepped silhouette, a flared trunk base, and a cream edging with a small chain loop at the tip for hanging.
The palette is deep navy for the tree, cream for the folk-style motifs, and warm tan for the trunk. Tier 1 holds a cream diamond with a navy center. Tier 2 has a cream V that leads into a second diamond, flanked by two small tulip sprigs. Tier 3 has another V pointing into the trunk, a sprig on each side, and outward-sloping cream branches.
The pattern uses US crochet terms. The finished piece measures 8.25 in (21.0 cm) wide and 10.5 in (26.7 cm) tall, not counting the hanging loop.
You work the tree from the tip down in turning rows of single crochet, carrying the unused colors inside the stitches. Increases at both edges shape each tier. Slip-stitch steps create the ledges between tiers. One round of cream single crochet finishes the edge and adds the loop.
Finished Size and Construction
- Finished size: 8.25 in (21.0 cm) wide x 10.5 in (26.7 cm) tall, plus a loop of about 1.25 in (3.2 cm)
- Skill level: Intermediate (tapestry colorwork, shaping)
- Terminology: US
- Yarn weight: Worsted (#4)
- Hook: 4.0 mm (G-6)
- Number of pieces: 1
- Layout: One flat tree, worked top-down in 45 rows
- Piece size before border: 7.75 in (19.7 cm) wide x 10 in (25.4 cm) tall
- Border depth: 0.25 in (0.6 cm) on every edge
Materials
Pick a smooth worsted cotton or cotton blend. It shows the colorwork crisply and stays flat on a wall. Smooth acrylic also works. Skip fuzzy or loosely plied yarn, because the carried strands will show through.
- Navy (MC): 40 g / 80 m
- Cream (CC1): 20 g / 40 m
- Tan (CC2): 10 g / 20 m
These quantities include a margin of about 20%. Tapestry crochet uses more yarn than plain single crochet because the unused colors travel inside every stitch.
Tools:
– 4.0 mm (G-6) crochet hook
– Tapestry needle
– Scissors
– Stitch marker
– Rust-proof pins and a blocking mat
– Spray bottle
– Ruler or tape measure
Abbreviations (US Terms)
- ch – chain
- sc – single crochet
- sl st – slip stitch
- st(s) – stitch(es)
- inc – 2 sc in the same stitch
- MC / CC1 / CC2 – navy / cream / tan
- C – the center stitch of the row
- C±n – the stitches n positions to the left and right of center. For example, “C±3 cream” means the stitch 3 to the left of center and the stitch 3 to the right are both cream.
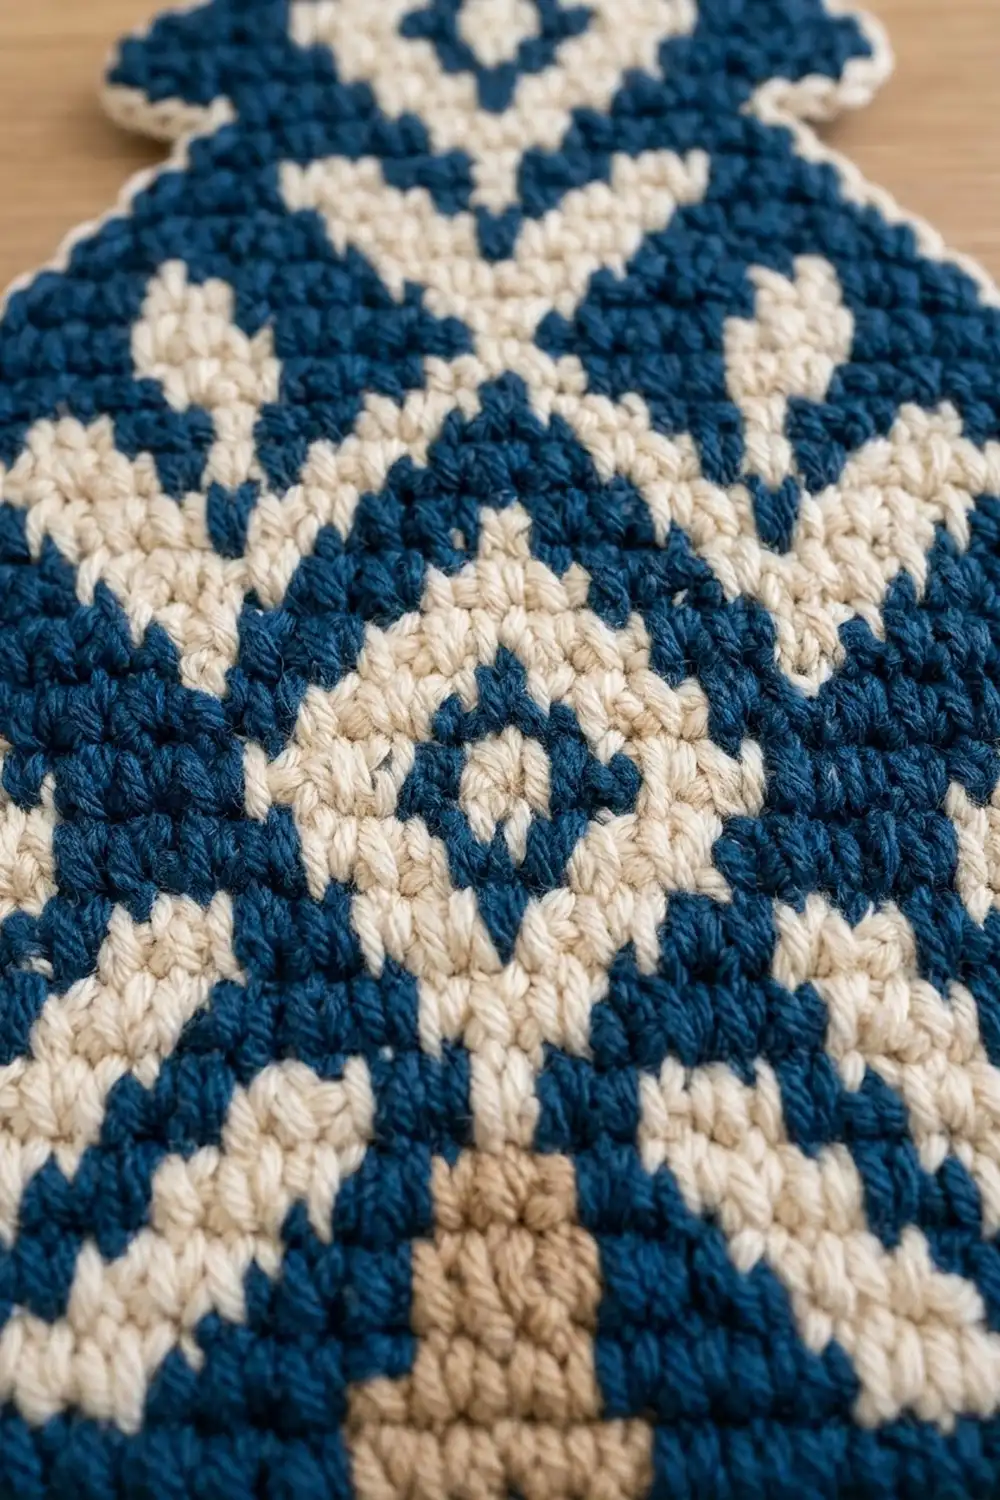
Tapestry sc (special stitch): Lay the unused color(s) along the tops of the stitches and work each sc over them so they are enclosed. To change color, work the last sc before the change until 2 loops remain on the hook. Yarn over with the new color and pull through. Keep tension even so the carried strands don’t pucker the fabric.
Increase row: Inc in the first st, sc across to the last st, then inc in the last st. This adds 2 sts.
Gauge and Checkpoints
Gauge: 16 sc and 18 rows = 4 in (10.2 cm) in tapestry sc, with carried yarn.
Use Tier 1 (Rows 1–14) as your gauge test. It is the first section of the real piece, so nothing is wasted if your gauge is right.
Checkpoints (before border):
– After Row 14: 17 sts, 4.25 in (10.8 cm) wide, 3.1 in (7.9 cm) tall
– After Row 26: 25 sts, 6.25 in (15.9 cm) wide, 5.8 in (14.7 cm) tall
– After Row 38: 31 sts, 7.75 in (19.7 cm) wide, 8.4 in (21.3 cm) tall
– After Row 45: base 15 sts, 3.75 in (9.5 cm) wide, total height 10 in (25.4 cm)
If Tier 1 comes out wider than 4.5 in (11.4 cm), start over with a 3.75 mm hook. If it is narrower than 4 in (10.2 cm), switch to a 4.5 mm hook. If the width is right but the height is off by more than 0.25 in (0.6 cm), check that you are working into both loops. A loose turning chain can also add height.
Pattern
Row structure: Ch 1 at the start of each row. It does not count as a stitch. Turn at the end of every row.
Stitch counts: Every even-numbered row in a tier is an increase row. Odd-numbered rows are worked straight, except for the step rows (15, 27, and 39).
Color layout: Unless a row says otherwise, every stitch is MC. Carry CC1 through Rows 4–36. Carry CC2 from Row 31 to the end. After Row 36, cut CC1 and stop carrying it.
Tier 1 (Rows 1–14)
Row 1: With MC, ch 4. Sc in the 2nd ch from the hook and in the next 2 ch. (3 sts)
Row 2: Increase row. (5 sts)
Row 3: Sc across. (5 sts)
Row 4: Increase row. Join CC1 and carry it. C cream. (7 sts)
Row 5: Sc across. C±1 and C cream. (7 sts)
Row 6: Increase row. C through C±2 cream (5 cream). (9 sts)
Row 7: Sc across. C±1 to C±3 cream, C navy. (9 sts)
Row 8: Increase row. C±2 to C±4 cream, C through C±1 navy. (11 sts)
Row 9: Sc across. C±1 to C±3 cream, C navy. (11 sts)
Row 10: Increase row. C through C±2 cream. (13 sts)
Row 11: Sc across. C through C±1 cream. (13 sts)
Row 12: Increase row. C cream. (15 sts)
Row 13: Sc across in MC. (15 sts)
Row 14: Increase row in MC. (17 sts)
Rows 4–12 form a solid cream diamond, 9 sts wide and 9 rows tall, with a navy center dot that is 3 sts across at its widest.
Tier 2 (Rows 15–26)
Row 15 (step): Sl st in the first 3 sts. Ch 1, then sc in the same st as the last sl st and in the next 12 sts. Leave the last 2 sts unworked. C±4 cream. (13 sts)
This row leaves a 2-st ledge on each side of the tree.
Row 16: Increase row. C±3 cream. (15 sts)
Row 17: Sc across. C±2 cream. (15 sts)
Row 18: Increase row. C±1 cream. (17 sts)
Row 19: Sc across. C cream. (17 sts)
Row 20: Increase row. C through C±1 cream, and C±6 cream. (19 sts)
Row 21: Sc across. C through C±2 cream, and C±6 cream. (19 sts)
Row 22: Increase row. C±1 to C±3 cream, C navy, and C±5 to C±7 cream. (21 sts)
Row 23: Sc across. C through C±2 cream, and C±6 cream. (21 sts)
Row 24: Increase row. C through C±1 cream. (23 sts)
Row 25: Sc across. C cream. (23 sts)
Row 26: Increase row in MC. (25 sts)
Rows 15–19 form a V that closes down into the diamond in Rows 19–25. The sprigs at C±6 have a 2-row stem tip, a 3-st crossbar, and a 1-st base.
Tier 3 (Rows 27–38)
Row 27 (step): Sl st in the first 4 sts. Ch 1, then sc in the same st as the last sl st and in the next 18 sts. Leave the last 3 sts unworked. C±4 cream. (19 sts)
This row leaves a 3-st ledge on each side.
Row 28: Increase row. C±3 cream. (21 sts)
Row 29: Sc across. C±2 cream, and C±8 cream. (21 sts)
Row 30: Increase row. C±1 cream, and C±8 cream. (23 sts)
Row 31: Sc across. Join CC2 and carry it. C tan, and C±7 to C±9 cream. (23 sts)
Row 32: Increase row. C tan, and C±8 cream. (25 sts)
Row 33: Sc across. C through C±1 tan, and C±5 cream. (25 sts)
Row 34: Increase row. C through C±1 tan, and C±6 cream. (27 sts)
Row 35: Sc across. C through C±2 tan, and C±7 cream. (27 sts)
Row 36: Increase row. C through C±2 tan, and C±8 cream. Cut CC1 at the end of the row. (29 sts)
Row 37: Sc across. C through C±3 tan. (29 sts)
Row 38: Increase row. C through C±3 tan. (31 sts)
Base (Rows 39–45)
Row 39 (step): Sl st in the first 12 sts. Ch 1, then sc in the same st as the last sl st and in the next 8 sts. Leave the last 11 sts unworked. C through C±3 tan, C±4 navy. (9 sts)
This row leaves an 11-st ledge on each side.
Row 40: Sc across with the same colors as Row 39. (9 sts)
Row 41: Increase row. C through C±4 tan, C±5 navy. (11 sts)
Row 42: Sc across with the same colors as Row 41. (11 sts)
Row 43: Increase row. C through C±5 tan, C±6 navy. (13 sts)
Row 44: Sc across with the same colors as Row 43. (13 sts)
Row 45: Increase row. C through C±6 tan, C±7 navy. (15 sts)
Fasten off MC and CC2 and weave in the ends.
The tan trunk starts as a single stitch at Row 31 and widens by 2 sts every 2 rows. Through the base it is framed by a 1-st navy edge.
Border
Border gauge:
– 1 sc per row end
– 1 sc per stitch on the ledges, top, and bottom
– 2 extra sc at each outer corner
Single crochet is about 0.22 in (0.6 cm) tall and 0.25 in (0.6 cm) wide. Because those are so close, 1 sc per row end lies flat along both the sloped and the vertical edges.
Border Round: With RS facing, join CC1 in the first foundation ch at the tip.
- Top: Sc in the first ch. In the center ch, work (sc, ch 12, sc). Sc in the last ch. (4 sc + loop)
- Right side, top to bottom:
- 1 sc in each of the 14 row ends of Tier 1
- 1 sc in each of the 2 ledge sts, with 2 extra sc in the outermost one
- 1 sc in each of the 12 row ends of Tier 2
- 1 sc in each of the 3 ledge sts, with 2 extra sc in the outermost one
- 1 sc in each of the 12 row ends of Tier 3
- 1 sc in each of the 11 ledge sts, with 2 extra sc in the outermost one
- 1 sc in each of the 7 row ends of the base
That is 61 + 6 = 67 sc.
3. Bottom: 3 sc in the first st of Row 45, 1 sc in each of the next 13 sts, and 3 sc in the last st. That is 15 + 4 = 19 sc.
4. Left side, bottom to top: Mirror the right side. On the side where the step rows began, work into the slip stitches on each ledge. (67 sc)
Join with a sl st to the first sc. Total: 4 + 67 + 19 + 67 = 157 sc, plus the ch-12 loop. Fasten off.
Why the math works: Each side has 14 + 12 + 12 + 7 = 45 row ends, which matches the 45 rows. It also has 2 + 3 + 11 = 16 ledge stitches, which matches the stitches left unworked on each side in Rows 15, 27, and 39. The extra stitches at the tier points and the bottom corners let the border turn sharp corners without cupping. The border adds 0.25 in (0.6 cm) to every edge. That takes the piece from 7.75 in (19.7 cm) to 8.25 in (21.0 cm) wide, and from 10 in (25.4 cm) to 10.5 in (26.7 cm) tall.
Final Blocking
- Weave in all ends on the WS. Run each end through stitches of its own color.
- Lay the tree WS up on a blocking mat.
- Pin the tip, the outer point of each tier, and the two bottom corners. Measure 8.25 in (21.0 cm) across Tier 3 and 10.5 in (26.7 cm) from tip to base.
- Pin along each tier slope so the edges run straight.
- Mist the piece evenly until it is damp, not soaked.
- Pat the diamonds square and smooth out any puckers from the carried strands.
- Let it dry completely, at least 12 hours, before unpinning.
- Shape the loop so it stands upright.
Final Quality-Control Checklist
- The stitch counts at Rows 14, 26, 38, and 45 are 17, 25, 31, and 15.
- The ledges are 2, 3, and 11 sts deep on each side, and the two sides mirror each other.
- Both diamonds are centered, with navy centers.
- The sprigs and branches mirror each other left and right.
- The trunk is centered and widens evenly.
- No carried strands show on the RS.
- The border lies flat with no ruffling or cupping.
- The finished size is 8.25 in (21.0 cm) x 10.5 in (26.7 cm).
- The loop is secure and centered.
- All ends are woven in.
Troubleshooting
Navy shows through the cream stitches. Pull the carried yarn snug and keep the hook low as you work. Cotton hides carried strands better than acrylic.
The fabric leans or slants. This is a normal bias in tapestry sc. Blocking corrects most of it. You can also work in the back loop on alternate rows to reduce it.
The motif is off center. Recount C after each increase row. With an odd stitch count, C is always the middle stitch.
The tiers ruffle. You may be increasing on odd rows. Increases go on even rows only.
The border cups. Use 1 sc per row end, not 2. You can also go up one hook size for the border.
The border ruffles at the corners. Work 2 extra sc at the corners, not more.
The ledges look uneven. Make the step-row slip stitches loose. The border covers them.
Care
Hand wash in cool water with mild soap and press out the water in a towel. Reshape and dry flat. Do not wring or tumble dry.
Final Notes
Everything rests on one gauge: 16 sc and 18 rows = 4 in (10.2 cm). Tier 1 should measure 4.25 in (10.8 cm) wide. Tier 2 grows to 6.25 in (15.9 cm) and Tier 3 to 7.75 in (19.7 cm). With the base, the piece is 10 in (25.4 cm) tall. The border brings it to 8.25 in (21.0 cm) by 10.5 in (26.7 cm). If you check each of those numbers as you go, the motifs will line up and the edging will lie flat.
Happy crocheting!