

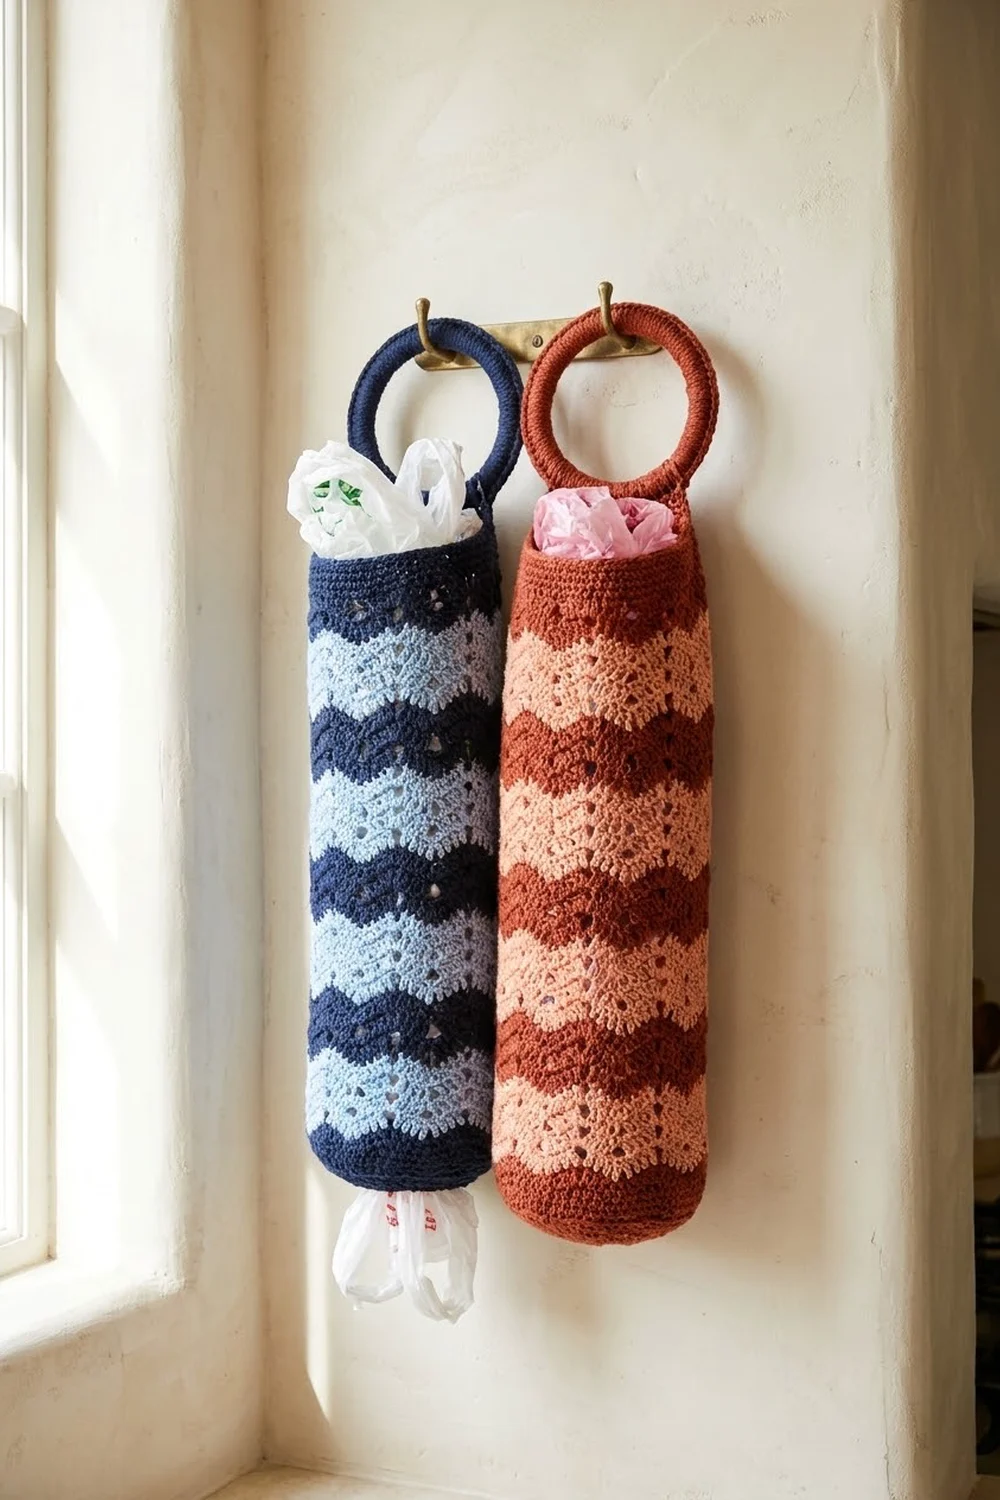
The Harbor Wave Bag Holder is a tall, tidy tube that turns a drawer full of loose grocery bags into one neat column on the wall. You stuff bags in at the top and pull them out, one at a time, from the slightly narrower opening at the bottom.
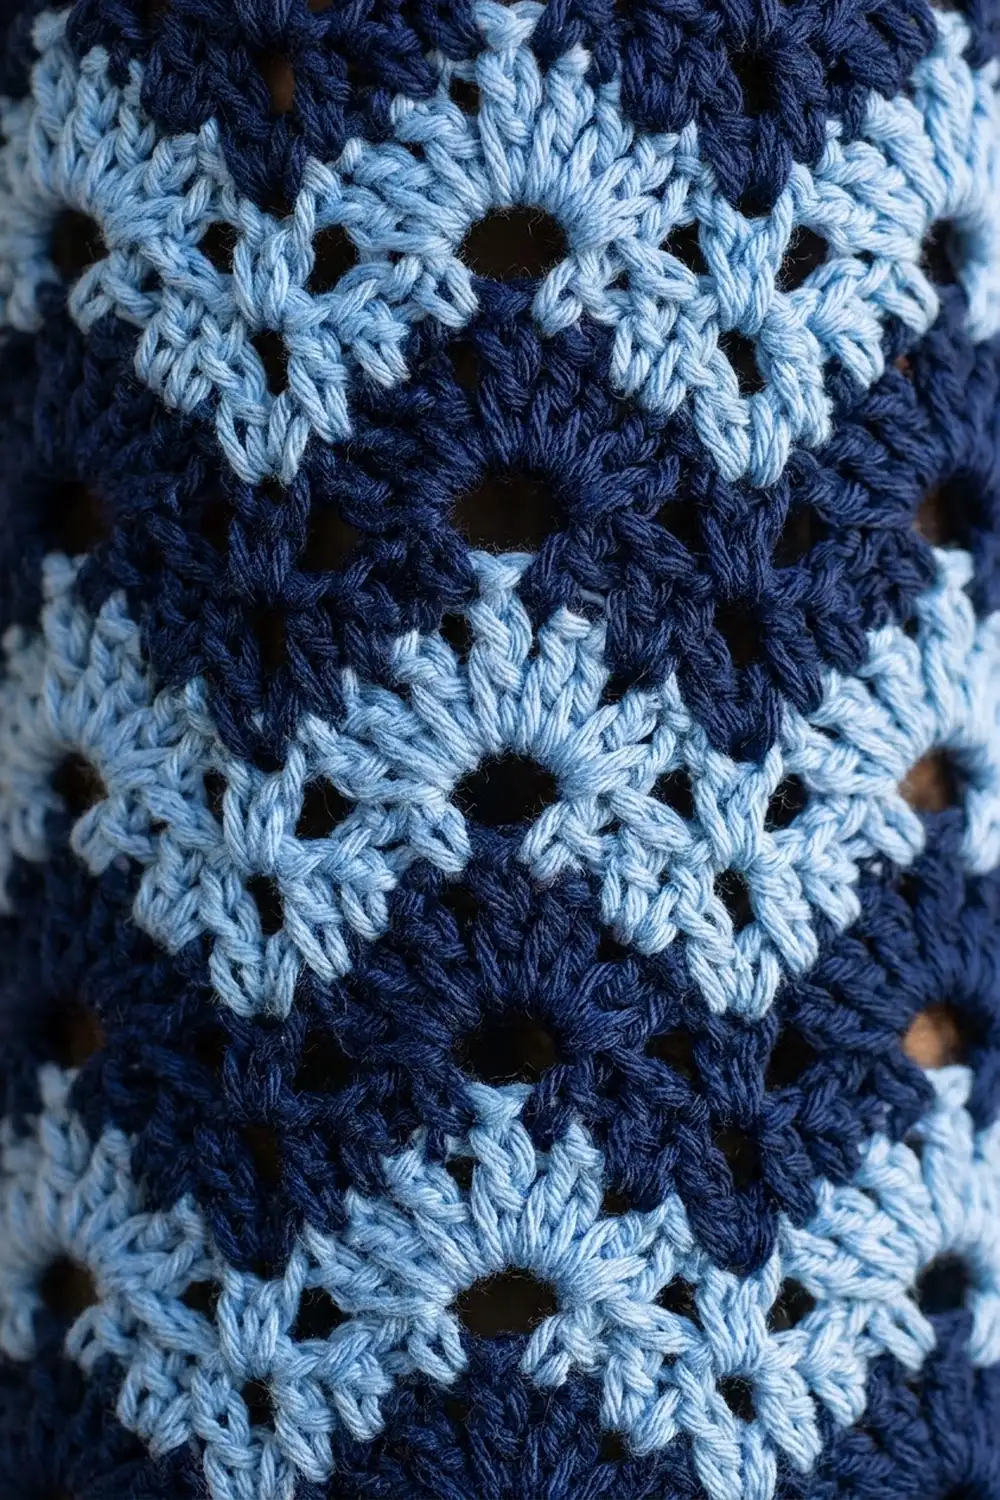
The body is worked in a classic openwork chevron. Two-round stripes of navy and light blue zigzag up the tube, and a small eyelet sits under every peak, so the waves look crisp and a little lacy. Solid navy bands frame the top and bottom, and a navy-covered ring at the top rim hangs on a hook or knob.
This pattern uses US crochet terms. The finished holder measures 6 in (15.2 cm) wide laid flat and 18 in (45.7 cm) tall, not counting the ring. With the ring included it hangs about 20 in (50.8 cm) long.
Construction is simple. You crochet one seamless tube in joined rounds from the bottom up, starting with a narrow sc band, then 32 rounds of chevron, then a leveling round and a flat sc rim. Separately, you cover a ring with sc and sew it to the inside back of the rim.
Finished Size and Construction
- Finished size: 6 in (15.2 cm) wide flat x 18 in (45.7 cm) tall; about 20 in (50.8 cm) with ring
- Skill level: Easy / advanced beginner
- Terminology: US crochet terms
- Yarn weight: Worsted (#4), cotton or cotton blend
- Hook: 4.5 mm (US 7)
- Number of pieces: 1 tube body + 1 covered ring
- Layout: Single vertical tube, ring centered at the back of the top rim
- Body circumference: 12 in (30.5 cm), worked over 48 stitches
- Bottom opening: 10 in (25.4 cm) around, 5 in (12.7 cm) flat, worked over 40 stitches
- Size before top band: 6 in (15.2 cm) x 17 in (43.2 cm)
- Top band depth: 1 in (2.5 cm), measured above the chevron peaks
Materials
Choose a smooth worsted cotton or cotton blend. Cotton holds its shape when the tube is stuffed full and does not stretch out over time the way soft acrylic can. Avoid fuzzy or very splitty yarns, because the eyelets and dc3tog valleys look best in a crisp yarn.
- Color A, navy: about 60 g / 105 m (115 yd), used for both bands, eight stripes, and the ring
- Color B, light blue: about 40 g / 70 m (77 yd), used for eight stripes
Quantities include a safety margin of roughly 15 percent, so you will not run out partway through a stripe.
Tools:
- 4.5 mm (US 7) crochet hook
- One 2 in (5.1 cm) metal or plastic ring
- Stitch marker
- Tapestry needle
- Scissors
- Measuring tape
- Spray bottle and a rolled towel for blocking
Optional colorway: The same pattern looks great in rust with a peach contrast. Simply swap Color A and Color B.
Abbreviations (US Terms)
- ch – chain
- sl st – slip stitch
- sc – single crochet
- hdc – half double crochet
- dc – double crochet
- tr – treble crochet
- sp – space
- st(s) – stitch(es)
- rnd(s) – round(s)
- rep – repeat
Special stitch, dc3tog (double crochet 3 together): *Yarn over, insert hook in next st, yarn over and pull up a loop, yarn over and pull through 2 loops; rep from * in each of the next 2 sts (4 loops on hook), yarn over and pull through all 4 loops. Uses 3 sts, makes 1 st. This forms each valley.
Peak: (dc, ch 2, dc) worked into one st or sp. The ch-2 sp forms the eyelet under each point.
Gauge and Checkpoints
Gauge in sc: 16 sc and 16 rnds = 4 in (10.2 cm).
Gauge in chevron: One 12-unit repeat = 3 in (7.6 cm) wide; 4 rnds = 2 in (5.1 cm) tall. Each ch-2 sp counts as 1 unit of width.
The tube itself is your gauge swatch. Work the bottom band and the first 4 chevron rnds, then stop and measure:
- After Rnd 4 (bottom band): 1 in (2.5 cm) tall; 5 in (12.7 cm) wide flat.
- After Rnd 8: chevron section 2 in (5.1 cm) tall; tube 6 in (15.2 cm) wide flat.
- After Rnd 20: total height 9 in (22.9 cm).
- After Rnd 36: total height 17 in (43.2 cm).
- After Rnd 40: total height 18 in (45.7 cm).
If the tube is wider than 6 in (15.2 cm) flat, go down to a 4 mm (US G-6) hook. If it is narrower, go up to a 5 mm (US H-8) hook. If only the height is off, you can add or remove a pair of chevron rnds; each pair changes the length by 1 in (2.5 cm). Keep the stitch counts exactly as written, because the 12-unit repeat is what keeps the waves straight.
Pattern
Work in joined rnds with the right side facing you at all times; do not turn. Carry the unused color loosely up the inside of the tube at the join instead of cutting it. To change color, work the final yarn-over of the joining sl st with the new color.
Bottom Band (Color A, navy)
Foundation: With Color A, ch 40. Sl st to the first ch to form a ring, taking care not to twist the chain.
Rnd 1: Ch 1, sc in each ch around, join with sl st to first sc. (40 sc)
Rnds 2–3: Ch 1, sc in each st around, join. (40 sc)
Rnd 4 (increase rnd): Ch 1, sc in next 4 sts, 2 sc in next st; rep from * 7 more times, join. (40 sc worked 1-per-stitch + 8 extra sc = 48 sc)*
Checkpoint: 1 in (2.5 cm) tall, 5 in (12.7 cm) wide flat at the lower edge. The increase rnd flares the top of the band slightly so the body sits 1 in (2.5 cm) wider than the opening.
Chevron Body
Each repeat covers 12 units: 11 dc and 1 ch-2 sp. Four repeats go around the tube, so every chevron rnd totals 44 dc + 4 ch-2 sps = 48 units.
Rnd 5 (setup rnd, Color B): Join Color B. Ch 3 (counts as dc), (ch 2, dc) in same st as join (first peak made), dc in next 4 sts, dc3tog over next 3 sts, dc in next 4 sts, (dc, ch 2, dc) in next st; rep from * 2 more times, then rep from * to ** once more. Join with sl st to top of beginning ch-3. (44 dc + 4 ch-2 sps)*
Check the math: each repeat uses 1 + 4 + 3 + 4 = 12 sc and makes 2 + 4 + 1 + 4 = 11 dc plus 1 ch-2 sp.
Rnd 6 (pattern rnd, Color B): Sl st in next ch-2 sp, ch 3 (counts as dc), (ch 2, dc) in same sp, dc in next 4 sts, dc3tog over next 3 sts, dc in next 4 sts, (dc, ch 2, dc) in next ch-2 sp; rep from * 2 more times, then rep from * to ** once more. Join to top of beginning ch-3. (44 dc + 4 ch-2 sps)*
The center of each dc3tog always lands on the dc3tog below it, and each peak always sits in the ch-2 sp below. On the final repeat, the last of the 4 dc goes into the beginning ch-3 of the previous rnd. This keeps the eyelets stacked in neat vertical lines and the valleys sharply pointed.
Rnds 7–36: Rep Rnd 6, following this stripe sequence:
- Rnds 7–8: Color A
- Rnds 9–10: Color B
- Continue alternating 2 rnds of each color.
- Rnds 33–34: Color B
- Rnds 35–36: Color A
Every rnd: 44 dc + 4 ch-2 sps.
That gives 32 chevron rnds (Rnds 5–36): eight light blue stripes and eight navy stripes, starting with light blue and ending with navy. Cut Color B after Rnd 34 and weave in later.
Checkpoint: 17 in (43.2 cm) total height, 6 in (15.2 cm) wide flat.
Hanging Ring (Color A, navy)
With Color A, make a slip knot on the hook. Work sc directly around the 2 in (5.1 cm) ring: insert hook through the center, yarn over, pull up a loop, yarn over, pull through 2 loops. Work 40 sc around the ring, sliding them together as you go so no plastic or metal shows. Add or skip a few sc if your ring needs it; full coverage matters more than the exact count. Join with sl st to the first sc and fasten off, leaving a 12 in (30.5 cm) tail for sewing.
The covered ring measures about 2.5 in (6.4 cm) across.
Border (Top Band)
The top band levels the zigzag into a straight rim and gives the ring a firm place to attach.
Border gauge: 16 sc = 4 in (10.2 cm), the same as the bottom band. 48 sts around = 12 in (30.5 cm), matching the body.
Rnd 37 (leveling rnd, Color A): Sl st in next ch-2 sp, ch 1, sc in same sp, sc in next dc, hdc in next 2 sts, dc in next 2 sts, tr in dc3tog, dc in next 2 sts, hdc in next 2 sts, sc in next st, sc in next ch-2 sp; rep from * 2 more times, then rep from * to ** once more. Join to first sc. (44 sts worked 1-per-stitch + 4 sc worked in ch-2 sps = 48 sts)*
The short sc sit on the peaks and the tall tr fill the valleys, so the top edge comes out flat.
Rnds 38–40: Ch 1, sc in each st around, join. (48 sc) Fasten off and weave in ends.
Counts per side: Flatten the tube with the ring position at the center back. A tube has no corners, so the fold lines fall between stitches and no corner stitches are added. Each side holds 24 sts: 2 repeats x 12 units in the chevron rnds, and 24 sc in Rnds 38–40. Front 24 + back 24 = 48.
Why the math works: Every chevron rnd uses exactly 12 units per repeat and makes exactly 12 units per repeat. The dc3tog removes 2 stitches and the peak adds 2 (1 extra dc + 1 ch-2 sp). The leveling rnd then turns each ch-2 sp into 1 sc, so 48 units become 48 sts. As a result, the rim matches the 48-st body exactly and lies flat, without ruffling or pulling in.
Attach the ring: Turn the tube inside out. Center the ring on the back, between the two back chevron peaks. Overlap the lower 0.5 in (1.3 cm) of the ring onto the inside of Rnds 38–40. With the tail, whipstitch about 6 sc of the ring securely to the band, going through both loops. Pass through each point twice. Turn the tube right side out. The ring should stand 2 in (5.1 cm) above the rim.
Final Blocking
- Weave in all ends on the inside, running each tail through at least 2 in (5.1 cm) of same-color stitches.
- Roll a bath towel into a firm tube about 12 in (30.5 cm) around.
- Slide the crochet tube over the towel.
- Spray evenly until damp, not soaking.
- Gently pull it lengthwise to 18 in (45.7 cm), and ease each peak and valley into a straight vertical line.
- Check that the flat width measures 6 in (15.2 cm) and the bottom opening 5 in (12.7 cm).
- Let it dry completely on the towel, then remove.
Final Quality-Control Checklist
- 48 sts in the body and top rim; 40 sts at the bottom opening
- 32 chevron rnds, alternating 2-rnd stripes, 8 of each color
- Eyelets stacked in four straight vertical lines
- Valleys line up vertically with no drift
- Top rim flat and level, with no wavy edge
- Ring fully covered and sewn firmly at the center back
- Size: 6 in (15.2 cm) x 18 in (45.7 cm), about 20 in (50.8 cm) with ring
- All ends woven in on the inside
Troubleshooting
Chevrons look slanted or spiraled: You likely started a rnd in the wrong place. Each pattern rnd must begin with a sl st into the ch-2 sp. Count 44 dc + 4 sps after every rnd.
Stitch count off by 2: You probably missed a dc3tog or a peak. Check that each repeat has 4 dc on each side.
Top rim wavy: You likely worked 2 sc into a ch-2 sp on Rnd 37. Use exactly 1 sc per sp.
Bottom too tight for bags to pull through: Remake the band with ch 44 and 44 sc. On Rnd 4, work (sc in next 10 sts, 2 sc in next st) 4 times to reach 48.
Visible jog at color changes: Join with the new color on the final yarn-over, and keep the carried strand loose.
Ring flops forward: Sew a second line of stitches lower down on the ring so it braces against the band.
Care
Hand wash in cool water and lay flat or roll in a towel to dry. Reshape while damp. Cotton can also go through a gentle machine cycle inside a mesh bag.
Final Notes
Here is the measurement chain:
- 16 sc = 4 in (10.2 cm), so the 40-st bottom band is 10 in (25.4 cm) around and 5 in (12.7 cm) flat.
- The increase rnd brings the count to 48.
- Four 12-unit chevron repeats at 3 in (7.6 cm) each give 12 in (30.5 cm) around, or 6 in (15.2 cm) flat.
- 32 chevron rnds at 0.5 in (1.3 cm) each add 16 in (40.6 cm).
- The 1 in (2.5 cm) bands at the top and bottom bring the total to 18 in (45.7 cm).
- The ring adds 2 in (5.1 cm), for about 20 in (50.8 cm) overall.
If you check each checkpoint, the finished holder will match.
Happy crocheting!