

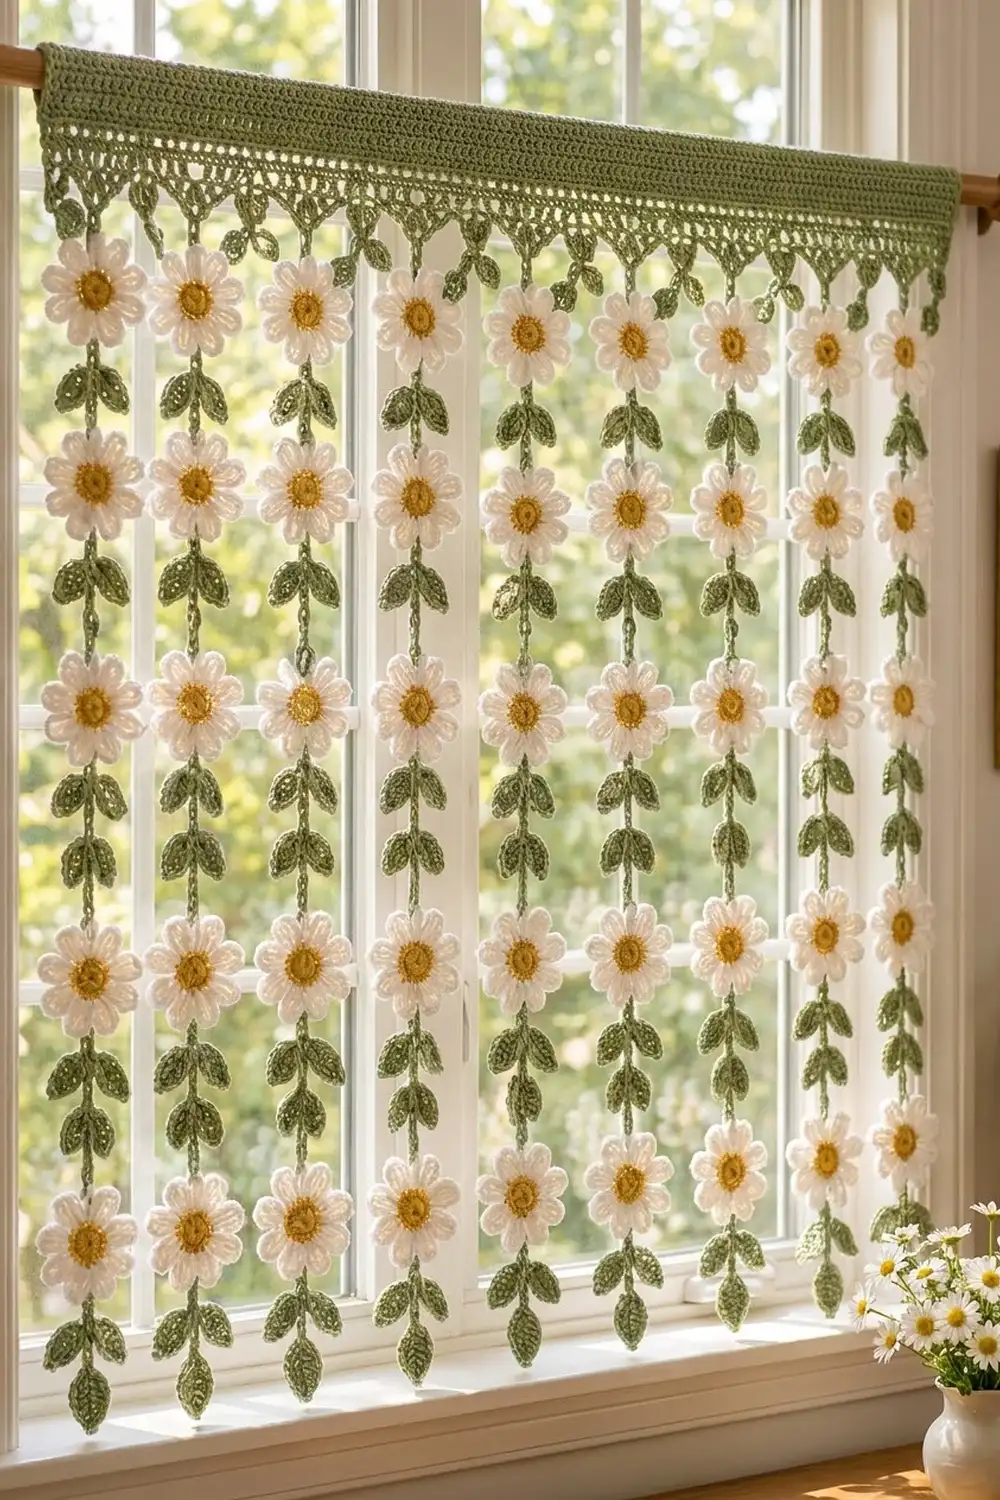
This curtain brings a meadow to your window. A sage-green header with a mesh band and pointed edge hangs from a wooden rod. Ten strands of white daisies and leafy stems hang from the points and let the light through.
The palette is sage green, white and golden yellow. It suits a cottage-style or farmhouse room. This pattern uses US crochet terms throughout.
The finished curtain is 30 in (76.2 cm) wide and 36.25 in (92.1 cm) long, measured from the top of the rod pocket to the tip of the last leaf.
You make it in three stages. First crochet 60 daisies. Then work 10 strands, joining the daisies as you go and growing the leaves straight off the chain stem. Last, crochet the header and finish it with a pointed border; the tip of each point attaches to the top of one strand.
Finished Size and Construction
- Finished size: 30 in × 36.25 in (76.2 cm × 92.1 cm)
- Skill level: Intermediate
- Terminology: US crochet terms
- Yarn weight: DK (light worsted, #3) cotton
- Hook: 4.0 mm (G-6)
- Number of pieces: 71 (1 header, 60 daisies, 10 strands)
- Layout: 10 strands across, 6 daisies down each strand
- Daisy size: 2.5 in (6.4 cm) across
- Strand length: 30.25 in (76.8 cm)
- Header size before border: 30 in × 5.2 in (76.2 cm × 13.2 cm) laid flat
- Border depth: 2.8 in (7.1 cm)
Materials
Use a smooth mercerized or combed cotton in DK weight. Cotton holds the petal shapes crisply and hangs straight in a window. Avoid fuzzy yarns, because they blur the leaf veins.
- Sage green: 200 g / 480 m (header, stems, leaves)
- White: 150 g / 360 m (petals)
- Golden yellow: 50 g / 120 m (daisy centers)
These quantities include a safety margin of about 20%.
Tools:
– 4.0 mm (G-6) crochet hook
– Tapestry needle
– Scissors
– Stitch markers
– Rust-proof pins and a blocking mat
– Measuring tape
– Curtain rod up to 1 in (2.5 cm) in diameter
Abbreviations (US Terms)
- ch: chain
- sl st: slip stitch
- sc: single crochet
- hdc: half double crochet
- dc: double crochet
- tr: treble crochet
- sk: skip
- sp: space
- MR: magic ring
- RS / WS: right side / wrong side
- dc2tog: (yarn over, insert hook in next st, pull up a loop, yarn over, pull through 2 loops) twice, yarn over, pull through all 3 loops
- dc3tog: like dc2tog, but worked over 3 sts, ending with 4 loops on the hook
Special stitches:
– Petal: (ch 3, tr, ch 1, tr, ch 3, sl st) all in the same stitch. The ch-1 sp is the petal tip.
– Surface sl st: with the yarn held behind the work, insert your hook through the fabric, pull up a loop and draw it through the loop on your hook. This leaves a line of chain-like stitches on the surface.
Gauge and Checkpoints
- Fabric gauge: 20 dc and 10 rows = 4 in (10.2 cm), so 5 sts and 2.5 rows per inch. Each dc row is 0.4 in (1.0 cm) tall.
- Chain gauge: 5 ch = 1 in (2.5 cm), measured unstretched.
Make 1 daisy and 1 leaf before you start production. Measure them against these checkpoints:
- Daisy center after Rnd 2: 1 in (2.5 cm) across
- Finished daisy: 2.5 in (6.4 cm) across, from petal tip to the opposite petal tip
- Leaf: 1.25 in (3.2 cm) long and 0.75 in (1.9 cm) wide
- Header after Row 10: 30 in × 4 in (76.2 cm × 10.2 cm)
If your pieces are too big, go down 0.5 mm in hook size. If they are too small, go up 0.5 mm. Don’t change the stitch counts. All of the layout math depends on 150 header stitches.
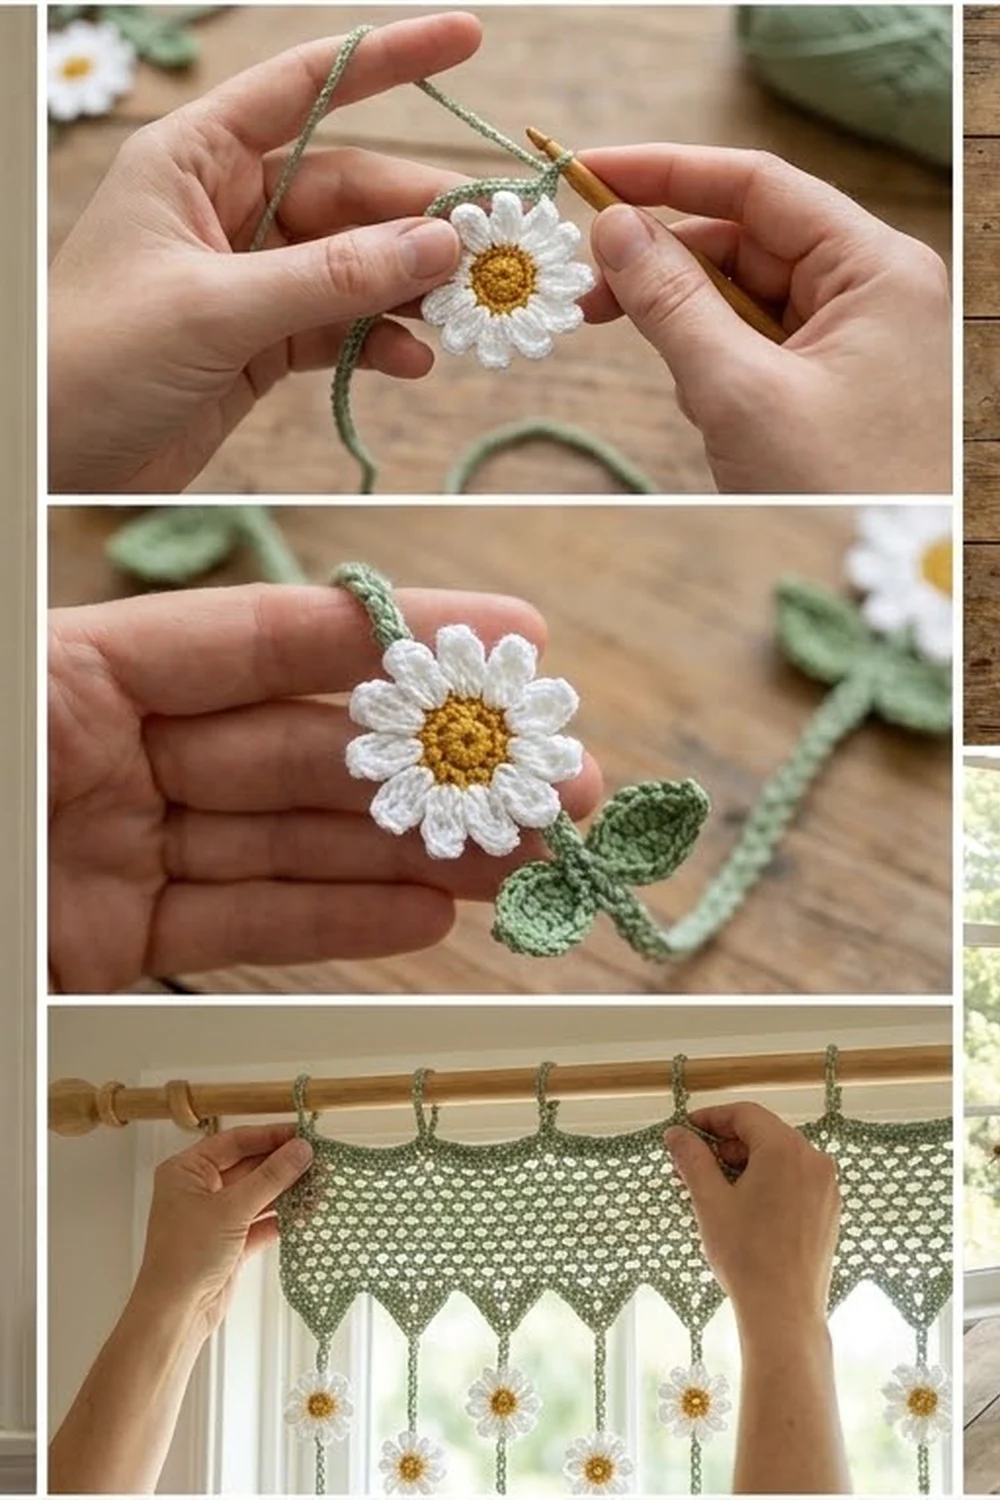
Daisy (make 60)
Rnd 1 (yellow): Make an MR, ch 1, work 6 sc in the ring, and sl st to the first sc. (6 sc)
Rnd 2: Ch 2 (does not count as a stitch). Work 2 hdc in each sc around, and sl st to the first hdc. (12 hdc) Fasten off, then weave in the tails now.
Checkpoint: the center measures 1 in (2.5 cm) across.
Rnd 3 (white): Join white with a sl st in any hdc. Work [Petal in the same st, sl st in next hdc] 12 times. The last sl st lands in the joining stitch. (12 petals) Fasten off and weave in the tails.
Each petal stands about 0.75 in (1.9 cm) beyond the center, which gives 1 + 0.75 + 0.75 = 2.5 in (6.4 cm) across.
Mark any petal as Petal 1. Count around to the opposite petal and mark it as Petal 7. These are the top and bottom attachment points.
Leaf Technique (worked on the stem)
Every leaf grows from a chosen base stitch on the stem.
- Ch 7.
- First side: starting in the 2nd ch from the hook, work sc, hdc, dc, dc, hdc, sc. (6 sts)
- Ch 1, then rotate the leaf.
- Second side: working in the opposite loops of the same 6 ch, work sc, hdc, dc, dc, hdc, sc. (6 sts) You are now back at the tip.
- Point: (ch 2, sl st) in the skipped tip ch.
- Vein: work 6 surface sl sts down the center line of the leaf, one over each foundation ch, back to the base.
- Sl st in the base stitch on the stem.
The vein gives the raised center rib, and the ch-2 makes a pointed tip. The finished leaf is 1.25 in × 0.75 in (3.2 cm × 1.9 cm).
Leaf pair: work 1 leaf, then work a second leaf from the same base stitch. They fan out to the left and right.
Make All Pieces
- Yellow: 60 daisy centers (Rnds 1–2)
- White: 60 petal rounds (Rnd 3)
- Green: 1 header and 10 strands, which include 150 leaves (15 per strand: 7 pairs plus 1 end leaf)
Layout grid (S = strand number, D = daisy):
S1  S2  S3  S4  S5  S6  S7  S8  S9  S10
D   D   D   D   D   D   D   D   D   D
D   D   D   D   D   D   D   D   D   D
D   D   D   D   D   D   D   D   D   D
D   D   D   D   D   D   D   D   D   D
D   D   D   D   D   D   D   D   D   D
D   D   D   D   D   D   D   D   D   D
Keep each set of 6 daisies together, and store the finished strands flat so the stems don’t twist.
Joining: Building the Strands (make 10)
The strands join the daisies stitch to stitch with the green yarn. Work each strand from the top down.
Start: leave an 8 in (20.3 cm) tail. Make a slip knot and place a marker in the slip-knot loop; this is the top of the strand.
Unit (repeat 6 times):
- Upper stem: ch 5, about 1 in (2.5 cm).
- Leaf pair: work it from the last ch made.
- Lower stem: ch 5, about 1 in (2.5 cm).
- Join the daisy:
- With the daisy RS facing, sl st in the ch-1 tip of Petal 1.
- Turn the daisy to the WS. Work 11 surface sl sts in a straight vertical line down the back: through the base of Petal 1, across the center rounds, and up the back of Petal 7.
- Sl st in the ch-1 tip of Petal 7.
The yarn now leaves the daisy at the bottom, and the stem is hidden behind the flower. On the front it looks as if the stem runs straight through the flower.
End of strand:
1. Ch 5, then work a leaf pair.
2. Ch 5, then work 1 single leaf.
3. Fasten off and weave in the end.
Stitch logic per strand:
– 14 ch-5 stem segments = 70 stem ch
– 6 daisies × (2 tip sl sts + 11 surface sl sts) = 78 joining sts
– 15 leaves
Tension: keep the stem chains snug and even. Loose chains stretch under the weight of the daisies and make the strands uneven. Your surface sl sts should be firm but shouldn’t pucker the petals.
Size checkpoint:
– Each unit is 1 + 1 + 2.5 = 4.5 in (11.4 cm). Six units give 27 in (68.6 cm).
– The end section (1 in + 1 in + 1.25 in) adds 3.25 in (8.3 cm).
– Total strand length: 30.25 in (76.8 cm).
Hang each strand from its marker to check it. Make sure all 10 strands are within 0.25 in (0.6 cm) of each other.
Header Band
Use green.
Foundation: ch 152.
Row 1 (RS): Dc in the 4th ch from the hook and in each ch across. The skipped ch count as the first dc. Turn. (150 dc)
Rows 2–10: Ch 3 (counts as dc), dc in each st across. Turn. (150 dc per row)
Checkpoint: 30 in × 4 in (76.2 cm × 10.2 cm).
Row 11 (mesh): Ch 3 (counts as dc), dc in the next st, then [ch 1, sk 1, dc in next st] 74 times. Turn.
– Count: 2 dc + 74 × 2 = 150 sts, where each ch-1 sp counts as 1 st.
Row 12 (solid): Ch 3 (counts as dc). Dc in each dc and in each ch-1 sp across. Turn. (150 dc)
Row 13 (mesh): Repeat Row 11. (150 sts)
Do not fasten off. Your header now measures 30 in × 5.2 in (76.2 cm × 13.2 cm).
Border: Pointed Header Edge
Border gauge: same as the fabric gauge, 5 sts and 2.5 rows per inch.
The border has 10 triangles. Each one is worked separately over 15 sts of Row 13, and each finishes by attaching the top of one strand. Number Row 13’s stitches 1–150 from the current end. Triangle 1 uses sts 1–15, Triangle 2 uses sts 16–30, and so on, with Triangle 10 using sts 136–150.
Each triangle (count each ch-1 sp as a stitch):
T-Row 1: Ch 2, dc in the next st (counts as dc2tog). Dc in the next 11 sts, then dc2tog. Turn.
– 2 sts + 11 sts + 2 sts = 15 sts used, giving 1 + 11 + 1 = 13 sts.
T-Row 2: Ch 2, dc in next (counts as dc2tog), dc in next 9, dc2tog. Turn. (11 sts)
T-Row 3: Same as T-Row 2, with dc in the middle 7. (9 sts)
T-Row 4: Same, with dc in the middle 5. (7 sts)
T-Row 5: Same, with dc in the middle 3. (5 sts)
T-Row 6: Same, with dc in the middle 1. (3 sts)
T-Row 7:
1. Ch 2, then dc2tog over the next 2 sts. Together these count as dc3tog. (1 st)
2. Sl st into the marked slip-knot loop at the top of a strand.
3. Fasten off, leaving a 6 in (15.2 cm) tail.
4. Use the strand’s 8 in (20.3 cm) top tail to sew the stem neatly to the point.
For the next triangle, join the yarn in the first unworked st of Row 13 and repeat T-Rows 1–7. Make 10 triangles in total, attaching the strands in order S1–S10.
Why the math works:
– 10 triangles × 15 sts = 150 sts, exactly the header width, with no gaps and no extra sts at the seams.
– Each triangle is 15 ÷ 5 = 3 in (7.6 cm) wide, so the strand tips sit 3 in (7.6 cm) apart.
– The outer strands hang 1.5 in (3.8 cm) in from each edge.
– The daisies are 2.5 in (6.4 cm) wide, which leaves 0.5 in (1.3 cm) of light between neighboring flowers.
– Seven rows × 0.4 in = 2.8 in (7.1 cm) of border depth.
Rod pocket:
1. With the WS facing, fold Rows 1–5 to the back so the foundation chain lies along the line between Row 10 and Row 11.
2. Whipstitch the foundation chain in place, 1 stitch per ch: 150 stitches.
The pocket has a 4 in (10.2 cm) circumference, which fits rods up to 1 in (2.5 cm) in diameter.
Visible header: Rows 6–10 (2 in / 5.1 cm) + Rows 11–13 (1.2 in / 3.0 cm) + border (2.8 in / 7.1 cm) = 6 in (15.2 cm).
Final Blocking
- Weave in all remaining ends, hiding the green tails along the stems.
- Soak the whole curtain in cool water for 15 minutes. Press the water out gently in a towel; don’t wring it.
- Lay the header flat. Pin it to 30 in (76.2 cm) wide, and pin each triangle point straight.
- Lay the strands straight down from their points, spaced 3 in (7.6 cm) apart.
- Shape each daisy to 2.5 in (6.4 cm) across. Pin the petal tips evenly and press the yellow centers flat.
- Open the leaves into a V shape and pin each tip. Make sure the vein runs straight.
- Check that each strand is 30.25 in (76.8 cm) long. Ease any strand that is short; don’t stretch the stem chains hard.
- Let everything dry completely before you unpin it.
Final Quality-Control Checklist
- Header is 30 in (76.2 cm) wide, with 150 sts in every row
- All 10 triangles are equal, each 3 in (7.6 cm) wide and 2.8 in (7.1 cm) deep
- Each strand has 6 daisies, 7 leaf pairs and 1 end leaf
- Every daisy has 12 petals, joined at Petals 1 and 7
- No surface slip stitches show on the RS of the daisies
- Strands are within 0.25 in (0.6 cm) of each other in length
- Rod pocket slides freely over the rod
- All ends are secured and trimmed
Troubleshooting
- The daisy cups or ruffles: your petal tension is too loose, or the center is too small. Rework Rnd 2 with a slightly looser hdc.
- The petals look skinny: make sure both tr of each petal go into the same hdc.
- Leaves curl: that’s normal before blocking. Pin them flat while wet.
- A strand is too long: the stem chains are loose. Rework the stems with snug chains, or remove 1 ch from each segment.
- The triangles lean: you missed a decrease. Count every T-Row against the counts above.
- The header is narrower than 30 in (76.2 cm): your foundation chain is tight. Redo it with a hook 0.5 mm larger.
- Daisies twist sideways: the surface slip stitch line is off-center. Redo it straight from Petal 1 to Petal 7.
Care
Hand wash in cool water with a mild detergent, then lay it flat to dry and reshape the daisies. Keep it away from long, direct midday sun to slow fading.
Final Notes
The measurement chain works like this:
- Gauge gives 5 sts per inch, so the 150-stitch header is 30 in (76.2 cm) wide.
- That header divides into 10 triangles of 15 sts each, 3 in (7.6 cm) wide.
- Each triangle’s tip anchors 1 strand.
- Each strand is six 4.5 in (11.4 cm) units plus a 3.25 in (8.3 cm) end, for 30.25 in (76.8 cm).
- With the 6 in (15.2 cm) visible header, the finished curtain is 36.25 in (92.1 cm) long.
Check each link in the chain as you go, and the curtain will hang straight.
Happy crocheting!