

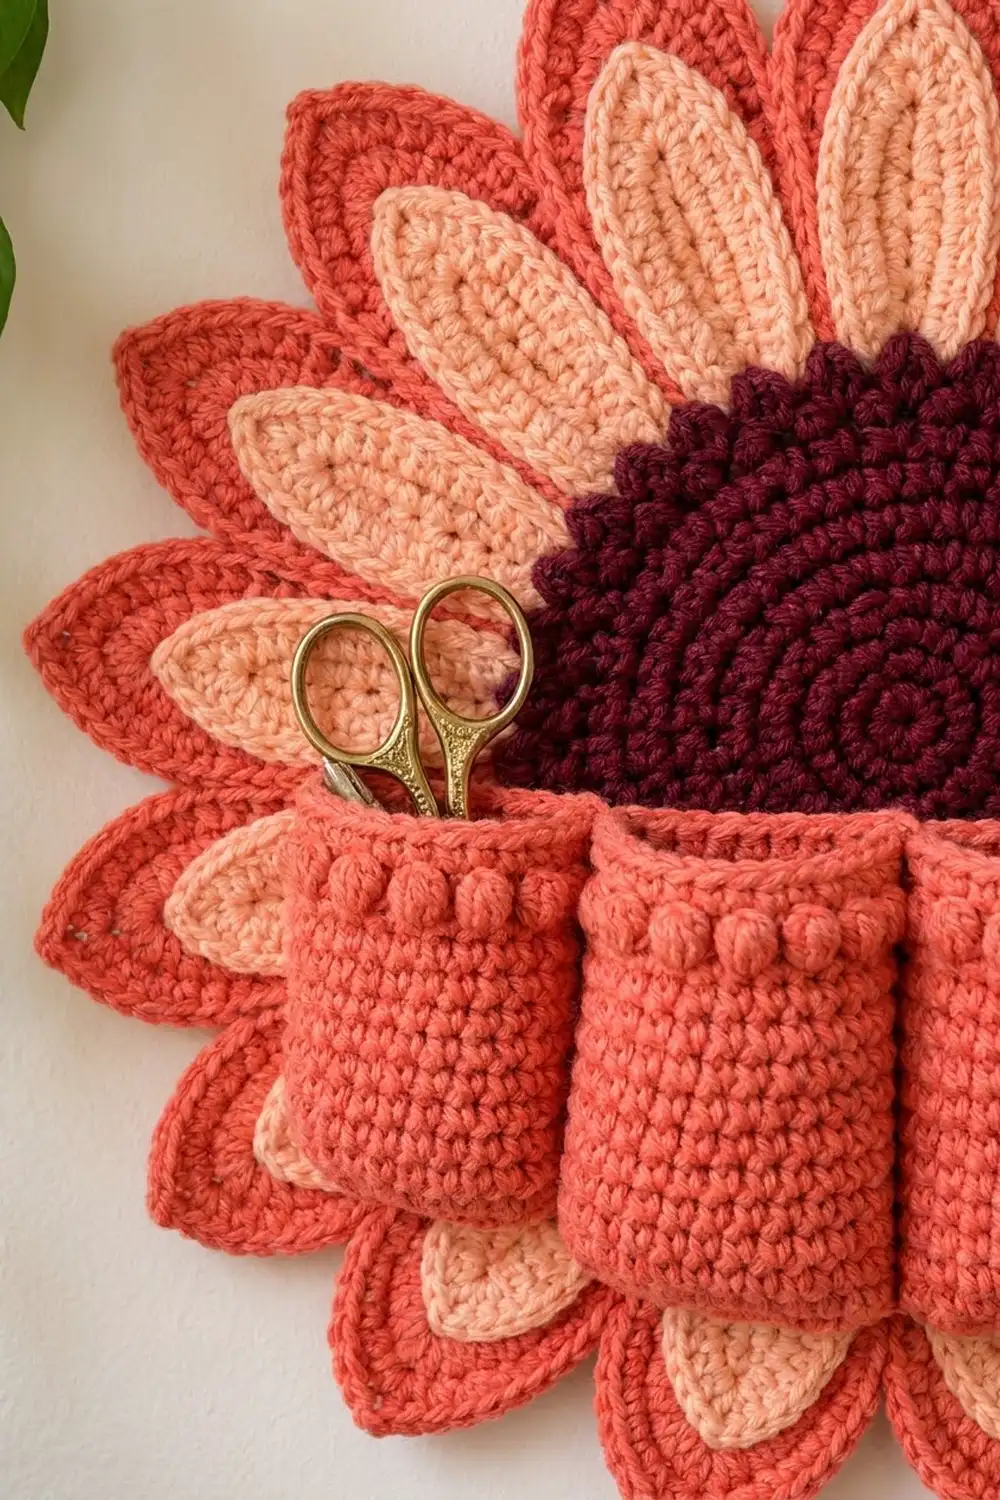
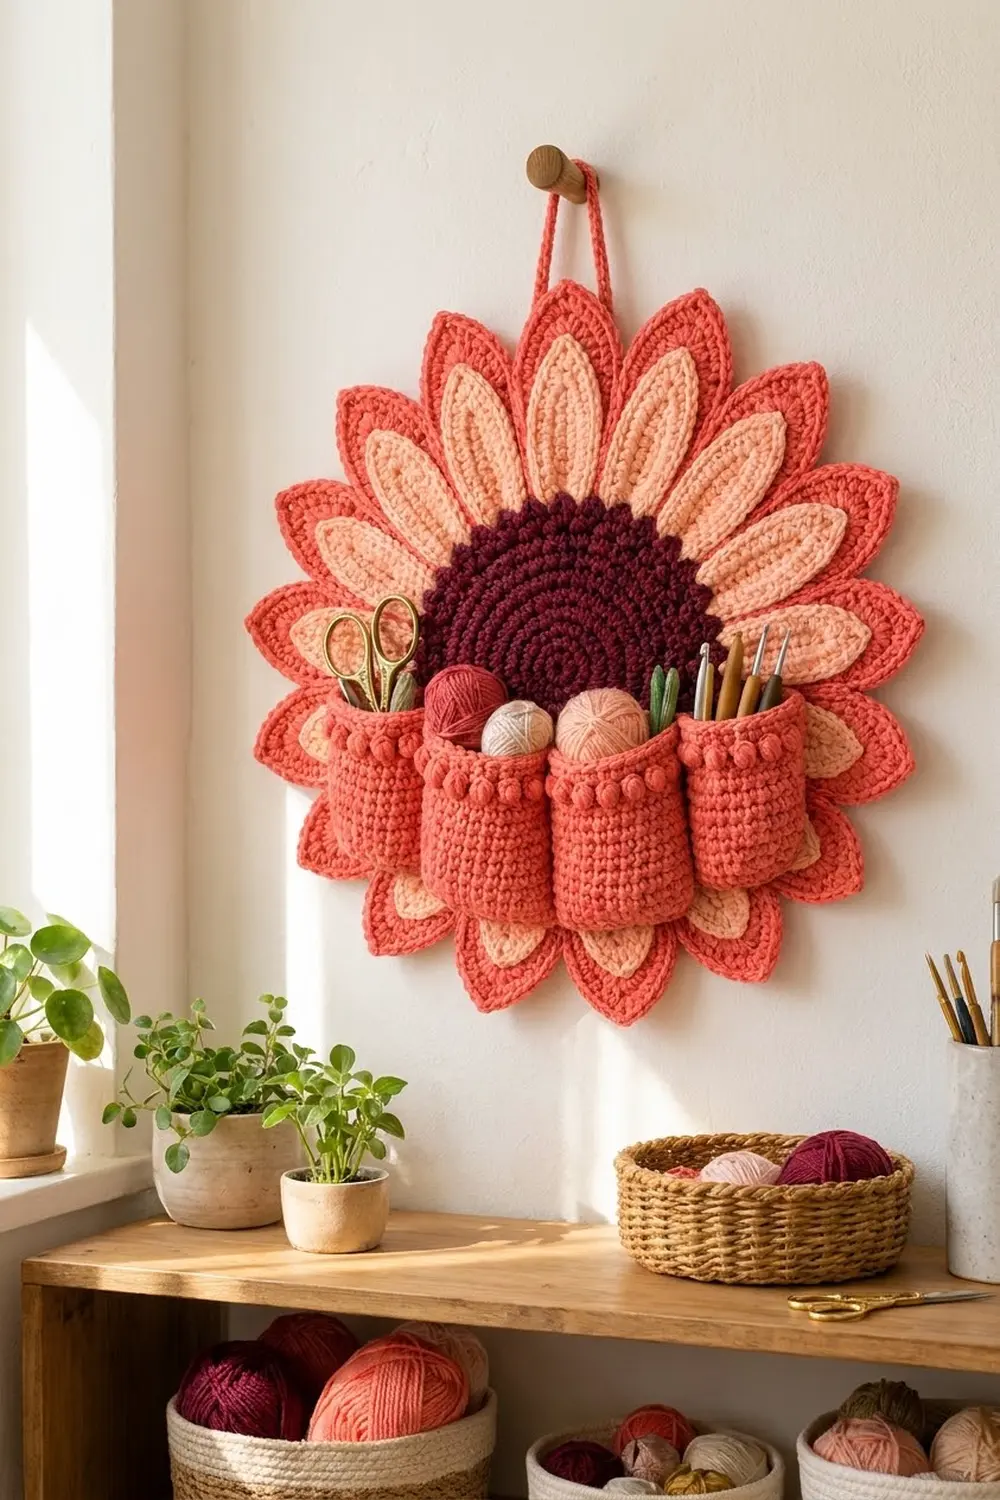
The Coral Bloom Wall Organizer is a large crochet flower that hangs on the wall and keeps your small tools close by. A deep burgundy center sits inside two rings of pointed petals. Each petal has a soft peach middle and a coral outline. Four coral pockets run across the lower half of the flower, and a row of small popcorns trims each pocket rim.
The pattern uses three colors: burgundy, coral and peach. The look is warm, a little retro, and useful. The pockets hold scissors, a few hooks, a tape measure or mini yarn balls.
This pattern uses US crochet terms. The finished organizer measures about 14.25 in (36.2 cm) across from petal tip to petal tip, not counting the hanging loop.
The construction is simple and made in parts. You crochet a flat center circle in single crochet, 32 two-color petals, four pockets with oval bases, and a hanging strap. Then you sew the petals behind the center in two offset rings. A burgundy rim border finishes the center edge, and the pockets are sewn on in a row across the front.
Finished Size and Construction
- Finished size: about 14.25 in (36.2 cm) across
- Skill level: Easy-intermediate
- Terminology: US crochet terms
- Yarn weight: Worsted weight (#4), cotton or cotton blend
- Hook: 4.0 mm (US G-6)
- Number of pieces: 38 (1 center, 16 front petals, 16 back petals, 4 pockets, 1 strap)
- Layout: center circle, then 16 front petals and 16 back petals in alternating positions, then 4 pockets in a single row
- Piece sizes: front petal 3.75 x 1.75 in (9.5 x 4.4 cm); back petal 4.25 x 2.25 in (10.8 x 5.7 cm); pocket 3 in (7.6 cm) wide x 3.25 in (8.3 cm) tall
- Center before border: 7.25 in (18.4 cm) across
- Border depth: about 0.25 in (0.6 cm), a raised lip around the center
Materials
Choose a smooth worsted-weight cotton or cotton blend. Cotton keeps the petal points crisp and the pockets upright. The amounts below assume about 200 m per 100 g. Check your label and adjust if needed.
- Burgundy: 30 g / 60 m (center circle and rim border)
- Peach: 40 g / 80 m (all petal middles)
- Coral: 80 g / 160 m (petal outlines, pockets, strap and sewing)
These amounts include a margin of about 20 percent for gauge differences and sewing tails.
Tools:
- 4.0 mm (US G-6) crochet hook
- Tapestry needle
- Stitch markers
- Scissors
- Rustproof pins and a foam blocking mat
- Spray bottle
- Optional: a 7 in (17.8 cm) circle of stiff felt for the back
Abbreviations (US Terms)
- ch – chain
- sl st – slip stitch
- sc – single crochet
- hdc – half double crochet
- dc – double crochet
- inc – 2 sc in the same stitch
- MR – magic ring
- BLO / FLO – back loop only / front loop only
- st(s) – stitch(es)
- sp – space
Special stitch – Popcorn (pc): Work 4 dc in the same stitch. Take the hook out of the loop and insert it from front to back into the top of the first dc. Pick up the dropped loop and pull it through. Ch 1 to close. The ch 1 does not count as a stitch. The popcorn bulges toward you, so it ends up on the outside of the pocket.
Gauge and Checkpoints
Gauge: 16 sc and 18 rounds = 4 in (10.2 cm) in single crochet.
Make the center circle first and use it as your gauge swatch. Every other measurement depends on it.
- After Rnd 8 (48 sts): 3.5 in (8.9 cm) across
- After Rnd 16 (96 sts): 7 in (17.8 cm) across
- After Rnd 17: 7.25 in (18.4 cm) across
If your circle is too big, go down 0.5 mm. If it is too small, go up 0.5 mm. If the circle ruffles, your stitches are tighter than the increase rate expects, so go up one hook size. If it cups, go down one size.
Next, make one front petal and check it. It should be 3.75 in (9.5 cm) long and 1.75 in (4.4 cm) wide.
Center Circle
With burgundy, work in continuous rounds. Place a marker in the first stitch of each round and move it up as you go. Stagger the increases so the circle stays round instead of turning into a hexagon. To do this, start some rounds with a few sc before the first inc.
- Rnd 1: 6 sc in MR. (6)
- Rnd 2: inc in each st around. (12)
- Rnd 3: (sc, inc) x 6. (18)
- Rnd 4: (sc in next 2, inc) x 6. (24)
- Rnd 5: (sc in next 3, inc) x 6. (30)
- Rnd 6: (sc in next 4, inc) x 6. (36)
- Rnd 7: (sc in next 5, inc) x 6. (42)
- Rnd 8: (sc in next 6, inc) x 6. (48)
Checkpoint: 3.5 in (8.9 cm) across.
- Rnds 9–16: keep going the same way, with one more sc between increases each round. Rnd 9 is (sc in next 7, inc) x 6 for 54 sts. Rnd 16 is (sc in next 14, inc) x 6. The round totals are 54, 60, 66, 72, 78, 84, 90 and 96.
Checkpoint: 96 sts, 7 in (17.8 cm) across.
- Rnd 17: sc in BLO of each st around. (96)
Sl st to the next st and fasten off with a 12 in (30.5 cm) tail. Rnd 17 makes a flat seam allowance on the back for sewing the petals. The unused front loops of Rnd 16 stay free for the border.
Front Petals (make 16)
Rnd 1 (peach): Ch 14. Sc in 2nd ch from hook, hdc in next 2 ch, dc in next 7 ch, hdc in next 2 ch, 3 sc in last ch. Rotate the piece and work along the other side of the foundation chain: hdc in next 2 ch, dc in next 7 ch, hdc in next 2 ch, sc in the same ch as the first sc. Sl st to the first sc. (27 sts: 11 on each side, 3 sc at the base, and 1 sc on each side of the tip.)
Fasten off peach.
The change from sc to hdc to dc and back gives the leaf shape: wide in the middle and narrow at both ends.
Rnd 2 (coral outline): Join coral with sc in the first sc of the 3-sc base group. Work another sc in the same st, then 2 sc in each of the next 2 sc (6 sc around the base). Sc in the next 11 sts, then sc in the next sc. Ch 2, then sc in the first sc of Rnd 1 (this makes the point). Sc in the next 11 sts. Sl st to the first sc. (30 sc and 1 ch-2 sp.)
Each long side has 12 sc (11 plus the tip sc), and the base has 6 sc: 12 + 12 + 6 = 30. Fasten off and leave a 10 in (25.4 cm) tail for sewing.
Checkpoint: 3.75 x 1.75 in (9.5 x 4.4 cm).
Back Petals (make 16)
Work Rnds 1–2 exactly as for the front petal, but don’t fasten off the coral.
Rnd 3 (coral): Sc in each sc up to the ch-2 sp, work (sc, ch 2, sc) in the ch-2 sp, then sc in each remaining sc. Sl st to the first sc. (32 sc and 1 ch-2 sp.)
That is 30 sc worked 1 per existing stitch, plus 2 sc added at the tip. Fasten off with a 10 in (25.4 cm) tail.
Checkpoint: 4.25 x 2.25 in (10.8 x 5.7 cm). The wider coral outline makes the back ring look darker where it shows between the front petals.
Pockets (make 4)
With coral, work in continuous rounds.
- Rnd 1: Ch 9. Sc in 2nd ch from hook, sc in next 6 ch, 3 sc in last ch. Rotate and work along the other side: sc in next 6 ch, 2 sc in the first ch. (18)
- Rnd 2: 2 sc in first st, sc in next 6, 2 sc in each of next 3, sc in next 6, 2 sc in each of next 2. (24)
The oval base measures about 3 x 1 in (7.6 x 2.5 cm).
- Rnd 3: sc in BLO of each st around. (24) This turns the corner so the walls go straight up.
- Rnds 4–13: sc in each st around. (24)
- Rnd 14: (sc in next 2, pc in next st) x 8. (24: 16 sc and 8 pc)
- Rnds 15–16: sc in each st around. (24)
Sl st to the next st and fasten off with a 16 in (40.6 cm) tail.
Checkpoint: the pocket is 3.25 in (8.3 cm) tall and 3 in (7.6 cm) across when flattened. The popcorn row sits two rounds below the rim.
Hanging Strap
With coral, ch 41. Sc in 2nd ch from hook and in each ch across. (40) Fasten off with a 10 in (25.4 cm) tail. The strap is 10 in (25.4 cm) long and folds in half to make a 5 in (12.7 cm) loop.
Make All Pieces
- Burgundy: 1 center circle
- Peach and coral: 16 front petals and 16 back petals
- Coral: 4 pockets and 1 strap
Layout, front view (F = front petal, B = back petal, P = pocket):
        B F B F B F B
      F               F
     B    [ CENTER ]   B
      F               F
       [P] [P] [P] [P]
        B F B F B F B
The 16 front petals are spaced evenly around the center, and one back petal sits behind each gap. Front and back petals alternate all the way around, for 32 points in total.
Joining
Before you start joining, work the Border (next section) on the center circle. It goes into the free loops of Rnd 16 and is easiest while the circle is still loose. Then come back here.
Stitch logic: Rnd 17 has 96 sts, and 96 ÷ 16 = 6 sts per petal section. Mark every 6th stitch of Rnd 17 with a stitch marker. You should have 16 markers.
Stage A – back petals. Lay the center face down. Center each back petal on a marker so it sits exactly on the line between two sections. Tuck the petal base 0.75 in (1.9 cm) in from the edge of the circle. Whipstitch the 6 base sc to the back of the center. Catch only the back layer so the stitches don’t show on the front.
Stage B – front petals. Center each front petal on stitches 3 and 4 of a section, halfway between two back petals. Tuck the base 0.5 in (1.3 cm) behind the edge. Whipstitch the base across 4 sts of Rnd 17. Then tack each side of the petal to the back petals beside it with two small stitches.
Tension: Pull each sewing stitch just snug. Tight stitches make the center pucker, and loose ones let the petals flop forward.
Checkpoint: the flower measures 14.25 in (36.2 cm) across the back petal tips and 13.75 in (34.9 cm) across the front petal tips.
Stage C – pockets. Line up the four pockets side by side with the bases down. Where the sides of two pockets touch (Rnds 8–13), whipstitch them together through 6 sts. The row should measure 12 in (30.5 cm) wide. Center the row from side to side, with the pocket rims 0.5 in (1.3 cm) below the middle of the flower. Sew the back wall of each pocket to the flower along its base and up both sides. Leave the front free so it can bulge.
Strap. Fold the strap in half and sew both ends to the back of the center at the top, across Rnd 17 and the bases of the top petals. If you like, glue or sew the felt circle over the back to hide the seams.
Border
Border gauge: the rim puts 1 sc into each of the 96 free front loops of Rnd 16. That is 96 sts around a circle about 22 in (55.9 cm) long, or about 4.4 sts per inch. This is a little firmer than the 4 sts per inch of the main fabric, which helps the lip stand up.
Border Rnd 1: With the center face up, join burgundy in any free front loop of Rnd 16. Sc in each free front loop around. Sl st to the first sc. (96 sc: 6 per petal section x 16 sections)
Border Rnd 2: Sl st in each sc around, keeping the slip stitches loose. (96 sl st) Fasten off and weave in the end.
Why the math works: Rnd 16 already has 96 sts, and the border adds none. Working 1 stitch into each stitch keeps the rim flat instead of ruffled. Because 96 divides evenly by 16, each petal section gets exactly 6 border stitches, and your petal markers stay lined up with the rim.
Final Blocking
- Weave in all remaining ends on the back.
- Lay the organizer face up on a blocking mat.
- Mist it with water until it is damp but not soaked.
- Pin each petal tip outward. Check the 14.25 in (36.2 cm) diameter with a tape measure.
- Pinch each coral ch-2 tip into a sharp point.
- Fill each pocket with a rolled paper towel so it dries round.
- Let it dry completely, for at least 24 hours, before hanging.
Final Quality-Control Checklist
- The center measures 7.25 in (18.4 cm) and lies flat
- The border rim has 96 sts and sits evenly around the center
- There are 16 front and 16 back petals, all with sharp coral points
- Front and back petals alternate evenly, with no gaps and no doubled petals
- There are four pockets of 24 sts each, each with 8 popcorns facing out
- The pocket row is 12 in (30.5 cm) wide and centered
- No sewing stitches show from the front
- The strap is centered at the top and the organizer hangs level
Troubleshooting
- Center ruffles: your stitches are too tight for the increase rate. Go up one hook size or stagger the increases more.
- Center cups: go down one hook size, or check that you didn’t skip an increase.
- Petals curl: block them damp and pinned flat. Check that the outline has exactly 30 sc.
- Petal points are blunt: make sure you didn’t skip the ch 2 at the tip.
- Popcorns pop inward: you are working the pocket inside out. Turn it so the outside faces you.
- Pockets sag forward: add more sewing stitches along the pocket sides, up to Rnd 14.
- Organizer tilts: move the strap so it is centered over the top front petal.
Care
Spot clean with mild soap and cool water. If you need to, hand wash it, press the water out in a towel, and dry it flat with the petals pinned again.
Final Notes
The measurements build on each other in a short chain. Gauge makes the center 7 in (17.8 cm) after Rnd 16 and 7.25 in (18.4 cm) after Rnd 17. The 96 rim stitches split into 16 sections of 6, which place the 32 petals. The petals bring the flower to 14.25 in (36.2 cm) across. The four 3 in (7.6 cm) pockets make a 12 in (30.5 cm) row across the front. Check each step and the finished piece will come out right.
Happy crocheting!