

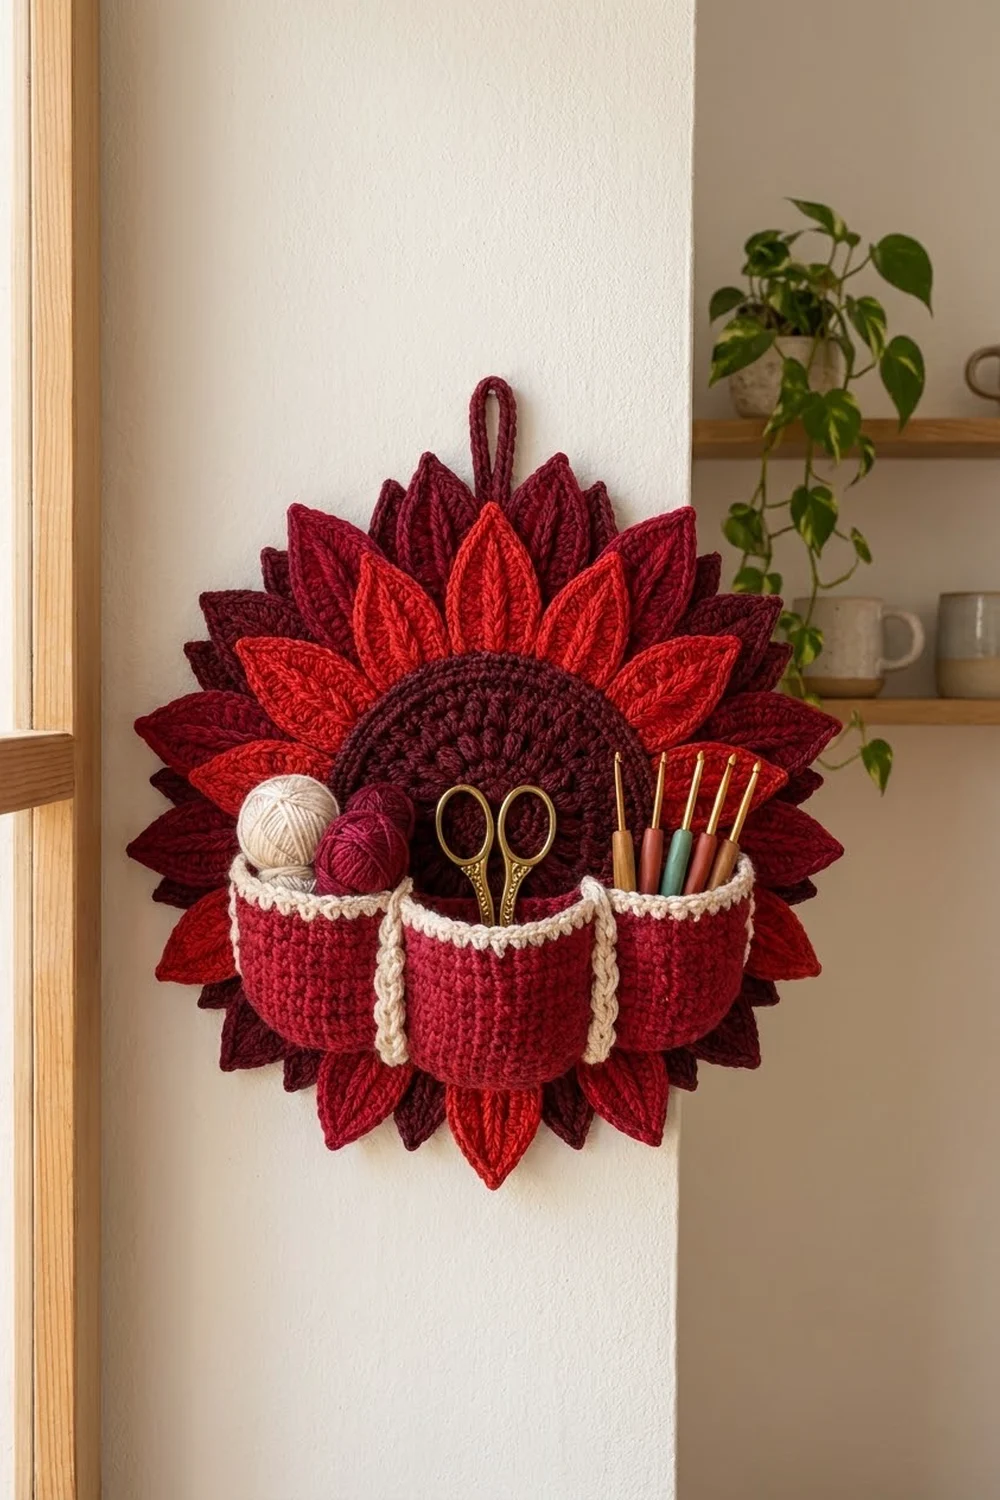
The Ember Bloom is a sunflower that hangs on the wall and holds your small tools. A dark burgundy center sits on two layered rings of pointed petals, and a cranberry pocket band across the front gives you three pockets for scissors, hooks and mini skeins.
The colors are deep and warm: dark burgundy, cranberry, bright scarlet and cream. The cream rim and braided dividers frame the pockets and match the woven-looking spine on each petal. It looks cozy and handmade, and it is useful in a craft corner.
This pattern uses US crochet terms. The finished flower is 14 in (35.6 cm) across from tip to tip, or 14.5 in (36.8 cm) tall including the hanging loop. The pocket band is 11.5 in (29.2 cm) wide before mounting, and its base is sewn down to 8.5 in (21.6 cm).
Here is how it goes together. You crochet a ribbed front disk, a plain backing disk, 12 outer petals, 12 inner petals, a hanging loop and a single pocket panel. You then sandwich the petals between the two disks, add the cream border to the pocket panel, and sew the panel to the front with ease so the three pockets puff out.
Finished Size and Construction
- Finished size: 14 in (35.6 cm) across the petal tips; 14.5 in (36.8 cm) tall with the loop
- Skill level: Intermediate
- Terminology: US
- Yarn weight: Worsted (#4)
- Hook: 4.5 mm (US 7)
- Number of pieces: 28 (front disk, backing disk, 12 outer petals, 12 inner petals, pocket panel, hanging loop)
- Layout: Petals arranged around the disk like a clock face; pocket band across the lower half
- Piece sizes: front disk 7 in (17.8 cm); backing disk 6.5 in (16.5 cm); outer petal 4.5 x 2 in (11.4 x 5.1 cm); inner petal 3.5 x 1.5 in (8.9 x 3.8 cm)
- Pocket panel before border: 10.5 x 4 in (26.7 x 10.2 cm)
- Border depth: 0.5 in (1.3 cm), on the top edge and both short ends
Materials
Choose a smooth worsted-weight yarn in acrylic or a cotton blend, about 190 m per 100 g. A smooth yarn shows the ribs and petal spines clearly, and a firm fiber helps the pockets hold their shape.
- Color A, dark burgundy (disks, loop): 50 g, about 95 m
- Color B, cranberry (outer petals, pocket panel): 100 g, about 190 m
- Color C, bright scarlet (inner petals): 50 g, about 95 m
- Color D, cream (pocket border, dividers): 15 g, about 30 m
All quantities include a safety margin of about 10 percent.
Tools: 4.5 mm (US 7) hook, tapestry needle, 12 locking stitch markers, sewing pins, measuring tape, scissors, blocking mat, and a spray bottle.
Abbreviations (US Terms)
- ch: chain
- sl st: slip stitch
- sc: single crochet
- hdc: half double crochet
- dc: double crochet
- tr: treble crochet
- FPdc: front post double crochet
- st(s): stitch(es)
- sp: space
- BLO: back loop only
Special stitches
- Reverse sc (crab stitch): Work sc from left to right (right-handed). Insert the hook into the next stitch to the right, yarn over, pull up a loop, then yarn over and draw through both loops.
- Surface slip stitch: Hold the yarn behind the work. Insert the hook from front to back through a gap, pull up a loop, then move to the next gap and pull the new loop through the loop on the hook.
Gauge and Checkpoints
- Gauge: 16 sc and 18 rows = 4 in (10.2 cm)
- Dc rounds: each round adds 1 in (2.5 cm) to the diameter
Make the front disk and one inner petal before anything else, because they test both kinds of gauge.
Front disk checkpoints:
| After round | Diameter |
|---|---|
| Rnd 2 | 2.5 in (6.4 cm) |
| Rnd 4 | 4.5 in (11.4 cm) |
| Rnd 6 | 6.5 in (16.5 cm) |
| Rnd 7 | 7 in (17.8 cm) |
Inner petal checkpoint: 3.5 in (8.9 cm) long.
Pocket panel checkpoint: after Row 1 it should measure 10.5 in (26.7 cm) wide.
- Pieces too big: go down to a 4 mm (US G-6) hook.
- Pieces too small: go up to a 5 mm (US H-8) hook.
- Disk curls into a bowl: your dc is too tight, so go up a hook size for the disks only.
- Disk ruffles: go down a hook size.
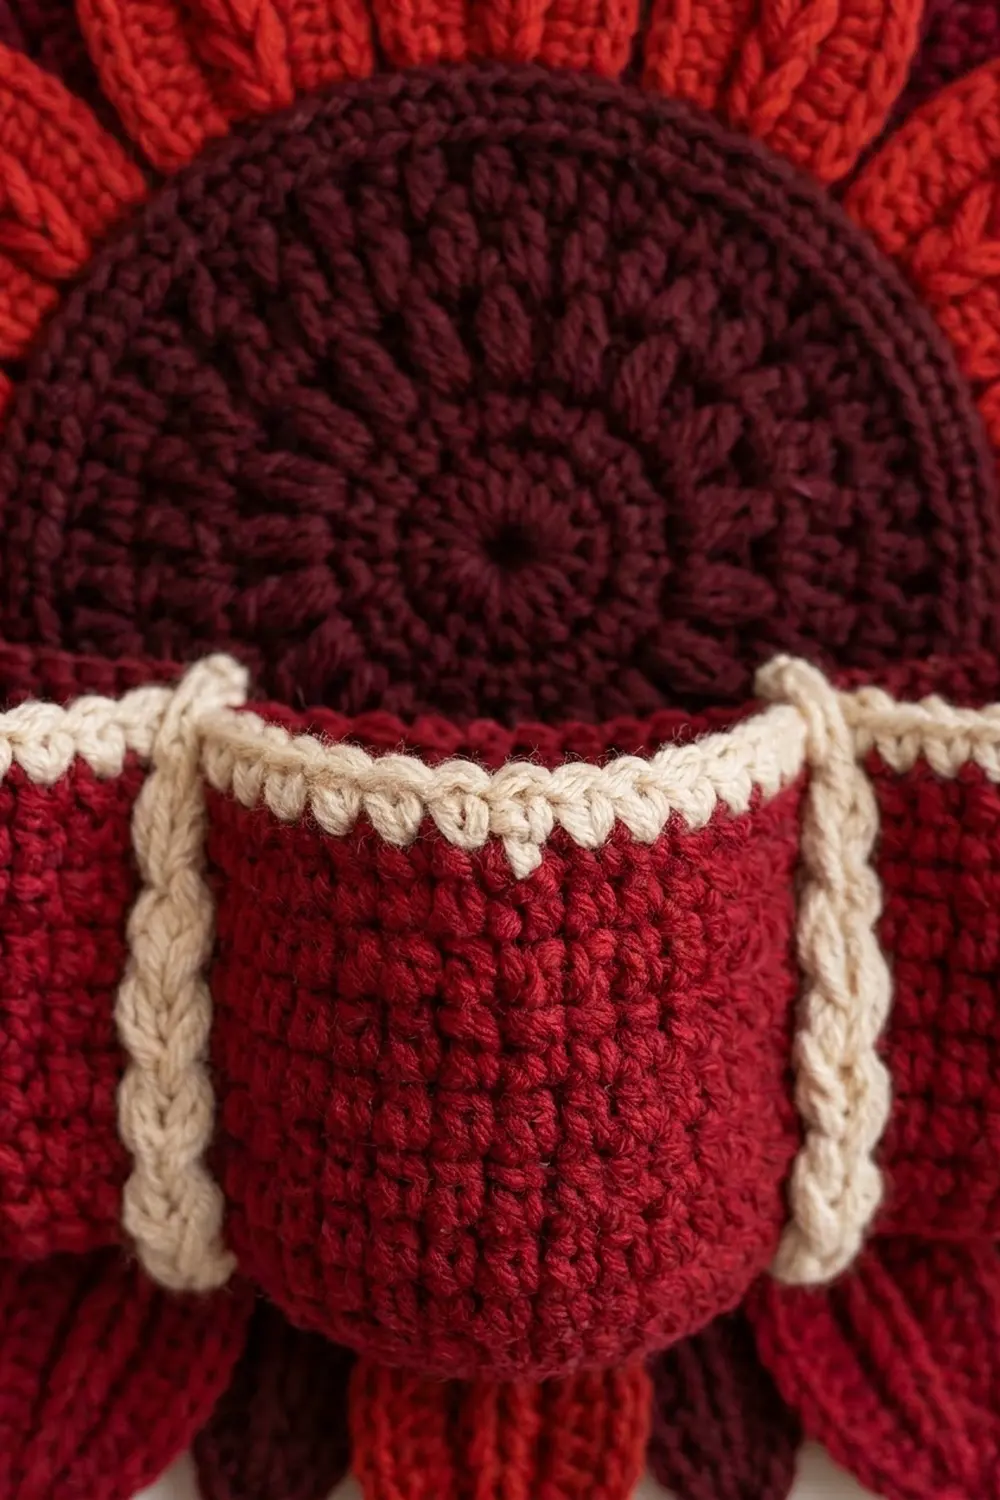
Front Disk (Color A)
- Rnd 1: Make a magic ring. Ch 3 (counts as dc), then work 11 dc in the ring. Sl st to the top of the ch-3. (12 sts)
- Rnd 2: Ch 3, dc in the same st, then 2 dc in each st around. Sl st to join. (24 sts)
- Rnd 3: Ch 3 (counts as FPdc here and in later rounds), 2 dc in the next st. Then repeat (FPdc around the next st, 2 dc in the next st) 11 times. Sl st to join. (36 sts)
- Rnd 4: Ch 3, dc in the next st, 2 dc in the next st. Then repeat (FPdc around the FPdc, dc in the next st, 2 dc in the next st) 11 times. Join. (48 sts)
- Rnd 5: Ch 3, dc in each of the next 2 sts, 2 dc in the next st. Then repeat (FPdc around the FPdc, dc in each of the next 2 sts, 2 dc in the next st) 11 times. Join. (60 sts)
- Rnd 6: Ch 3, dc in each of the next 3 sts, 2 dc in the next st. Then repeat (FPdc around the FPdc, dc in each of the next 3 sts, 2 dc in the next st) 11 times. Join. (72 sts)
- Rnd 7 (trim): Ch 1, then sc in each st around. Join. Count: 72 worked 1 per stitch + 0 added = 72 sts. Fasten off.
The FPdc stitches stack into 12 raised ribs that radiate from the center.
Backing Disk (Color A)
- Rnd 1: Make a magic ring. Ch 3, 11 dc in the ring. Join. (12 sts)
- Rnd 2: Ch 3, dc in the same st, then 2 dc in each st around. Join. (24 sts)
- Rnds 3–6: Ch 3, then increase evenly so each round adds 12 sts: dc in each st, working 2 dc in every 2nd, 3rd, 4th and then 5th st on Rnds 3, 4, 5 and 6. (36, 48, 60, 72 sts)
Fasten off and leave a 40 in (101.6 cm) tail. The disk should measure 6.5 in (16.5 cm).
Outer Petals (Color B, make 12)
- Ch 16.
- Rnd 1: Starting in the 2nd ch from the hook, work sc, hdc, dc in each of the next 3 ch, tr in each of the next 6 ch, dc in each of the next 2 ch, hdc, then (sc, ch 2, sc) in the last ch for the tip. Rotate and work along the other side of the foundation chain: hdc, dc in each of the next 2 ch, tr in each of the next 6 ch, dc in each of the next 3 ch, hdc, sc in the base ch. Sl st to the first sc. Count: 15 sts on each side, including the tip sc. (30 sts + ch-2 sp)
- Rnd 2: Ch 1, sc in each of the next 15 sts, (sc, ch 2, sc) in the ch-2 sp, sc in each of the next 15 sts. Join. (32 sc + ch-2 sp)
- Spine: Without fastening off, work a surface slip stitch line along the center foundation chain from the base to the tip. This raised line looks braided.
- Fasten off and leave a 12 in (30.5 cm) tail.
Each outer petal measures 4.5 x 2 in (11.4 x 5.1 cm).
Inner Petals (Color C, make 12)
- Ch 12.
- Rnd 1: Starting in the 2nd ch from the hook, work sc, hdc, dc in each of the next 7 ch, hdc, then (sc, ch 2, sc) in the last ch. Along the other side: hdc, dc in each of the next 7 ch, hdc, sc in the base ch. Join. Count: 11 sts on each side. (22 sts + ch-2 sp)
- Rnd 2: Ch 1, sc in each of the next 11 sts, (sc, ch 2, sc) in the sp, sc in each of the next 11 sts. Join. (24 sc + ch-2 sp)
- Spine: Work a surface slip stitch line from base to tip, the same as for the outer petals.
- Fasten off and leave a 12 in (30.5 cm) tail.
Each inner petal measures 3.5 x 1.5 in (8.9 x 3.8 cm).
Hanging Loop (Color A)
- Ch 45.
- Sc in the 2nd ch from the hook and in each ch across. (44 sc, 11 in / 27.9 cm)
- Fasten off and leave a long tail.
Pocket Panel (Color B)
- Ch 43.
- Row 1: Sc in the 2nd ch from the hook and in each ch across. Turn. (42 sts)
- Rows 2–18: Ch 1, sc in each st across. Turn. (42 sts)
- Fasten off.
The panel measures 10.5 x 4 in (26.7 x 10.2 cm). Mark the positions for the pockets and dividers:
| Stitches | Purpose | Width |
|---|---|---|
| 1–13 | Left pocket | 3.25 in (8.3 cm) |
| 14 | Divider | |
| 15–28 | Center pocket | 3.5 in (8.9 cm) |
| 29 | Divider | |
| 30–42 | Right pocket | 3.25 in (8.3 cm) |
Check: 13 + 1 + 14 + 1 + 13 = 42.
Make All Pieces
| Color | Pieces |
|---|---|
| A | 1 front disk, 1 backing disk, 1 hanging loop |
| B | 12 outer petals, 1 pocket panel |
| C | 12 inner petals |
| D | Pocket border and dividers only |
Placement map (based on the 72 stitches of front disk Rnd 7, with st 1 at 12 o’clock):
Outer petal (B) centers: sts 1, 7, 13, 19, 25, 31, 37, 43, 49, 55, 61, 67
Inner petal (C) centers: sts 4, 10, 16, 22, 28, 34, 40, 46, 52, 58, 64, 70
Pattern around the disk: B . C . B . C . B ... (12 of each, alternating)
Joining
- Mark the disk. Place a marker every 6 sts on Rnd 7 of the front disk, starting at st 1. That gives you 12 markers.
- Sew the outer petals. Lay the front disk face down. Center the base of an outer petal at each marker, overlapping the back of the disk by 1 in (2.5 cm). Whipstitch each base to the back bumps of Rnds 6–7. The petals project 3.5 in (8.9 cm) past the disk edge.
- Sew the inner petals. Center an inner petal at sts 4, 10, 16 and so on, overlapping by 0.75 in (1.9 cm). Lay them over the outer petals so the scarlet sits in front of the cranberry. They project 2.75 in (7.0 cm), so the inner ring measures 12.5 in (31.8 cm) across.
- Attach the loop. Fold the loop in half and pin both ends to the top of the backing disk’s wrong side, overlapping 1.25 in (3.2 cm). Sew them securely. The loop rises 4.25 in (10.8 cm) above the backing edge, which is 0.5 in (1.3 cm) above the top outer petal tip.
- Close the sandwich. Place the backing disk wrong side down over all the petal bases. Whipstitch its Rnd 6 edge through the petal layers into the back bumps of Rnd 5 of the front disk, using one stitch per backing stitch (72 total).
Tension: Keep the stitches snug but not puckered. If the front starts to cup, loosen the stitches.
Checkpoint: The flower measures 14 in (35.6 cm) from tip to tip.
Border (Pocket Panel, Color D)
Border gauge: 4 sc per 1 in (2.5 cm) along both the stitches and the row ends.
- Row 1: With the right side facing, join D at the bottom of the right short end.
- Right end: work (sc in each of the next 8 row ends, skip 1) twice. (16 sts)
- Top: 3 sc in the corner st, sc in each of the next 40 sts, 3 sc in the last corner st. (46 sts, corners included)
- Left end: work (sc in each of the next 8 row ends, skip 1) twice. (16 sts)
- Total: 16 + 46 + 16 = 78 sts. Turn.
- Row 2: Do not turn. Ch 1, then work reverse sc in each st back across. (78 sts) Fasten off.
Why the math works:
- Ends: 18 row ends equal 4 in (10.2 cm), and that height needs 16 sc at border gauge. Skipping 2 row ends removes the extra 2.
- Top: The 42 top sts become 40 worked singly plus 2 corners worked as 3 each, which gives 46 sts.
- Result: The panel now measures 11.5 x 4.5 in (29.2 x 11.4 cm).
Dividers: With D, work a surface slip stitch line up the gap on each side of st 14, from the bottom row to the border. Repeat on each side of st 29. Each pair of lines makes one raised braid.
Mounting:
- Center the panel on the front of the flower with its top rim 0.5 in (1.3 cm) below the center of the disk.
- Pin the short ends flat.
- Sew the bottom edge along a straight line 8.5 in (21.6 cm) long.
- Ease each pocket by 1 in (2.5 cm): the side pockets sit over 2.25 in (5.7 cm) and the center pocket over 2.5 in (6.4 cm).
- Sew straight up each divider and up both ends.
Base check: 1 in + 2.25 + 0.25 + 2.5 + 0.25 + 2.25 = 8.5 in.
Final Blocking
- Pin the flower face up on a mat, as a 14 in (35.6 cm) circle.
- Pin each petal tip into a sharp point.
- Mist the piece until damp. Do not soak it.
- Fill the pockets with rolled towels so they dry rounded.
- Leave it to dry completely, about 24 hours.
- Unpin it and check that the loop hangs centered.
Final Quality-Control Checklist
- [ ] The front disk measures 7 in (17.8 cm) and has 12 straight ribs.
- [ ] There are 12 outer petals and 12 inner petals, evenly alternating.
- [ ] Every petal has a visible spine running from base to tip.
- [ ] No petal bases show from the front.
- [ ] The pocket border has 78 sts with crisp corners.
- [ ] The dividers are straight and sewn down firmly.
- [ ] The flower measures 14 in (35.6 cm) across.
- [ ] All ends are woven in securely.
Troubleshooting
- The disk cups: Loosen your FPdc or go up a hook size. Recheck the counts per round.
- The disk ruffles: You probably added an extra increase. Count each round against 12, 24, 36, 48, 60 and 72.
- The petal tip is blunt: Tighten the ch-2 at the tip and pin it to a point when blocking.
- The petals twist: Block them flat before sewing.
- The pockets sag: Shorten the stitched base line by 0.25 in (0.6 cm) on each pocket and keep the bottom seam firm.
- The border flares at the ends: Skip one more row end on each side.
- The flower tilts when hung: Resew the loop so it sits centered over st 1.
Care
Spot clean with mild soap and cool water. Lay flat to dry with the pockets stuffed so they keep their shape.
Final Notes
Each stage depends on the one before it:
- The gauge of 16 sc = 4 in (10.2 cm) and 1 in (2.5 cm) per dc round sets the 7 in (17.8 cm) disk.
- The disk carries 12 outer petals of 4.5 in (11.4 cm) and 12 inner petals of 3.5 in (8.9 cm), which together give a 14 in (35.6 cm) bloom.
- The 42-stitch pocket panel, at 10.5 in (26.7 cm), grows to 11.5 in (29.2 cm) with its 78-stitch border.
- Sewn down with 1 in (2.5 cm) of ease per pocket, the panel sits on an 8.5 in (21.6 cm) base.
Check each stage before moving on, and the organizer will hang flat and hold its tools neatly.
Happy crocheting!