

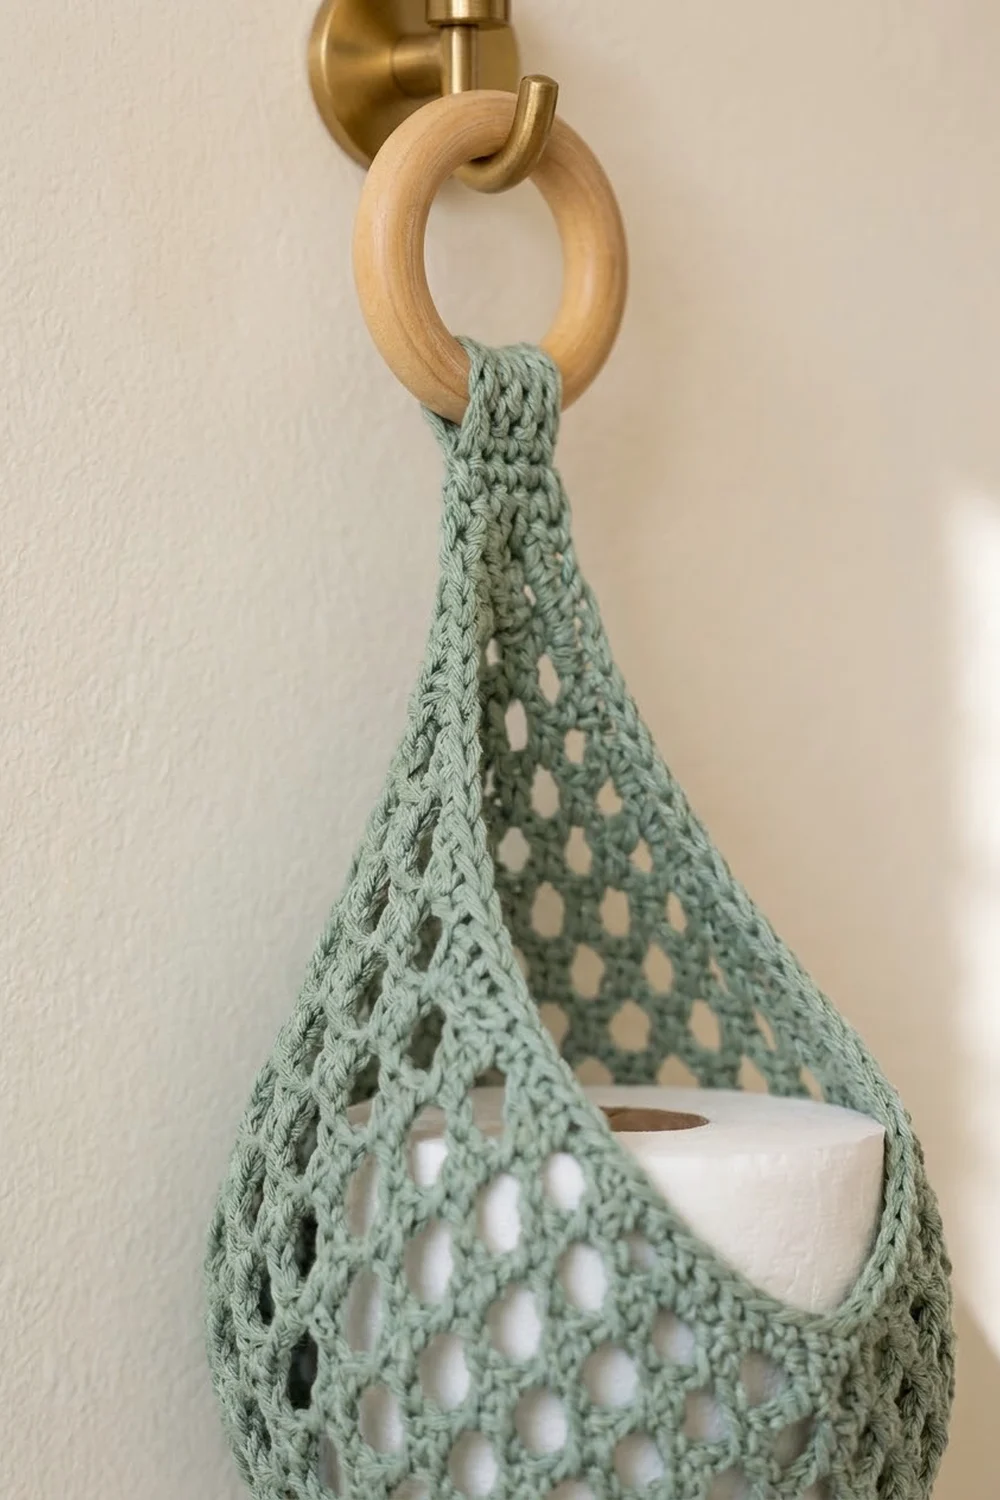
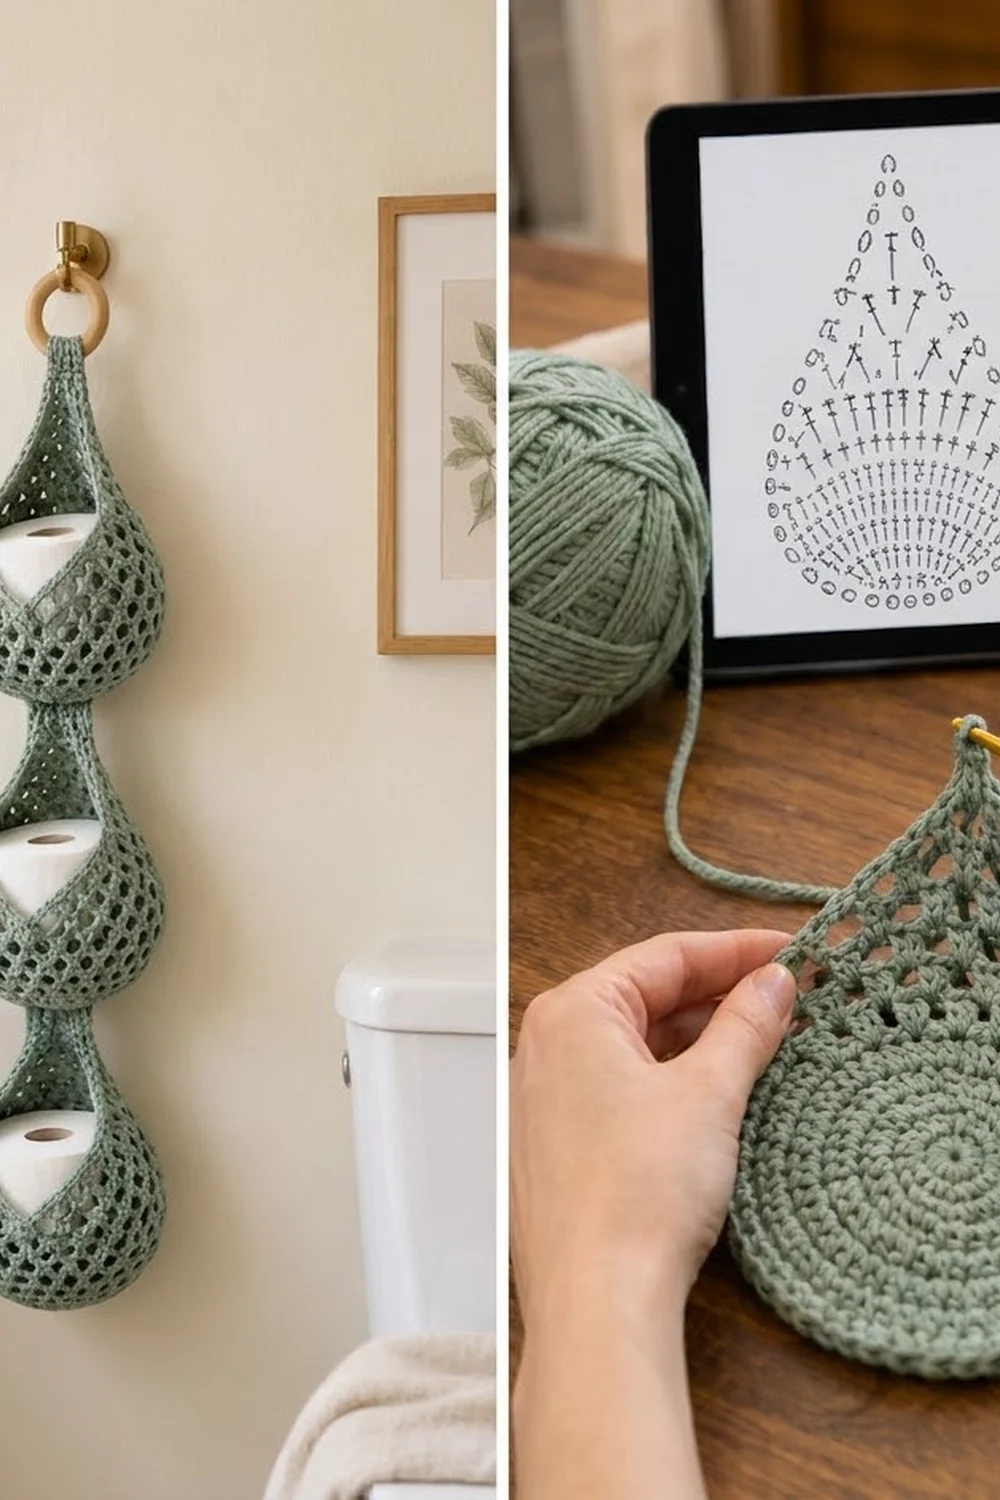
This hanging holder stores three standard toilet rolls in a column of teardrop-shaped pockets. Each pocket has a solid, rounded base, an open honeycomb mesh body, and a scooped front opening. The back tapers up into a narrow strap. The straps link the pockets together, and the top strap loops around a wooden ring for hanging.
The sample uses one color, a soft sage-green worsted-weight cotton. The look is calm and natural, a good fit for a spa-style or farmhouse bathroom. Cotton holds the teardrop shape well and stands up to a humid room.
The pattern uses US crochet terms. Each pocket measures about 9 in (22.9 cm) tall and 7.5 in (19.1 cm) wide when flattened. The finished holder hangs about 32 in (81.3 cm) long, not counting the ring.
Here’s how it’s built:
1. Crochet the solid base in the round.
2. Work three rounds of offset mesh.
3. Turn and work rows over the back of the pocket. This shapes the teardrop point and the front opening.
4. Work a short single-crochet strap.
5. Add a two-row edging to firm up the opening.
6. Sew the three pockets into a column and attach the ring.
Finished Size and Construction
- Finished size: about 32 in (81.3 cm) long, not counting the ring
- Skill level: Easy to Intermediate
- Terminology: US crochet terms
- Yarn weight: Worsted (#4) cotton
- Hook: 5.0 mm (US H-8)
- Number of pieces: 3 identical pockets
- Layout: 1 column x 3 pockets, joined top to bottom with straps
- Piece size: about 7.5 in (19.1 cm) wide x 9 in (22.9 cm) tall, flattened
- Size before border: the same. The edging only trims the opening and doesn’t change the outer measurements.
- Border depth: 2 rows of sc, about 0.5 in (1.3 cm)
Materials
Choose a smooth worsted-weight cotton or cotton blend. Pure cotton gives the firmest pocket and holds the teardrop point best. Acrylic works but sags more under the weight of a roll.
- Sage Green: 150 g, about 255 m (280 yd)
These quantities include a margin of roughly 40 percent. One pocket uses about 30 m (33 yd). The longer top strap and the sewing tails use a little more.
Tools:
- 5.0 mm (US H-8) crochet hook
- 1 wooden ring, 2.75 in (7.0 cm) across
- Wall hook or knob for hanging
- 4 stitch markers
- Tapestry needle
- Scissors
- Tape measure
- Rust-proof pins and a spray bottle
- 1 standard toilet roll for test fitting
Abbreviations (US Terms)
- ch – chain
- sl st – slip stitch
- sc – single crochet
- dc – double crochet
- inc – 2 sc in the same stitch
- sc2tog – single crochet 2 together
- sk – skip
- sp – space
- st(s) – stitch(es)
- rep – repeat
Special stitch – mesh unit: 1 dc followed by ch 1. In stitch counts, each mesh unit counts as 2 sts (the dc and the ch-1 sp). From Round 14 on, every dc goes into a ch-1 sp of the previous round. This offsets the holes and gives the honeycomb look.
Gauge and Checkpoints
Single crochet gauge: 16 sc and 17 rounds = 4 in (10.2 cm).
Mesh gauge: 16 sts (8 mesh units) and 7 rounds = 4 in (10.2 cm).
Test one pocket base first. The base doubles as your gauge swatch.
Checkpoints:
- After Round 5 (30 sts), the flat circle measures about 2.4 in (6.1 cm) across.
- After Round 10 (60 sts), the flat circle measures about 4.75 in (12.1 cm) across.
- After Round 12, the base has curled into a shallow bowl. The top edge measures about 15 in (38.1 cm) around.
- Rounds 13–15 (the mesh) add about 1.7 in (4.3 cm) of height.
- By the end of Row 8, the back has grown about 4.6 in (11.7 cm) above Round 15.
A standard roll is about 4.5 in (11.4 cm) across, so it’s about 14.1 in (35.8 cm) around. A pocket 15 in (38.1 cm) around gives just enough room.
If your base is too big by more than 0.25 in (0.6 cm) at Checkpoint 2, go down to a 4.5 mm hook. If it’s too small, go up to a 5.5 mm hook. Test again before you continue. A tight pocket won’t take a roll.
Pocket (Make 3)
Base
Work in continuous rounds. Place a marker in the first st of each round and move it up as you go.
Round 1: Make a magic ring and work 6 sc in the ring. Pull tight. (6 sts)
Round 2: Inc in each st around. (12 sts)
Round 3: Sc in next st, inc; rep from * around. (18 sts)
Round 4: Sc in next 2 sts, inc; rep from * around. (24 sts)
Round 5: Sc in next 3 sts, inc; rep from * around. (30 sts)
Round 6: Sc in next 4 sts, inc; rep from * around. (36 sts)
Round 7: Sc in next 5 sts, inc; rep from * around. (42 sts)
Round 8: Sc in next 6 sts, inc; rep from * around. (48 sts)
Round 9: Sc in next 7 sts, inc; rep from * around. (54 sts)
Round 10: Sc in next 8 sts, inc; rep from * around. (60 sts)
Check Checkpoint 2 now.
Rounds 11–12: Sc in each st around. (60 sts each round)
At the end of Round 12, sl st into the next st to smooth the step. These two plain rounds turn the edge upward and form the rounded bottom of the teardrop.
Mesh Body
Now switch to joined rounds.
Round 13 (conversion round): Ch 4 (counts as dc and ch 1), sk next st, dc in next st, ch 1, sk next st; rep from * around. Sl st to the 3rd ch of the beginning ch-4. Count: 30 dc (1 in every other st) + 30 ch-1 sps = 60 sts (30 mesh units).
Round 14: Sl st into the next ch-1 sp, ch 4 (counts as dc and ch 1), dc in next ch-1 sp, ch 1; rep from * around. Sl st to the 3rd ch of the beginning ch-4. (30 mesh units, 60 sts)
Round 15: Rep Round 14. (30 mesh units, 60 sts)
Don’t fasten off. Check Checkpoint 4.
Back Shaping and Front Opening
From here you work in rows over the back two-thirds of the pocket. The front third stays unworked and becomes the bottom of the front opening.
Row 1: Sl st into the next ch-1 sp, ch 3 (counts as dc), ch 1, dc in next ch-1 sp; rep from * 19 times. (20 dc and 19 ch-1 sps, 39 sts)
Row 1 covers 20 ch-1 sps of Round 15. That leaves 10 ch-1 sps and 10 dc (20 sts) unworked at the front.
Row 2 (decrease row): Turn. Sl st in the first dc, then in the next ch-1 sp, the next dc, and the next ch-1 sp. Ch 3 (counts as dc). Ch 1, dc in next ch-1 sp; rep from * across, working the last dc into the last ch-1 sp. Leave the final dc unworked. (18 dc)
How the decrease works: a row with k dc has k – 1 ch-1 sps. You skip the first sp and the final dc, so you work into k – 2 sps, and each row loses 2 dc. Because you turn every row, the skipped sp switches sides each time, so the point stays centered.
Rows 3–8: Rep Row 2.
- Row 3: 16 dc
- Row 4: 14 dc
- Row 5: 12 dc
- Row 6: 10 dc
- Row 7: 8 dc
- Row 8: 6 dc (6 dc and 5 ch-1 sps, 11 sts)
Check Checkpoint 5. The back should now taper to a narrow point.
Strap
Row 9: Ch 1, turn. Sc in each dc across, skipping the ch-1 sps. (6 sc)
Row 10: Ch 1, turn. Sc2tog, sc in next 2 sts, sc2tog. (4 sc)
Rows 11–16: Ch 1, turn. Sc in each st across. (4 sc each row)
The strap is about 1 in (2.5 cm) wide. Rows 9–16 measure about 1.9 in (4.8 cm) long.
For the top pocket only: keep going through Row 28 (4 sc each row). Rows 9–28 measure about 4.7 in (11.9 cm).
Fasten off, leaving a 12 in (30.5 cm) tail for sewing.
Make All Pieces
Make 3 pockets in Sage Green:
- 2 pockets with the short strap (Rows 9–16)
- 1 pocket with the long strap (Rows 9–28)
Layout grid (top to bottom):
[ Ring ]
[ Pocket A – long strap ]
[ Pocket B – short strap ]
[ Pocket C – short strap ]
Add the opening edging to all three pockets before joining.
Opening Edging (Border)
The edging firms up the opening so it doesn’t stretch as you pull rolls in and out.
Border gauge: across stitches, work 4 sc per 1 in (2.5 cm). Along the sides, work 2 sc per dc row end. One dc row is about 0.57 in (1.4 cm) tall, so 2 sc pull it in slightly. That’s on purpose: it keeps the opening edge snug against the roll.
With the pocket right side out, join yarn at the top of Row 8 on the right-hand edge, just below the strap.
Border Row 1: Ch 1.
– Down the first side: work 2 sc in each row end, Rows 8 to 1 (16 sc).
– Across the front: sc in each of the 20 unworked sts of Round 15, meaning 1 sc in each dc and 1 sc in each ch-1 sp (20 sc).
– Up the second side: work 2 sc in each row end, Rows 1 to 8 (16 sc).
(52 sc)
Border Row 2: Ch 1, turn. Sc in each st across. (52 sc)
Fasten off and weave in the ends.
Why the math works: each side has 8 dc rows x 2 sc = 16 sc. The front has 10 dc + 10 ch-1 sps = 20 sts, worked 1 sc per st for 20 sc. That makes 16 + 20 + 16 = 52 sc. Row 2 matches Row 1 stitch for stitch, so the edge stays flat with no ruffling or pulling.
Joining
Join the pockets with a flat whipstitch, sewing each strap to the base of the pocket above.
- Lay Pocket C (bottom) and Pocket B (middle) face down, with their backs toward you.
- Place the end of Pocket C’s strap over the center of Pocket B’s base, overlapping by 0.75 in (1.9 cm). Line the strap up with Pocket B’s back point.
- Pin in place. Using the strap tail, whipstitch around the three sides of the overlap. Make 1 whipstitch into each strap stitch along the end (4 stitches) and 1 into each row end along the sides.
- Catch only the back loops of the base stitches so the sewing doesn’t show inside the pocket.
- Repeat to join Pocket B’s strap to Pocket A’s base.
Tension advice: keep the stitches snug but not puckered. The strap should lie flat against the base. If the base dimples, loosen your stitches.
Checkpoint: about 1.1 in (2.8 cm) of strap shows between pockets. The joined column should measure about 29.2 in (74.2 cm) from the bottom of Pocket C to the top of Pocket A’s back point.
Attach the ring: pass Pocket A’s long strap through the ring from front to back. Fold the last 2 in (5.1 cm) of the strap down behind itself and whipstitch the end and sides in place. About 2.7 in (6.9 cm) of strap stays visible below the ring.
Final Blocking
- Weave in all remaining ends.
- Slide a toilet roll into each pocket. A roll is the best blocking form for this shape.
- Hang the holder by its ring.
- Mist each pocket until damp but not dripping.
- Smooth the mesh with your hands so the holes look even and round.
- Pinch the teardrop points into shape and straighten the straps.
- Check that the openings face forward and lie flat against the rolls.
- Let it dry completely while hanging, about 12 to 24 hours.
Final Quality-Control Checklist
- Each base has 60 sts at Round 10 and measures about 4.75 in (12.1 cm) across.
- Each mesh round has 30 mesh units.
- Row 8 has 6 dc on all three pockets.
- Both short straps are 4 sc wide and about 1.9 in (4.8 cm) long.
- Each edging has 52 sc: 16 per side and 20 across the front.
- Straps are centered on the backs of the bases.
- A roll slides into each pocket without forcing.
- The holder hangs straight at about 32 in (81.3 cm), not counting the ring.
Troubleshooting
The base ruffles. You’re crocheting loosely or adding extra stitches. Recount each round, or go down one hook size for the base only.
The base cups too early. You’re crocheting tightly. Go up one hook size, and check that each round has 6 increases.
The roll won’t fit. The pocket is less than 15 in (38.1 cm) around. Remake it with a hook one size larger and check Checkpoint 3 again.
The point leans to one side. You probably skipped the first sp on the same side twice. Turn at the start of every decrease row.
The opening edge flares. Use 2 sc per row end, not 3, and don’t add stitches at the front corners.
The pockets twist when hung. The straps are off-center. Unpick them and re-center each strap on its base.
Care
Hand wash in cool water with mild soap, then press out the water in a towel. Dry it flat, or hanging with rolls inside to keep the shape. Avoid the dryer, which can shrink cotton.
Final Notes
The measurement chain is short:
– The 60-st base is 4.75 in (12.1 cm) across and becomes a pocket 15 in (38.1 cm) around.
– Three mesh rounds add 1.7 in (4.3 cm).
– Eight shaping rows add 4.6 in (11.7 cm) and form the teardrop point.
– Each pocket ends up about 9 in (22.9 cm) tall.
– About 1.1 in (2.8 cm) of strap shows between pockets, and the long strap carries the column to the ring.
– The total length is about 32 in (81.3 cm).
Check the base, check the mesh, and test each pocket with a roll before you join. If those checkpoints match, the finished holder will hang straight and hold its shape.
Happy crocheting!