

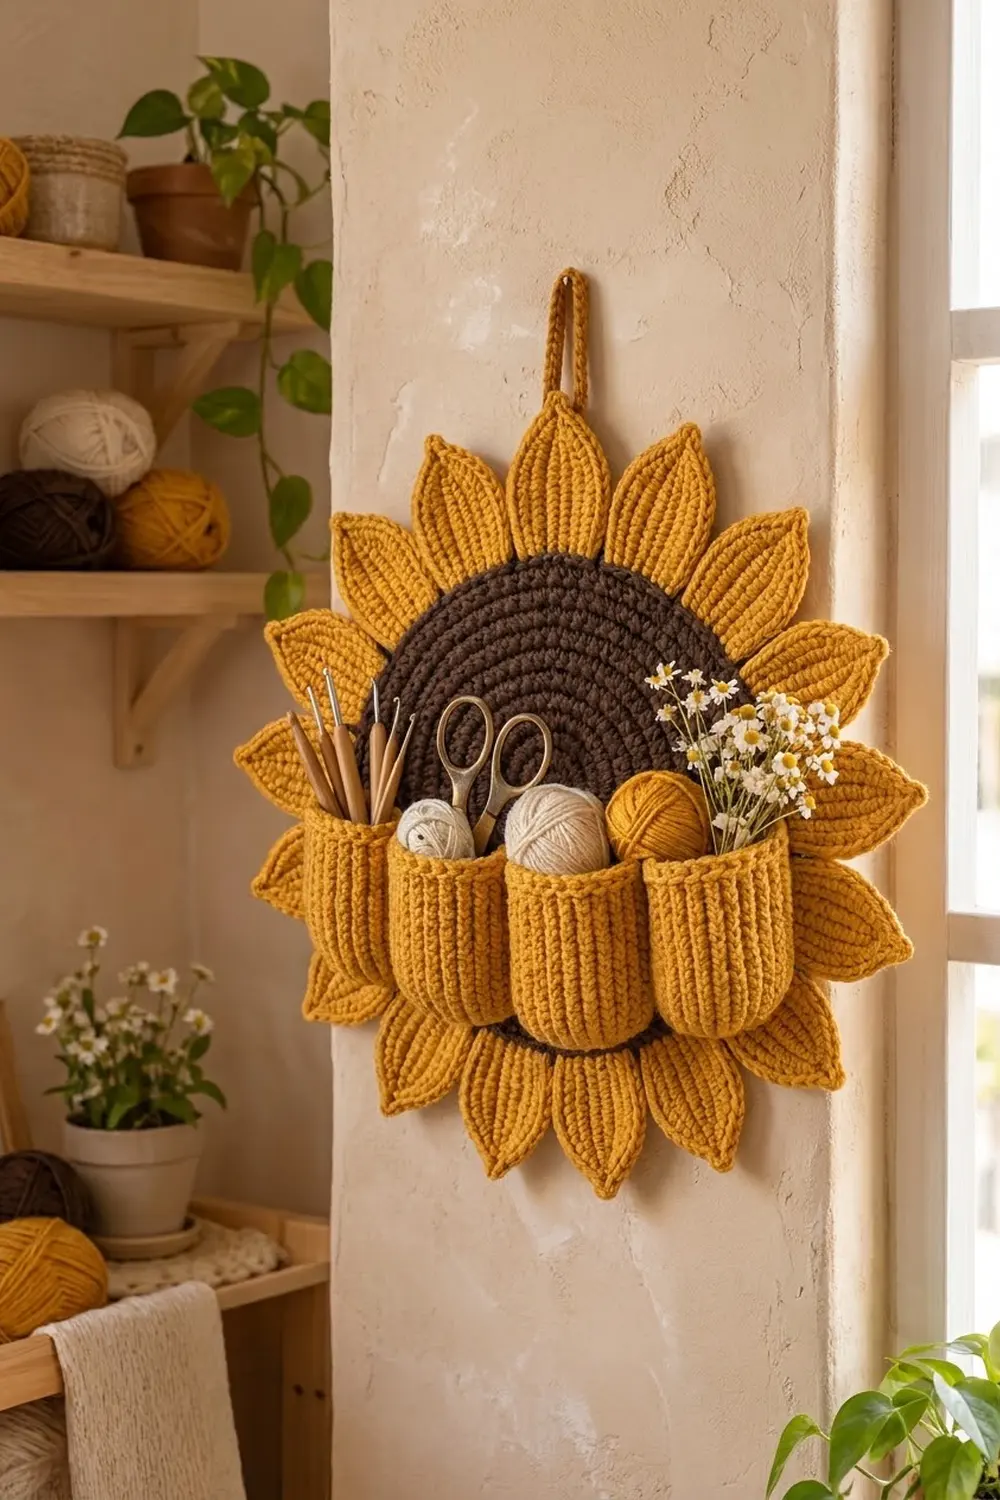
The Golden Hour Sunflower is a crocheted organizer that hangs on the wall. A solid chocolate-brown center is ringed with 24 mustard-gold petals, and a ribbed panel across the lower half forms four rounded pockets. These hold hooks, scissors, small yarn balls or a few dried stems.
The design uses two colors: a deep brown for the center and a warm mustard for the petals, pockets and hanging loop. Firm single crochet keeps the piece flat and sturdy. The petals have a center spine and a single crochet outline, and the pocket panel has vertical ribs from back-loop stitches.
This pattern uses US crochet terms. The finished organizer measures about 13.5 in (34.3 cm) across from petal tip to petal tip, and the brown center is 8 in (20.3 cm) in diameter.
You’ll crochet the center disc in a spiral, make 24 small petals, work a ribbed rectangle for the pockets and add a single crochet border around it. Then you sew the petals behind the disc, stitch the pocket panel down in four sections and attach a hanging loop.
Finished Size and Construction
- Finished size: about 13.5 in (34.3 cm) across, tip to tip
- Skill level: Easy+ (simple stitches, careful assembly)
- Terminology: US crochet terms
- Yarn weight: Worsted (#4) cotton or cotton blend
- Hook: 4.0 mm (G-6)
- Number of pieces: 27 (1 center disc, 24 petals, 1 pocket panel, 1 hanging loop)
- Layout: Petals spaced evenly around the disc, one every 4 edge stitches. The pocket panel runs horizontally across the lower half.
- Piece sizes: disc 8 in (20.3 cm) across. Each petal 3.25 x 1.5 in (8.3 x 3.8 cm).
- Pocket panel before border: 3 x 12 in (7.6 x 30.5 cm)
- Border depth: 0.25 in (0.6 cm) on every side. The panel measures 3.5 x 12.5 in (8.9 x 31.8 cm) after the border.
Materials
Cotton or a cotton blend gives crisp stitch definition and holds its shape on a wall. Avoid very soft or fuzzy acrylics, because the petals will droop. The amounts below assume a worsted cotton of about 85 m per 50 g.
- Brown (center disc): 50 g, about 85 m
- Mustard (petals, pocket panel, loop): 120 g, about 204 m
Both quantities include a margin of roughly 20 percent for gauge swatches and sewing tails.
Tools:
– 4.0 mm (G-6) crochet hook
– Tapestry needle
– About 30 locking stitch markers
– Rust-proof pins
– Measuring tape
– Scissors
– Spray bottle and a foam blocking mat
Abbreviations (US Terms)
- ch – chain
- sl st – slip stitch
- sc – single crochet
- hdc – half double crochet
- dc – double crochet
- inc – 2 sc in the same stitch
- BLO – back loop only
- MR – magic ring
- st(s) – stitch(es)
- sp – space
- RS – right side
Special technique: BLO sc. Work a single crochet into the back loop of the stitch only. When you do this in turned rows, the unused front loops form raised ridges. Because the pocket panel is worked sideways, these ridges run vertically on the finished pockets.
Gauge and Checkpoints
Gauge: 16 sc and 16 rows = 4 in (10.2 cm) in sc, worked firmly with a 4.0 mm hook.
Make the center disc first and use it as your test piece. A flat circle shows your gauge quickly and accurately. Check the diameter at these points:
- After Rnd 4 (24 sts): 2 in (5.1 cm)
- After Rnd 8 (48 sts): 4 in (10.2 cm)
- After Rnd 12 (72 sts): 6 in (15.2 cm)
- After Rnd 16 (96 sts): 8 in (20.3 cm)
If the disc is too big: go down a half size to a 3.75 mm hook and restart.
If the disc is too small: go up to a 4.5 mm hook.
If the disc ruffles: you are working more loosely at the edge than at the center. Tighten your tension or go down a hook size.
If the disc cups: your stitches are too tight. Relax your tension; don’t add extra increases.
Make one petal and compare it with the checkpoints in the Petals section before you make the remaining 23.
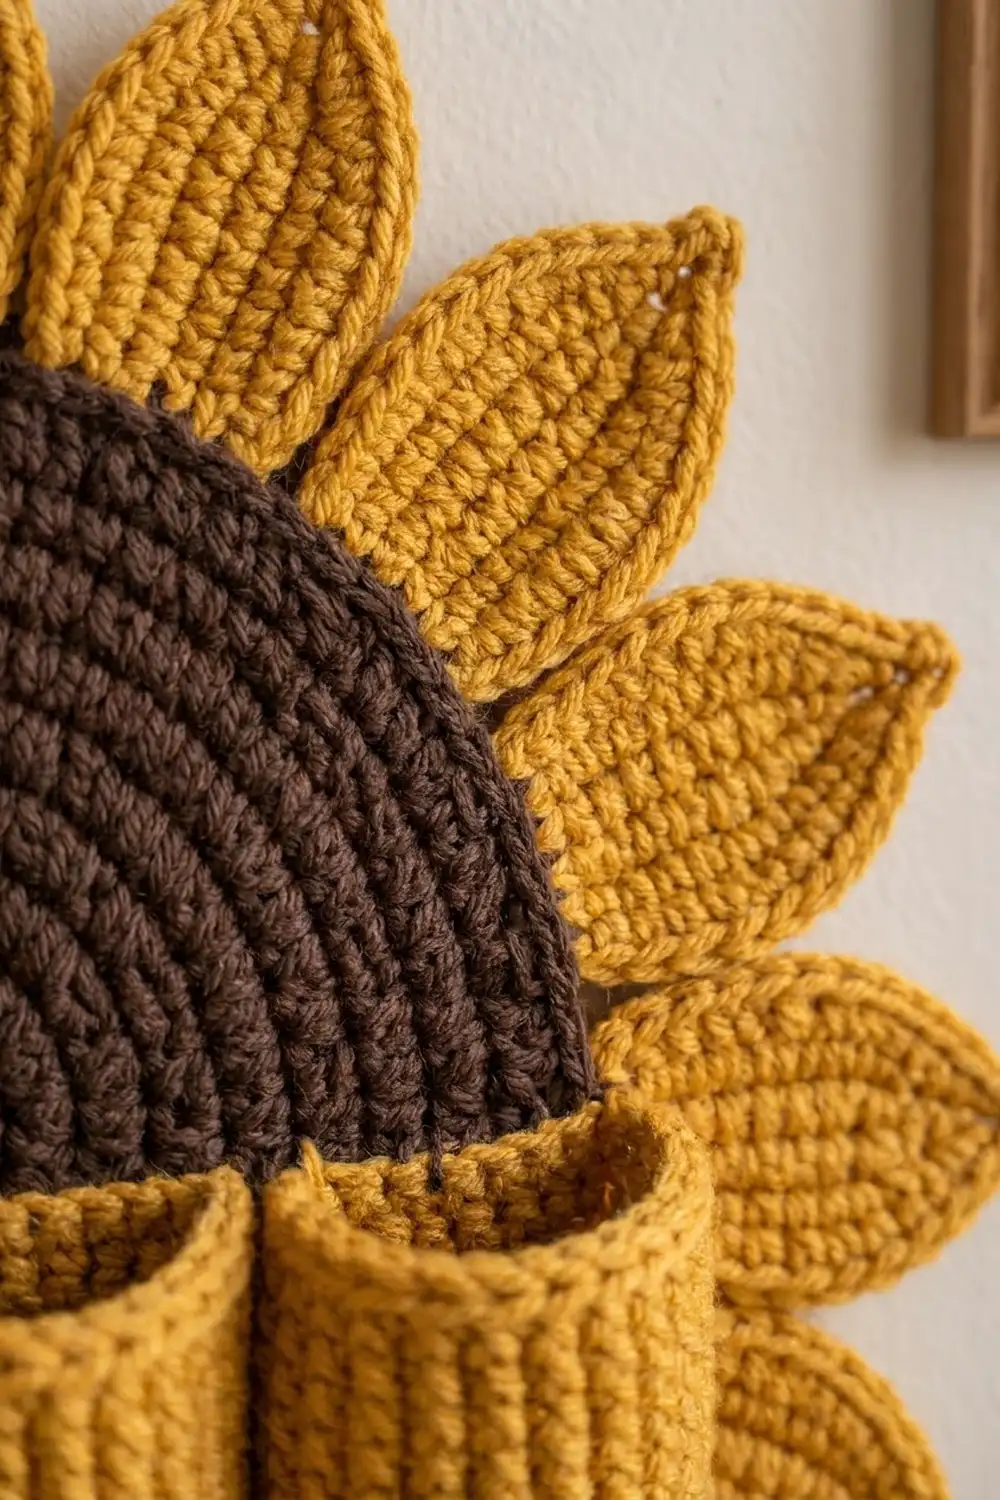
Center Disc (Brown)
Work in a continuous spiral without joining. Place a marker in the first stitch of each round and move it up as you go.
- Rnd 1: 6 sc in MR. (6)
- Rnd 2: Inc in each st around. (12)
- Rnd 3: (Sc in next st, inc) 6 times. (18)
- Rnd 4: (Sc in next st, inc, sc in next st) 6 times. (24)
- Rnd 5: (Sc in next 3 sts, inc) 6 times. (30)
- Rnd 6: (Sc in next 2 sts, inc, sc in next 2 sts) 6 times. (36)
- Rnd 7: (Sc in next 5 sts, inc) 6 times. (42)
- Rnd 8: (Sc in next 3 sts, inc, sc in next 3 sts) 6 times. (48)
- Rnd 9: (Sc in next 7 sts, inc) 6 times. (54)
- Rnd 10: (Sc in next 4 sts, inc, sc in next 4 sts) 6 times. (60)
- Rnd 11: (Sc in next 9 sts, inc) 6 times. (66)
- Rnd 12: (Sc in next 5 sts, inc, sc in next 5 sts) 6 times. (72)
- Rnd 13: (Sc in next 11 sts, inc) 6 times. (78)
- Rnd 14: (Sc in next 6 sts, inc, sc in next 6 sts) 6 times. (84)
- Rnd 15: (Sc in next 13 sts, inc) 6 times. (90)
- Rnd 16: (Sc in next 7 sts, inc, sc in next 7 sts) 6 times. (96)
The increases are staggered on alternate rounds so the disc stays round instead of turning hexagonal.
Finishing the edge: sl st in the next st to smooth the step at the end of the spiral. Fasten off and weave in the tail.
Checkpoint: 96 sts and 8 in (20.3 cm) across.
Petals (Mustard, Make 24)
Each petal is worked around a foundation chain. The chain becomes the raised center spine.
Ch 12.
Rnd 1:
1. Starting in the 2nd ch from the hook, work along the first side of the chain: sl st, sc, hdc, dc in next 5 ch, hdc, sc. This uses 10 ch.
2. Tip: work (sc, ch 2, sc) in the last ch.
3. Rotate and work along the opposite side of the chain: sc, hdc, dc in next 5 ch, hdc, sc, sl st in the same ch as the first sl st. This uses 10 ch.
4. Base: ch 2 and join with a sl st to the first sl st.
Rnd 1 count: 22 sts plus 2 ch-2 sps. The petal now measures about 2.75 x 1 in (7.0 x 2.5 cm).
Rnd 2:
1. Ch 1. Sc in each of the next 11 sts. These are side one (10 sts) plus the first tip sc.
2. Work (sc, ch 2, sc) in the tip ch-2 sp.
3. Sc in each of the next 11 sts. These are the second tip sc plus side two (10 sts).
4. Work (sc, ch 2, sc) in the base ch-2 sp. Join with a sl st to the first sc.
Rnd 2 count: 26 sc plus 2 ch-2 sps. Rnd 2 is a trim round: 22 sc (1 in each existing st) + 4 sc (2 at each point) = 26 sc.
Fasten off, leaving a 12 in (30.5 cm) tail for sewing.
Checkpoint: each petal is 3.25 in (8.3 cm) long and 1.5 in (3.8 cm) wide. It is pointed at both ends and has the chain spine running down the center.
Pocket Panel (Mustard)
The panel is worked sideways in rows, so each row becomes one vertical rib on the pockets.
- Foundation: Ch 13.
- Row 1: Sc in the 2nd ch from the hook and in each ch across. (12)
- Rows 2–48: Ch 1 and turn. BLO sc in each st across. (12)
Do not fasten off.
Checkpoint: 12 sts and 48 rows, measuring 3 x 12 in (7.6 x 30.5 cm). If the panel is shorter than 12 in (30.5 cm), switch hooks and rework it. Don’t change the row count, because the pocket divisions depend on 48 rows.
Make All Pieces
Before you start assembling, check that you have:
- Brown: 1 center disc (96 edge sts)
- Mustard: 24 petals, 1 pocket panel (bordered as described below) and 1 hanging loop
Hanging loop: with mustard, ch 25. Sl st in the back bump of the 2nd ch from the hook and in each ch across. (24 sl st) The cord should be about 6 in (15.2 cm) long. Fasten off, leaving a 10 in (25.4 cm) tail.
Layout grid. Number the 96 Rnd 16 sts starting at the top center of the disc. Each petal is centered over its own block of 4 sts:
Petal  1: sts  1–4   (12 o'clock)   Petal 13: sts 49–52 (6 o'clock)
Petal  2: sts  5–8                  Petal 14: sts 53–56
Petal  3: sts  9–12                 Petal 15: sts 57–60
Petal  4: sts 13–16                 Petal 16: sts 61–64
Petal  5: sts 17–20                 Petal 17: sts 65–68
Petal  6: sts 21–24 (3 o'clock)     Petal 18: sts 69–72 (9 o'clock)
Petal  7: sts 25–28                 Petal 19: sts 73–76
Petal  8: sts 29–32                 Petal 20: sts 77–80
Petal  9: sts 33–36                 Petal 21: sts 81–84
Petal 10: sts 37–40                 Petal 22: sts 85–88
Petal 11: sts 41–44                 Petal 23: sts 89–92
Petal 12: sts 45–48                 Petal 24: sts 93–96
Place a marker every 4 sts, for 24 markers in total. 24 petals x 4 sts = 96 sts, so the petals fill the full edge with no gaps and no leftover stitches.
Joining
Petals to the disc. Turn the disc wrong side up. Slide the base point of a petal 0.5 in (1.3 cm) behind the disc edge, centered on its 4-st block.
Use the petal’s tail to whipstitch across those 4 sts. Sew each stitch of the petal outline to the back of the matching Rnd 16 st, then tack the base ch-2 point to Rnd 14. That makes 4 sewing passes per petal: one disc stitch per pass, with no skipped or doubled stitches.
Sew the petals in opposite pairs: 1 and 13, then 7 and 19, then fill in between. This keeps the spacing even. Sew snugly, but not so tightly that the disc edge puckers. The petals should lie flat when the piece rests on a table.
Checkpoint: 2.75 in (7.0 cm) of each petal shows beyond the disc. The flower measures 8 + 2.75 + 2.75 = 13.5 in (34.3 cm) tip to tip.
Pocket panel. Add the border first (next section), then attach the panel:
- Center the panel horizontally on the RS of the disc, with its top edge level with the disc’s center line.
- Pin the two short ends 4 in (10.2 cm) to each side of center. The outer pockets will overlap the side petals.
- Mark the bottom border into 4 groups of 12 sc.
- Sew a vertical line from the bottom edge to the top edge between each group, 2 in (5.1 cm) apart on the backing. This creates 4 pockets. Each one has about 3 in (7.6 cm) of fabric over a 2 in (5.1 cm) base, which gives the rounded, open shape.
- Whipstitch each pocket’s bottom 12 sc to the backing, easing in the extra fabric evenly.
- Sew the short ends down vertically through the disc and the petal layers.
About 0.5 in (1.3 cm) of brown remains visible below the center pockets.
Hanging loop. Fold the cord in half. Sew both ends 0.5 in (1.3 cm) onto the back of the disc behind Petal 1. The visible loop stands about 2.5 in (6.4 cm) high.
Border (Pocket Panel)
Border gauge: 4 sc per inch (2.5 cm) along every edge.
Rnd 1: Continue from the last row with RS facing. Ch 1 and work along each side in turn:
- Down the long edge (row ends): 1 sc in each of the 48 row ends. (48)
- Ch 1 at the corner.
- Across the foundation chain: 1 sc in each of the 12 sts. (12)
- Ch 1 at the corner.
- Along the second long edge: 1 sc in each of the 48 row ends. (48)
- Ch 1 at the corner.
- Across Row 48: 1 sc in each of the 12 sts. (12)
- Ch 1 and join with a sl st to the first sc.
Total: 120 sc plus 4 corner ch-1 sps. The corner chains are separate from the side counts, so each long side is exactly 48 sc and each short side is exactly 12 sc. Fasten off, leaving an 18 in (45.7 cm) tail.
Why the math works: the panel has 16 rows per 4 in (10.2 cm), which is 4 rows per inch. Working 1 sc per row end puts 4 sc into every inch, which matches the sc gauge, so the long edges stay flat. The short sides have 12 sts across 3 in (7.6 cm), the same rate. The border adds 0.25 in (0.6 cm) on every side, so 3 x 12 in becomes 3.5 x 12.5 in (8.9 x 31.8 cm). The 48 bottom sc divide evenly into 4 pockets of 12 sc each.
Final Blocking
- Lightly mist the whole organizer until it is damp but not soaked.
- Lay it RS up on a blocking mat.
- Pin the disc edge into an 8 in (20.3 cm) circle.
- Pin each petal tip straight out from the center, keeping the tips 13.5 in (34.3 cm) apart across the flower.
- Shape each pocket by hand into a rounded tube. Don’t pin the pockets flat.
- Let everything dry completely, usually 12–24 hours, before unpinning.
Final Quality-Control Checklist
- The disc has 96 edge sts and measures 8 in (20.3 cm) across.
- All 24 petals measure 3.25 x 1.5 in (8.3 x 3.8 cm) and have a visible center spine.
- Each petal is sewn across exactly 4 disc sts.
- The flower is 13.5 in (34.3 cm) tip to tip.
- The pocket panel has 120 border sc and measures 3.5 x 12.5 in (8.9 x 31.8 cm).
- The 4 pockets are evenly spaced, each with a 2 in (5.1 cm) base.
- The hanging loop is centered at the top and secure.
- All tails are woven in on the back.
Troubleshooting
- The disc is wavy: you have too many stitches for your tension. Go down a hook size, or frog back to Rnd 12 and work more firmly.
- The petals curl: wet-block them flat. If they are still curling, work Rnd 2 more loosely.
- There are gaps between petals: a petal has slipped off its 4-st block. Re-center it using the layout grid.
- The pockets lie flat: the vertical seams are more than 2 in (5.1 cm) apart. Resew them closer together.
- The organizer tilts on the wall: the loop is off-center. Move it so it sits directly behind Petal 1.
- The pocket bottoms sag: reinforce each bottom seam with a second pass of whipstitch.
Care
Spot clean or hand wash in cool water, press out the water in a towel and dry flat, reshaping the petals and pockets. Don’t machine dry.
Final Notes
The sizes build on each other in a simple chain. Gauge of 4 sc per inch gives a disc with 96 sts that measures 8 in (20.3 cm). That 96 divides into 24 petals of 4 sts each, and each petal adds 2.75 in (7.0 cm) on each side, for 13.5 in (34.3 cm) overall. The pocket panel’s 12 x 48 grid of 3 x 12 in (7.6 x 30.5 cm) becomes 3.5 x 12.5 in (8.9 x 31.8 cm) with the border, and the 48 bottom sc divide into 4 pockets of 12 sc each. If you keep each checkpoint on target, the finished sunflower will hang flat. Happy crocheting!