
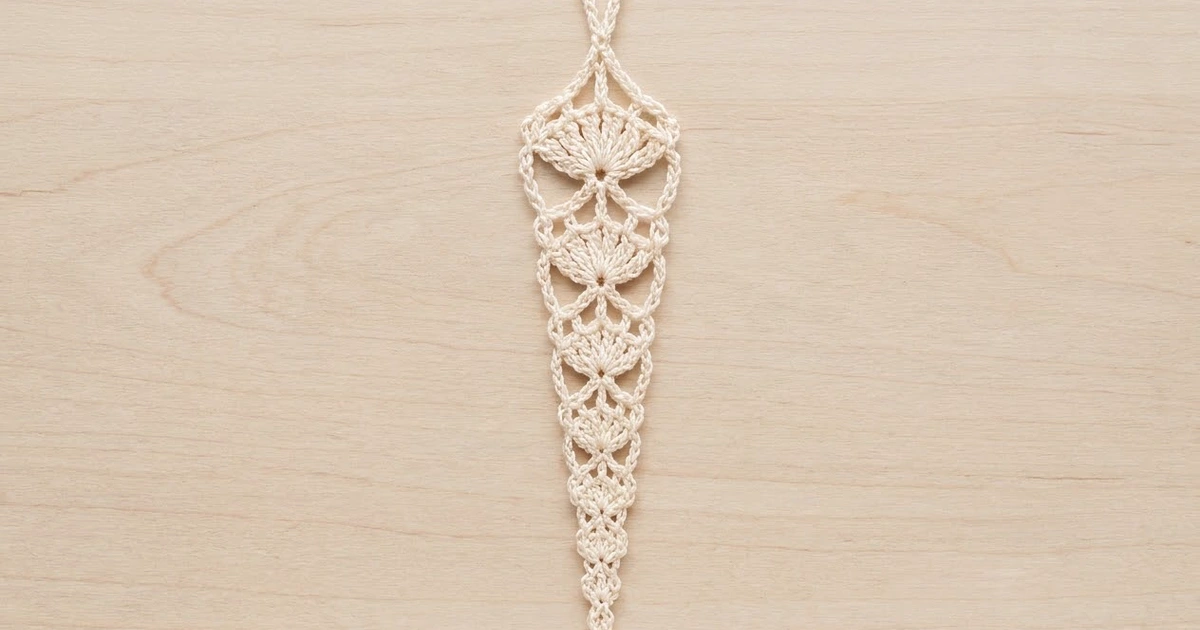
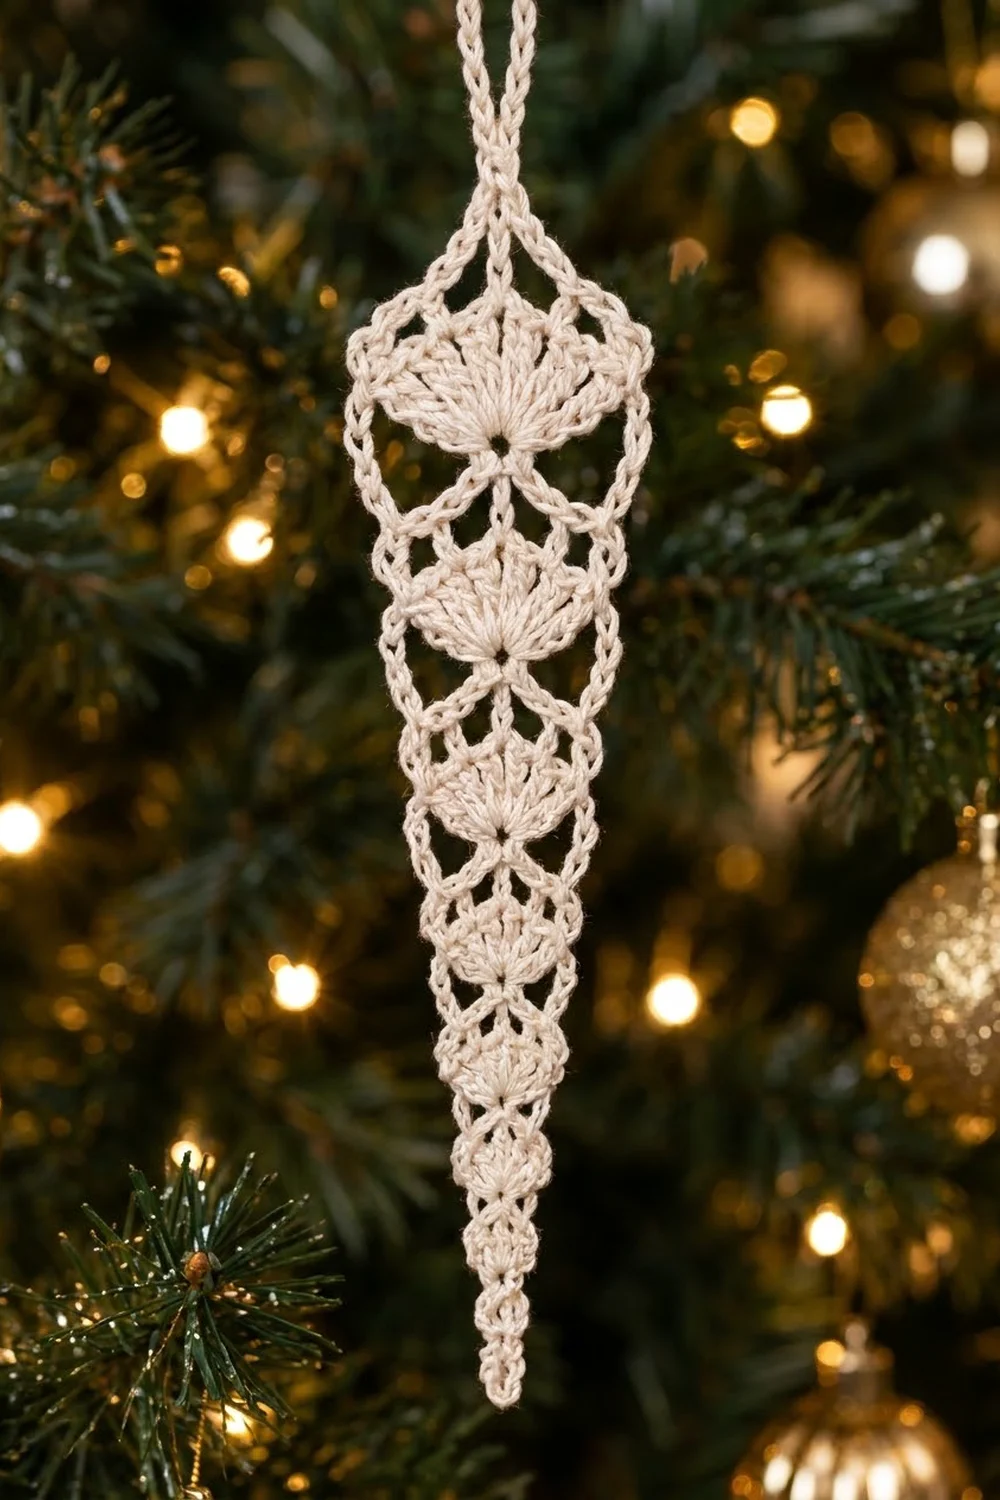
The Frosted Fan Icicle is a slim lace ornament made with fine cotton thread. It starts at a tiny pointed tip, widens through eight fan shells and finishes with a peaked top and a chain hanging loop. On the tree it looks like frosted glass, and in warm light it looks like an old-fashioned heirloom.
The sample is worked in one color, ivory/cream. Light thread colors show off the open lace best: white, ivory, pale silver or soft gold.
The pattern uses US crochet terms. The finished ornament is 1.5 in (3.8 cm) wide at its widest point and 5 in (12.7 cm) long from tip to peak. The hanging loop adds 1.25 in (3.2 cm), so the overall length is 6.25 in (15.9 cm).
The ornament is one piece worked flat in turned rows from the bottom up. Odd rows make the fan shells. Even rows make chain arches that set up the next fan. A final row builds the peaked top and the hanging loop. There is no sewing and no joining.
Finished Size and Construction
- Finished size: 1.5 in (3.8 cm) wide × 5 in (12.7 cm) long, plus a 1.25 in (3.2 cm) loop. Overall length 6.25 in (15.9 cm)
- Skill level: Intermediate. You need to be comfortable with fine thread and counting into chain spaces
- Terminology: US
- Yarn weight: Size 10 crochet cotton thread (lace weight, category 0)
- Hook: 1.75 mm (US steel 6)
- Number of pieces: 1
- Layout: Single vertical piece with 8 stacked fan tiers
- Piece size before peak: 1.5 in (3.8 cm) × 4.5 in (11.4 cm) after Row 16
- Size before border: Same as above
- Border depth: The peak-and-loop finish (Row 17) adds 0.5 in (1.3 cm) of length to the body and no width
Materials
Yarn advice: Use mercerized cotton thread in size 10. It has a crisp twist, so the fans and chains keep sharp lines and hold starch well. Avoid fuzzy or acrylic threads because the lace will look soft and blurry.
- Ivory / cream (main color): 3 g, about 10 m (11 yd) per ornament
Tools:
– 1.75 mm (US steel 6) crochet hook
– Fine tapestry needle
– Small sharp scissors
– Fabric stiffener or homemade starch
– Blocking board or foam, rustproof pins, and plastic wrap
– Ruler that shows inches and cm
The thread amount includes a margin of about 25% for your gauge swatch, weaving in ends and small tension differences. If you are making a set, multiply the amount by the number of ornaments.
Abbreviations (US Terms)
- ch – chain
- sl st – slip stitch
- sc – single crochet
- tr – treble crochet (yarn over twice)
- dtr – double treble crochet (yarn over 3 times, then [yarn over, pull through 2 loops] 4 times)
- sp – space
- tch – turning chain
- st(s) – stitch(es)
- RS / WS – right side / wrong side
Special stitch – Fan Shell: Work the stated number of tr into the single sc named in the instructions. All the tr share one base, so they spread upward into a fan.
Turning chains: In shell rows, ch 4 at the start counts as the first tr. In arch rows, ch 1 at the start does not count as a stitch.
Gauge and Checkpoints
Gauge matters less than for a garment, but it still controls how the arches and fans line up. Make one full ornament first and check these measurements, unblocked, before you make a set:
- After Row 1: the first fan is 0.4 in (1.0 cm) wide.
- After Row 8 (4 fans): the piece is about 0.9 in (2.3 cm) wide × 2.25 in (5.7 cm) long.
- After Row 16 (8 fans): the piece is 1.5 in (3.8 cm) wide × 4.5 in (11.4 cm) long.
- After Row 17: the length from tip to peak is 5 in (12.7 cm).
A single tr in this thread should be about 0.25 in (0.6 cm) tall.
Too big? Go down to a 1.5 mm hook, or pull each tr’s first loop up a little less.
Too small? Go up to a 2.0 mm hook. Size 10 thread still looks crisp on a 2.0 mm hook.
A difference of up to 0.125 in (0.3 cm) in width is fine, because blocking will even it out.
Pattern
The Tip
Ch 4, sl st in first ch to form a ring.
Row 1 (RS): Ch 4 (counts as tr), 4 tr in ring. Turn. (5 tr – fan 1)
Row 2 (WS): Ch 1, sc in first tr, ch 3, sc in 3rd tr (center of fan), ch 3, sc in top of tch. Turn. (3 sc, 2 ch-3 sps)
Growing the Fans
In every shell row, the new fan goes into the center sc of the row below. That stacks each fan point directly above the center of the previous fan. The chain spaces on either side make the open arches along the edges.
Row 3 (RS): Ch 4 (counts as tr), ch 1, skip ch-3 sp, 5 tr in center sc, ch 1, skip next ch-3 sp, tr in last sc. Turn. (7 tr: 5 fan + 2 edge; 2 ch-1 sps)
Row 4: Ch 1, sc in first tr, ch 3, sc in 3rd tr of fan, ch 3, sc in top of tch. Turn. (3 sc, 2 ch-3 sps)
Row 5: Ch 4 (counts as tr), ch 2, skip ch-3 sp, 7 tr in center sc, ch 2, skip next ch-3 sp, tr in last sc. Turn. (9 tr: 7 fan + 2 edge; 2 ch-2 sps)
Row 6: Ch 1, sc in first tr, ch 4, sc in 4th tr of fan, ch 4, sc in top of tch. Turn. (3 sc, 2 ch-4 sps)
Row 7: Ch 4 (counts as tr), ch 2, skip ch-4 sp, 7 tr in center sc, ch 2, skip next ch-4 sp, tr in last sc. Turn. (9 tr: 7 fan + 2 edge; 2 ch-2 sps)
Row 8: Ch 1, sc in first tr, ch 4, sc in 4th tr of fan, ch 4, sc in top of tch. Turn. (3 sc, 2 ch-4 sps)
Checkpoint: about 0.9 in (2.3 cm) wide × 2.25 in (5.7 cm) long.
Row 9: Ch 4 (counts as tr), ch 3, skip ch-4 sp, 9 tr in center sc, ch 3, skip next ch-4 sp, tr in last sc. Turn. (11 tr: 9 fan + 2 edge; 2 ch-3 sps)
Row 10: Ch 1, sc in first tr, ch 5, sc in 5th tr of fan, ch 5, sc in top of tch. Turn. (3 sc, 2 ch-5 sps)
Row 11: Ch 4 (counts as tr), ch 3, skip ch-5 sp, 9 tr in center sc, ch 3, skip next ch-5 sp, tr in last sc. Turn. (11 tr: 9 fan + 2 edge; 2 ch-3 sps)
Row 12: Ch 1, sc in first tr, ch 5, sc in 5th tr of fan, ch 5, sc in top of tch. Turn. (3 sc, 2 ch-5 sps)
Row 13: Ch 4 (counts as tr), ch 4, skip ch-5 sp, 11 tr in center sc, ch 4, skip next ch-5 sp, tr in last sc. Turn. (13 tr: 11 fan + 2 edge; 2 ch-4 sps)
Row 14: Ch 1, sc in first tr, ch 6, sc in 6th tr of fan, ch 6, sc in top of tch. Turn. (3 sc, 2 ch-6 sps)
Row 15: Ch 4 (counts as tr), ch 4, skip ch-6 sp, 11 tr in center sc, ch 4, skip next ch-6 sp, tr in last sc. Turn. (13 tr: 11 fan + 2 edge; 2 ch-4 sps)
Row 16 (WS): Ch 1, sc in first tr, ch 7, sc in 6th tr of fan, ch 7, sc in top of tch. Turn. (3 sc, 2 ch-7 sps)
Checkpoint: 1.5 in (3.8 cm) wide × 4.5 in (11.4 cm) long. You should have 8 fans. Their sizes from the tip up are 5, 5, 7, 7, 9, 9, 11 and 11 tr.
Why the arches line up: Every arch row has exactly 3 sc: one at each edge and one at the exact center of the fan. The center fan stitch is always the middle one. For a fan of N stitches (always an odd number), it is stitch (N + 1) ÷ 2: the 3rd of 5, the 4th of 7, the 5th of 9 and the 6th of 11. This keeps the ornament symmetrical all the way up.
Border: Peaked Top and Hanging Loop
This ornament has no added edging around its sides. Its border is the chain-arch frame built into the even rows, plus this final peak row. Here is the border gauge for the peak: size 10 chain runs about 11 ch per inch (2.5 cm).
Row 17 (RS): Ch 1, sc in first sc, ch 10, dtr in center sc, ch 30, sl st in top of dtr (hanging loop made), ch 10, sl st in last sc. Fasten off.
Counts:
– Left side: 1 sc + ch-10 arm
– Center: 1 dtr + ch-30 loop
– Right side: ch-10 arm + 1 sl st
Why the math works: The top of the dtr stands about 0.5 in (1.3 cm) above Row 16. Each top corner is 0.75 in (1.9 cm) to the side of the center. The straight line from corner to peak is therefore about 0.9 in (2.3 cm). At 11 ch per inch, 10 ch covers 0.9 in (2.3 cm), so each arm pulls taut without puckering. The 30-ch loop is about 2.7 in (6.9 cm) of chain. Folded in half it hangs about 1.25 in (3.2 cm) tall, which brings the overall length to 6.25 in (15.9 cm).
Weave in both ends along the edge chains and trim them close.
Final Blocking
- Mix fabric stiffener as the label directs, or make a medium-strength starch.
- Soak the ornament fully, then press it gently in a towel. Do not wring it.
- Cover the blocking board with plastic wrap.
- Pin the tip at the bottom and the dtr peak at the top, 5 in (12.7 cm) apart.
- Pin the two top corners 1.5 in (3.8 cm) apart, centered on the vertical line.
- Open each fan by pinning its outer tr points slightly outward and keeping it symmetrical.
- Pin each edge arch outward to make the diamond lattice along both sides.
- Lay the hanging loop straight up from the peak and pin it flat.
- Let it dry completely, usually 12–24 hours, before you unpin.
Final Quality-Control Checklist
- [ ] There are 8 fans with 5, 5, 7, 7, 9, 9, 11 and 11 tr from the tip up
- [ ] Every fan sits directly above the center of the fan below it
- [ ] Every arch row has 3 sc and 2 equal chain spaces
- [ ] The width is 1.5 in (3.8 cm) at Row 16
- [ ] Tip to peak is 5 in (12.7 cm)
- [ ] The loop hangs 1.25 in (3.2 cm) tall
- [ ] The ornament hangs straight without twisting
- [ ] The ends are woven in invisibly and the piece is dry and stiff
Troubleshooting
Fans lean to one side: You probably worked into the wrong center tr. Count again using (N + 1) ÷ 2.
Edges ripple or flare: Your shell-row chains are too loose. Go down a hook size for those chains only.
Edges pull inward: Your arch-row chains are too tight. Make each chain a little looser, or add 1 ch to each arch and keep it the same on both sides.
The peak arms sag: The dtr is too short. Pull the first loop up taller, or remove 1 ch from each arm.
The ornament twists when hung: Starch it again and dry it fully flat under light weight.
The ring at the tip is too loose: Before Row 2, pull the starting tail to close the ring tight.
Care
Dust gently with a soft brush and store the ornament flat in tissue paper. If it softens, hand-wash it in cool water, then starch and block it again.

Final Notes
Here is the measurement chain. The tip fan is 0.4 in (1.0 cm) wide. After 4 fans the piece is 0.9 in × 2.25 in (2.3 cm × 5.7 cm). After 8 fans it is 1.5 in × 4.5 in (3.8 cm × 11.4 cm). The peak row brings it to 5 in (12.7 cm), and the loop takes it to 6.25 in (15.9 cm) overall.
If your first ornament hits these checkpoints, every copy will match. A set of identical icicles makes a striking tree.
Happy crocheting!