
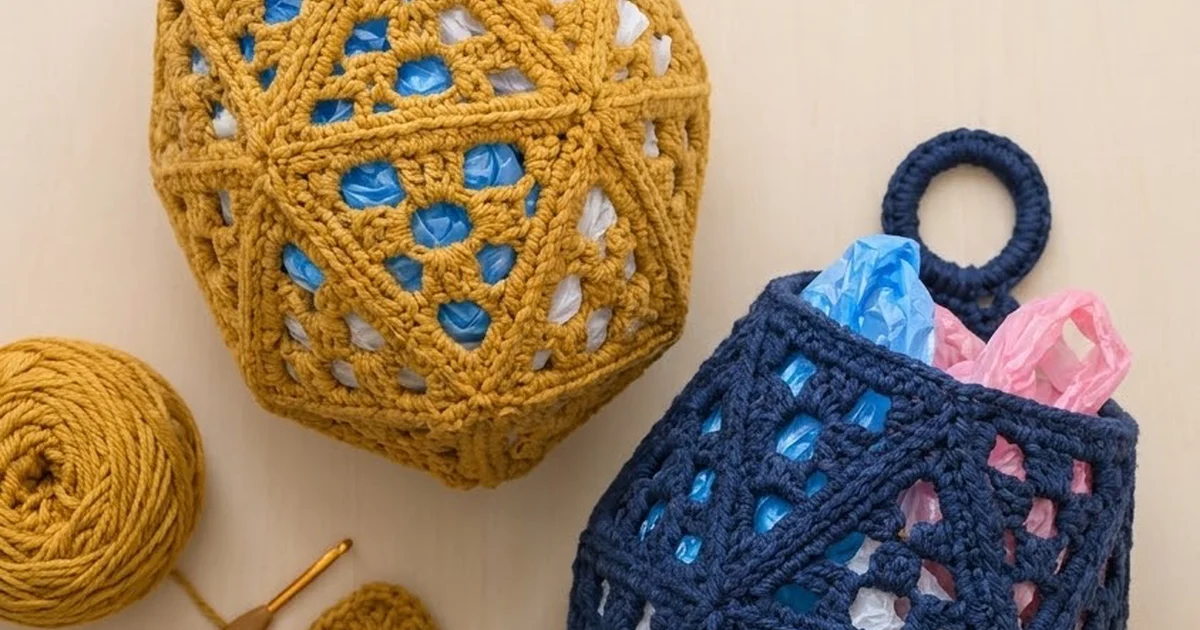
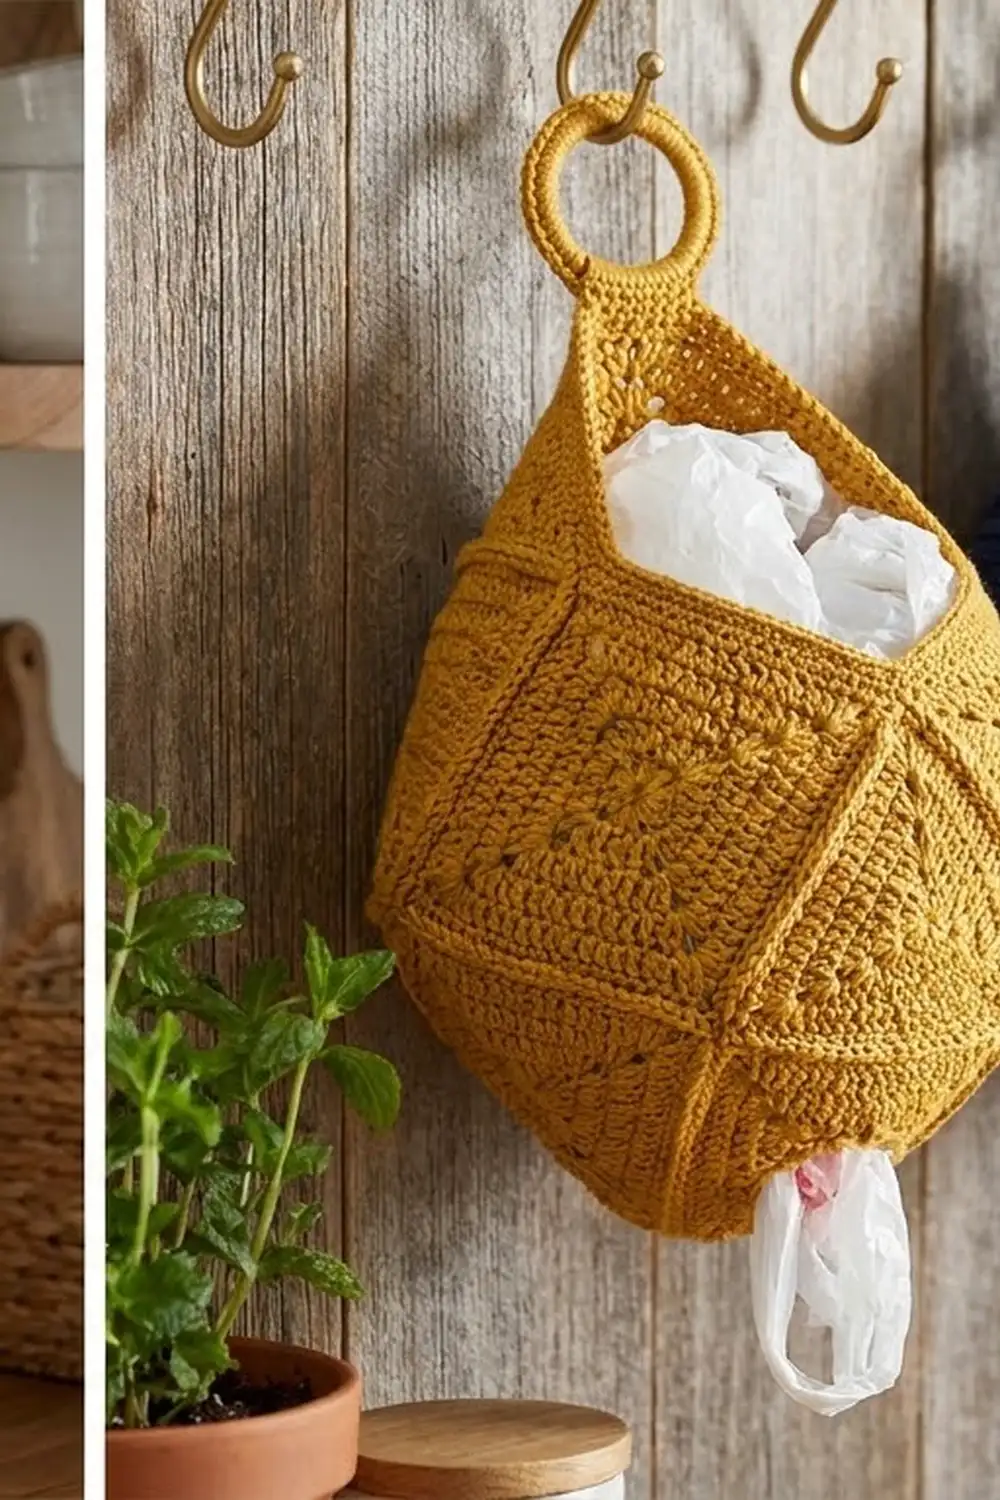
The Facet Lantern is a geometric plastic-bag holder made from granny triangles. Fifteen triangles join into a faceted, gem-like shape with an open top for stuffing bags in, a small opening at the bottom for pulling them out, and a covered ring for hanging it on a hook.
Each triangle has a classic open granny center inside a solid double-crochet frame. Because the seams are worked on the outside, they form raised ridges that outline every facet. Make it in one solid color. Warm mustard and deep navy both work well, and the bags show through the open centers like stained glass.
This pattern uses US crochet terms. The finished body is about 9.25 in (23.5 cm) tall and 10 in (25.4 cm) wide when filled. With the hanging ring, the total length is about 12 in (30.5 cm).
Here is the construction in brief. You make 15 identical triangles and join 10 of them into a zigzag band. Then you close the bottom with 5 more, leaving a small opening at the tip. Finally you work a rim border and edge the bottom opening, then cover a ring and attach it with a short tab.
Finished Size and Construction
- Finished size: 9.25 in (23.5 cm) body height, 10 in (25.4 cm) widest, about 12 in (30.5 cm) including the ring
- Skill level: Intermediate
- Terminology: US
- Yarn weight: Worsted (#4)
- Hook: 5.0 mm (H-8)
- Number of pieces: 15 triangles, plus 1 hanging ring and tab
- Layout: 5 rim triangles pointing down alternating with 5 pointing up, plus 5 bottom triangles meeting at the opening
- Piece size: 6 in (15.2 cm) per side, from corner tip to corner tip
- Size before border: 8.25 in (21.0 cm) tall, with a rim perimeter of about 30 in (76.2 cm)
- Border depth: 1 in (2.5 cm) at the top rim
Materials
Yarn: Use a sturdy worsted-weight acrylic, cotton or cotton blend. Firm, smooth yarns show the granny holes and raised seams best. Avoid fluffy or very stretchy fibers, because the holder carries weight.
- Main color (mustard yellow or navy blue): 160 g, about 290 m (317 yd)
Quantities include a margin of about 15% for gauge differences and the gauge swatch.
Tools:
– 5.0 mm (H-8) crochet hook
– Metal, wooden or plastic ring, 2.5 in (6.4 cm) in diameter
– Tapestry needle
– Locking stitch markers (at least 10)
– Scissors and a tape measure
– Blocking mat and pins
– Spray bottle
Abbreviations (US Terms)
- ch – chain
- sl st – slip stitch
- sc – single crochet
- dc – double crochet
- sc2tog – single crochet 2 together
- sp – space
- st(s) – stitch(es)
- RS / WS – right side / wrong side
Special stitch – sc join: Hold two pieces WS together. Insert the hook through both loops of the stitch on the front piece, then through both loops of the matching stitch on the back piece, and complete an sc. This makes a raised ridge on the RS.
Gauge and Checkpoints
Gauge: 14 sc = 4 in (10.2 cm) in the final round of a triangle.
Make one triangle first and block it before you start the rest. Measure each side from corner tip to corner tip:
- After Round 2: 2.5 in (6.4 cm)
- After Round 4: 4.5 in (11.4 cm)
- After Round 5: 5.5 in (14.0 cm)
- After Round 6: 6 in (15.2 cm)
If the triangle is too big, go down 0.5 mm in hook size. If it is too small, go up 0.5 mm. A difference of 0.25 in (0.6 cm) per side adds up to about 1.25 in (3.2 cm) around the rim, so it is worth fixing gauge now.
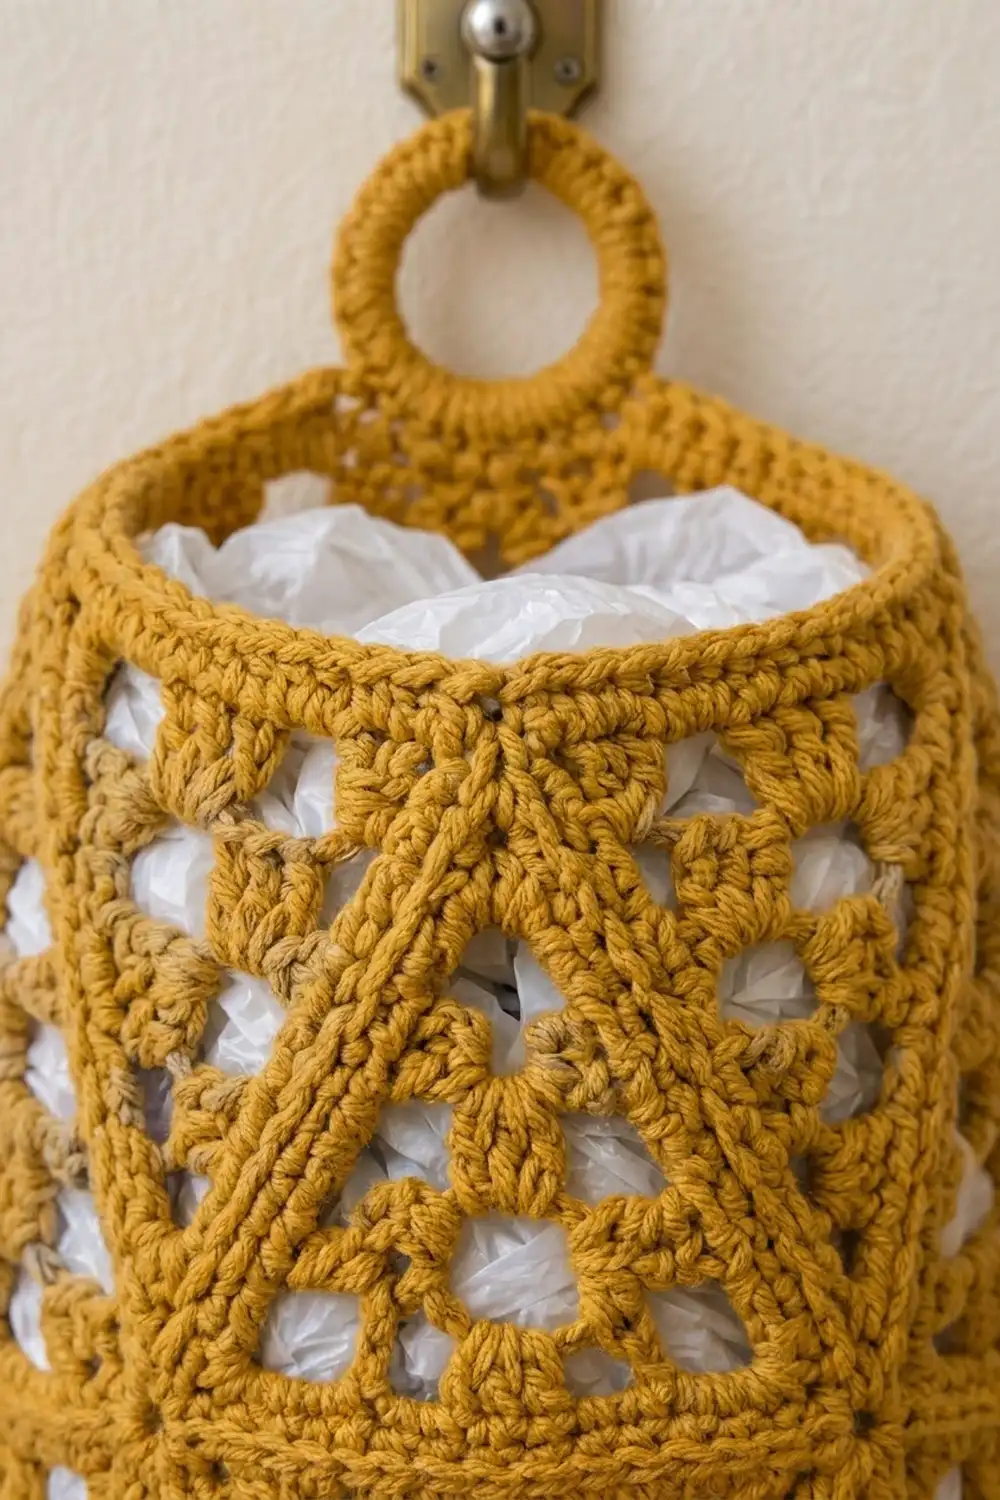
Granny Triangle (make 15)
Round 1: Make a magic ring. Ch 3 (counts as dc), 2 dc in ring, ch 2. Then work 3 dc in ring, ch 2 twice. Sl st to the top of the beginning ch-3. Pull the ring closed.
(9 dc, 3 ch-2 corners. Each side has 3 dc.)
Round 2: Sl st in the next 2 dc and into the ch-2 sp. In that same sp, work ch 3, 2 dc, ch 2, 3 dc. Ch 1. Then work (3 dc, ch 2, 3 dc) in the next ch-2 sp, ch 1 twice. Sl st to the top of the ch-3.
(18 dc, 6 per side.)
Round 3: Sl st in the next 2 dc and into the ch-2 sp. In that same sp, work ch 3, 2 dc, ch 2, 3 dc. Ch 1, then 3 dc in the next ch-1 sp, ch 1. In the next corner work (3 dc, ch 2, 3 dc), ch 1, then 3 dc in the next ch-1 sp, ch 1. Repeat from * once more. Sl st to the top of the ch-3.
(27 dc, 9 per side.)
Round 4: Work as Round 3, but put 3 dc in each ch-1 sp along the sides, so each side gets one more cluster. Sl st to join.
(36 dc, 12 per side. Each side also has 3 ch-1 sps, for 9 ch-1 sps in total.)
Round 5 (conversion to solid dc): Ch 3 (counts as the first dc). Work dc in each dc and 1 dc in each ch-1 sp. In each corner ch-2 sp, work (2 dc, ch 2, 2 dc). Sl st to join.
Count: 36 dc worked one per existing dc + 9 dc in the ch-1 sps + 12 corner dc = 57 dc. That is 19 dc per side between the corner chains: 2 + 12 + 3 + 2.
Round 6 (sc trim): Ch 1. Work sc in each dc. In each corner ch-2 sp, work (sc, ch 2, sc). Sl st to the first sc. Fasten off and weave in the ends.
Count: 57 sc worked one per existing dc + 6 corner sc = 63 sc. That is 21 sc per side, counting the corner sc at both ends of the side. The corner ch-2 sps sit outside this count.
Pin each triangle into an equilateral shape with 6 in (15.2 cm) sides. Mist it and let it dry.
Make All Pieces
Make 15 triangles in your main color. For tracking, label them in three groups with stitch markers:
- A (rim, pointing down): 5 triangles
- B (band, pointing up): 5 triangles
- C (bottom, pointing down to the opening): 5 triangles
Here is the layout, opened out flat. The rim is at the top, and the left and right ends join into a ring:
   rim:  ___A1___ ___A2___ ___A3___ ___A4___ ___A5___
         \      /\      /\      /\      /\      /\
band:     \ A1 / B1\ A2 / B2\ A3 / B3\ A4 / B4\ A5 / B5\
           \  /     \  /     \  /     \  /     \  /
          ---B1 base---B2 base---B3 base---B4 base---B5 base
               C1        C2        C3        C4        C5
                 \  bottom tips gather at the opening /
Joining
All seams use the sc join with WS together, so the ridges sit on the outside. Each seam starts with a sl st through the matching corner ch-2 sps, which is not counted. Then work 21 sc joins, one per matching pair of sts, and finish with a sl st through the next pair of corner sps. You never add extra stitches to a seam.
Step 1 – Band: Lay out A1, B1, A2, B2 and so on through B5, alternating point-down and point-up. Join A1’s right side to B1’s left side with 21 sc. Continue joining each triangle to the next one until B5 is joined to A5. Then join B5’s right side to A1’s left side to close the ring. That makes 10 seams.
Step 2 – Bottom bases: Join the base of each C triangle to the base of a B triangle with 21 sc. That makes 5 seams.
Step 3 – Bottom sides: Join the neighboring sides of the C triangles. Start at the base vertex and work toward the tip. Work 19 sc joins, then stop. Leave the last 2 sts of each side and the tip ch-2 sp free. That makes 5 seams.
Total: 15 seams × 21 + 5 seams × 19 = 410 joining sc.
Tension: Keep the joining sc the same size as your trim sc. Tight seams pucker the facets, and loose seams sag under the weight of the bags. Every 7 sts, check that both edges are still matched stitch for stitch.
Checkpoint: Before the border, the body should be about 8.25 in (21.0 cm) tall. The rim perimeter should be close to 30 in (76.2 cm).
Border
Border gauge: 14 sc = 4 in (10.2 cm), the same as the triangle trim.
Top Rim
Each of the 5 rim edges is the base of one A triangle, so it gives 1 × 21 = 21 sts. At each rim vertex, three corner ch-2 sps meet: from two A triangles and one B triangle.
Round 1: With the RS facing, join the yarn in any rim vertex. Ch 1. Work 1 sc through all three gathered corner sps together. Sc in each of the 21 sts across the edge, then 1 sc through the next gathered vertex. Repeat from * around, leaving out the last vertex sc, which you have already made. Sl st to join.
Count: 5 edges × 21 + 5 vertex sc = 110 sc. That is about 31.5 in (80.0 cm).
Round 2: Ch 1. Work sc in the next 9 sts, sc2tog. Repeat 10 times. Sl st to join.
Count: 100 sc. That is about 28.5 in (72.4 cm). The decreases firm up the rim.
Rounds 3–4: Ch 1, sc in each st around, and sl st to join. (100 sc each round.) Fasten off.
Why the math works: The 110 sc of Round 1 is one stitch per existing edge stitch plus one at each vertex, so the rim stays flat. Round 2 has exactly 10 repeats of 11 sts (110 ÷ 11 = 10), which leaves 100. That is 2 sc2tog per edge, spread evenly.
Bottom Opening
Round 1: With the RS facing, join the yarn in the first free st at any tip. Ch 1. For each of the 5 tips, work sc in the 2 free sts on one side, 1 sc in the tip ch-2 sp, and sc in the 2 free sts on the other side. Sl st to join.
Count: 5 tips × 5 = 25 sc.
Round 2: Ch 1. Work sc in the next 3 sts, sc2tog 5 times. Sl st to join.
Count: 20 sc. That is about 5.75 in (14.6 cm) around, or roughly 1.75 in (4.4 cm) across. This is small enough to hold the bags in and big enough to pull one out. Fasten off.
Hanging Ring and Tab
Ring: Join the yarn around the 2.5 in (6.4 cm) ring. Work 40 sc over the ring, keeping the stitches packed tight, and sl st to join. Fasten off. The covered ring measures about 3 in (7.6 cm) across.
Tab: With the RS facing, join the yarn in Round 4 of the rim, 3 sts before the st above any vertex. Row 1: ch 1, sc 7, centered on the vertex. Rows 2–6: ch 1, turn, sc 7.
The tab measures 2 in (5.1 cm) wide by 1.5 in (3.8 cm) tall. Fold it over the bottom of the covered ring to the WS and sew the last row to Row 1. Weave in the ends.
Final Blocking
- Stuff the holder firmly with a rolled towel or plastic bags.
- Shape the facets by hand so that every seam ridge sits straight.
- Mist it evenly until it is damp, not soaked.
- Pinch the rim into a smooth circle and flatten the tab.
- Let it dry completely, hanging or upright.
- Remove the stuffing and check the measurements: 9.25 in (23.5 cm) tall and 10 in (25.4 cm) widest.
Final Quality-Control Checklist
- 15 triangles, each with 63 sc and 6 in (15.2 cm) sides
- 20 seams, all with raised ridges on the outside
- Band seams and base seams with 21 sc each, bottom side seams with 19 sc each
- Top rim at 110 sc, then 100 sc
- Bottom opening at 25 sc, then 20 sc
- Ring tightly covered and tab sewn on securely
- All ends woven in and secured
Troubleshooting
- Triangle cups or curls: The corners are too tight. Loosen the ch-2 corners, or try a larger hook.
- Triangle ruffles: Check that Round 5 has only 1 dc in each ch-1 sp.
- Seams don’t line up: Recount to 21 sts per side and pin both corners before you start joining.
- Rim flares: Make sure Round 2 has all 10 decreases.
- Bags fall out of the bottom: Add a third round to the opening: sc 2, sc2tog, for 15 sc.
- Bags are hard to pull out: Leave Round 2 of the opening off and keep it at 25 sc.
Care
Hand wash in cool water, press out the water in a towel, and reshape the holder to dry. Do not tumble dry, because it can stretch the seams and the tab.
Final Notes
The measurements build on each other. A triangle side of 6 in (15.2 cm) at 21 sc gives a rim of 110 sc, about 31.5 in (80.0 cm). The rim then draws in to 100 sc, about 28.5 in (72.4 cm). The body stands 9.25 in (23.5 cm) tall with its 1 in (2.5 cm) border, and the bottom opening is 20 sc around. If your first triangle matches gauge, every count after it will line up. Hang it near the door and fill it up.
Happy crocheting!