

The Evergreen Links Wall Hanging is a simple, sculptural decoration made of five crocheted rings linked like a chain. Each ring is a round, firm tube of single crochet with a light cord inside. The rings get bigger from top to bottom, which gives the piece a soft, tapered outline. It looks good on a narrow wall, a door, or beside a window.
The sample uses one color, a deep olive green. That keeps the attention on the shape and the ridged stitch texture. Any solid color works. Variegated yarn tends to hide the stitch columns.
The pattern uses US crochet terms. The finished chain of rings measures about 13¼ in (33.7 cm) long and 5 in (12.7 cm) wide at the bottom ring. The hanging loop adds about 4 in (10.2 cm) above that.
Here is how it is built. You crochet each ring as a narrow single crochet tube worked in a spiral. You slide a length of cotton piping cord inside, then sew the tube’s two ends together to close the ring. Each new ring is threaded through the ring before it before you close it, so the chain is linked as you go. A chained hanging cord with a wrapped knot finishes the top.
Finished Size and Construction
- Finished size: about 13¼ in (33.7 cm) long × 5 in (12.7 cm) wide, not counting the hanging loop
- Skill level: Easy
- Terminology: US crochet terms
- Yarn weight: Worsted (#4), cotton or a cotton blend
- Hook: 3.75 mm (US F-5), or the size you need to get gauge
- Number of pieces: 5 rings plus 1 hanging cord
- Layout: one vertical column, smallest ring at the top, largest at the bottom
- Piece size: outer diameters of 2.5 in (6.4 cm), 3 in (7.6 cm), 3.5 in (8.9 cm), 4 in (10.2 cm) and 5 in (12.7 cm)
- Size before border: a straight tube 6 in to 13.5 in (15.2 cm to 34.3 cm) long, depending on the ring
- Border depth: none. The tube surface is the finished edge.
Materials
Yarn: Use a smooth worsted-weight cotton or cotton blend. It keeps the tube firm and shows the stitch columns clearly. Acrylic also works, but it is softer and may sag a little on the larger rings.
- Olive green: 60 g, about 120 m (131 yd)
Tools and notions:
- 3.75 mm (US F-5) crochet hook
- About 1.5 yd (137.2 cm) of 3/8 in (1 cm) cotton piping cord or soft macramé cord, for the filler
- Tapestry needle
- Scissors
- Stitch marker
- Tape measure
- Small piece of tape, to wrap the cord ends so they don’t fray
The yarn amount includes about a 30% margin for your swatch, seams, and the hanging cord. Five rings at this gauge use about 85 m (93 yd).
Abbreviations (US Terms)
- ch: chain
- sc: single crochet
- sl st: slip stitch
- st(s): stitch(es)
- rnd(s): round(s)
- BLO: back loop only
Special technique: spiral tube. You work the rounds continuously without joining. Put a marker in the first stitch of each round and move it up as you go. Count rounds by the marker, not by eye. A spiral has no visible join line, which gives the clean, unbroken columns you see on these rings.
Gauge and Checkpoints
Gauge: 5 sc and 6 rnds = 1 in (2.5 cm) in the tube fabric.
Don’t make a flat swatch. Make Ring A first and use it as your test piece. A tube behaves differently from flat fabric, and Ring A is quick.
Checkpoint 1 (after Rnd 12): The tube should be 2 in (5.1 cm) long. Laid flat, it should be 1 in (2.5 cm) wide, because the 2 in (5.1 cm) around folds in half.
Checkpoint 2 (tube finished): Ring A’s tube should be 6 in (15.2 cm) long, measured gently without stretching.
Checkpoint 3 (cord inserted): The filled tube should be about 0.6 in (1.5 cm) thick and feel firm, like a soft pencil.
Checkpoint 4 (ring closed): Ring A should be about 2.5 in (6.4 cm) across the outside, with a hole about 1.3 in (3.3 cm) across in the middle.
If your tube is too long for the round count, your rounds are too short (more than 6 rnds per inch). Go up a hook size, or keep the hook and stop at the target length instead of the target round count.
If your tube is too short, your stitches are tall. Go down to a 3.5 mm (US E-4) hook.
If the cord won’t fit inside, your stitches are too tight around the tube. Go up a hook size, or use 1/4 in (0.6 cm) cord.
If the tube looks baggy or the cord shows through, go down a hook size. The fabric must be dense enough to hide the filler.
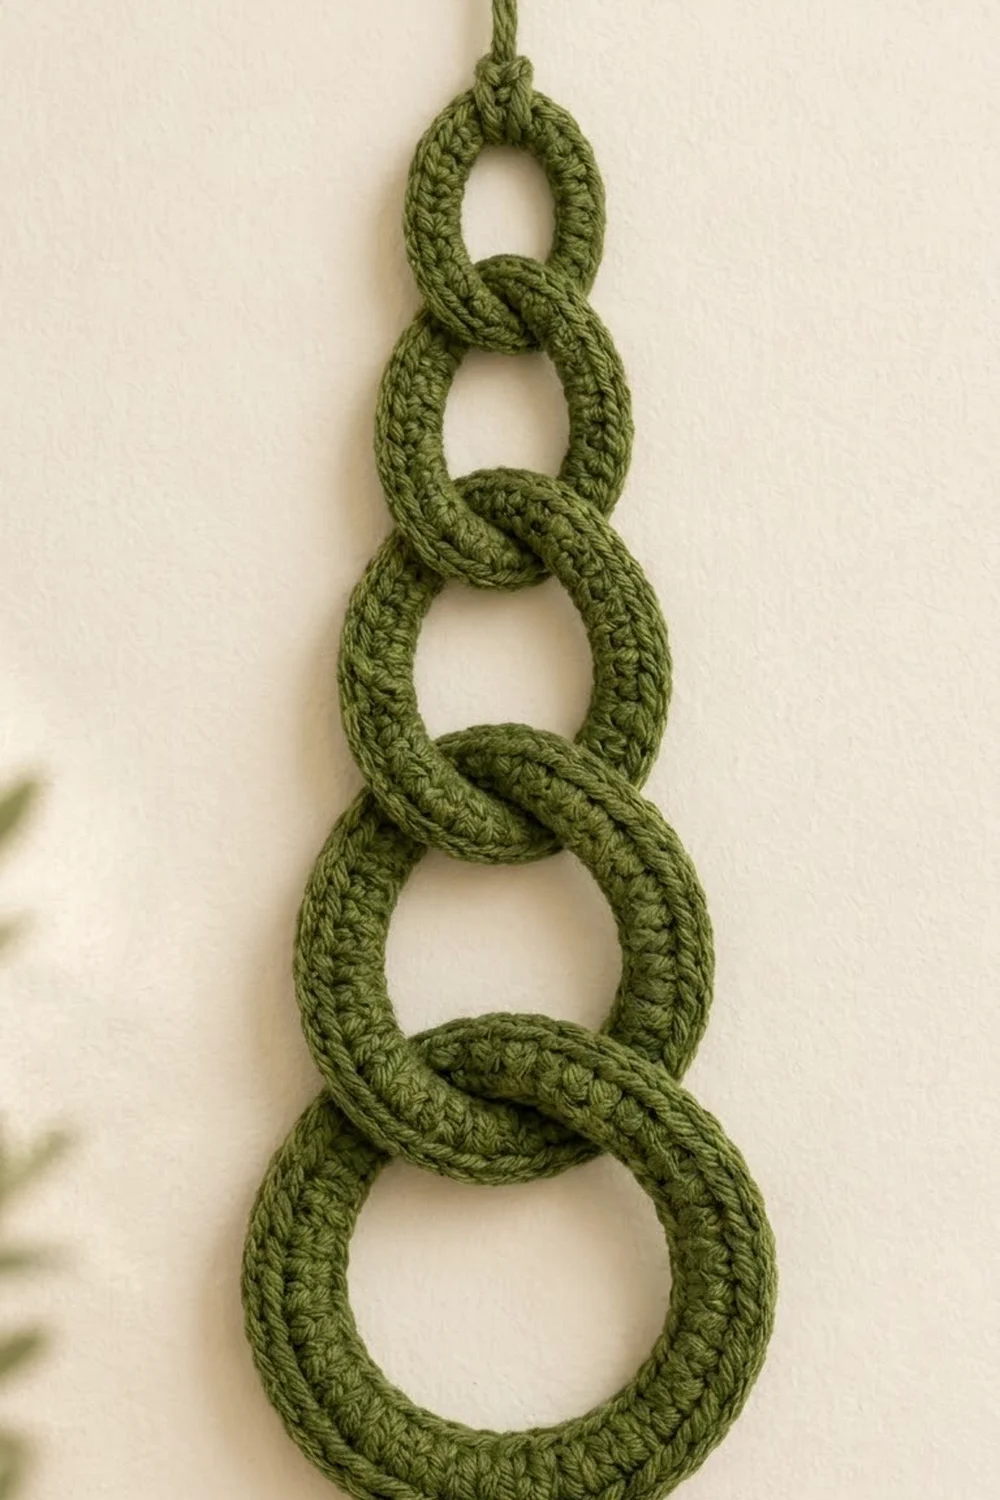
Ring Tube (Basic Pattern)
All five rings use the same tube. Only the number of rounds changes.
Foundation: Leave a 12 in (30.5 cm) tail and ch 10. Join with sl st in the first ch to form a ring, making sure the chain isn’t twisted.
Rnd 1: Ch 1. Sc in each ch around and place a marker in the first sc. (10 sc)
Rnd 2: Sc in each sc around without joining, and move the marker up. (10 sc)
Rnds 3 to end: Repeat Rnd 2 until you reach the round total for your ring (see the table below). Every round has exactly 10 sc.
Count your stitches every 10 rounds. If you have 11 or 9, you have added or skipped a stitch near the marker. Undo back to that round and fix it now. Even one extra stitch makes a bump on the finished ring.
Finishing the tube: After the last round, sl st in the next sc. Fasten off and leave a 12 in (30.5 cm) tail for closing the ring.
| Ring | Rounds | Total sc | Tube length | Cord length | Outer diameter |
|---|---|---|---|---|---|
| A (top) | 36 | 360 | 6 in (15.2 cm) | 5.75 in (14.6 cm) | 2.5 in (6.4 cm) |
| B | 45 | 450 | 7.5 in (19.1 cm) | 7.25 in (18.4 cm) | 3 in (7.6 cm) |
| C | 54 | 540 | 9 in (22.9 cm) | 8.75 in (22.2 cm) | 3.5 in (8.9 cm) |
| D | 63 | 630 | 10.5 in (26.7 cm) | 10.25 in (26.0 cm) | 4 in (10.2 cm) |
| E (bottom) | 81 | 810 | 13.5 in (34.3 cm) | 13.25 in (33.7 cm) | 5 in (12.7 cm) |
Why these numbers work: Tube length divided by π (about 3.14) gives the diameter measured through the middle of the tube. Adding one tube thickness, 0.6 in (1.5 cm), gives the outer diameter. For Ring A, 6 in ÷ 3.14 = 1.9 in, and 1.9 in + 0.6 in = 2.5 in (6.4 cm).
Filling the Tube
- Cut the piping cord to the length in the table for your ring. Each piece is 0.25 in (0.6 cm) shorter than the tube, so the tube ends can meet without crowding.
- Wrap each cord end with a small piece of tape so it doesn’t fray.
- Push the cord into the tube from one end and ease the fabric over it a little at a time. Don’t stretch the tube lengthwise.
- Center the cord so about 0.125 in (0.3 cm) of empty tube is left at each end.
Make All Pieces
Make one tube of each size, all in olive green:
- Ring A: 1 tube, 36 rnds
- Ring B: 1 tube, 45 rnds
- Ring C: 1 tube, 54 rnds
- Ring D: 1 tube, 63 rnds
- Ring E: 1 tube, 81 rnds
- Hanging cord: 1 (see the Border section)
Fill all five tubes with cord. Close only Ring A for now. Leave B through E open until you join them.
Layout grid (top to bottom):
   [ hanging loop ]
         |
        (A)   2.5 in / 6.4 cm
        (B)   3 in / 7.6 cm
        (C)   3.5 in / 8.9 cm
        (D)   4 in / 10.2 cm
        (E)   5 in / 12.7 cm
Each ring passes through the ring directly above it and the ring directly below it, and through no others.
Joining
The rings are joined by linking them, not by sewing them to each other. The only seam on each ring is where its own two tube ends meet.
Closing Ring A:
- Bend the tube into a circle so the last round meets the foundation chain. Check that the stitch columns aren’t twisted. They should run straight around the ring.
- Thread the end tail onto the tapestry needle.
- Whipstitch the 10 sts of the last round to the 10 loops of the foundation chain, one stitch to one loop, all the way around.
- Pull each stitch snug, but not so tight that the seam pinches. The seam should look like one more round of sc.
- Weave both tails through the inside of the tube for 2 in (5.1 cm) and trim.
Linking Ring B:
- Slide one open end of the filled Ring B tube through the center of Ring A.
- Pull it through until Ring A sits roughly in the middle of Ring B’s length.
- Bend Ring B into a circle and whipstitch its ends together, 10 sts to 10 loops, exactly as for Ring A.
Rings C, D and E: Thread each new tube through the ring above it in the same way. C goes through B, D through C, and E through D. Then close each ring.
Tension advice: The seam is where the ring is most likely to flatten. Keep your stitches at the same tension as your crochet. If the seam looks pulled in, add one more pass of whipstitch through the outside loops only.
Size checkpoint: Hang the chain from Ring A. Each joint overlaps by about two tube thicknesses, or 1.2 in (3.0 cm). The outer diameters add up to 18 in (45.7 cm). Take away 4 overlaps × 1.2 in = 4.8 in (12.2 cm), and the chain should hang about 13¼ in (33.7 cm) long.
Border
This project has no fabric border. Each tube’s single crochet surface is its finished edge, and adding stitches would make the smooth rounded shape lumpy. In this section you make the hanging cord, which is the only finishing piece.
Hanging cord:
- Leave an 8 in (20.3 cm) tail and ch 54, keeping the chain firm. It should measure about 9 in (22.9 cm).
- Fasten off and leave another 8 in (20.3 cm) tail.
- Fold the chain in half to make a loop about 4.5 in (11.4 cm) long.
- Lay both cord ends against the top of Ring A, one in front of the ring and one behind it.
- Use one tail to wrap the cord ends and the top of Ring A together tightly 8 times. The wraps should cover about 0.5 in (1.3 cm).
- Thread the tail onto the needle and pass it up under the wraps. Then knot it to the other tail.
- Bury both tails inside Ring A’s tube and trim.
Why the math works: At about 6 ch per inch, 54 ch = 9 in (22.9 cm). Folded in half, that is 4.5 in (11.4 cm). About 0.5 in (1.3 cm) disappears into the wrap, which leaves about 4 in (10.2 cm) of visible loop.
Final Blocking
- Lightly spritz the whole hanging with water. Don’t soak it, because the cord inside takes a long time to dry.
- Roll each ring gently between your palms to round out any flat spots, especially at the seams.
- Turn each ring so its seam faces the back or sits hidden at a joint.
- Lay the chain flat on a towel in its hanging order, with the rings centered on one line.
- Let it dry completely, then hang it from the loop for 24 hours so the rings settle into place.
Final Quality-Control Checklist
- Every round has 10 sc, and the stitch columns run straight around each ring.
- The ring sizes from top to bottom are 2.5, 3, 3.5, 4 and 5 in (6.4, 7.6, 8.9, 10.2 and 12.7 cm).
- No cord shows through the fabric.
- Seams are flat, firm and turned out of sight.
- Each ring links only to the ring above and the ring below it.
- The wrapped knot is tight and the hanging loop is centered.
- The chain hangs straight at about 13¼ in (33.7 cm).
Troubleshooting
Stitch columns twist around the ring. That happens in a spiral. Line up the columns when you close the ring so the twist stays on the back. Next time, work a little more loosely.
The ring is oval, not round. The cord may be too stiff or too long. Trim it by 0.25 in (0.6 cm) and roll the ring between your palms again.
There’s a dent at the seam. The ends are pulled too tight, or the cord is too short. Undo the seam, move the cord to the center, and sew it again with even tension.
The chain hangs crooked. Turn each ring so the joints sit at the exact top and bottom of the ring.
The wrapped knot slips. Add 2 to 3 more wraps and pull each one firmly before you secure it.
Care
Spot clean with a damp cloth and mild soap. If you need to wash it fully, hand wash in cool water, press the water out in a towel, and dry it flat so the cord inside dries completely.
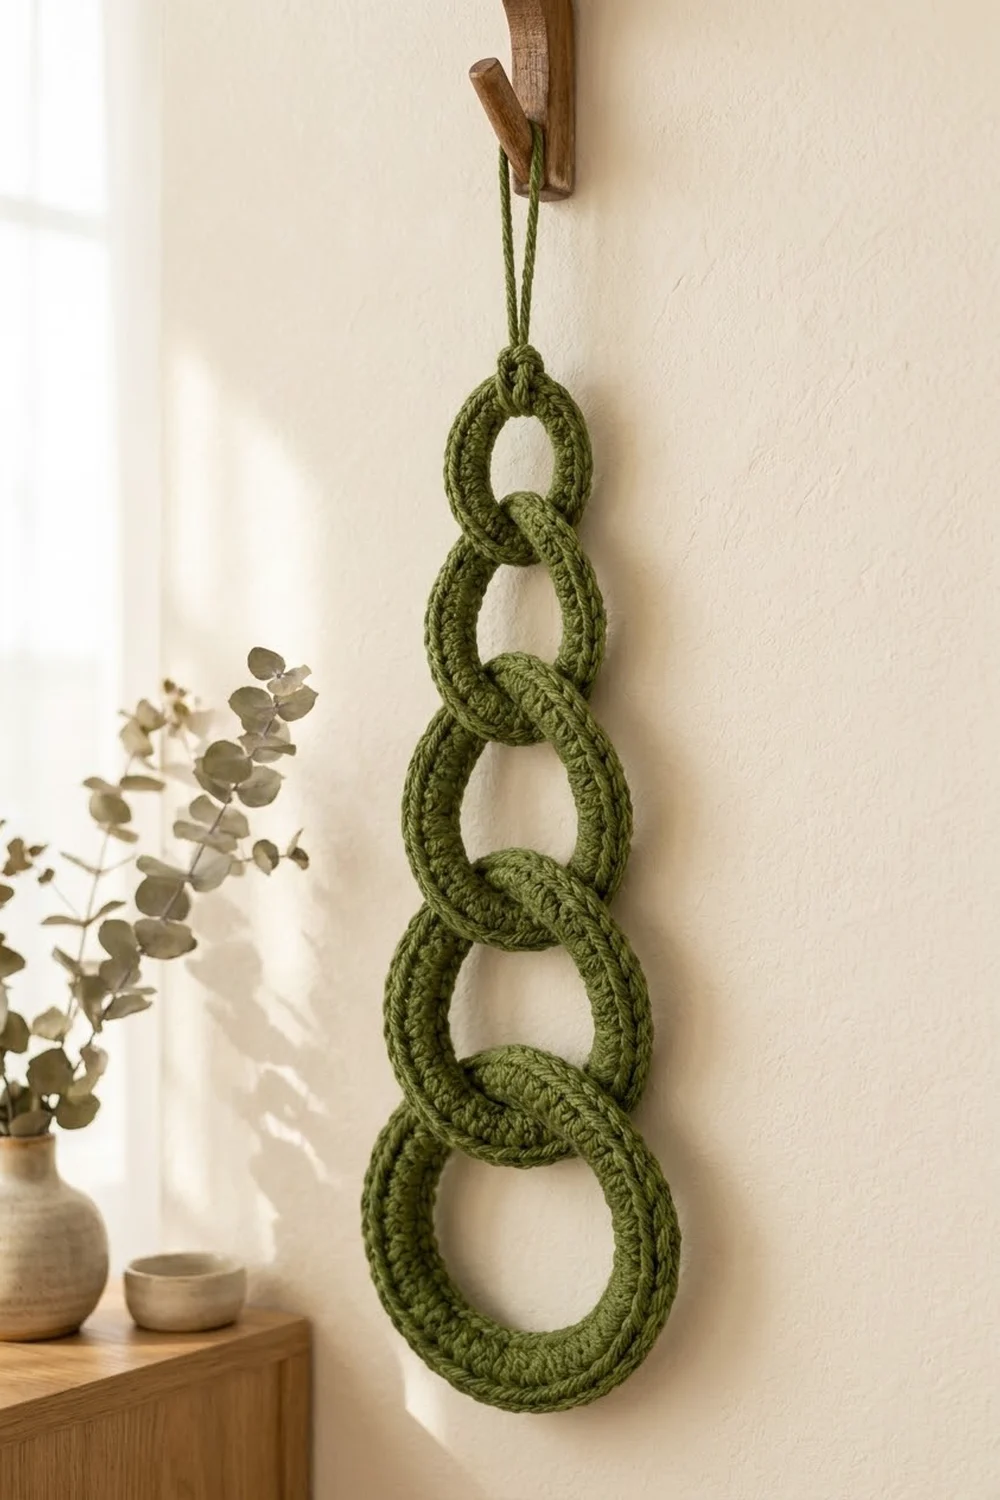
Final Notes
The measurements all build on one another. A gauge of 5 sc and 6 rnds per inch gives a tube 2 in (5.1 cm) around and 0.6 in (1.5 cm) thick when filled. The round count sets each tube’s length, from 6 in to 13.5 in (15.2 cm to 34.3 cm). Tube length divided by π, plus one tube thickness, gives the ring sizes from 2.5 in to 5 in (6.4 cm to 12.7 cm). Linking the five rings, each joint overlapping by 1.2 in (3.0 cm), gives a hanging chain about 13¼ in (33.7 cm) long. If Ring A matches its checkpoints, the other rings will come out right too.
Happy crocheting!