

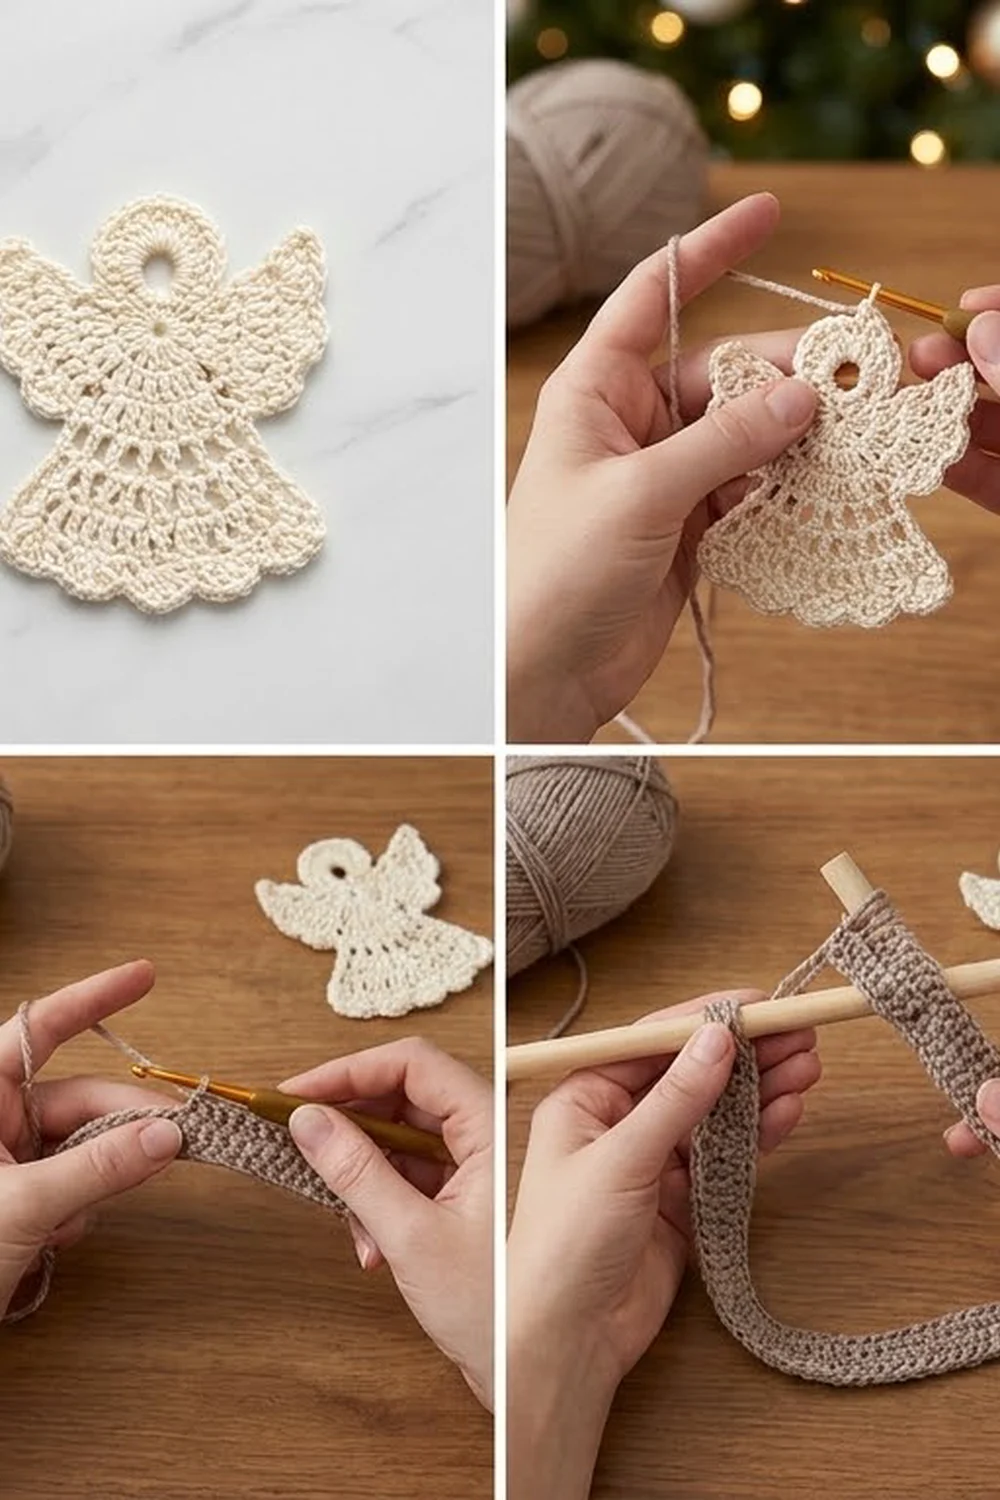
The Hearthside Angel is a small, flat lace angel in soft ivory cotton. She has a round head, two fan-shaped wings that lift up from her shoulders, and a bell skirt with open spokes, a row of chain arches and a scalloped hem. She looks vintage and light, and works well as a tree ornament, a gift-tag topper or a sew-on appliqué for a towel.
The sample is worked in a single cream color. It goes well with natural wood, taupe linen and greenery, but it also looks good in white, pale gold or soft blush.
This pattern uses US crochet terms. The finished angel measures 4 in (10.2 cm) tall and 4.25 in (10.8 cm) wide across both the wings and the hem.
The angel is one single piece. You crochet the head in the round, then work the skirt in rows down from the bottom of the head. Next, you add a fan-shaped wing to each shoulder. Finally, you finish the skirt and wings with a scalloped edging and block the piece flat.
Finished Size and Construction
- Finished size: 4 in (10.2 cm) tall × 4.25 in (10.8 cm) wide
- Skill level: Easy / advanced beginner
- Terminology: US crochet terms
- Yarn weight: DK / light (#3) cotton
- Hook: 3.5 mm (E-4)
- Number of pieces: 1
- Layout: Single motif; the head sits at the top center, a wing comes off each shoulder and the skirt flares below
- Piece size: 4 in (10.2 cm) tall × 4.25 in (10.8 cm) wide
- Size before border: 3.5 in (8.9 cm) tall, hem 3.5 in (8.9 cm) wide, wingspan 3.75 in (9.5 cm)
- Border depth: about 0.5 in (1.3 cm) at the hem and 0.25 in (0.6 cm) at the wing tips
Materials
Yarn: Use a smooth mercerized or combed cotton in DK weight. Cotton holds the scallops crisply, takes blocking well and doesn’t fuzz. Acrylic also works, but the lace will look softer and the piece may curl more.
- Cream / ivory: 8 g (about 18 m / 20 yd)
This quantity includes a margin for a test swatch, the weaving tails and one practice wing. One angel actually uses about 5 g (12 m / 13 yd).
Tools:
– 3.5 mm (E-4) crochet hook
– Tapestry needle
– Scissors
– 2 locking stitch markers
– Blocking mat or folded towel, rust-proof pins
– Spray bottle with water
– Optional: spray starch for an ornament-stiff finish
Abbreviations (US Terms)
- ch – chain
- sl st – slip stitch
- sc – single crochet
- dc – double crochet
- sp(s) – space(s)
- st(s) – stitch(es)
- tch – turning chain
- RS – right side
- [ ] – repeat the bracketed steps the number of times stated
Special stitch – Shell: Work 5 dc into the same stitch or space. In the wing edging, a smaller 3-dc shell is used; the instructions say which shell to work each time.
Working around a post: Insert the hook from front to back around the stitch’s vertical post instead of under its top loops. In this pattern you use this to anchor each wing to the side of Row 1.
Gauge and Checkpoints
Gauge matters less here than on a garment, but it controls the final size. Make one head first and measure it before you go on.
- Head gauge: Head Rounds 1–2 = 1.25 in (3.2 cm) across
- Dc gauge: 5 dc = 1 in (2.5 cm); 1 dc row ≈ 0.5 in (1.3 cm) tall
Checkpoints:
– After Head Round 2: 1.25 in (3.2 cm) diameter
– After Skirt Row 1: bodice 1.25 in (3.2 cm) wide
– After Skirt Row 3: skirt 3 in (7.6 cm) wide at the bottom edge
– After Skirt Row 4: 3.5 in (8.9 cm) tall from the top of the head, hem 3.5 in (8.9 cm) wide
– After Wing Row 1 (both wings): wingspan 3.75 in (9.5 cm)
– After the border: 4 in (10.2 cm) × 4.25 in (10.8 cm)
Too big? Go down to a 3.25 mm (D-3) hook, or switch to a slightly thinner sport-weight cotton.
Too small? Go up to a 3.75 mm (F-5) hook.
Head cupping? Your sc round is too tight. Loosen your tension or go up a hook size for Round 2 only.
Pattern
Head (worked in the round)
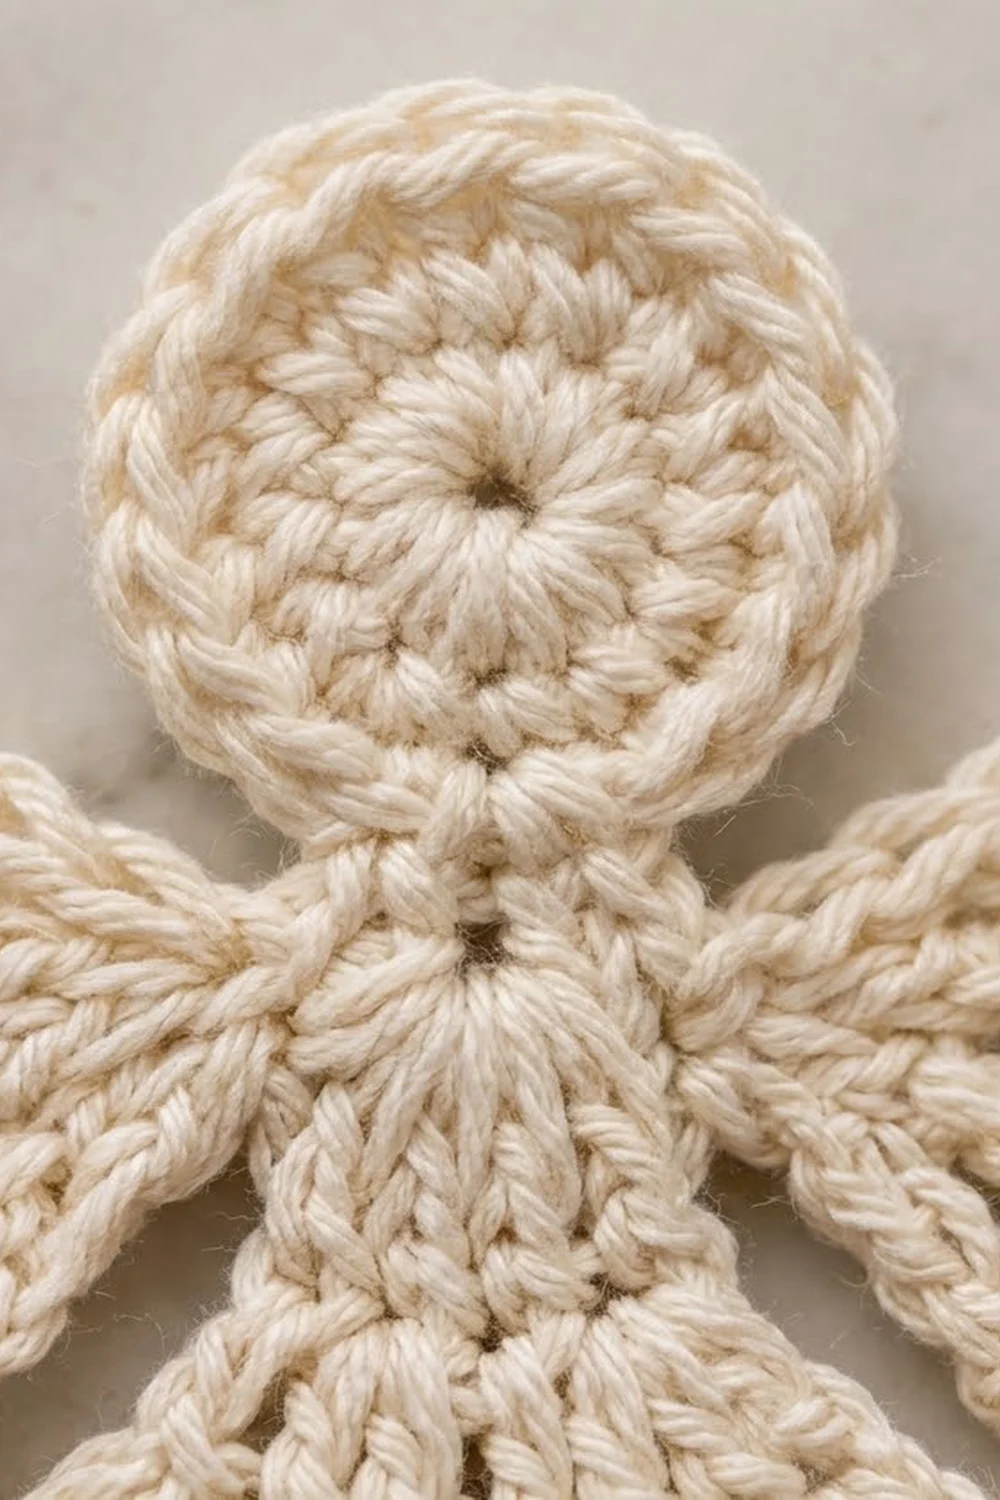
Round 1: Make a magic ring. Ch 3 (counts as dc), work 11 dc into the ring. Pull the ring closed and sl st to the top of the beginning ch-3. (12 dc)
Round 2: Ch 1, work 2 sc in each st around. Sl st to the first sc. (24 sc)
Fasten off, leaving a 6 in (15.2 cm) tail.
Checkpoint: The head lies flat and measures 1.25 in (3.2 cm) across.
Hold the head with the Round 2 join at the top center. Counting around from the join, the sc numbered 12, 13 and 14 sit directly opposite the join, at the bottom of the head. Mark sc 12 and sc 14.
Skirt (worked in rows from the head down)
Row 1 (bodice), RS: Join yarn with a sl st in sc 12. Ch 3 (counts as dc), dc in the same st, 2 dc in sc 13, 2 dc in sc 14. Turn. (6 dc)
This short, solid row forms the bodice and shoulders. It should measure 1.25 in (3.2 cm) wide.
Row 2 (first spokes): Ch 4 (counts as dc + ch 1). [Dc in next dc, ch 1] 4 times, then dc in the top of the tch. Turn. (6 dc, 5 ch-1 sps)
Spreading the same 6 dc apart with ch-1 spaces makes the spokes fan outward.
Row 3 (wide spokes): Ch 5 (counts as dc + ch 2). [Dc in next dc, ch 2] 4 times, then dc in the 3rd ch of the tch. Turn. (6 dc, 5 ch-2 sps)
Checkpoint: The bottom edge measures 3 in (7.6 cm).
Row 4 (arch band): Ch 1. Sc in the first dc. [Ch 3, sc in next ch-2 sp, ch 3, sc in next dc] 5 times; the final sc goes into the 3rd ch of the tch. Turn. (11 sc, 10 ch-3 arches)
Each ch-2 space from Row 3 gets its own sc, so the arch count is exactly double the space count: 5 × 2 = 10 arches.
Checkpoint: The angel measures 3.5 in (8.9 cm) from the top of the head to the arches, and the hem measures 3.5 in (8.9 cm) wide. Don’t fasten off. The hem border is worked from here (see Border).
Wings (make 2, worked into the shoulders)
Finish the hem border first (Border, Hem Row 5), then come back to the wings. You can also work the wings first if you prefer; the counts don’t change.
Wing Row 1, RS: With the RS facing and the head at the top, join yarn with a sl st around the post of the last dc of Skirt Row 1 on the right-hand side. That stitch is the shoulder edge. Ch 4 (counts as dc + ch 1). Then [dc, ch 2] 4 times around the same post and dc around the same post once more. Turn. (6 dc, 5 ch-2 sps)
Correction note for accuracy: the first space after the ch-4 is ch-1 sized by the turning chain. To keep all 5 spaces even, make the starting chain ch 5 (counts as dc + ch 2) instead. The count stays 6 dc, 5 ch-2 sps.
All 6 dc go around a single post, so the wing opens into a half-fan. Gently turn it so it points out and slightly up beside the head.
Repeat on the left shoulder around the post of the first stitch of Skirt Row 1 (the beginning ch-3).
Checkpoint: Each wing reaches about 1.25 in (3.2 cm) out from the bodice. The wingspan is 1.25 in + 1.25 in + 1.25 in = 3.75 in (9.5 cm).
Border
The border is the scalloped edging that gives the angel her wavy outline. It’s worked separately on the hem and on each wing.
Border gauge: One hem repeat (one 5-dc shell plus one sc) ≈ 0.4 in (1.0 cm) wide and 0.5 in (1.3 cm) deep. One wing repeat (one 3-dc shell plus one sc) ≈ 0.3 in (0.8 cm) wide and 0.25 in (0.6 cm) deep.
Hem Row 5 (continue from Skirt Row 4)
Ch 1. Sc in the first sc. [Work a shell (5 dc) in the next ch-3 arch, then sc in the next sc] 10 times. Fasten off.
Count: 11 sc + (10 shells × 5 dc = 50 dc) = 61 sts, 10 shells.
Why the math works: Row 4 has 10 arches and 11 sc, and they alternate starting and ending with an sc. Each arch takes one shell and each sc stays an sc, so you get 10 shells with an anchoring sc on each side of every shell. The hem spreads from 3.5 in (8.9 cm) to 4.25 in (10.8 cm) because the shells flare about 0.375 in (1.0 cm) past each side edge.
Wing Row 2 (edging, each wing)
Continue from Wing Row 1 without fastening off. Ch 1. Sc in the first dc. [Work 3 dc in the next ch-2 sp, then sc in the next dc] 5 times; the final sc goes into the 3rd ch of the tch. Fasten off.
Count: 6 sc + (5 shells × 3 dc = 15 dc) = 21 sts, 5 shells per wing.
Why the math works: Wing Row 1 has 6 dc and 5 spaces. Each space gets one small shell and each dc gets one sc, so the edging matches the spokes one for one. Each wing grows about 0.25 in (0.6 cm). The final wingspan is 1.25 in + 2 × 1.5 in = 4.25 in (10.8 cm), the same as the hem width, so the angel’s outline is balanced.
Finished dimensions: 4 in (10.2 cm) tall × 4.25 in (10.8 cm) wide.
Final Blocking
- Weave in all the tails, keeping them inside the solid dc of the head or bodice so they don’t show in the lace.
- Wet the angel completely in cool water and gently press out the extra water in a towel. Don’t wring it.
- Lay her RS up on the blocking mat.
- Pin the head into a circle 1.25 in (3.2 cm) across.
- Pin the center of each hem shell so the scallops sit evenly and the hem measures 4.25 in (10.8 cm).
- Open each wing so the spokes fan evenly. Pin the tip of each wing shell so the wingspan measures 4.25 in (10.8 cm) and the wings point slightly upward.
- Check that the total height is 4 in (10.2 cm) and adjust the pins if needed.
- For an ornament, mist with spray starch now.
- Let it dry completely, at least 8 hours, before you unpin it.
Final Quality-Control Checklist
- Head is round, flat and 1.25 in (3.2 cm) across
- Bodice is centered under the head and the join seam is at the top
- Skirt has 6 even spokes, then 10 arches and 10 hem shells
- Each wing has 6 spokes and 5 edge shells
- Both wings are the same size and lift at the same angle
- Hem and wingspan both measure 4.25 in (10.8 cm)
- Total height is 4 in (10.2 cm)
- All tails are woven in and none show through the lace
Troubleshooting
Head ruffles: You made too many sc in Round 2. Recount to 24, or work Round 2 with a smaller hook.
Skirt pulls in at the sides: Your turning chains are too tight. Chain a little more loosely, and check that each tch counts as a stitch.
Wrong number of arches: Row 4 needs one sc in every ch-2 space and one sc in every dc. Count 11 sc before you start the hem.
Wings flop downward: Wing Row 1 wasn’t anchored around the shoulder post. Rework it there, and pin the wings upward when blocking.
Scallops lean to one side: You skipped an sc between shells. Each shell must sit between two sc.
Uneven wings: Count the 5 spaces on each wing before the edging. The tension on the post anchor also makes a difference.
Care
Hand wash in cool water with mild soap, press it flat in a towel and reblock to dry. If she’s sewn onto a towel, wash the towel on a gentle cycle and lay it flat to dry.
Final Notes
Here is the measurement chain to check against as you go:
– Head: 1.25 in (3.2 cm)
– Bodice: 1.25 in (3.2 cm) wide
– Skirt after Row 3: 3 in (7.6 cm) wide
– Before the border: 3.5 in (8.9 cm) tall, hem 3.5 in (8.9 cm) wide, wingspan 3.75 in (9.5 cm)
– Finished after the scalloped edging: 4 in (10.2 cm) × 4.25 in (10.8 cm)
If you hit each checkpoint, the stitch counts will line up and your angel will block into a crisp, balanced shape.
Happy crocheting!