

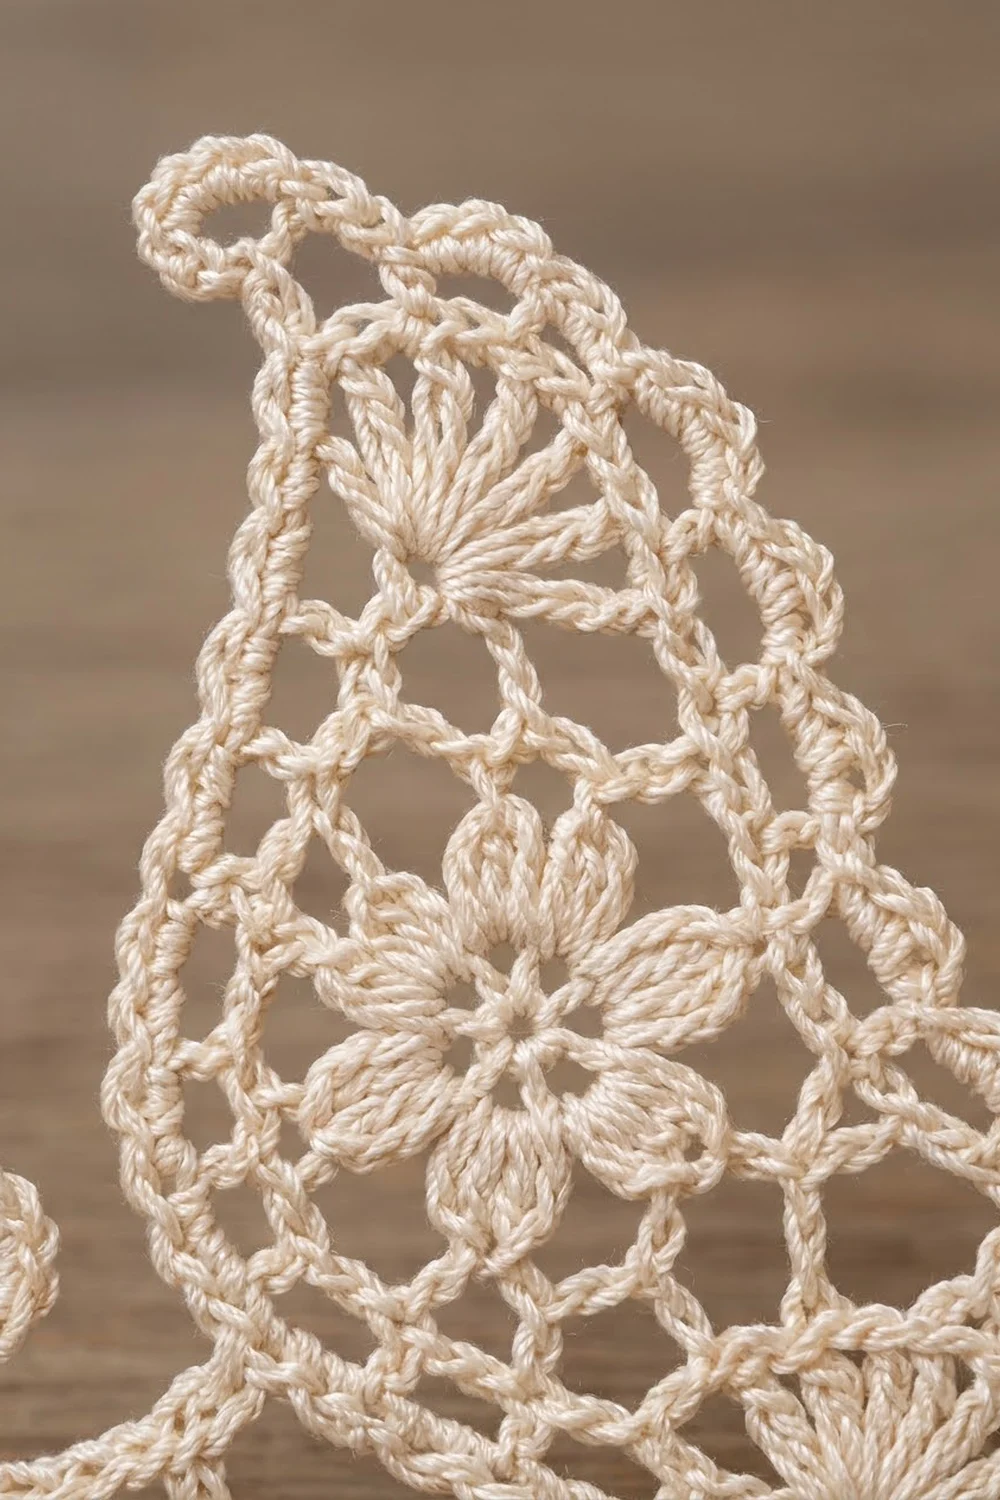
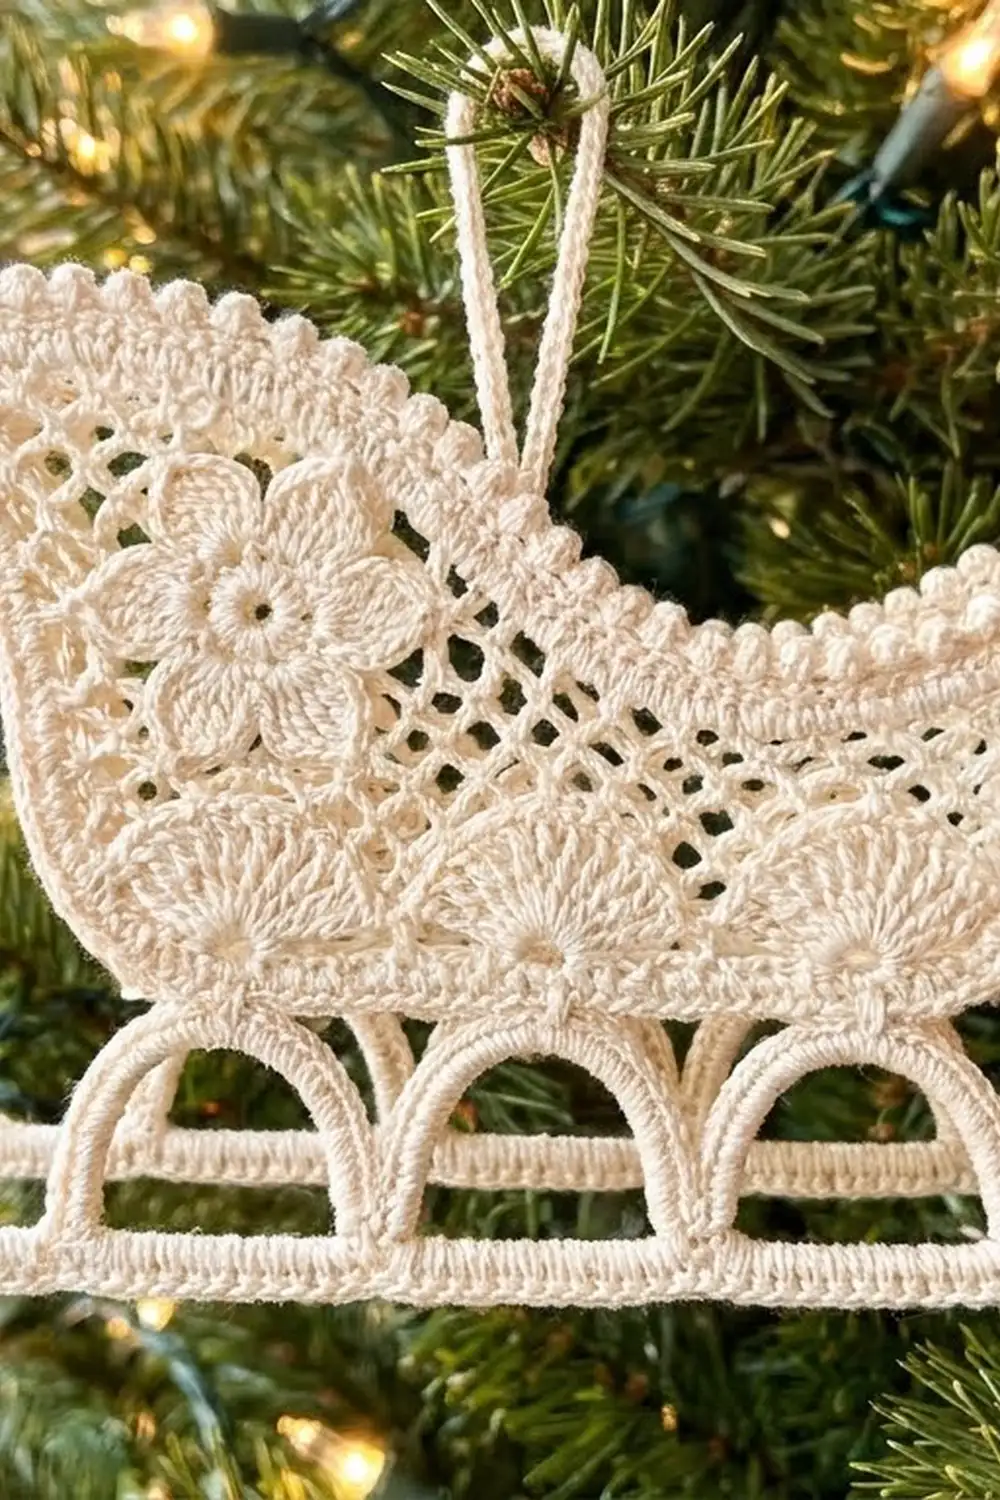
This little sleigh is a cream thread ornament that looks like frosted filigree on the tree. A six-petal flower sits in the middle of an airy chain-loop net. Fan shells top the back and front crests, and a beaded corded edge outlines the whole shape. Below the body, chain struts form small arches down to a runner that curls into a spiral at each end.
The design uses one color, cream or ivory, so the lace texture does the work. It suits a vintage, white-Christmas tree, and it also works as a gift tag or a card embellishment.
The pattern uses US crochet terms. The finished ornament measures about 4.5 in (11.4 cm) wide by 3.75 in (9.5 cm) tall, plus a 1 in (2.5 cm) hanging loop.
The construction is simple to follow. You crochet the flower first and grow the net around it in rounds. A shaping round then flattens the bottom and sets up the crests, and short rows build the back and front crests. Two border rounds create the corded outline. Last, you make the runner and crochet it onto the body with struts, so nothing is sewn.
Finished Size and Construction
- Finished size: 4.5 in x 3.75 in (11.4 cm x 9.5 cm), loop excluded
- Skill level: Intermediate
- Terminology: US
- Yarn weight: Size 10 cotton crochet thread (lace, weight 0)
- Hook: 1.5 mm (US steel 8)
- Number of pieces: 1 (a single ornament; the runner is crocheted onto the body)
- Layout: Single motif, no grid
- Body size before border: 3.0 in wide x 2.75 in tall at the back crest (7.6 cm x 7.0 cm)
- Body size after border: 3.25 in x 3.0 in (8.3 cm x 7.6 cm)
- Border depth: 1/8 in (0.3 cm) on each edge
Materials
Thread: Use a mercerized size 10 cotton thread. Mercerized cotton holds crisp stitch definition and takes stiffener well. Avoid fuzzy or acrylic threads, because the net loops will blur.
- Cream/ivory: 8 g, about 25 m (27 yd)
This quantity includes a margin for your gauge swatch and weaving in ends. One ornament uses roughly 6 g (about 19 m).
Tools:
– 1.5 mm (US steel 8) hook
– Fine tapestry needle
– Stitch markers (4–6 small ones)
– Rustproof pins and a foam blocking board
– Fabric stiffener, or a 1:1 mix of white glue and water
– Plastic wrap
– Small scissors
Abbreviations (US Terms)
- ch – chain
- sl st – slip stitch
- sc – single crochet
- hdc – half double crochet
- dc – double crochet
- rev sc – reverse single crochet (crab stitch)
- sk – skip
- sp – space
- st(s) – stitch(es)
Special stitch – rev sc: Work single crochet from left to right (right to left if you are left-handed). Without turning, insert the hook in the next stitch to the right, yarn over, and pull up a loop. Yarn over again and pull through both loops. The twisted top creates the beaded, cord-like edge.
Gauge and Checkpoints
Gauge: 10 sc = 1 in (2.5 cm) using size 10 thread and a 1.5 mm hook.
Make one full ornament as your test piece before starting a batch, and check it at these points:
- After Flower Round 3: 1.25 in (3.2 cm) across
- After Round 4: 1.75 in (4.4 cm) across
- After Round 6: 2.75 in (7.0 cm) across, slightly oval
- After Round 7: bottom edge 2.0 in (5.1 cm); body 3.0 in x 2.0 in (7.6 cm x 5.1 cm)
- After the crests: 2.75 in (7.0 cm) tall at the back, 2.4 in (6.1 cm) at the front
- After the border: 3.25 in x 3.0 in (8.3 cm x 7.6 cm)
- Runner before curling: 5.5 in (14.0 cm)
If your piece is too big, go down to a 1.4 mm or 1.25 mm hook. If it is too small, go up to a 1.65 mm hook. Small differences of 1/8 in (0.3 cm) can be corrected in blocking.
Pattern
Flower Center
Round 1: Ch 4 and sl st to the first ch to form a ring. Ch 1 and work 12 sc in the ring. Join with a sl st to the first sc. (12 sc)
Round 2: Ch 1, sc in the first sc, ch 3, sk 1. [Sc in the next sc, ch 3, sk 1] 5 times. Join to the first sc. (6 sc, 6 ch-3 sps)
Round 3: In each ch-3 sp, work (sc, hdc, 3 dc, hdc, sc). Join. (6 petals, 42 sts)
The petals come out rounded and slightly cupped, which gives the flower its raised look.
Round 4: Sl st in the next 4 sts so you finish in the center dc of the first petal. [Ch 5, sc in the center dc of the next petal] 5 times, then ch 5 and sl st in the first sl st. (6 ch-5 loops)
Lace Net
Round 5: Sl st into the first loop. [(Sc, ch 5, sc) in the loop, ch 5] in each loop around, and join. (12 ch-5 loops)
Round 6: Sl st in the next 3 ch to reach the center of the first loop. [Ch 5, sc in the next loop] 11 times, then ch 5 and join. (12 ch-5 loops)
Lay the net flat with the flower toward the left (the back of the sleigh). Mark the loops counterclockwise, starting at the lower left:
- B1–B4: the 4 bottom loops, from back to front
- F1–F2: the 2 front loops, lower then upper
- T1–T4: the 4 top loops, from front to back
- K1–K2: the 2 back loops, upper then lower
Round 7 (Shaping Round)
Join the thread in B1 and work in this order:
- Bottom, B1–B4: 5 sc in each loop (20 sc). This is the flat floor of the sleigh.
- Lower front, F1: 7 dc in the loop (7 dc). This is the small lower fan.
- Upper front, F2: 5 sc (5 sc)
- Top, T1–T4: 5 sc in each loop (20 sc)
- Back, K1–K2: 5 sc in each loop (10 sc)
Join to the first sc and fasten off. (62 sts: 20 + 7 + 5 + 20 + 10)
Back Crest (Short Rows)
Row 1: With the right side facing, join the thread in the 1st sc of T4 and sc in the same st. [Ch 5, sk 2, sc in the next st] 3 times. This uses all 10 sts of T4 and K1 (1 + 9). (3 loops)
Row 2: Ch 1 and turn. Sc in the first loop, [ch 5, sc in the next loop] twice. (2 loops, 3 sc)
Row 3: Ch 1 and turn. Sc in the first loop, ch 1, then work 9 dc in the center sc of Row 2. Ch 1 and sc in the last loop. (13 sts: 9 dc, 2 ch, 2 sc)
Fasten off. The 9 dc spread out from a single stitch, which gives the radiating fan.
Front Crest (Short Rows)
Row 1: Join the thread in the 1st sc of F2 and sc in the same st. [Ch 5, sk 2, sc in the next st] 3 times, working across all 10 sts of F2 and T1. (3 loops)
Row 2: Ch 1 and turn. Sc in the first loop, 9 dc in the middle loop, sc in the last loop. (11 sts)
Fasten off. The 10 sc of T2 and T3 stay unworked between the crests and form the seat dip.
Border (Corded Outline)
Border gauge: 10 sc = 1 in (2.5 cm), the same as the body. On row-end edges, work 2 sc per loop row and 1 sc per sc or fan row.
Each segment count below already includes its corner stitches. Do not add extra stitches at the corners.
Border Round 1: Join the thread in the first sc of B1. Sc evenly around as follows:
- Bottom: 1 sc in each st (20)
- Lower front fan, F1: 1 sc in each dc (7)
- Front crest, up the side: 2 sc for Row 1 and 1 sc for Row 2 (3)
- Front crest top: 1 sc in each st of Row 2 (11)
- Front crest, down the side: (3)
- Seat dip, T2–T3: 1 sc in each st (10)
- Back crest, up the side: 2 sc each for Rows 1–2 and 1 sc for Row 3 (5)
- Back crest top: 1 sc in each st and ch of Row 3 (13)
- Back crest, down the side: (5)
- Lower back, K2: 1 sc in each st (5)
Join. (82 sc: 20 + 7 + 3 + 11 + 3 + 10 + 5 + 13 + 5 + 5)
Border Round 2: Ch 1 and do not turn. Work 1 rev sc in each sc around, and add two extras as you go:
- Back curl: At the last sc of the back crest top (the back corner), work the rev sc, then ch 9. Sc in the 2nd ch from the hook and in the next 7 ch (8 sc). Sl st in the same border st.
- Hanging loop: At the 5th sc of the seat dip, work the rev sc, then ch 20 and sl st in the same st.
Join and fasten off. (82 rev sc; the curl and the loop are not counted)
Why the math works: Round 1 places exactly 1 sc on each existing stitch along the stitched edges, so those edges keep their length and lie flat. The row-end rate of 2 sc per loop row matches the height of a ch-5 net row, about 0.2 in (0.5 cm), at 10 sc per inch. Round 2 is worked 1 into 1, so the count stays at 82, and the twisted rev sc adds the 1/8 in (0.3 cm) corded edge without rippling.
Runner and Struts
Row 1: Ch 56. Sc in the 2nd ch from the hook and in each ch across. (55 sc, 5.5 in / 14.0 cm)
Row 2: Ch 1 and do not turn. Work 1 rev sc in each sc back across. (55 rev sc)
Fasten off. Number the runner stitches 1–55 from the end where Row 2 finished. Sts 1–9 become the back curl, sts 10–42 are the straight runner (3.3 in / 8.4 cm), and sts 43–55 become the larger front curl.
Struts: Count the 20 bottom border stitches from the back corner.
- Join the thread at body st 2, ch 7, and sl st in runner st 14.
- Work 8 sc over the ch-7 back toward the body, then sl st in body st 2.
- Sl st in the next 6 sts to reach body st 8. Repeat steps 1–2 into runner st 22.
- Sl st in the next 5 sts to reach body st 13. Repeat into runner st 30.
- Sl st in the next 6 sts to reach body st 19. Repeat into runner st 38.
Fasten off. The struts mirror each other around the center of the body (2 + 19 = 21 and 8 + 13 = 21) and around runner st 26. This keeps the arches centered.
Final Blocking
- Weave in all ends along the corded edge so they don’t show through the net.
- Soak the ornament in stiffener until it is fully saturated, then gently squeeze out the excess.
- Cover the blocking board with plastic wrap.
- Pin the bottom edge straight first, 2.0 in (5.1 cm) long.
- Open each net loop and the flower petals. Pin the crests: the back to 2.75 in (7.0 cm) and the front to 2.4 in (6.1 cm), measured before the border.
- Set the struts at an even 0.6 in (1.5 cm) drop and pin the runner straight.
- Roll the runner curls inward, the back curl to about 0.4 in (1.0 cm) across and the front curl to about 0.5 in (1.3 cm). Roll the back crest curl outward. Pin each curl in its spiral.
- Check the overall size: 4.5 in x 3.75 in (11.4 cm x 9.5 cm).
- Let it dry completely, usually 12–24 hours, before unpinning.
Final Quality-Control Checklist
- [ ] Flower has 6 even petals and 6 ch-5 loops
- [ ] Round 7 has 62 sts
- [ ] Back crest is taller than the front crest; seat dip has 10 sts
- [ ] Border has 82 sts in each round, with no corner extras
- [ ] Runner has 55 sts; struts land on runner sts 14, 22, 30, and 38
- [ ] Hanging loop sits at the center of the seat, and the ornament hangs level
- [ ] Finished size is 4.5 in x 3.75 in (11.4 cm x 9.5 cm)
- [ ] No visible ends and no stiffener shine or residue
Troubleshooting
- Net loops are cupping: Your chains are too tight. Loosen your chain tension, or work the ch-5s on a hook 0.25 mm larger.
- Border ripples: You likely added stitches on the row-end edges. Recount against the segment counts.
- Border pulls the edge in: You skipped stitches. Recheck that each segment has its full count.
- Fans look flat: Keep all 9 dc in a single stitch; don’t spread them across neighboring stitches.
- Ornament hangs tilted: Move the hanging loop one stitch toward the higher side, or re-block the crests.
- Curls unroll: Re-stiffen the curls and pin them in a tighter spiral.
Care
Dust gently with a soft brush. If the ornament gets limp, rinse it in cool water, then re-stiffen and re-block it.
Final Notes
Here is the measurement chain:
- The flower measures 1.25 in (3.2 cm) after Round 3 and 1.75 in (4.4 cm) after Round 4.
- The net reaches 2.75 in (7.0 cm) after Round 6.
- Round 7 sets a 2.0 in (5.1 cm) bottom edge.
- The crests bring the body to 3.0 in x 2.75 in (7.6 cm x 7.0 cm).
- The 82-stitch border adds 1/8 in (0.3 cm) per edge, for 3.25 in x 3.0 in (8.3 cm x 7.6 cm).
- The 55-stitch runner is curled and blocked to finish at 4.5 in x 3.75 in (11.4 cm x 9.5 cm).
Check each stage and the next one will fall into place. Happy crocheting!