

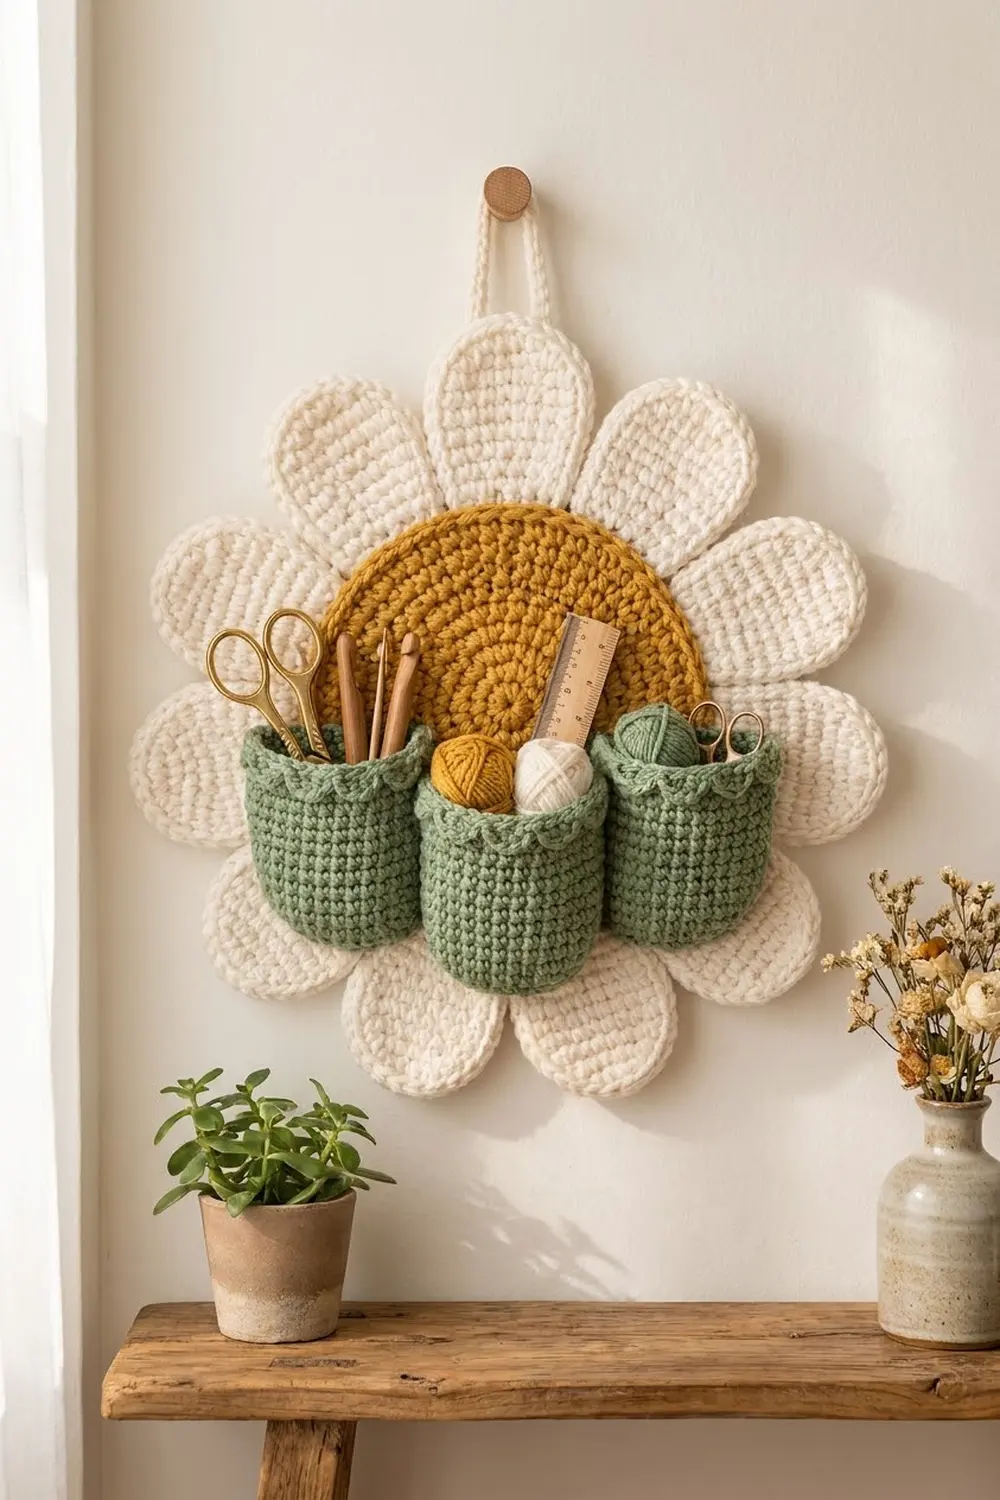
This daisy wall organizer turns a few simple crochet shapes into something you will use every day. A warm mustard center sits inside twelve soft cream petals. Three sage green pockets across the lower half hold scissors, hooks, a small ruler and mini yarn balls.
The colors are calm and natural: mustard, cream and sage. The style is cottage-modern, with solid single crochet fabric, a rope-like edge on the center and a small scalloped trim on each pocket rim.
This pattern uses US crochet terms. The finished organizer measures about 13 in (33.0 cm) from petal tip to petal tip. With the 3 in (7.6 cm) hanging loop, it’s about 16 in (40.6 cm) tall.
You make each part separately: one center circle, twelve petals and three pockets. Then you sew the petals behind the center, sew the pockets onto the front and add the hanging cord. Everything is single crochet in joined rounds, so the fabric is firm enough to carry tools.
Finished Size and Construction
- Finished size: 13 in (33.0 cm) wide x 13 in (33.0 cm) tall, plus a 3 in (7.6 cm) loop
- Skill level: Easy to intermediate
- Terminology: US crochet terms
- Yarn weight: Worsted (#4), cotton or cotton blend
- Hook: 4.0 mm (G-6)
- Number of pieces: 17 (1 center, 12 petals, 3 pockets, 1 hanging cord)
- Layout: One petal at every clock-hour position behind the center; 3 pockets in a row across the lower half
- Piece sizes: Center 6.5 in (16.5 cm) across; petal 2 in x 4.25 in (5.1 cm x 10.8 cm); pocket 3 in (7.6 cm) wide when flattened, 3.5 in (8.9 cm) tall
- Center size before border: 6.25 in (15.9 cm)
- Border depth: 0.125 in (0.3 cm) on the center; 0.5 in (1.3 cm) scallop on each pocket
Materials
Choose a smooth worsted cotton or cotton blend with good stitch definition. Cotton holds its shape under the weight of tools and stretches very little when hanging. The amounts below assume about 180 m per 100 g.
- Mustard (center): 25 g, about 45 m
- Cream (petals and hanging cord): 75 g, about 135 m
- Sage green (pockets): 50 g, about 90 m
All amounts include about 15 percent extra for gauge swatches and sewing tails.
Tools:
- 4.0 mm (G-6) crochet hook
- Tapestry needle
- 12 locking stitch markers
- Scissors and measuring tape
- Rust-proof pins and a blocking mat
- Spray bottle
- Optional: a 6.5 in (16.5 cm) circle of stiff felt for the back of the center
Abbreviations (US Terms)
- ch – chain
- sl st – slip stitch
- sc – single crochet
- dc – double crochet
- inc – 2 sc in the same stitch
- BLO – back loop only
- MR – magic ring
- rev sc – reverse single crochet
- sk – skip
- st(s) – stitch(es)
- rnd(s) – round(s)
Reverse single crochet (rev sc): Working from left to right (if you are right-handed), insert the hook into the next stitch to the right, yarn over and pull up a loop, then yarn over and pull through both loops. This makes the twisted, rope-like edge on the center.
Scallop: Sl st in the next st, 4 dc in the next st, sk the next st. Each scallop uses 3 stitches of the round below.
Gauge and Checkpoints
Gauge: 16 sc x 18 rnds = 4 in (10.2 cm), in sc worked in joined rounds.
Test one piece first: make the center through Rnd 8 and measure it before you go on. Checkpoints:
- Center Rnd 4 (24 sts): 1.75 in (4.4 cm) across
- Center Rnd 8 (48 sts): 3.5 in (8.9 cm)
- Center Rnd 12 (72 sts): 5.25 in (13.3 cm)
- Center Rnd 14 (84 sts): 6.25 in (15.9 cm)
- Center Rnd 15 (edge): 6.5 in (16.5 cm)
- Petal Rnd 1: 3 in (7.6 cm) long, 0.5 in (1.3 cm) wide
- Petal Rnd 4: 4.25 in (10.8 cm) long, 2 in (5.1 cm) wide
- Pocket Rnd 4 (base): 1.75 in (4.4 cm) across
If the center is more than 3.75 in (9.5 cm) across at Rnd 8, your stitches are too loose: switch to a 3.5 mm hook. If it is less than 3.25 in (8.3 cm), your stitches are too tight: switch to a 4.5 mm hook. Once your gauge is right, use the same hook for every piece.
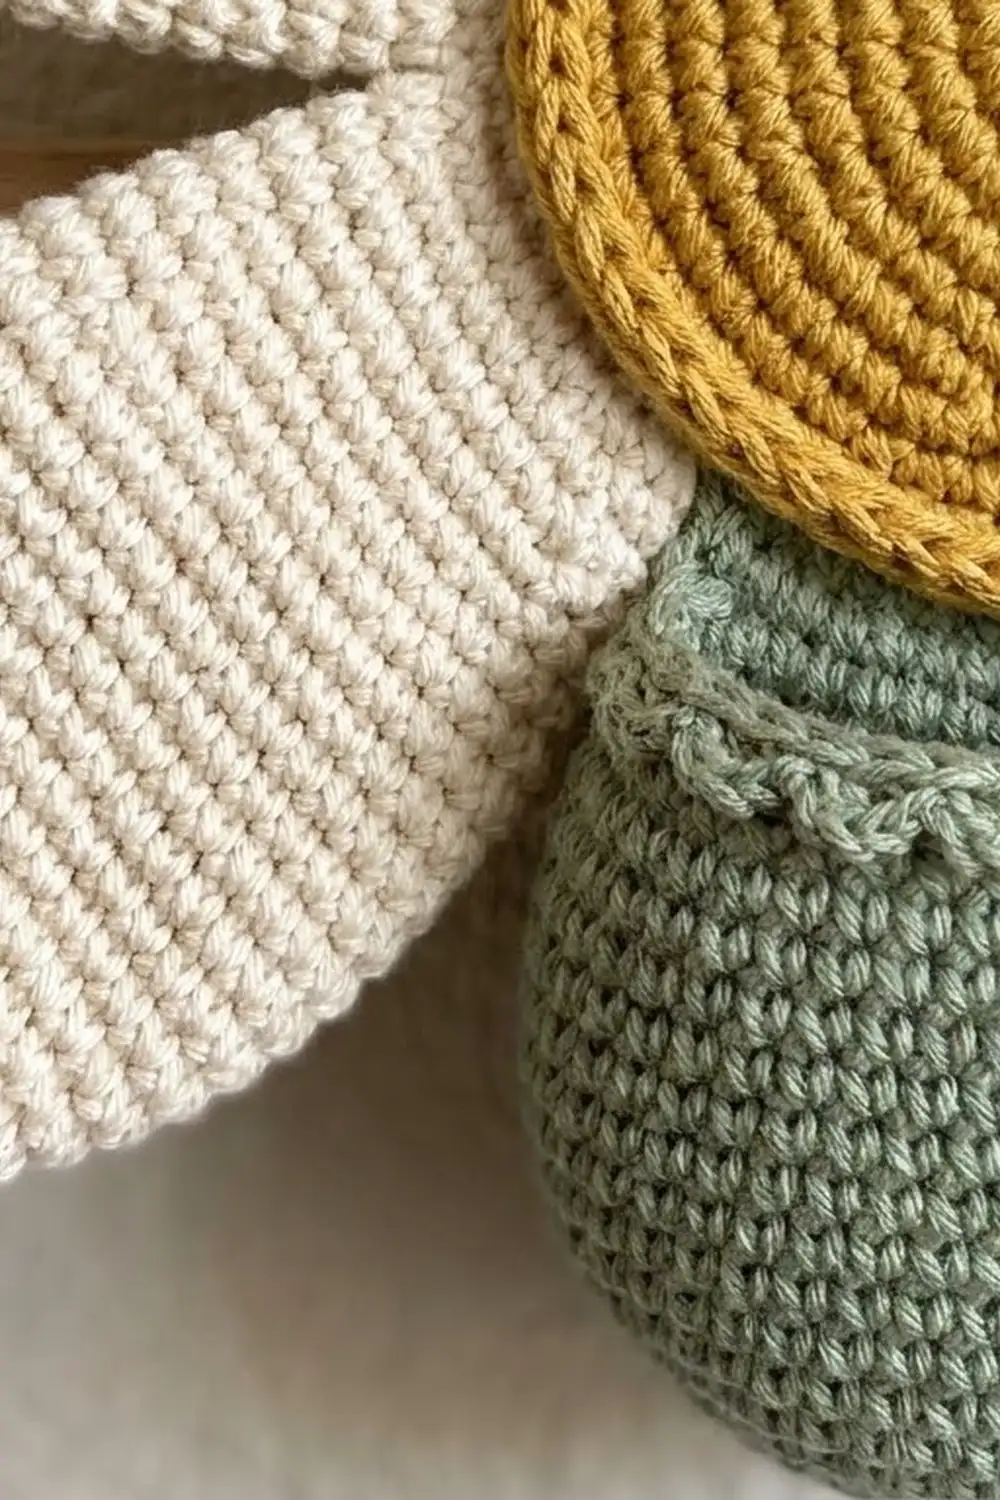
Flower Center (make 1, mustard)
Work in joined rounds. End each round with a sl st into the first sc. Start each round with ch 1 (this does not count as a stitch) and work the first sc into the same st as the join. Work the increases exactly as written. On the even rounds they are shifted so the circle stays round instead of turning into a hexagon.
Rnd 1: 6 sc in MR. (6 sts)
Rnd 2: Inc in each st around. (12 sts)
Rnd 3: (Sc 1, inc) 6 times. (18 sts)
Rnd 4: Sc 1, inc, (sc 2, inc) 5 times, sc 1. (24 sts)
Rnd 5: (Sc 3, inc) 6 times. (30 sts)
Rnd 6: Sc 2, inc, (sc 4, inc) 5 times, sc 2. (36 sts)
Rnd 7: (Sc 5, inc) 6 times. (42 sts)
Rnd 8: Sc 3, inc, (sc 6, inc) 5 times, sc 3. (48 sts)
Rnd 9: (Sc 7, inc) 6 times. (54 sts)
Rnd 10: Sc 4, inc, (sc 8, inc) 5 times, sc 4. (60 sts)
Rnd 11: (Sc 9, inc) 6 times. (66 sts)
Rnd 12: Sc 5, inc, (sc 10, inc) 5 times, sc 5. (72 sts)
Rnd 13: (Sc 11, inc) 6 times. (78 sts)
Rnd 14: Sc 6, inc, (sc 12, inc) 5 times, sc 6. (84 sts)
Do not fasten off. Rnd 15, the edge round, is in the Border section. The center should now measure 6.25 in (15.9 cm) across and lie flat.
Petals (make 12, cream)
Each petal is worked in joined rounds around both sides of a starting chain. The end that gets 3 sc in Rnd 1 becomes the rounded tip. The other end becomes the narrower base.
Rnd 1: Ch 11. Sc in the 2nd ch from the hook and in the next 8 ch (9 sc). Work 3 sc in the last ch (tip). Turn the piece and work along the other side of the chain: sc in the next 8 ch, then 2 sc in the same ch as the first sc (base). Join. (9 + 3 + 8 + 2 = 22 sts)
Rnd 2: Ch 1, sc 9, inc in each of the next 3 sts, sc 8, inc in each of the last 2 sts. Join. (9 + 6 + 8 + 4 = 27 sts)
Rnd 3: Ch 1, sc 9, (sc 1, inc) 3 times, sc 8, (sc 1, inc) 2 times. Join. (9 + 9 + 8 + 6 = 32 sts)
Rnd 4: Ch 1, sc 9, (sc 2, inc) 3 times, sc 14. Join. (9 + 12 + 8 + 6 = 35 sts)
Fasten off and leave a 12 in (30.5 cm) tail for sewing. The petal measures 4.25 in (10.8 cm) long and 2 in (5.1 cm) wide, with a full, round tip and a slimmer base.
Pockets (make 3, sage green)
Each pocket is a small tube with a round bottom. Join the rounds the same way as the center.
Rnd 1: 6 sc in MR. (6 sts)
Rnd 2: Inc in each st around. (12 sts)
Rnd 3: (Sc 1, inc) 6 times. (18 sts)
Rnd 4: Sc 1, inc, (sc 2, inc) 5 times, sc 1. (24 sts)
Rnd 5: Sc in the BLO of each st around. (24 sts) This makes the wall turn upward.
Rnds 6–17: Sc in each st around. (24 sts each round)
The wall (Rnds 5–17, 13 rounds) is about 3 in (7.6 cm) tall. Do not fasten off. The scallop trim is in the Border section.
Hanging Cord (make 1, cream)
Ch 41. Sl st in the back bump of the 2nd ch from the hook and in each ch across. (40 sl sts) The cord is about 10 in (25.4 cm) long. Fasten off and leave a 10 in (25.4 cm) tail.
Make All Pieces
- Mustard: 1 center
- Cream: 12 petals and 1 hanging cord
- Sage green: 3 pockets
Layout (front view, with petals at clock positions):
              [cord loop]
                 12
          11            1
      10                    2
     9     ( mustard center )   3
      8   [P1]  [P2]  [P3]    4
          7     (lower)     5
                  6
P1, P2 and P3 are the pockets. P2 sits 0.5 in (1.3 cm) lower than P1 and P3.
Joining
Work the center’s Rnd 15 edge (see Border) before you start joining.
Petals to center. On Rnd 14 of the center, place a marker in sts 1, 8, 15, 22, 29, 36, 43, 50, 57, 64, 71 and 78. That is every 7th stitch: 84 sts ÷ 12 petals = 7 sts per petal, so the spacing is exactly even. Turn the center right side down. Lay each petal right side down underneath it, centered on a marker. The petal’s base should reach 1 in (2.5 cm) in from the edge, to about Rnd 10.
Where it crosses the edge, each petal is about 1.5 in (3.8 cm) wide, so it covers 6 of its 7 edge stitches. The 1 stitch left over between petals makes the small, even gap you see in the finished flower. Using the petal tail, whipstitch through the back loop of each of those 6 stitches on Rnd 14 and the petal stitch right under it. Then tack the base of the petal to Rnd 10 with 3 small stitches.
Tension: Pull each stitch snug but not tight. After every 3 petals, turn the piece over and check that the center still lies flat.
Pockets to front. Flatten each pocket so its 24 sts divide into 12 front sts and 12 back sts. A flattened pocket is 3 in (7.6 cm) wide. Pin P2 so it is centered over the 6 o’clock petal, with its top rim 1 in (2.5 cm) below the center’s horizontal midline. Pin P1 and P3 on either side, touching P2, with their rims 0.5 in (1.3 cm) higher than P2’s rim.
Together the pockets span 9 in (22.9 cm). They reach 1.25 in (3.2 cm) past the center on each side and overlap the 4 and 8 o’clock petals. Whipstitch each pocket’s 12 back stitches of Rnd 17 to the flower. Then sew down both folded sides and across the back half of the base. Leave the front wall free so the pocket bows out about 1 in (2.5 cm).
Cord. Fold the cord in half. Sew the lower 2 in (5.1 cm) of each half to the back of the 12 o’clock petal, finishing at the petal tip. This leaves a 3 in (7.6 cm) loop standing above the tip.
Size checkpoint: The joined flower should measure 13 in (33.0 cm) from the 3 o’clock tip to the 9 o’clock tip, and the same from 12 to 6. Each petal extends 3.25 in (8.3 cm) past the center: 6.5 + 3.25 + 3.25 = 13 in (33.0 cm).
Border
The border is made of two edgings: a raised rope edge around the center and a scalloped trim on each pocket rim. The border uses the same gauge as the main fabric, 4 sts per 1 in (2.5 cm).
Center edge, Rnd 15 (mustard): Continue from Rnd 14. Ch 1, rev sc in each st around. Join and fasten off. (84 worked 1-per-existing-stitch + 0 extra = 84 sts)
This round adds no stitches, so the 7-stitches-per-petal spacing from Rnd 14 stays the same: 12 sections x 7 sts = 84 sts. The rope edge adds 0.125 in (0.3 cm) on each side, so the center grows from 6.25 in (15.9 cm) to 6.5 in (16.5 cm).
Pocket trim, Rnd 18 (sage green): Continue from Rnd 17. (Sl st in the next st, 4 dc in the next st, sk the next st) 8 times. Join to the first sl st and fasten off, leaving a 16 in (40.6 cm) tail for sewing. (16 sts worked into + 24 extra dc = 40 sts; 8 sts skipped)
Each scallop uses exactly 3 stitches, and 24 ÷ 3 = 8 scallops with no stitches left over. When the pocket is flattened, 4 scallops sit on the front and 4 on the back, so the rim looks the same from either side. The scallops add 0.5 in (1.3 cm), so the pocket grows from 3 in (7.6 cm) to 3.5 in (8.9 cm) tall.
Final Blocking
- Weave in all ends on the back, through stitches of the same color.
- Lay the organizer face down on a blocking mat.
- Mist the petals and center until damp, not soaked.
- Turn it face up. Pin each petal tip so the flower measures 13 in (33.0 cm) in both directions.
- Shape each petal tip into a smooth curve with your fingers.
- Lightly mist the pockets. Put a rolled washcloth in each so it keeps a rounded front.
- Let it dry completely, for at least 12 hours.
- Optional: glue or sew the felt circle to the back of the center to make it stiffer.
Final Quality-Control Checklist
- Center is round and flat, 6.5 in (16.5 cm) across
- Rope edge is even all the way around
- 12 petals are evenly spaced, one at each clock hour
- Each petal is 4.25 in (10.8 cm) long with a rounded tip
- Flower measures 13 in (33.0 cm) from tip to tip
- Each pocket has 8 even scallops
- Middle pocket sits 0.5 in (1.3 cm) lower than the side pockets
- Pocket fronts open easily
- Cord loop is centered and 3 in (7.6 cm) tall
- No yarn ends show on the front
Troubleshooting
Center ruffles: Your stitches are too loose for the increases. Switch to a smaller hook, or undo back to Rnd 8 and check your gauge again.
Center curls into a bowl: Your stitches are too tight. Switch to a larger hook.
Petal tip is pointy: Check that you worked all 3 tip increases in each of Rnds 2–4.
Petals overlap or leave big gaps: Count the stitches between markers again. They must be exactly 7 sts apart.
Pockets sag forward: Add a few more tacking stitches along the back rim, or add the felt backing.
Care
Spot clean with a damp cloth and mild soap. If it needs more, hand wash in cool water, press the water out in a towel and dry flat, pinning the petals back to 13 in (33.0 cm).
Final Notes
Each measurement builds on the one before. A gauge of 16 sc x 18 rnds = 4 in (10.2 cm) gives a 6.25 in (15.9 cm) center at Rnd 14, and the rope edge brings it to 6.5 in (16.5 cm). Twelve petals, each 4.25 in (10.8 cm) long and tucked 1 in (2.5 cm) under, extend 3.25 in (8.3 cm) on every side, making a 13 in (33.0 cm) flower. Three 3 in (7.6 cm) pockets fill 9 in (22.9 cm) across the lower half, and a 3 in (7.6 cm) loop brings the total height to 16 in (40.6 cm). Check each measurement as you go and the finished organizer will hang flat and straight.
Happy crocheting!