

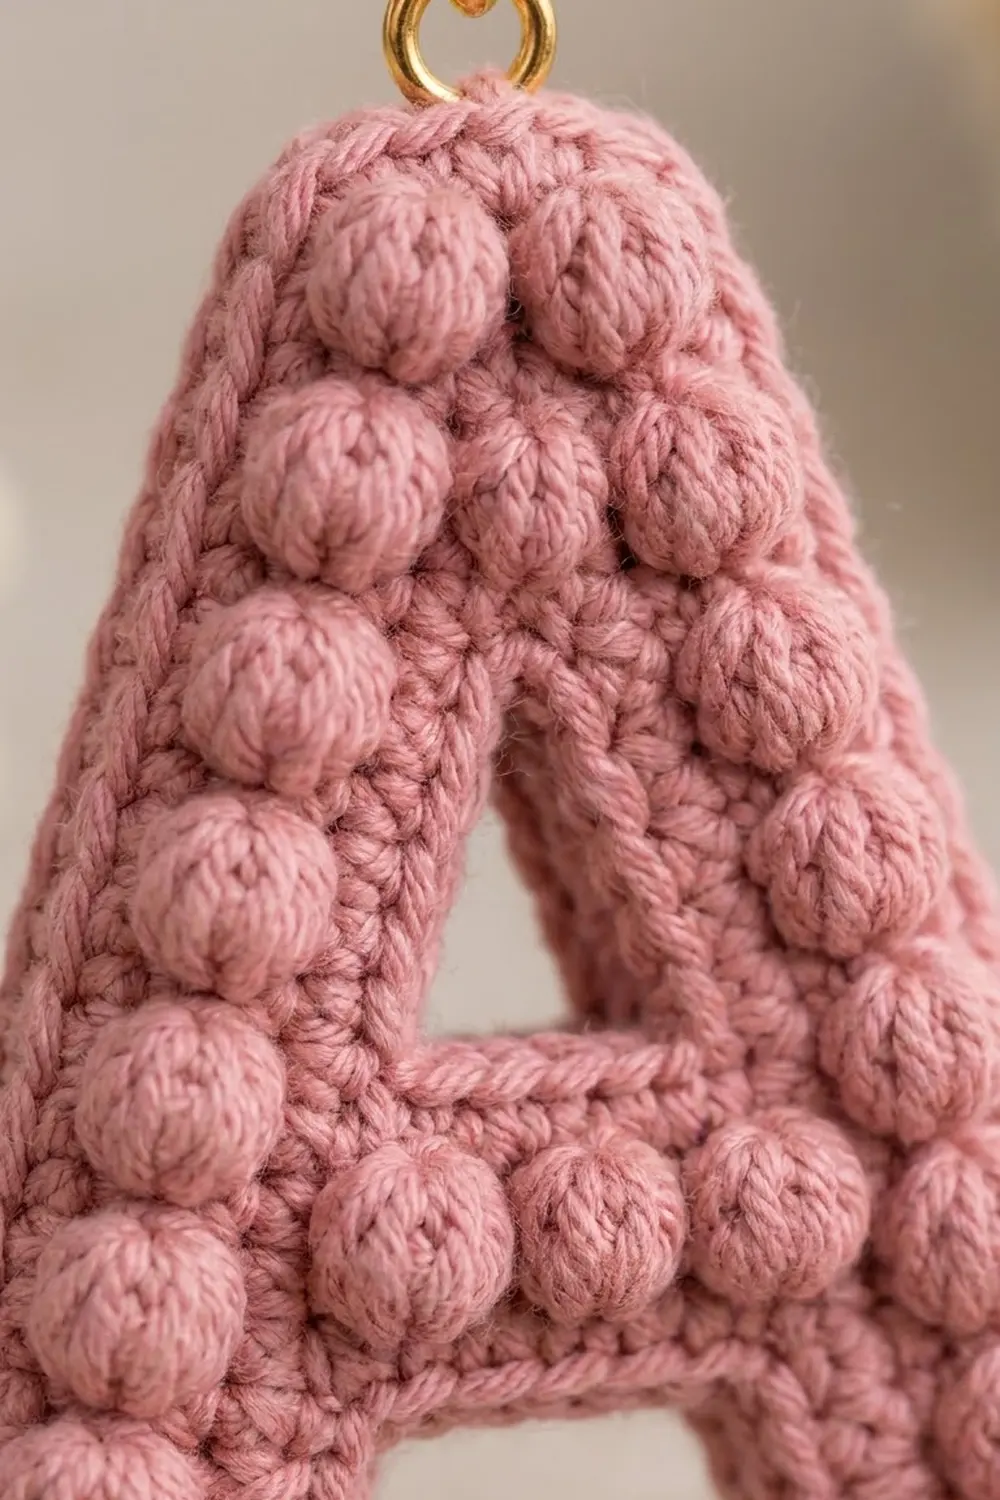
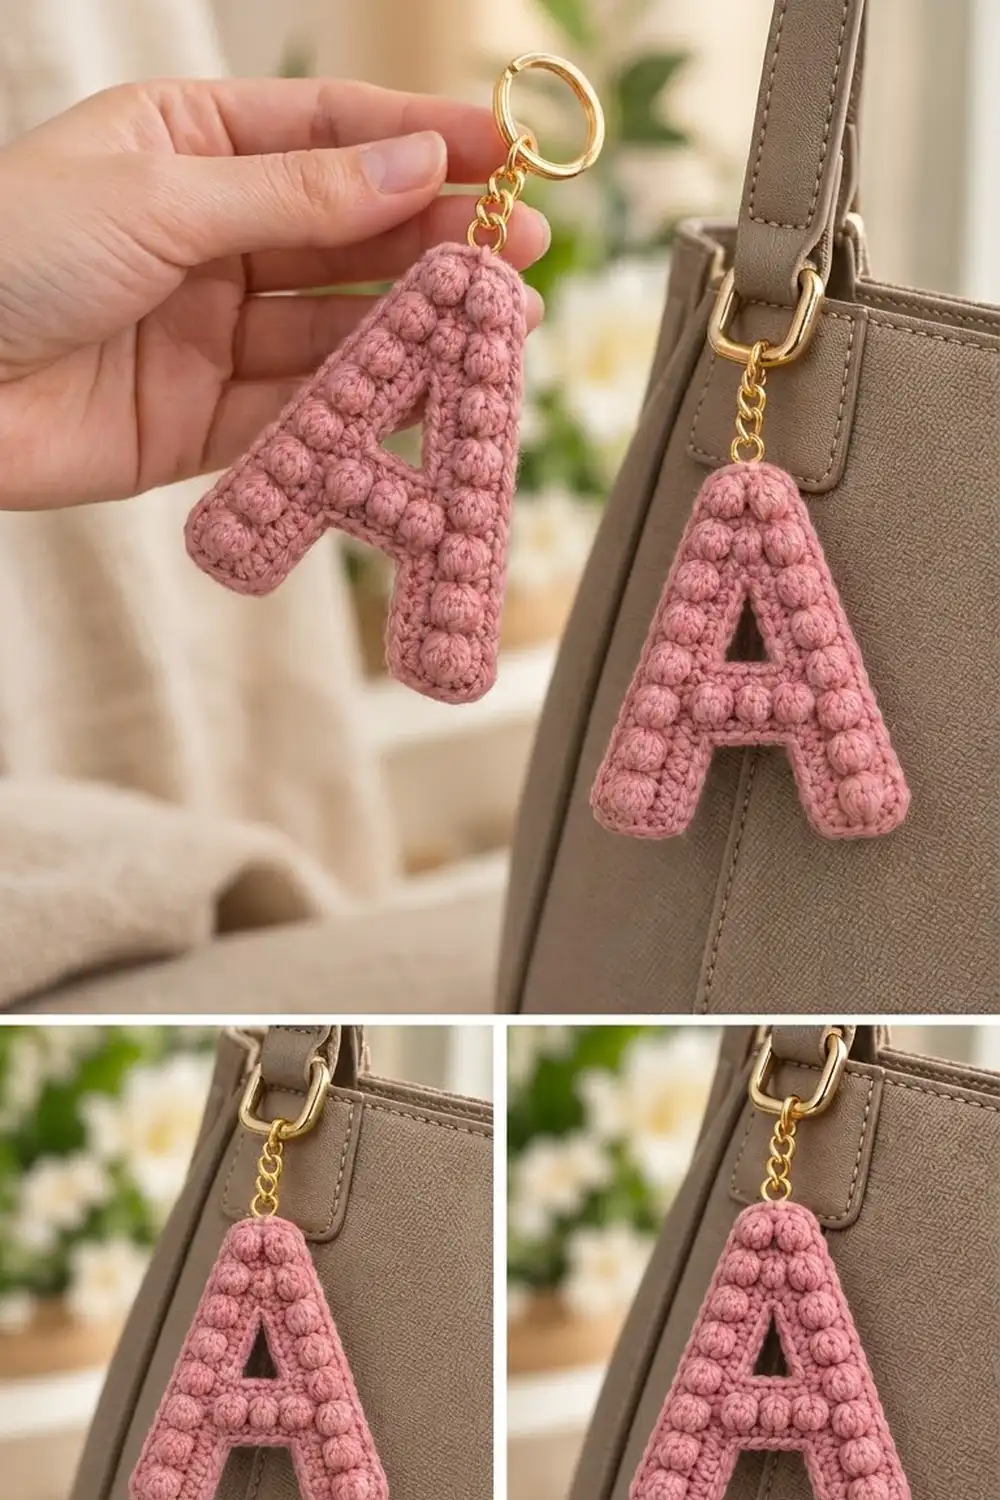
This puffy letter A keychain is a small, squishy bag charm with a lot of texture. Rounded bobbles run up both legs, across the crossbar and over the flat top, and a crisp single crochet edge outlines the whole letter like piping.
The sample is worked in one dusty rose cotton and finished with a gold chain and split ring. It looks soft and a little vintage, and it makes a quick personalized gift.
The pattern uses US crochet terms. The finished charm measures about 3.2 in (8.1 cm) wide by 3.4 in (8.6 cm) tall and 0.5 in (1.3 cm) thick, not counting the hardware.
You crochet two flat letter-shaped panels in rows: a bobble front and a plain back. Each panel starts as two separate legs, which are joined at the crossbar. The panel then splits for 3 rows to form the triangular hole and comes back together for the top. Finally, you hold the panels together, stuff them lightly and join them with one round of single crochet.
Finished Size and Construction
- Finished size: 3.2 in (8.1 cm) wide × 3.4 in (8.6 cm) tall × 0.5 in (1.3 cm) thick
- Skill level: Advanced beginner to intermediate
- Terminology: US
- Yarn weight: Worsted (#4) cotton or cotton blend
- Hook: 3.5 mm (E-4)
- Number of pieces: 2 (1 bobble front, 1 plain back)
- Layout: Panels stacked wrong sides together, with a thin layer of stuffing between them
- Panel size: 3.0 in (7.6 cm) wide × 3.2 in (8.1 cm) tall
- Size before border: 3.0 in (7.6 cm) × 3.2 in (8.1 cm)
- Border depth: About 0.1 in (0.3 cm) on each edge
Materials
Yarn: Use a smooth, tightly plied worsted cotton or cotton blend. Cotton gives clear bobble definition and holds its shape on a bag that gets handled a lot. Fuzzy or very splitty yarn will blur the bobbles.
- Dusty rose: 15 g (about 26 m)
This quantity includes a margin for the gauge swatch, the long joining tail and any frogging.
Tools and notions:
- 3.5 mm (E-4) crochet hook
- Tapestry needle
- 2 locking stitch markers
- Small handful of polyester fiberfill (about 2 g)
- 1 gold split key ring, 1 in (2.5 cm) across
- 1 gold chain, 1.25 in (3.2 cm) long
- 2 gold jump rings, 0.3 in (0.8 cm)
- 2 pairs of flat-nose pliers
- Scissors
Abbreviations (US Terms)
- ch – chain
- sc – single crochet
- sc2tog – single crochet 2 together
- sk – skip
- sl st – slip stitch
- st(s) – stitch(es)
- RS / WS – right side / wrong side
- BO – bobble
Bobble (BO): Yarn over, insert the hook in the stitch and pull up a loop, yarn over and pull through 2 loops. Repeat 4 more times in the same stitch (6 loops on hook). Yarn over and pull through all 6 loops. A bobble counts as 1 stitch.
Bobbles are always worked on WS rows so that they push out to the RS. Work the sc after each bobble firmly so the bobble stays upright.
Gauge and Checkpoints
Gauge: 10 sc and 12 rows = 2 in (5.1 cm) in sc rows.
Work a swatch of 12 sc for 14 rows and measure across the middle 10 stitches and 12 rows. If 10 sts measure more than 2.1 in (5.3 cm), go down half a hook size. If they measure less than 1.9 in (4.8 cm), go up half a size.
Make the back panel first, because it is all sc and gives you a clean read of your gauge. Check it at these points:
- After Row 1 (each leg): 5 sts = 1 in (2.5 cm).
- After Row 8: Leg height is 1.3 in (3.3 cm).
- After Row 9: The joined row is 11 sts = 2.2 in (5.6 cm) wide.
- After Row 11: Total height is 1.8 in (4.6 cm).
- After Row 19: Panel is 3.0 in (7.6 cm) wide at the base and 3.2 in (8.1 cm) tall. The top is 1 in (2.5 cm) wide.
If the panel comes out too big, the charm will look flat and gappy after stuffing. Go down a hook size and start again. If it comes out too small, the bobbles will crowd and buckle, so go up a size.
The bobble front should match the back’s outline. Bobble rows draw in slightly, so the front may be up to 0.1 in (0.3 cm) narrower. Blocking fixes that.
Front Panel (Bobble Panel)
All “left” and “right” directions are as seen with the RS facing you. RS rows are odd and WS rows are even. Ch 1 at the start of each row does not count as a stitch.
Left Leg
Ch 6.
Row 1 (RS): Sc in 2nd ch from hook and in each ch across, turn. (5 sts)
Row 2 (WS): Ch 1, sc 2, BO, sc 2, turn. (5 sts)
Row 3 (RS): Ch 1, 2 sc in first st, sc 2, sc2tog, turn. (5 sts)
The increase is on the inner edge and the decrease is on the outer edge, so the leg moves 1 st toward the center.
Row 4: Ch 1, sc 2, BO, sc 2, turn. (5 sts)
Row 5: Ch 1, sc in each st across, turn. (5 sts)
Row 6: Repeat Row 4. (5 sts)
Row 7: Repeat Row 3. (5 sts)
Row 8: Repeat Row 4. (5 sts)
Fasten off. The left leg has 4 bobbles.
Right Leg
Ch 6.
Row 1 (RS): Sc in 2nd ch from hook and in each ch across, turn. (5 sts)
Row 2 (WS): Ch 1, sc 2, BO, sc 2, turn. (5 sts)
Row 3 (RS): Ch 1, sc2tog, sc 2, 2 sc in last st, turn. (5 sts)
This time the decrease is on the outer edge at the start of the row and the increase is on the inner edge at the end.
Rows 4–8: Work as Rows 4–8 of the left leg, using the right-leg Row 3 for Row 7. (5 sts)
Do not fasten off. Your yarn is now at the outer right edge.
The opening between the legs is 5 sts, or 1 in (2.5 cm), wide at Rows 1–2. It narrows to 3 sts at Rows 3–6 and to 1 st at Rows 7–8, which makes the wedge under the crossbar.
Crossbar
Row 9 (RS): Ch 1, sc 5 across the right leg, ch 1, then sc 5 across Row 8 of the left leg, starting at its inner edge. Turn. (11 sts: 10 sc + 1 ch)
Row 10 (WS): Ch 1, sc 1, [BO, sc 1] 5 times, turn. (11 sts, 5 bobbles)
The middle bobble sits in the ch-1 st.
Row 11 (RS): Ch 1, sc in each st across, turn. (11 sts)
Hole Sides
Left side, Row 12 (WS): Ch 1, sc 1, BO, sc 2, turn. (4 sts)
Leave the remaining 7 sts unworked.
Row 13 (RS): Ch 1, 2 sc in first st, sc 1, sc2tog, turn. (4 sts)
Row 14 (WS): Ch 1, sc 1, BO, sc 2. (4 sts)
Fasten off.
Right side, Row 12 (WS): With the WS facing, skip 3 sts of Row 11 after the left side. These 3 sts form the base of the hole. Join yarn in the next st. Ch 1, sc 2, BO, sc 1, turn. (4 sts)
Row 13 (RS): Ch 1, sc2tog, sc 1, 2 sc in last st, turn. (4 sts)
Row 14 (WS): Ch 1, sc 2, BO, sc 1, turn. (4 sts)
Do not fasten off.
Each side moves 1 st inward on Row 13. The hole is 3 sts, or 0.6 in (1.5 cm), wide at the base and 1 st wide at the top. It is 3 rows, or 0.5 in (1.3 cm), tall, so it reads as a small triangle.
Top
Row 15 (RS): Ch 1, sc2tog, sc 2 across the right side, ch 1 over the hole, then sc 2, sc2tog across the left side. Turn. (7 sts: 1 + 2 + 1 + 2 + 1)
Row 16 (WS): Ch 1, sc 1, [BO, sc 1] 3 times, turn. (7 sts, 3 bobbles)
Row 17 (RS): Ch 1, sc2tog, sc 3, sc2tog, turn. (5 sts)
Row 18 (WS): Ch 1, sc 1, [BO, sc 1] 2 times, turn. (5 sts, 2 bobbles)
Row 19 (RS): Ch 1, sc in each st across. (5 sts)
Fasten off and weave in all ends on the WS.
Bobble total: 8 on the legs, 5 on the crossbar, 4 on the hole sides and 5 on the top, for 22 in all.
Outline check: Each outer edge moves inward 1 st on Rows 3, 7, 13, 15 and 17, which is 5 times per side. The width goes from 15 sts (5 + 5 + 5) to 15 − 10 = 5 sts at the top, which matches Row 19.
Back Panel (Plain Panel)
Work exactly as the front panel, but replace every BO with sc. All stitch counts stay the same, including the separate legs, the ch-1 sts in Rows 9 and 15 and the split at Rows 12–14.
Weave in all ends except the tail at the end of Row 19. Trim that tail to 2 in (5.1 cm) and weave it in too.
Make All Pieces
Make 1 bobble front and 1 plain back, both in dusty rose. Stack them like this:
[ FRONT  – bobble panel, RS facing out ]
[ FIBERFILL – thin, even layer        ]
[ BACK   – plain panel, RS facing out ]
Before you join, place the panels WS together and check that the legs, crossbar, hole and top line up stitch for stitch.
Joining
The border round is also the join. Each round is worked through both panels at once, catching the matching edge stitch or row end of the front and the back together.
Both panels have identical stitch and row counts, so every front edge stitch has a partner on the back. Row 1 matches Row 1 and the ch-1 matches the ch-1. If the panels seem to slide out of line, unpick back to the last matched pair rather than skipping a stitch.
Keep your tension firm and even. The edge sc should sit like a small rope and should not ruffle or pucker.
Stuff only a thin layer of fiberfill, enough to round out the bobbles without stretching the panels apart. The charm should be 0.5 in (1.3 cm) thick.
Size checkpoint after joining: 3.2 in (8.1 cm) wide at the base and 3.4 in (8.6 cm) tall.
Border
Border gauge: Work 1 sc per st along the foundation chains and the top. Work 1 sc per row end along the side edges.
At each of the 6 outer corners, work 3 sc in the corner stitch. The corners are the 2 bottom corners of each leg and the 2 top corners. Per-segment counts below include the corner stitch once, and the 2 extra corner sc are added separately.
Hole Round
With both panels held together and the front facing, join yarn at the right corner of the hole base. Sc 3 along the hole base (the 3 skipped sts of Row 11), sc 3 up the left side (row ends of Rows 12–14), sc 1 into the underside of the ch-1 of Row 15, and sc 3 down the right side. Sl st to the first sc. (10 sc)
Fasten off and hide the tail between the layers.
Outer Round
Join yarn at the bottom outer corner of the right leg and work counterclockwise.
| Segment | Sc |
|---|---|
| Right leg bottom (foundation ch) | 5 |
| Right outer edge (row ends 1–19) | 19 |
| Top (Row 19) | 5 |
| Left outer edge (row ends 19–1) | 19 |
| Left leg bottom (foundation ch) | 5 |
| Left leg inner edge (row ends 1–8) | 8 |
| Underside of Row 9 ch-1 | 1 |
| Right leg inner edge (row ends 8–1) | 8 |
| Worked 1 per st or row end | 70 |
| Corner extras (6 corners × 2) | 12 |
| Round total | 82 |
When you are about halfway up the left outer edge, place a marker and stuff the charm lightly through the open part. Finish the round and sl st to the first sc. (82 sc)
Fasten off, leaving an 8 in (20.3 cm) tail. Hide it inside the charm.
Why the math works: Each panel is 15 sts wide at the base and 19 rows tall, and the outline uses every one of those stitches and row ends once. The 12 corner extras only turn the corners, so no edge stretches or gathers. One sc row adds about 0.1 in (0.3 cm) on every side. That takes the panel from 3.0 × 3.2 in (7.6 × 8.1 cm) to 3.2 × 3.4 in (8.1 × 8.6 cm).
Final Blocking
- Lightly mist the charm with water. Do not soak it, because the stuffing will stay damp.
- Pinch each bobble into a round dome with your fingertips.
- Pin the charm to a blocking mat at 3.2 in (8.1 cm) wide by 3.4 in (8.6 cm) tall. Keep the legs straight and the top level.
- Run a finger along the edge so the piping rolls slightly outward.
- Let it dry completely, which takes about 4 hours.
- Open a jump ring with two pliers. Slip it through the center 2 sts at the top of the outer round, and add one end of the chain before closing it.
- Use the second jump ring to attach the other end of the chain to the split key ring.
Final Quality-Control Checklist
- Front has 22 bobbles, all pushed to the RS
- Both panels match stitch for stitch: 15 sts across the base, 19 rows tall
- Hole round is 10 sc and the outer round is 82 sc
- The triangular hole is open and clean, 0.6 in (1.5 cm) at the base
- The leg opening is a clear wedge, 1 in (2.5 cm) wide at the bottom
- Stuffing is even, with no lumps and no fiberfill showing through
- Finished size is 3.2 × 3.4 in (8.1 × 8.6 cm)
- Jump rings are fully closed, with no gap for the chain to slip through
Troubleshooting
Bobbles sink to the back: They were worked on a RS row. Bobbles belong on even (WS) rows only.
Bobbles look flat: Tighten the sc after each bobble, or add one more yarn-over pass to the bobble.
Legs don’t slant: You probably put the increase and decrease on the wrong edges. The decrease always goes on the outer edge.
Hole closed up: You may have worked into the 3 base sts on Row 12. Leave them unworked.
Edge ruffles: Make sure you work only 1 sc per row end, and go down half a hook size for the border.
Edge puckers: Check the corners. Each of the 6 outer corners needs 3 sc.
Panels don’t line up: Recount rows. Both panels must have exactly 19.
Care
Spot clean with mild soap and cool water, press out the moisture in a towel and air-dry flat. Remove the key ring before washing so the gold finish doesn’t tarnish.
Final Notes
The measurement chain is simple: a gauge of 10 sc × 12 rows = 2 in (5.1 cm) gives 1 in (2.5 cm) legs. The joined panel is 3.0 × 3.2 in (7.6 × 8.1 cm), with 22 bobbles on the front. The 10-sc hole round and 82-sc outer round add 0.1 in (0.3 cm) per side, for a finished charm of 3.2 × 3.4 in (8.1 × 8.6 cm). If you check each step against these numbers, your letter will turn out neat, puffy and ready to clip on.
Happy crocheting!