

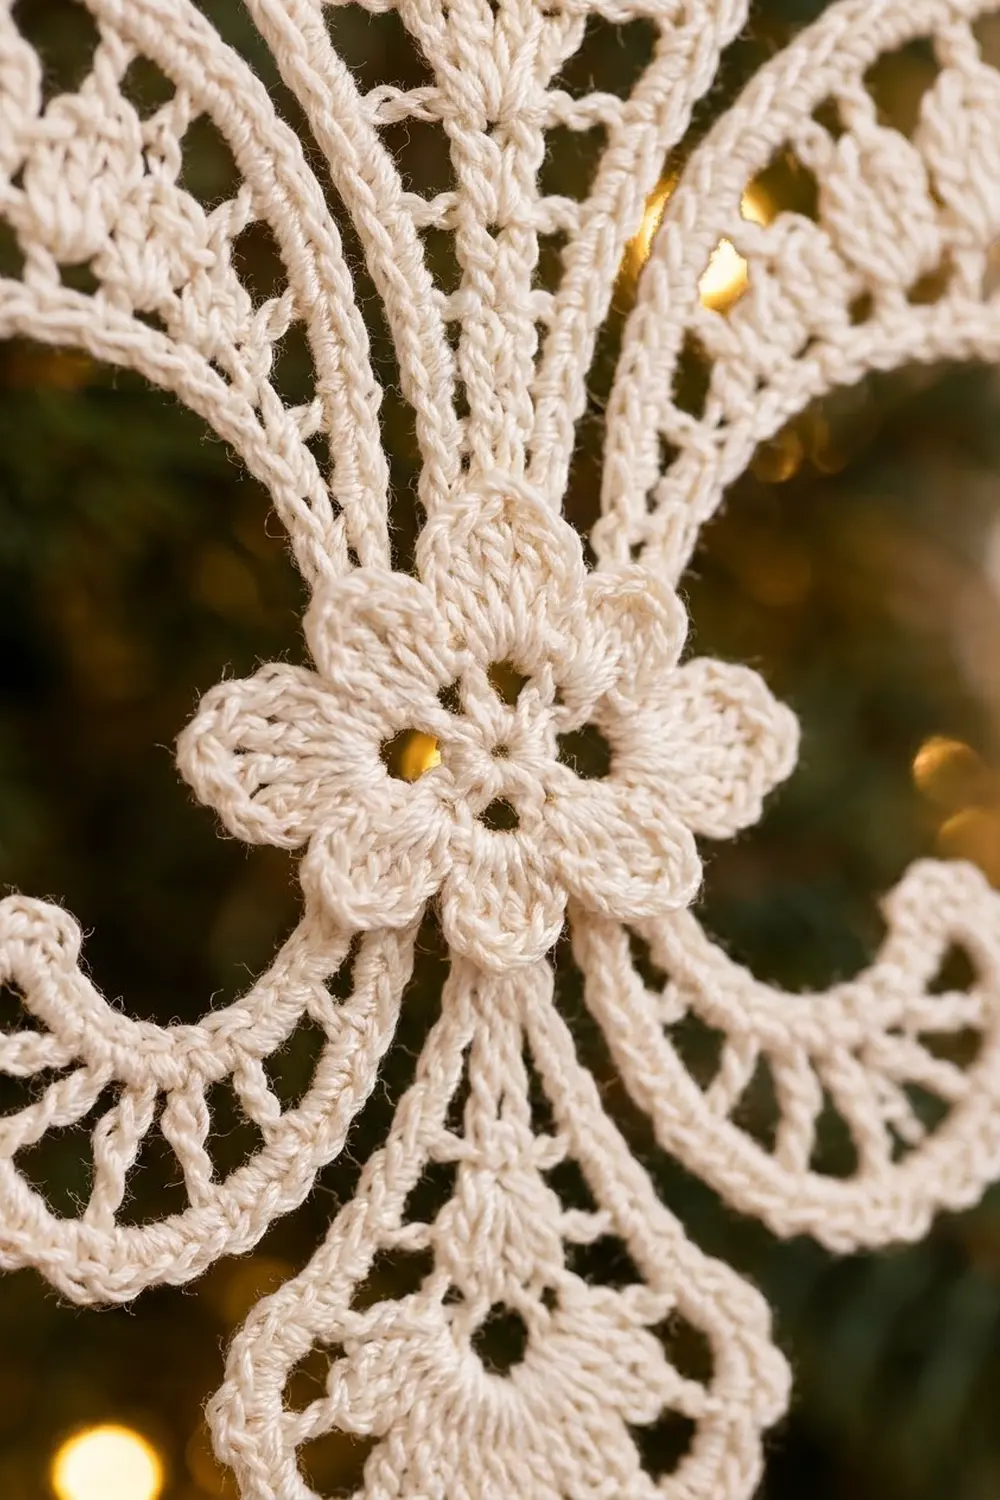
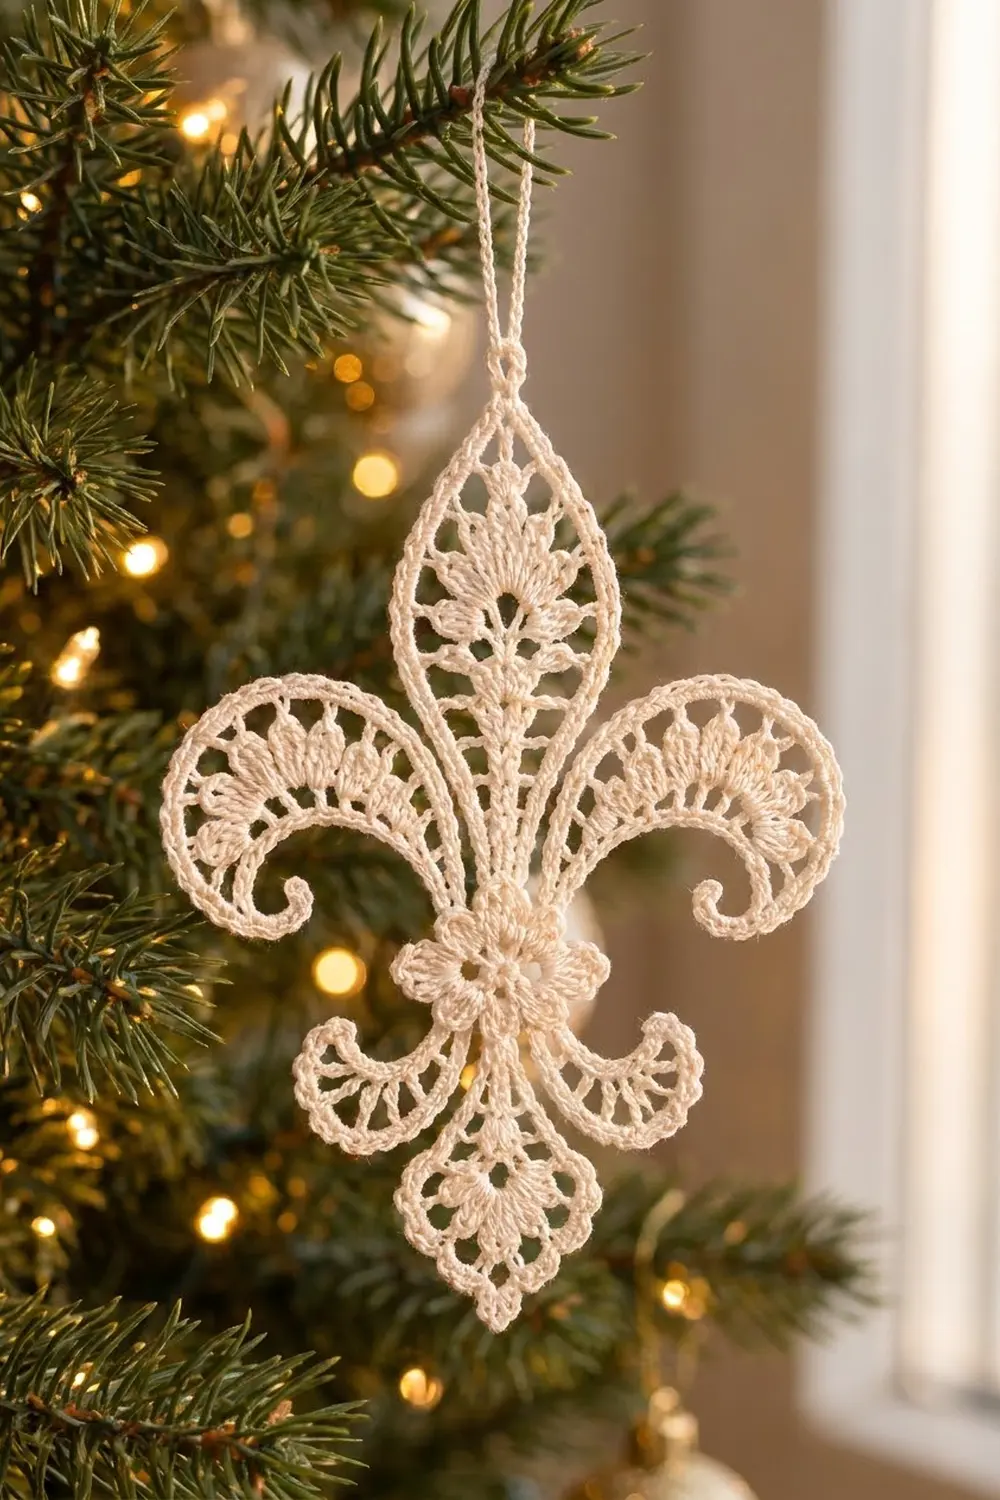
The Ivory Lumière Fleur-de-Lis is a thread-lace Christmas ornament in one soft ivory shade. A pointed almond-shaped top petal rises above a small raised rosette. Two crescent side petals sweep outward and curl at their tips. Two small scrolls curl below them, and a short pointed drop finishes the bottom.
The style is classic heirloom lace. The top petal has open mesh, an eyelet and a radiating fan, and graduated shells run along the curled petals. A fine picot edge outlines everything. With only one color, all the interest comes from texture and shadow, which looks especially good against tree lights.
This pattern uses US crochet terms. The finished ornament measures 5.5 in (14.0 cm) tall and 3.75 in (9.5 cm) wide without the hanging loop, or about 6.25 in (15.9 cm) tall with it.
Construction overview: you crochet a rosette, then add a round of chain loops behind it to make a 42-stitch base ring. Six sections are worked straight off that ring. A one-round picot border goes around the whole outline and also forms the hanging loop. Stiffening sets the curls.
Finished Size and Construction
- Finished size: 5.5 in (14.0 cm) tall x 3.75 in (9.5 cm) wide, or about 6.25 in (15.9 cm) tall with the loop
- Skill level: Intermediate
- Terminology: US crochet terms
- Yarn weight: Size 10 crochet cotton thread (Lace / 0)
- Hook: 1.5 mm (US steel 8)
- Number of pieces: 1 single motif, with no assembly
- Layout: One fleur-de-lis built outward from a central rosette
- Piece size before border: 5.25 in (13.3 cm) x 3.5 in (8.9 cm)
- Border depth: about 0.125 in (0.3 cm) per edge, adding 0.25 in (0.6 cm) to each overall dimension
Materials
Thread: Choose a mercerized size 10 cotton. It gives crisp stitches and holds its shape well once stiffened. A warm ivory or ecru gives a candlelit look.
- Ivory: 10 g, about 56 m (61 yd)
This quantity includes a generous margin. One ornament uses about 6 g.
Tools:
- 1.5 mm (US steel 8) steel hook
- Fine tapestry needle (size 24 or 26)
- 6 stitch markers
- Small sharp scissors
- Fabric stiffener or thick starch
- Blocking board covered with plastic wrap
- Rustproof pins
- Ruler
Abbreviations (US Terms)
- ch – chain
- sl st – slip stitch
- sc – single crochet
- hdc – half double crochet
- dc – double crochet
- tr – treble crochet
- sk – skip
- sp(s) – space(s)
- st(s) – stitch(es)
- RS – right side
- WS – wrong side
- dc3tog – (yarn over, insert hook in next st, pull up a loop, yarn over and pull through 2 loops) 3 times, then yarn over and pull through all 4 loops
- ch 2 + dc2tog – at the start of a row, the ch 2 sits on the first st and the dc2tog is worked over the next 2 sts. Together they count as one dc3tog. Likewise, ch 2 + dc4tog counts as one dc5tog.
Special stitch – Picot: Ch 3, then sl st into the front loop and left leg of the sc just made.
Gauge and Checkpoints
Gauge: 22 dc and 9 dc rows = 2 in (5.1 cm).
Because this is a single motif, the rosette is your test piece. Measure it before you start the sections.
Checkpoints:
- Rosette after Round 3: 1 in (2.5 cm) across.
- Base ring after Round 5: 1.25 in (3.2 cm) across.
- Top petal, Row 4: 1.4 in (3.6 cm) wide.
- Top petal, finished: 2.4 in (6.1 cm) from the base ring to the point.
- Side petal, Row 2: about 2.25 in (5.7 cm) from the tip to the base ring, measured uncurled.
- Bottom drop, finished: 1.5 in (3.8 cm) long.
- Before border: 5.25 in (13.3 cm) x 3.5 in (8.9 cm).
If your piece is too big, change to a 1.25 mm (US steel 10) hook. If it is too small, change to a 1.65 mm (US steel 7) hook. Measure while the lace is relaxed, not stretched.
Rosette and Base Ring
Round 1 (RS): Ch 6, sl st to the first ch to form a ring. Ch 1, 12 sc in the ring, sl st to the first sc. (12 sc)
Round 2: Ch 1, sc in the first sc, ch 3, sk next sc, sc in next sc, ch 3, sk next sc 5 times, sl st to the first sc. (6 sc, 6 ch-3 sps)
Round 3 (petals): In each ch-3 sp around, work (sc, hdc, 3 dc, hdc, sc). Sl st to the first sc. (6 petals of 7 sts = 42 sts) Check Checkpoint 1.
Round 4 (behind petals): Ch 1. Fold the petals toward you so you can work behind them. Sc around the post of the first Round 2 sc, ch 5, sc around the post of the next Round 2 sc 5 times, ch 5, sl st to the first sc. (6 ch-5 loops)
Round 5 (base ring): Sl st into the first loop. Ch 1, 7 sc in each ch-5 loop around, sl st to the first sc. Fasten off. (42 sc)
With the RS facing, mark the six 7-sc groups: A (top), B (upper right), C (lower right), D (bottom), E (lower left) and F (upper left). Check Checkpoint 2.
Top Petal
Row 1 (RS): Join thread in the first sc of group A. Ch 3 (counts as dc throughout), dc in the same st, dc in the next 5 sc, 2 dc in the last sc. (9 dc)
Row 2: Ch 3, turn, dc in the same st, dc in each st to the last st, 2 dc in the last st. (11 dc)
Row 3 (mesh): Ch 4 (counts as dc + ch 1), turn, dc in the same st, [ch 1, sk next st, dc in next st] 5 times, ch 1, dc in the same last st. (8 dc, 7 ch-1 sps; 15 sts wide)
Row 4: Ch 3, turn, dc in the first ch-1 sp, [dc in next dc, dc in next ch-1 sp] 6 times, dc in the last dc. (15 dc) Check Checkpoint 3.
Row 5 (eyelet): Ch 3, turn, dc in the next 5 dc, ch 3, sk next 3 dc, dc in the last 6 dc. (12 dc, 1 ch-3 sp)
Row 6 (fan): Ch 3, turn, dc in the next 4 dc, sk next dc, 5 dc in the ch-3 sp, sk next dc, dc in the last 5 dc. (15 dc)
Row 7 (spokes): Ch 2, turn, dc in the next dc (counts as dc2tog), dc in the next 2 dc, sk next dc, [dc in next fan dc, ch 1] 4 times, dc in the last fan dc, sk next dc, dc in the next 2 dc, dc2tog. (11 dc, 4 ch-1 sps) The fan stitches spread apart here to make the radiating spokes.
Row 8: Ch 2, turn, dc2tog (counts as dc3tog), [dc in next fan dc, dc in next ch-1 sp] 4 times, dc in the last fan dc, dc3tog. (11 dc)
Row 9: Ch 2, turn, dc2tog (counts as dc3tog), dc in the next 5 sts, dc3tog. (7 dc)
Row 10: Ch 2, turn, dc2tog (counts as dc3tog), dc in the next st, dc3tog. (3 dc)
Row 11: Ch 2, turn, dc2tog (counts as dc3tog). (1 st, the point) Fasten off. Check Checkpoint 4.
Right Side Petal
Row 1: Join thread in the sc of group B nearest group A. Ch 25, letting the chain lie upward and outward.
Row 2: Sc in the 2nd ch from the hook and the next 3 ch, hdc in the next 4 ch, dc in the next 8 ch, tr in the next 8 ch, then tr in each of the 7 sc of group B. (4 sc, 4 hdc, 8 dc, 15 tr = 31 sts) The stitches get taller toward the rosette, so the strip bends into a crescent and the short end becomes the curl. Check Checkpoint 5.
Row 3 (shell edge): Ch 1, turn, sc in the first tr, [sk 2 sts, 7 dc in next st, sk 2 sts, sc in next st] 2 times, [sk 2 sts, 5 dc in next st, sk 2 sts, sc in next st] 2 times, sc in each of the last 6 sts. Fasten off. (24 dc, 11 sc = 35 sts)
The shells get smaller toward the tip, so the fans shrink as the petal curls.
Left Side Petal
Join thread in the sc of group F nearest group A. Work Rows 1–3 as for the right side petal, working the Row 2 tr across group F. (Row 2: 31 sts; Row 3: 35 sts) Starting next to the top petal mirrors the crescent.
Right Lower Scroll
Row 1: Join thread in the sc of group C nearest group B. Ch 13.
Row 2: Sc in the 2nd ch from the hook and the next 2 ch, hdc in the next 3 ch, dc in the next 6 ch, then dc in each of the 7 sc of group C. (3 sc, 3 hdc, 13 dc = 19 sts)
Row 3: Ch 1, turn, sc in the first dc, [sk 2 sts, 5 dc in next st, sk 2 sts, sc in next st] 2 times, sc in each of the last 6 sts. Fasten off. (10 dc, 9 sc = 19 sts)
Left Lower Scroll
Join thread in the sc of group E nearest group F. Work Rows 1–3 as for the right lower scroll, using group E. (19 sts)
Bottom Drop
Row 1 (RS): Join thread in the first sc of group D. Ch 3, dc in the same st, dc in the next 5 sc, 2 dc in the last sc. (9 dc)
Row 2 (mesh): Ch 4 (counts as dc + ch 1), turn, sk next st, [dc in next st, ch 1, sk next st] 3 times, dc in the last st. (5 dc, 4 ch-1 sps)
Row 3: Ch 3, turn, 2 dc in each ch-1 sp and 1 dc in each dc across. (13 dc)
Row 4 (eyelets): Ch 3, turn, dc in the next 3 dc, ch 2, sk 2 dc, dc in the next dc, ch 2, sk 2 dc, dc in the last 4 dc. (9 dc, 2 ch-2 sps)
Row 5: Ch 2, turn, dc2tog (counts as dc3tog), dc in the next dc, 2 dc in the ch-2 sp, dc in the center dc, 2 dc in the ch-2 sp, dc in the next dc, dc3tog. (9 dc)
Row 6: Ch 2, turn, dc2tog (counts as dc3tog), dc in the next 3 sts, dc3tog. (5 dc)
Row 7: Ch 2, turn, dc4tog over the remaining 4 sts (counts as dc5tog). (1 st, the point) Fasten off and weave in all ends. Check Checkpoints 6 and 7.
Border
Border gauge: 2 sc per dc row-end, 1 sc per unused chain loop and 1 sc per stitch along shell edges.
Work clockwise with the RS facing. Don’t add stitches where two sections meet. Carry straight on from one section into the next and keep that stitch slightly snug.
Round 1: Join thread at the base of the top petal on its left edge, next to group F. Then work each section as follows:
- Top petal, left edge: [2 sc in next row-end, picot] 11 times. (22 sc, 11 picots)
- Top petal tip: (sc, ch 18, sc) in the point. The ch-18 is the hanging loop. (2 sc)
- Top petal, right edge: [2 sc in next row-end, picot] 11 times. (22 sc, 11 picots)
- Right side petal: Sc in each of the 24 unused chain loops, 3 sc around the tip, then 1 sc in each of the 35 Row 3 sts, with a picot after the sc in each shell’s center dc. (62 sc, 4 picots)
- Right lower scroll: Sc in each of the 12 chain loops, 3 sc around the tip, then sc in each of the 19 Row 3 sts, with a picot at each shell center. (34 sc, 2 picots)
- Bottom drop, right edge: [2 sc in next row-end, picot] 7 times. (14 sc, 7 picots)
- Bottom drop point: 3 sc in the point, with a picot after the 2nd sc. (3 sc, 1 picot)
- Bottom drop, left edge: [2 sc in next row-end, picot] 7 times. (14 sc, 7 picots)
- Left lower scroll: Sc in each of the 19 Row 3 sts (picot at each shell center), 3 sc around the tip, then sc in each of the 12 chain loops. (34 sc, 2 picots)
- Left side petal: Sc in each of the 35 Row 3 sts (picot at each shell center), 3 sc around the tip, then sc in each of the 24 chain loops. (62 sc, 4 picots)
Sl st to the first sc and fasten off.
Totals: Top petal 46 + side petals 62 + 62 + scrolls 34 + 34 + drop 31 = 269 sc. Picots: 22 + 4 + 4 + 2 + 2 + 15 = 49.
Why the math works: A dc row-end is about as tall as 2 sc, so the petal and drop edges lie flat. The edges of the curled sections match their own stitch counts exactly (24, 35, 12 and 19). The 3 sc at each tip ease the tight turn. Adding 0.125 in (0.3 cm) per edge takes 5.25 in x 3.5 in (13.3 cm x 8.9 cm) to 5.5 in x 3.75 in (14.0 cm x 9.5 cm).
Final Blocking
- Soak the ornament in stiffener for 1 minute.
- Press it between towels to remove the excess. Don’t wring it.
- Lay it RS up on the covered board.
- Pin the two points 5.5 in (14.0 cm) apart along a straight center line.
- Pin the outer curves of the side petals 3.75 in (9.5 cm) apart.
- Curl the side-petal tips inward and the scroll tips outward and upward, then pin them.
- Pin out each picot and shell center, and shape the loop into a teardrop.
- Let it dry for at least 12 hours.
Final Quality-Control Checklist
- The rosette is raised, with 6 even petals around an open center.
- The base ring has 42 sc, 7 in each group.
- The top petal has 11 rows with a visible mesh row, eyelet and spokes.
- Each side petal has 31 and 35 sts, with 2 large and 2 small shells.
- Each scroll has 19 sts per row, and the drop ends in a sharp point.
- The border has 269 sc and 49 picots.
- The piece measures 5.5 in x 3.75 in (14.0 cm x 9.5 cm), and the loop is about 0.75 in (1.9 cm).
Troubleshooting
- Petal won’t curl: Check that Row 2 steps up from sc to hdc to dc to tr. Pin the tip tighter when blocking.
- Lopsided top petal: Recount Rows 8–10. They should have 11, 7 and 3 sts.
- Border ruffles: Work exactly 2 sc per row-end.
- Border cups: Your tension is too tight. Loosen up, or go up one hook size for the border only.
- Gap at a junction: Close it with one hidden stitch on the WS.
- Flat rosette: Work Round 4 around the posts behind the petals.
Care
Hand wash in cool water with mild soap, then restiffen and pin to dry. Store the ornament flat in tissue paper.
Final Notes
The measurements build on each other. A 1 in (2.5 cm) rosette gives a 1.25 in (3.2 cm) base ring. That ring carries a 2.4 in (6.1 cm) top petal, the crescent petals, the scrolls and a 1.5 in (3.8 cm) drop. Together they make a 5.25 in x 3.5 in (13.3 cm x 8.9 cm) motif, and the border brings it to 5.5 in x 3.75 in (14.0 cm x 9.5 cm). If your first two checkpoints match, the rest will follow.
Happy crocheting!