

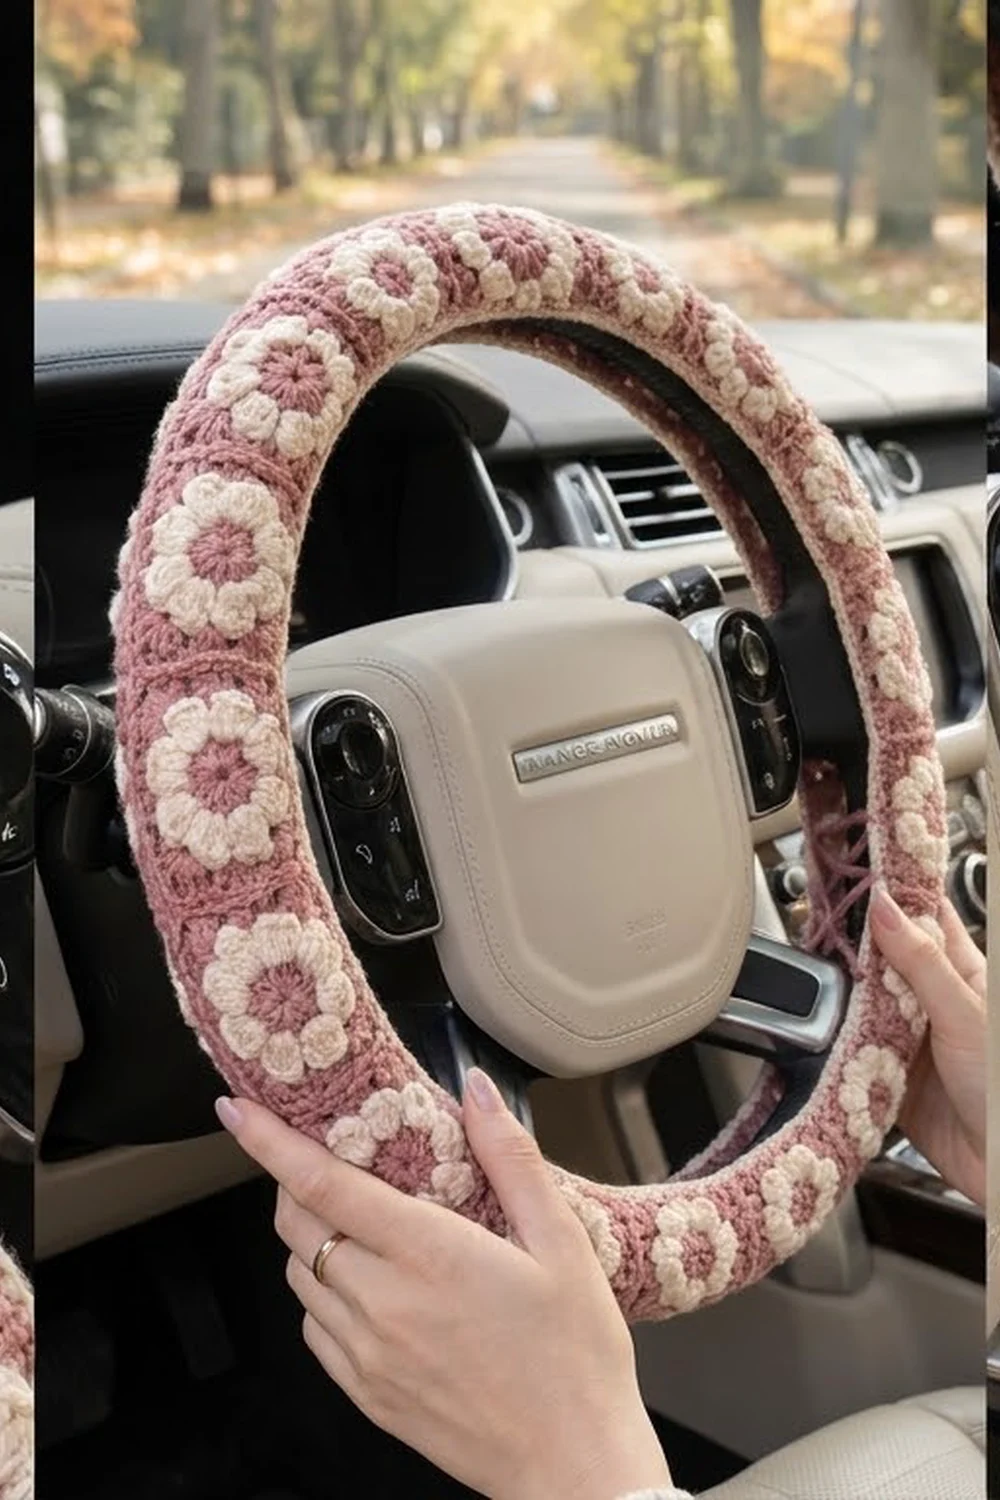
This steering wheel cover is a ring of small dusty rose granny squares. Each square holds a cream six-petal flower with a rose center. A thin cream line runs along both edges, and the back is laced closed so the cover stays snug and doesn’t slip.
The palette is just two colors, a soft dusty rose and a warm cream, for a vintage, cottage-style look. The fabric is firm enough to grip well and still soft under your hands. All instructions use US crochet terms.
The finished band is 41.4 in (105.2 cm) around and about 4.0 in (10.2 cm) wide before lacing. It fits standard wheels 14.5–15 in (36.8–38.1 cm) across, with a grip circumference of 4.25–4.75 in (10.8–12.1 cm).
You make 18 flower squares, join them in a line, and close the line into a ring. Then you work a border in rounds on each long edge, slip the band over the wheel, and lace the edges together behind the grip.
Finished Size and Construction
- Finished size: 41.4 in (105.2 cm) around x 4.0 in (10.2 cm) wide, before lacing
- Skill level: Easy-intermediate
- Terminology: US crochet terms
- Yarn weight: Sport (#2), cotton or cotton blend
- Hooks: 3.25 mm (US D/3) for the squares, 3.0 mm for the border
- Number of pieces: 18 flower squares, joined into one closed band
- Layout: 1 square wide x 18 squares long, closed into a ring
- Piece size: 2.3 in (5.8 cm) square
- Size before border: 41.4 in (105.2 cm) around x 2.3 in (5.8 cm) wide
- Border depth: about 0.85 in (2.2 cm) on each long edge
Materials
Use a smooth cotton or cotton-acrylic sport yarn. Cotton handles warm hands and sunlight well and pills less than soft acrylic. Avoid fuzzy or stretchy yarns, because they blur the flowers and let the cover sag.
- Dusty rose (Color A): 100 g, about 300 m (328 yd). Used for flower centers, backgrounds, border and lacing cords.
- Cream (Color B): 50 g, about 150 m (164 yd). Used for petals and the border edge line.
These amounts include a margin of about 20%. The cover itself uses about 81 g of rose and 32 g of cream.
Tools:
- 3.25 mm (US D/3) and 3.0 mm crochet hooks
- Yarn needle
- 4 locking stitch markers
- Scissors and measuring tape
- Blocking mat, pins, and a spray bottle or steamer
Abbreviations (US Terms)
- ch – chain
- sl st – slip stitch
- sc – single crochet
- hdc – half double crochet
- dc – double crochet
- sp(s) – space(s)
- sk – skip
- MR – magic ring
- st(s) – stitch(es)
- RS – right side
Special stitches:
- Standing sc: With a slip knot on the hook, insert the hook into the stitch, yarn over and pull up a loop, then yarn over and pull through both loops. This joins the new color and makes the first sc in one step.
- Back post single crochet (bpsc): From the back of the work, insert the hook back to front to back around the post of the stitch, then finish a sc. Here it anchors the rose background behind the petals.
Gauge and Checkpoints
Square gauge: 26 sc and 28 rows = 4 in (10.2 cm) with the 3.25 mm hook.
Border gauge: 28 sc and 28 rounds = 4 in (10.2 cm) with the 3.0 mm hook, which is 7 sts and 7 rounds per inch.
Make and block one square before you make the rest. The square sets the length of the whole cover. An error of just 0.1 in (0.3 cm) per square adds up to 1.8 in (4.6 cm) over 18 squares.
Square checkpoints:
- After Round 1: the center is about 0.8 in (2.0 cm) across.
- After Round 3: the flower is about 1.7 in (4.3 cm) from petal tip to petal tip.
- After Round 5: the square is about 2.0 in (5.1 cm) across.
- After Round 6: the square is 2.3 in (5.8 cm) side to side after blocking.
Too big: Use a 3.0 mm hook, or work the dc rounds tighter.
Too small: Use a 3.5 mm hook.
For a different wheel: Measure around the wheel along the middle of the grip and divide by 2.3 in (5.8 cm). Round down so the band stretches a little. For example, 44 in (111.8 cm) needs 19 squares.
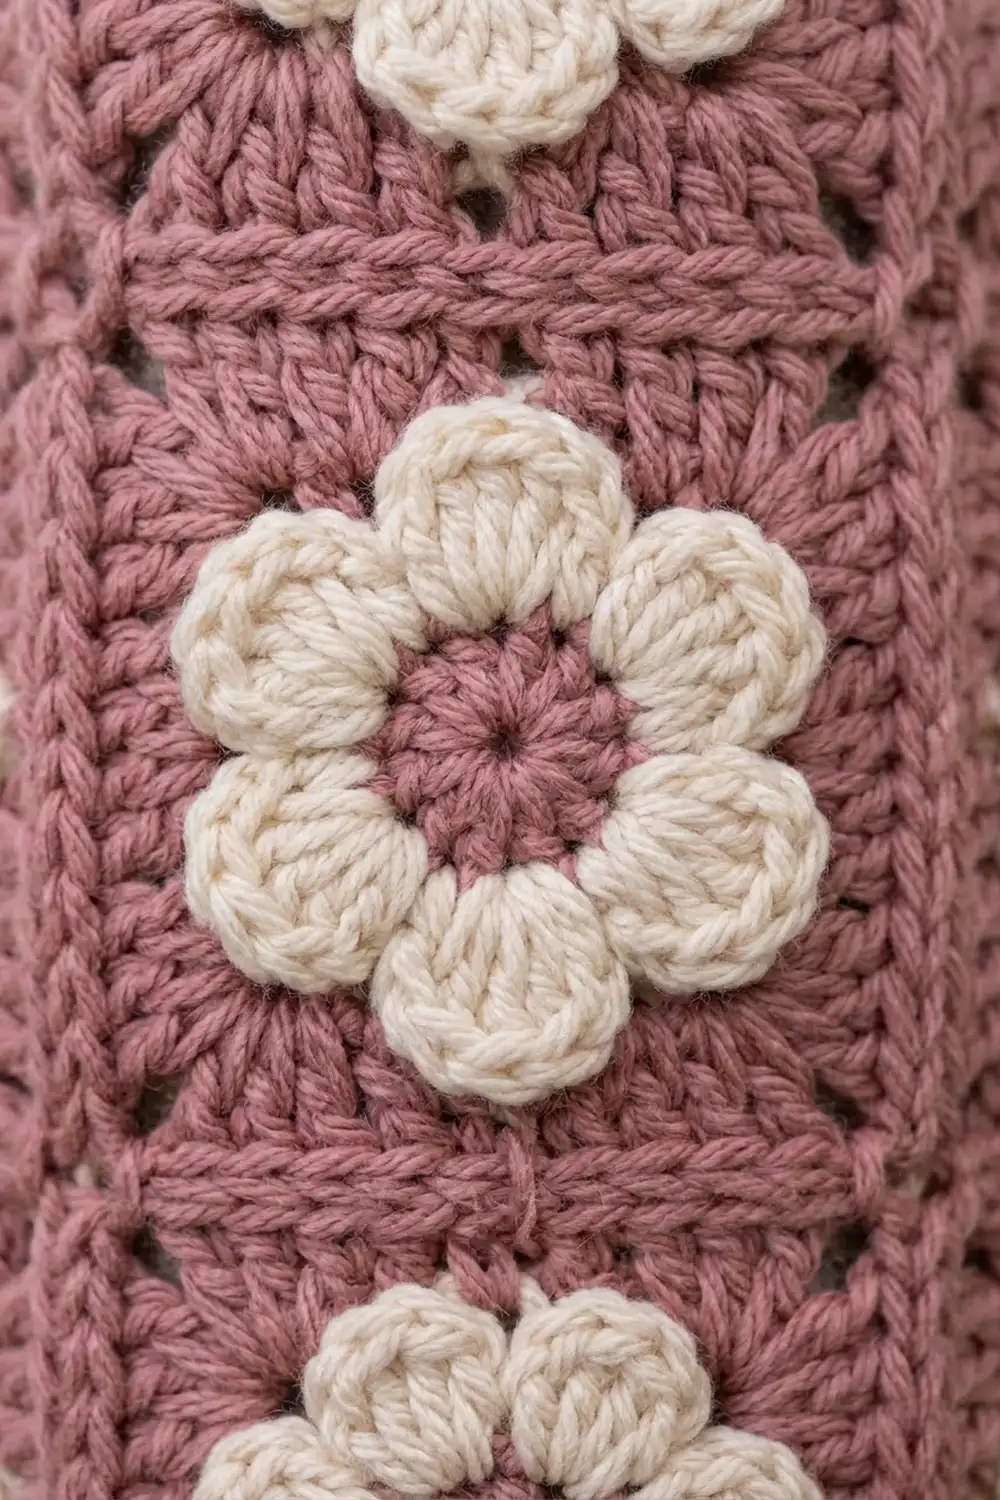
Flower Square (Make 18)
Work every round with the RS facing you and the 3.25 mm hook. Join each round with a sl st unless the instructions say otherwise.
Round 1 (Color A, rose): Make a MR. Ch 2 (doesn’t count as a st), then work 12 dc into the ring. Pull the ring closed, sl st to the top of the first dc, and fasten off. (12 dc)
Round 2 (Color B, cream): Join cream with a standing sc in any dc. Ch 3, sk next dc. Sc in next dc, ch 3, sk next dc. Repeat from * to * 4 more times. Sl st to the first sc. (6 sc, 6 ch-3 sps)
Round 3 (Color B, petals): Sl st into the next ch-3 sp. Work (sc, hdc, 3 dc, hdc, sc) in each ch-3 sp around. Sl st to the first sc and fasten off. (6 petals of 7 sts each = 42 sts)
The six Round 2 sc now sit in the dips between the petals.
Round 4 (Color A, rose): Join rose with a standing sc in the center dc of any petal. Ch 3. Fold the petals forward and work bpsc around the next Round 2 sc. Ch 3. Sc in the center dc of the next petal, ch 3, bpsc around the next Round 2 sc, ch 3. Repeat from * to * 4 more times. Sl st to the first sc. (12 sts, 12 ch-3 sps)
Half of these anchors sit behind the petals. That keeps the rose background behind the flower, so the petals stand out in relief.
Round 5 (Color A, square-up): Sl st into the next ch-3 sp. Ch 3 (counts as dc), then work (2 dc, ch 2, 3 dc) in the same sp. Work 3 dc in each of the next 2 sps. (3 dc, ch 2, 3 dc) in the next sp, 3 dc in each of the next 2 sps. Repeat from * to * 2 more times. Sl st to the top of the beginning ch-3. (48 dc + 4 ch-2 corner sps; 12 dc per side)
The 12 spaces split into 4 corners and 8 side spaces, so each side has 2 side spaces. Each side is 3 + 3 + 3 + 3 = 12 dc.
Round 6 (Color A, edge): Ch 1. Sc in the same st as the join and in the next 2 dc, then work 3 sc in the corner sp. Sc in each of the next 12 dc, 3 sc in the next corner sp. Repeat from * to * 2 more times. Sc in each of the last 9 dc and sl st to the first sc. Fasten off, leaving a 12 in (30.5 cm) tail on every second square for sewing.
Round 6 count: (48 sts worked 1 per dc) + (12 corner sts added) = 60 sc.
Each side has 16 sc including both corner center sts (1 + 14 + 1). That’s 4 sides x 16 = 64, minus the 4 corners counted twice, for 60. Mark the corner center stitches, weave in the ends, and block each square to 2.3 in (5.8 cm).
Make All Pieces
- Flower squares: 18 total
- Color A (rose): Rounds 1, 4, 5 and 6 of all 18 squares
- Color B (cream): Rounds 2 and 3 of all 18 squares
Layout (one strip, closed into a ring):
[1][2][3][4][5][6][7][8][9][10][11][12][13][14][15][16][17][18]
 ^                                                           |
 |___________ square 18 joins back to square 1 _____________|
The squares are symmetrical, so any side can face the next square. Just keep every square RS up.
Joining
Method: Whipstitch through the back loops only, with rose yarn and a yarn needle.
Lay two squares side by side, RS up. Start at a corner center stitch and match the 16 stitches of one side to the 16 stitches of the next square, corner to corner, sewing through the back loop of each pair. That’s 16 into 16, with nothing skipped or added.
The front loops stay on top as a flat line that almost disappears into the rose background, and the seam lies smooth on the wheel.
Tension: Pull each stitch just enough to close the gap. If it’s too tight, the seam puckers and the strip gets shorter. If it’s too loose, gaps open up when the band stretches.
Sew squares 1 through 18 in order, which takes 17 seams. Check that the strip isn’t twisted, then sew square 18 to square 1 for the 18th seam to close the ring.
Size checkpoint: The ring should measure 41.4 in (105.2 cm) around and 2.3 in (5.8 cm) wide. If it’s off by more than 0.5 in (1.3 cm), check your squares again before you start the border.
Border
The ring has two long edges and no corners. Switch to the 3.0 mm hook and work joined rounds on one edge, then repeat on the other edge.
Starting count per edge: 18 squares x 16 sts = 288 sts. Each square brings both corner center stitches to the edge, so two sit side by side at every seam. Work into both of them. The seams add no stitches.
Round 1 (Color B, cream edge line): Join cream with a standing sc in any st that isn’t next to a seam. Sc in each st around, sl st to the first sc, and fasten off. (288 sc)
This round falls where the band turns around the side of the grip, so you see it as a thin cream outline from the driver’s seat.
Rounds 2–6 (Color A, rose): Join rose in any sc. Ch 1, sc in each st around, sl st to the first sc. Work this 5 times, then fasten off. (288 sc in each round)
Work Rounds 1–6 again on the second edge, also with 288 sc in every round.
Why the math works: The band is a straight loop, so each edge is as long as the center line. At the border gauge of 7 sts per inch, 288 sts measure 41.1 in (104.4 cm). That’s within 0.3 in (0.8 cm) of the 41.4 in (105.2 cm) band, so you don’t need any increases or decreases. The tiny bit of negative ease keeps the edges snug behind the grip. Six rounds at 7 rounds per inch make each border about 0.85 in (2.2 cm) deep.
Finished width: 2.3 + 0.85 + 0.85 = about 4.0 in (10.2 cm). On a 4.5 in (11.4 cm) grip, this leaves a gap of about 0.5 in (1.3 cm) for the lacing to close.
Lacing cords (make 3): With rose, chain until the cord measures 40 in (101.6 cm), then fasten off. Measure the cord rather than counting chains, because chain gauge varies a lot.
Final Blocking
- Lay the ring flat as a doubled strip about 20.7 in (52.6 cm) long, RS up.
- Pin each layer to 4.0 in (10.2 cm) wide, keeping the borders straight and parallel.
- Mist it, or hold the steamer above the band without touching it. Never press the petals flat.
- Lift each petal gently with your fingertips to shape it.
- Let it dry completely, about 6–8 hours.
- Unpin it and check that the circumference is 41.4 in (105.2 cm).
Fitting and lacing:
- Center the flowers on the front of the wheel and fold both borders to the back.
- Starting next to a spoke, lace a cord back and forth through Round 6 of both edges, catching every 4th stitch, like lacing a shoe.
- Lace one section between each pair of spokes, stopping about 0.25 in (0.6 cm) before each spoke.
- Pull each section snug, tie a square knot, and tuck the ends under the lacing.
Each edge has about 72 lacing points (288 ÷ 4), split across the three sections.
Final Quality-Control Checklist
- All 18 squares measure 2.3 in (5.8 cm).
- Every square has 6 even petals and 60 sts in Round 6.
- All 18 seams match 16 sts to 16 sts.
- The band isn’t twisted.
- Every border round has 288 sts on both edges.
- The cream line runs unbroken along both edges.
- Ends are woven in at least 1 in (2.5 cm).
- The lacing is even, with no loose sections at the spokes.
- The cover doesn’t rotate when you turn the wheel by hand.
Troubleshooting
The petals look flat. Round 4 was probably worked in front of the petals. Redo it with the petals folded forward.
The square is wavy. The Round 5 dc are too loose. Work tighter or go down half a hook size.
The square cups. The Round 6 corners are too tight. Work the 3 corner sc more loosely.
The cover slides around. Remove one square, or pull the lacing tighter.
The band won’t stretch over the wheel. Add one square. That gives 304 sts per border round on each edge.
The border ruffles. Go down to a 2.75 mm hook for the border.
The lacing gap is too wide. Add one rose round to each edge, which adds about 0.15 in (0.4 cm) per side.
Care
Untie the lacing and take the cover off the wheel. Hand wash it in cool water with mild soap, lay it flat to dry, and lace it back on.
Final Notes
Each measurement in this pattern builds on the one before it. Round 1 has 12 dc, Round 3 has 6 petals, and Round 4 has 12 anchors. Those become 12 dc per side in Round 5 and 16 sc per side in Round 6. Eighteen 2.3 in (5.8 cm) squares make a 41.4 in (105.2 cm) ring with 288 stitches on each edge. Six border rounds bring the width to about 4.0 in (10.2 cm), which laces snugly around a 4.5 in (11.4 cm) grip. If your first square measures right, the rest of the cover will fit.
Happy crocheting!